How to Integrate SendPulse with Convertful
Subscription forms from Convertful appear on the right webpages, at the right time and help convert your visitors into subscribers. In this step-by-step guide, you can learn how to integrate SendPulse with Convertful.
Find SendPulse in the List of Integrations
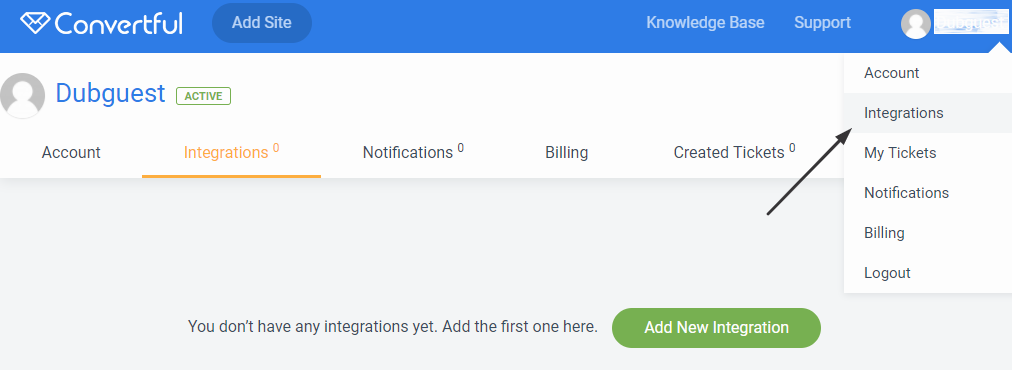
Log into your Convertful account and choose "Integrations" in the drop-down menu.
Choose SendPulse to integrate your account.

Then you can add a new SendPulse account by filling the form. "Account Name" is an internal value that you will be able to use to identify this particular account in account lists.

REST API ID and REST API Secret
Log into your SendPulse account and open "Account settings."
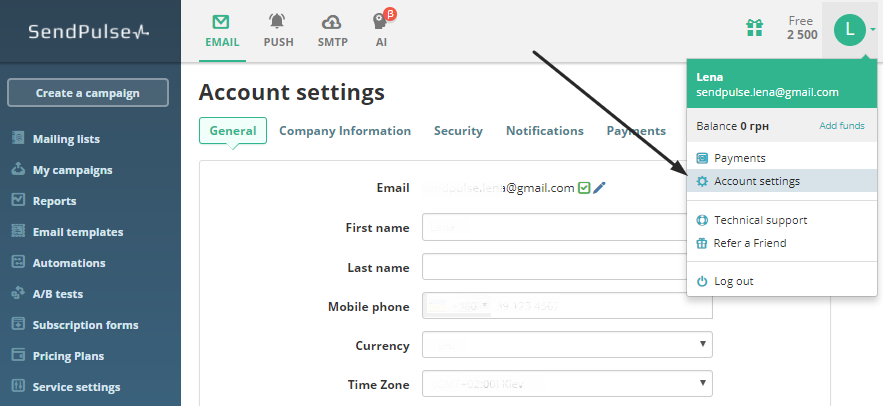
Choose the API tab, activate REST API, and click "Save." After these steps, the API ID and Secret will be created. Copy the data to your Convertful account and click the button "Connect with SendPulse."

Choose a Mailing List
If both REST API ID and REST API Secret are correct, Convertful will connect to your SendPulse account to fetch your email lists. Now you can choose an email list to add your subscribers from the subscription form.

Choose a Custom Field for the Subscriber Name
You can store the subscriber's name in the custom field of the mailing list. Choose where to save names by filling in the "Custom Field for Names." By default, the name of this field is "Name," but you may specify any other name, which will create a new attribute for storing subscriber's name in your SendPulse list:

Save the changes using the "Save" button in the top right corner. Now all subscribers who opted-in via Convertful widgets on your site will be added to your SendPulse mailing list. If you want to create additional fields and marks for subscribers who opted-in via Convertful forms, specify the Advanced Settings (described below).
Advanced Settings for Marking Subscribers
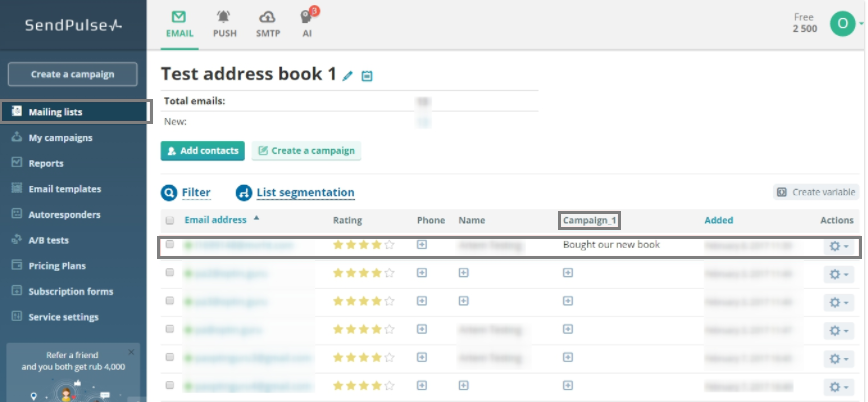
You may use marking subscribers in your SendPulse list to personalized offers and launching targeted mailing campaigns etc. Activate the "Mark Subscribers" option and fill in the "Custom Field for Marking" and its value in the field "Custom Field Value." For our test, we specify this field like "Bought our new book," so now it's possible to create a series of automated emails separately to these subscribers.

- "Custom Field for Marking" defines the name of an attribute that will be added to a subscriber.
- "Custom Field Value" defines the value that will be used for the given attribute.
Save changes using the "Save" button in the top right corner. After this, each visitor of your site subscribing with the Convertful widget will get an additional attribute (a mark) in your SendPulse list.
Check the Marks in SendPulse
Once you have used the "Mark Subscribers" feature, you may want to see your current subscribers with the applied marks. To do this, go to your SendPulse Mailing lists section. Here you can see the marks in the main subscriber list and make decisions based on it (create specific email campaigns, measure opt-in effectiveness, etc.)
Read more about SendPulse integration with Convertful
Learn more about Convertful opt-in forms
Watch a 3-minute video about Convertful

Last Updated: 05.01.2024
or