Integrate SendPulse with WooCommerce
Integrate your WooCommerce store with SendPulse through API and automatically transfer customer data, including email addresses, names, phone numbers, company names, cities, states, and countries. To use this plugin, you’ll need a SendPulse account with enabled API access.
Integration features:
- Sync customer data from WooCommerce with SendPulse mailing lists.
- Set up an autoresponder for transactional emails, such as order confirmation or thank-you emails.
- Add an optional subscription checkbox for marketing emails.
Let’s talk about how to install the plugin, integrate with WooCommerce, and troubleshoot potential issues.
Install and configure the plugin
Go to Plugins, install SendPulse subscription for WooCommerce, download the ZIP file, or copy it through FTP.
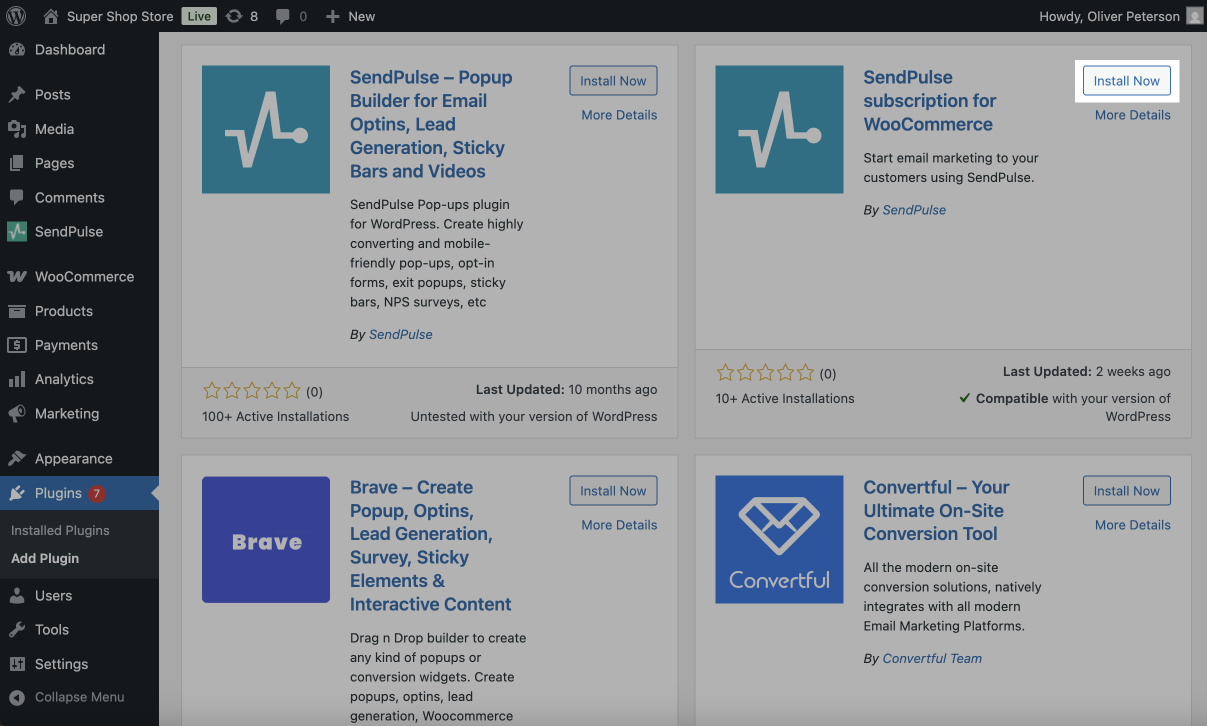
Activate the plugin in the Plugins section.
Go to WooCommerce > Settings > Integration and configure the plugin in the following fields:
| API | Paste your API ID from your account settings. |
| Secret | Paste your API Secret from your account settings. |
| Keep token at | Decide where to store the token. Recommended: Database. |
| Subscribe Event | Choose the event that triggers a subscription, such as order created or completed. |
| Mailing list | Choose the mailing list to save email addresses. |
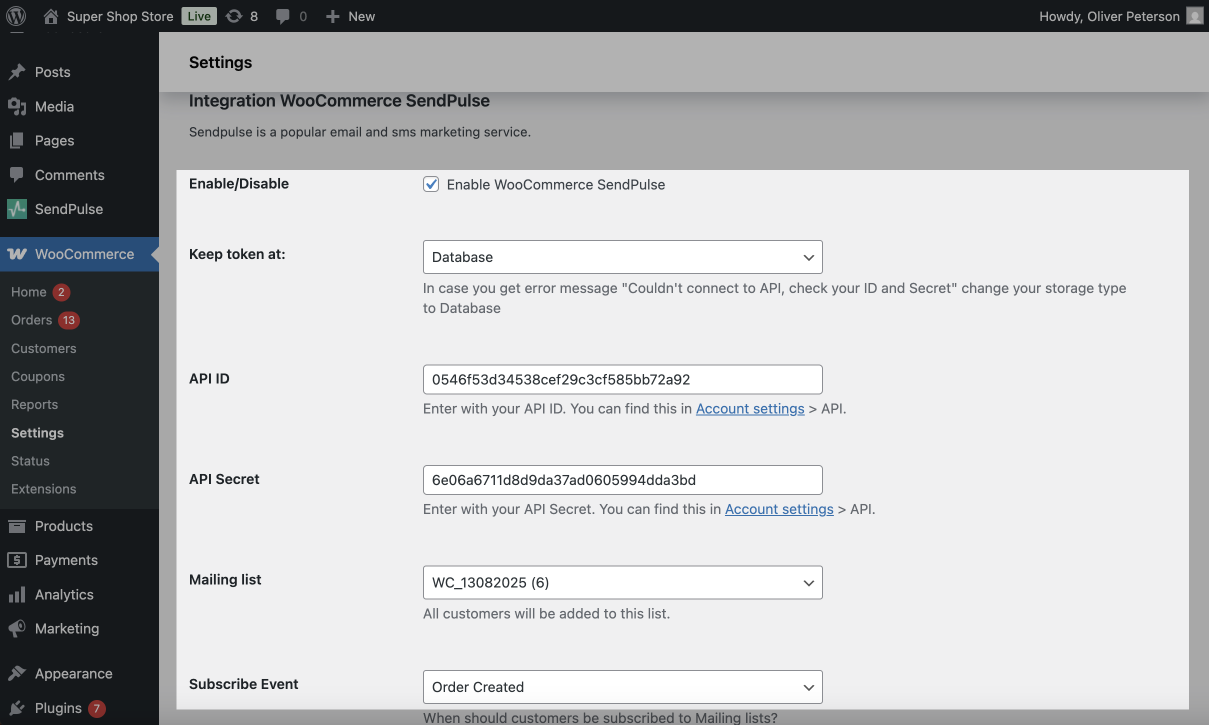
Click Save changes. The plugin is now ready to automatically transfer customer data when an order is created or completed.
Enable opt-in
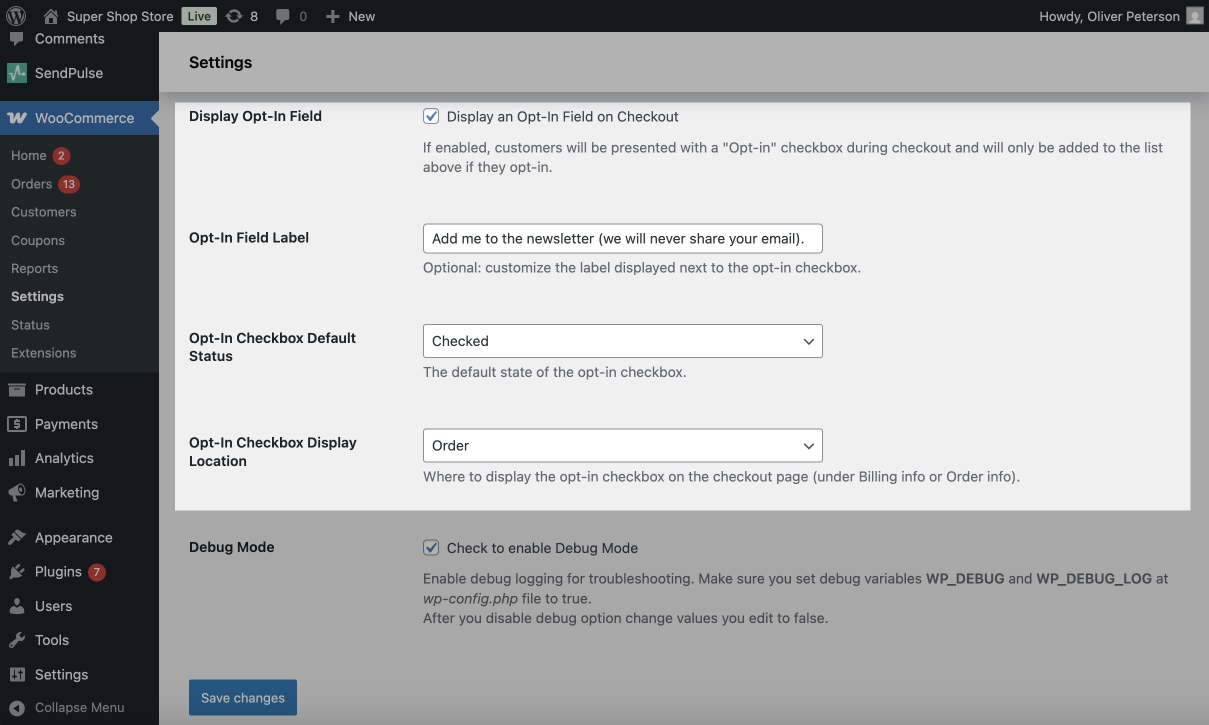
To prompt users to subscribe to your marketing emails at checkout, you can add an opt-in checkbox.
Enable Display an Opt-In Field on Checkout and configure the settings:
| Opt-In Field Label | Enter the opt-in label text visible to users. |
| Opt-In Checkbox Default Status | Select the default checkbox state (enabled or disabled). |
| Opt-In Checkbox Display Location | Decide where the checkbox appears at checkout. |
Last Updated: 29.09.2025
or