Create an automated TikTok chatbot flow
Use SendPulse's flow builder to design how your chatbot interacts with subscribers. You can automatically welcome new subscribers, reply to messages, and collect data. To create a flow, simply choose a trigger, map out a structure, and arrange builder elements.
Let’s go over all available triggers and elements, as well as how to use them
Choose a flow trigger
By default, there are three flows: Welcome message, Standard reply, and Unsubscribe from bot. You can also create custom triggers to expand your automation options.
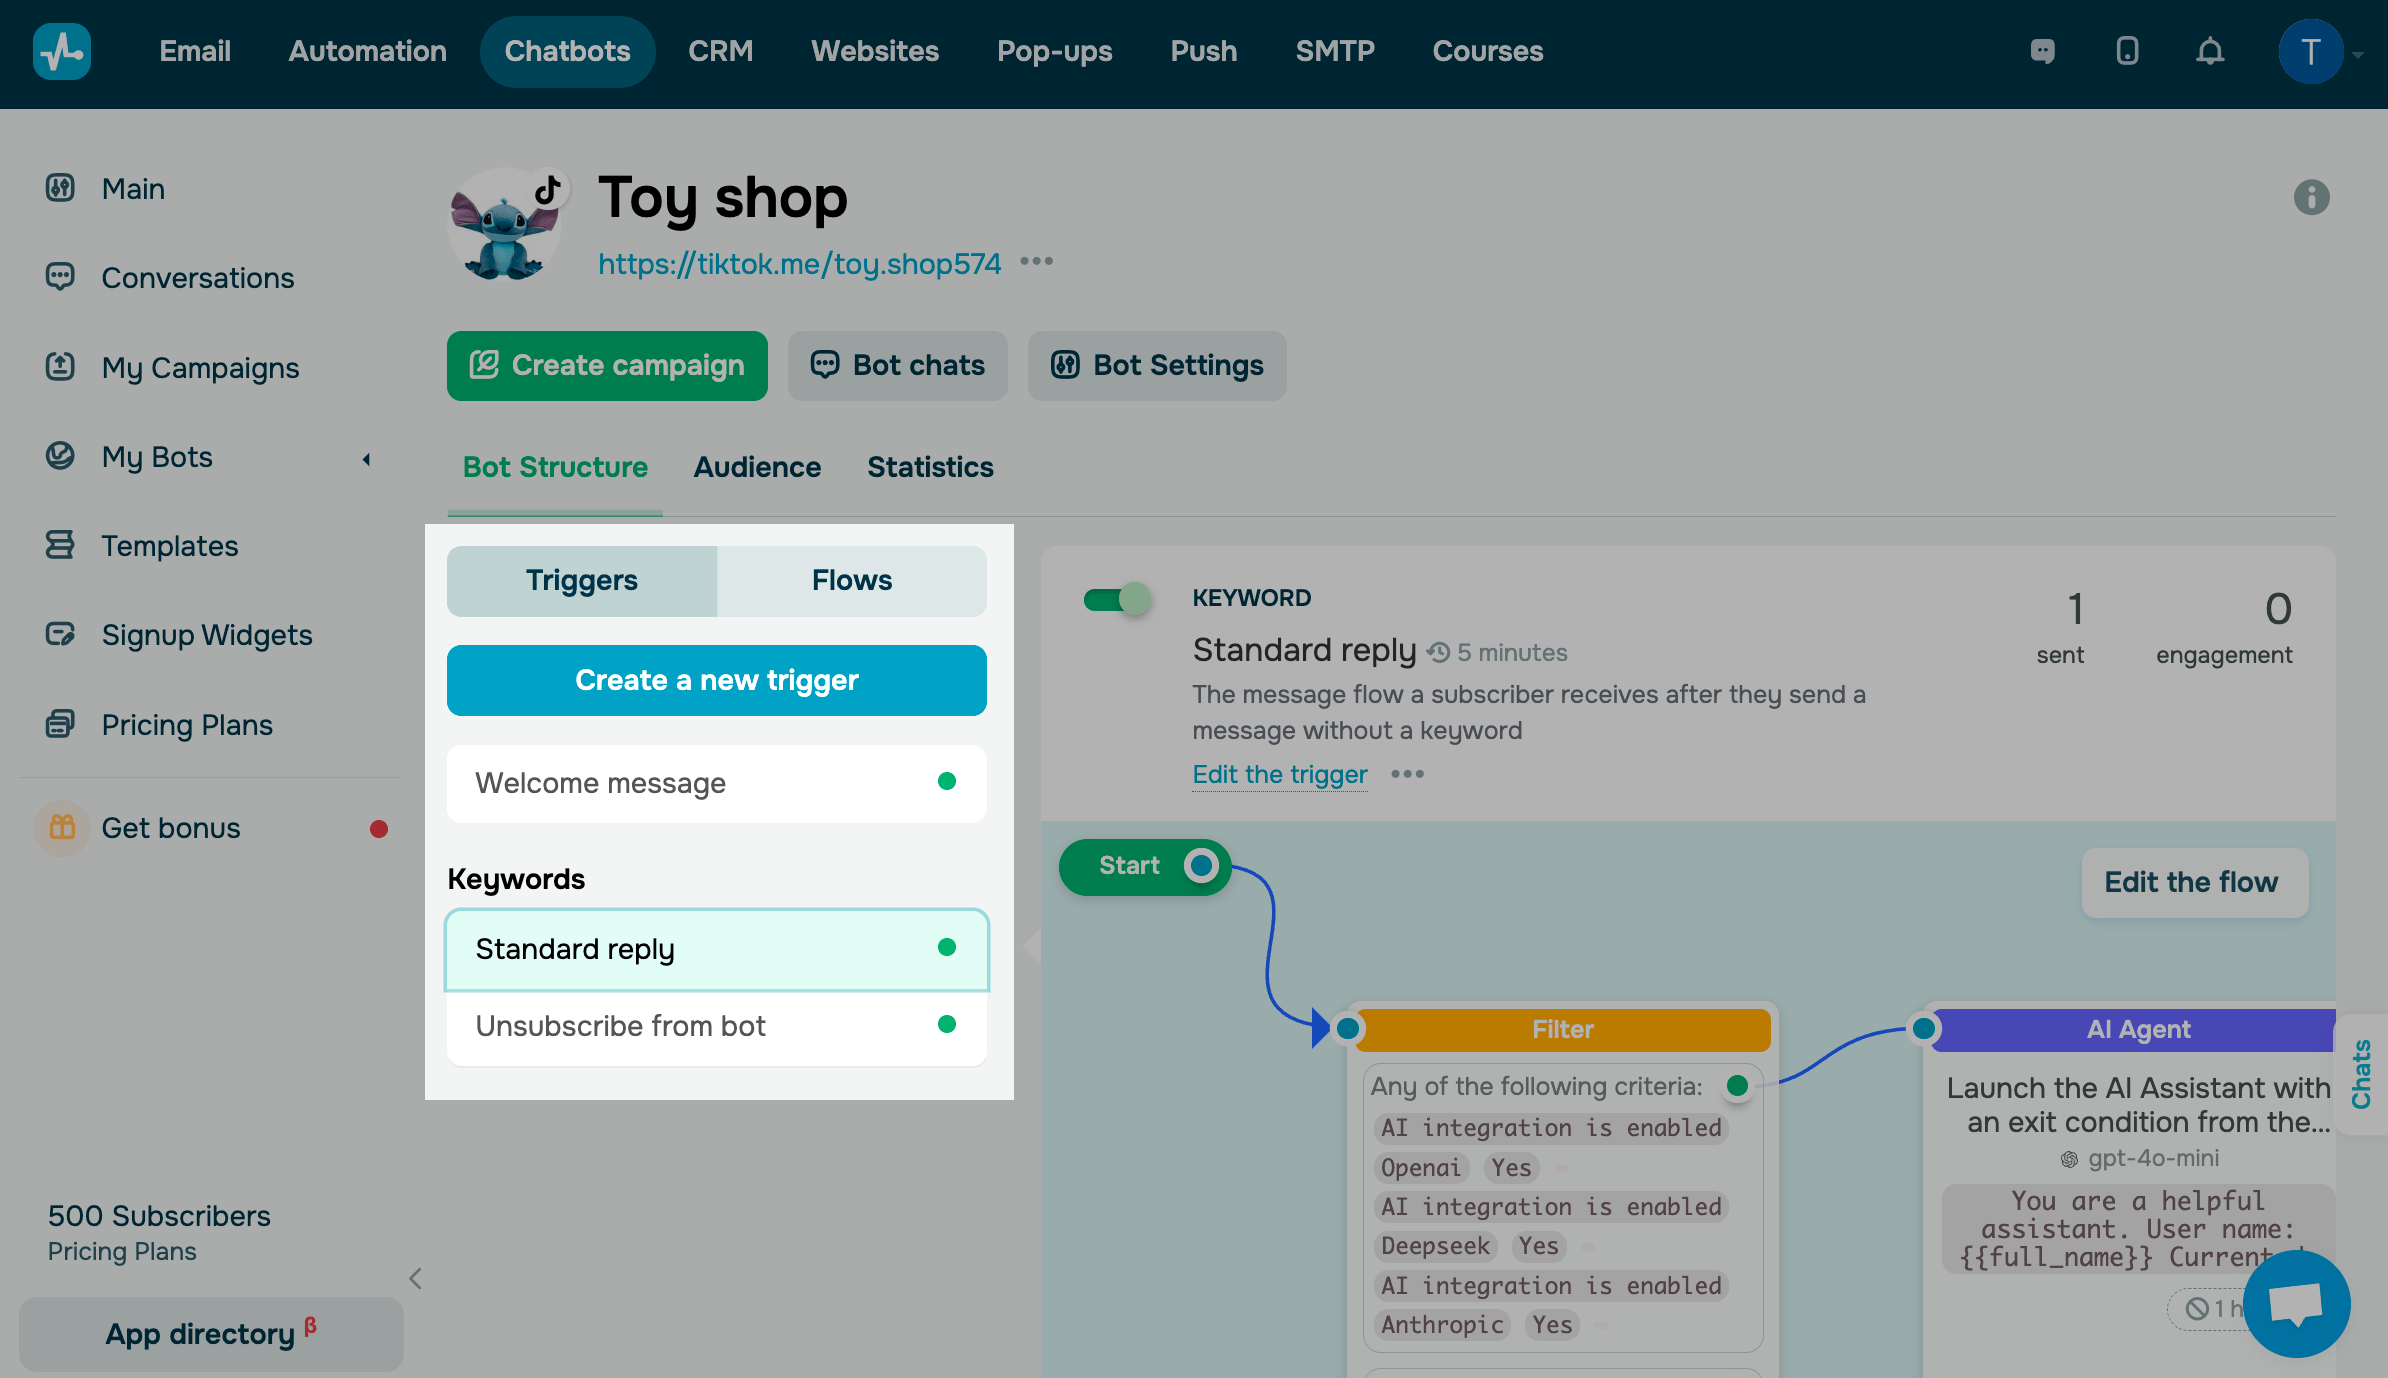
Choose your chatbot. Go to the Bot Structure tab and choose a trigger:
| Welcome message |
This flow starts after a user subscribes to your chatbot and messages your business profile. A user can subscribe to your TikTok chatbot without following your TikTok profile. |
| Standard reply |
This flow starts when a user asks a question that falls outside your chatbot’s scenario or sends an image. You can add a message to let users know that you will contact them during business hours or add an AI Agent. |
| Unsubscription from the bot | This one-message flow starts after a user unsubscribes from your chatbot using the /stop or /unsubscribe command. |
| Trigger |
This flow starts when a custom trigger is fired. To add your own trigger, click Create a new trigger. Select a trigger type: Keyword, or A360 event. Read more: How to manage chatbot flow triggers. |
Build your flow
Plan your chatbot’s architecture and behavior thoroughly. A thoughtful design makes it easier for users to get quick answers or place orders without confusion.
Define what you want your chatbot to do, organize its features, and plan how flow elements will interact with each other. Then, start building your flow using our drag-and-drop builder.
To get started, select a trigger and click Edit flow. If you want to use a custom trigger, click Create a flow.
Learn more about chatbot types and development strategies on our blog and YouTube channel. You can also select a ready-made flow template, copy a flow from another chatbot, or generate a flow using OpenAI.
All chatbot builder elements are optional, so you can stop even at the first message without adding any more elements.
Start
Use Start to select the first element that launches your flow. To begin your flow with an element, link it to Start.
You can use the Filter and API Request elements to analyze subscriber data and personalize your interactions. For example, start a flow only for users who meet certain criteria or create dedicated branches based on that information. Using the Random element, you can mix up your auto-replies or run an A/B test.
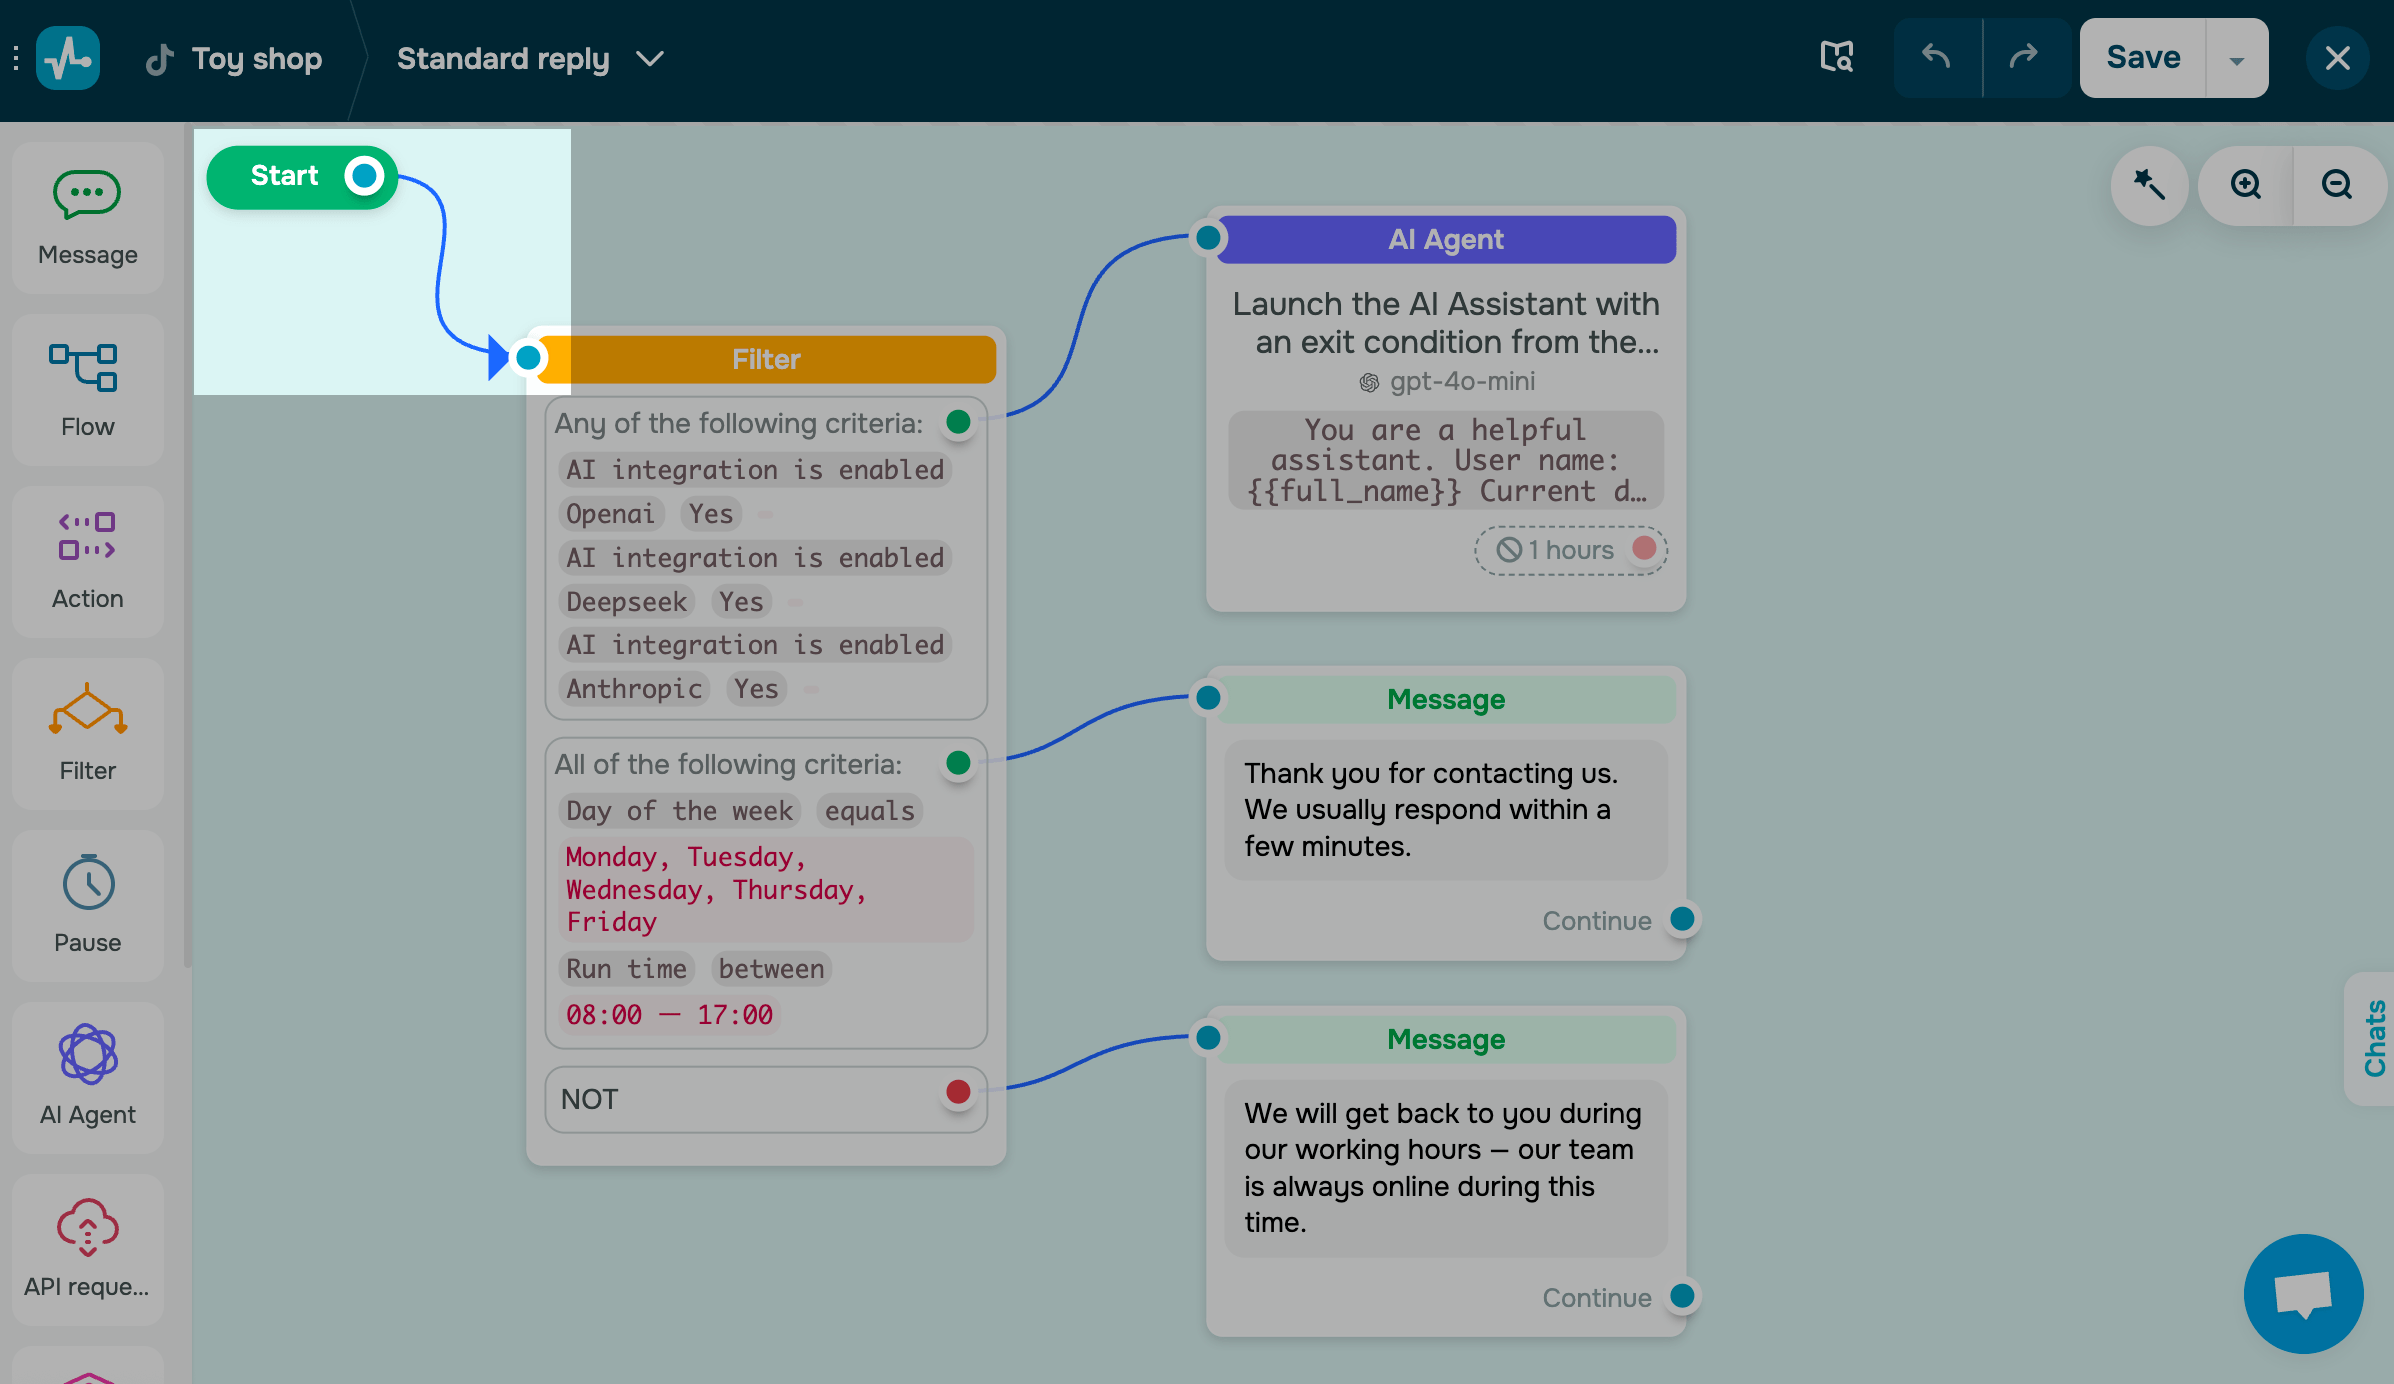
To see which trigger starts your flow, click Start.
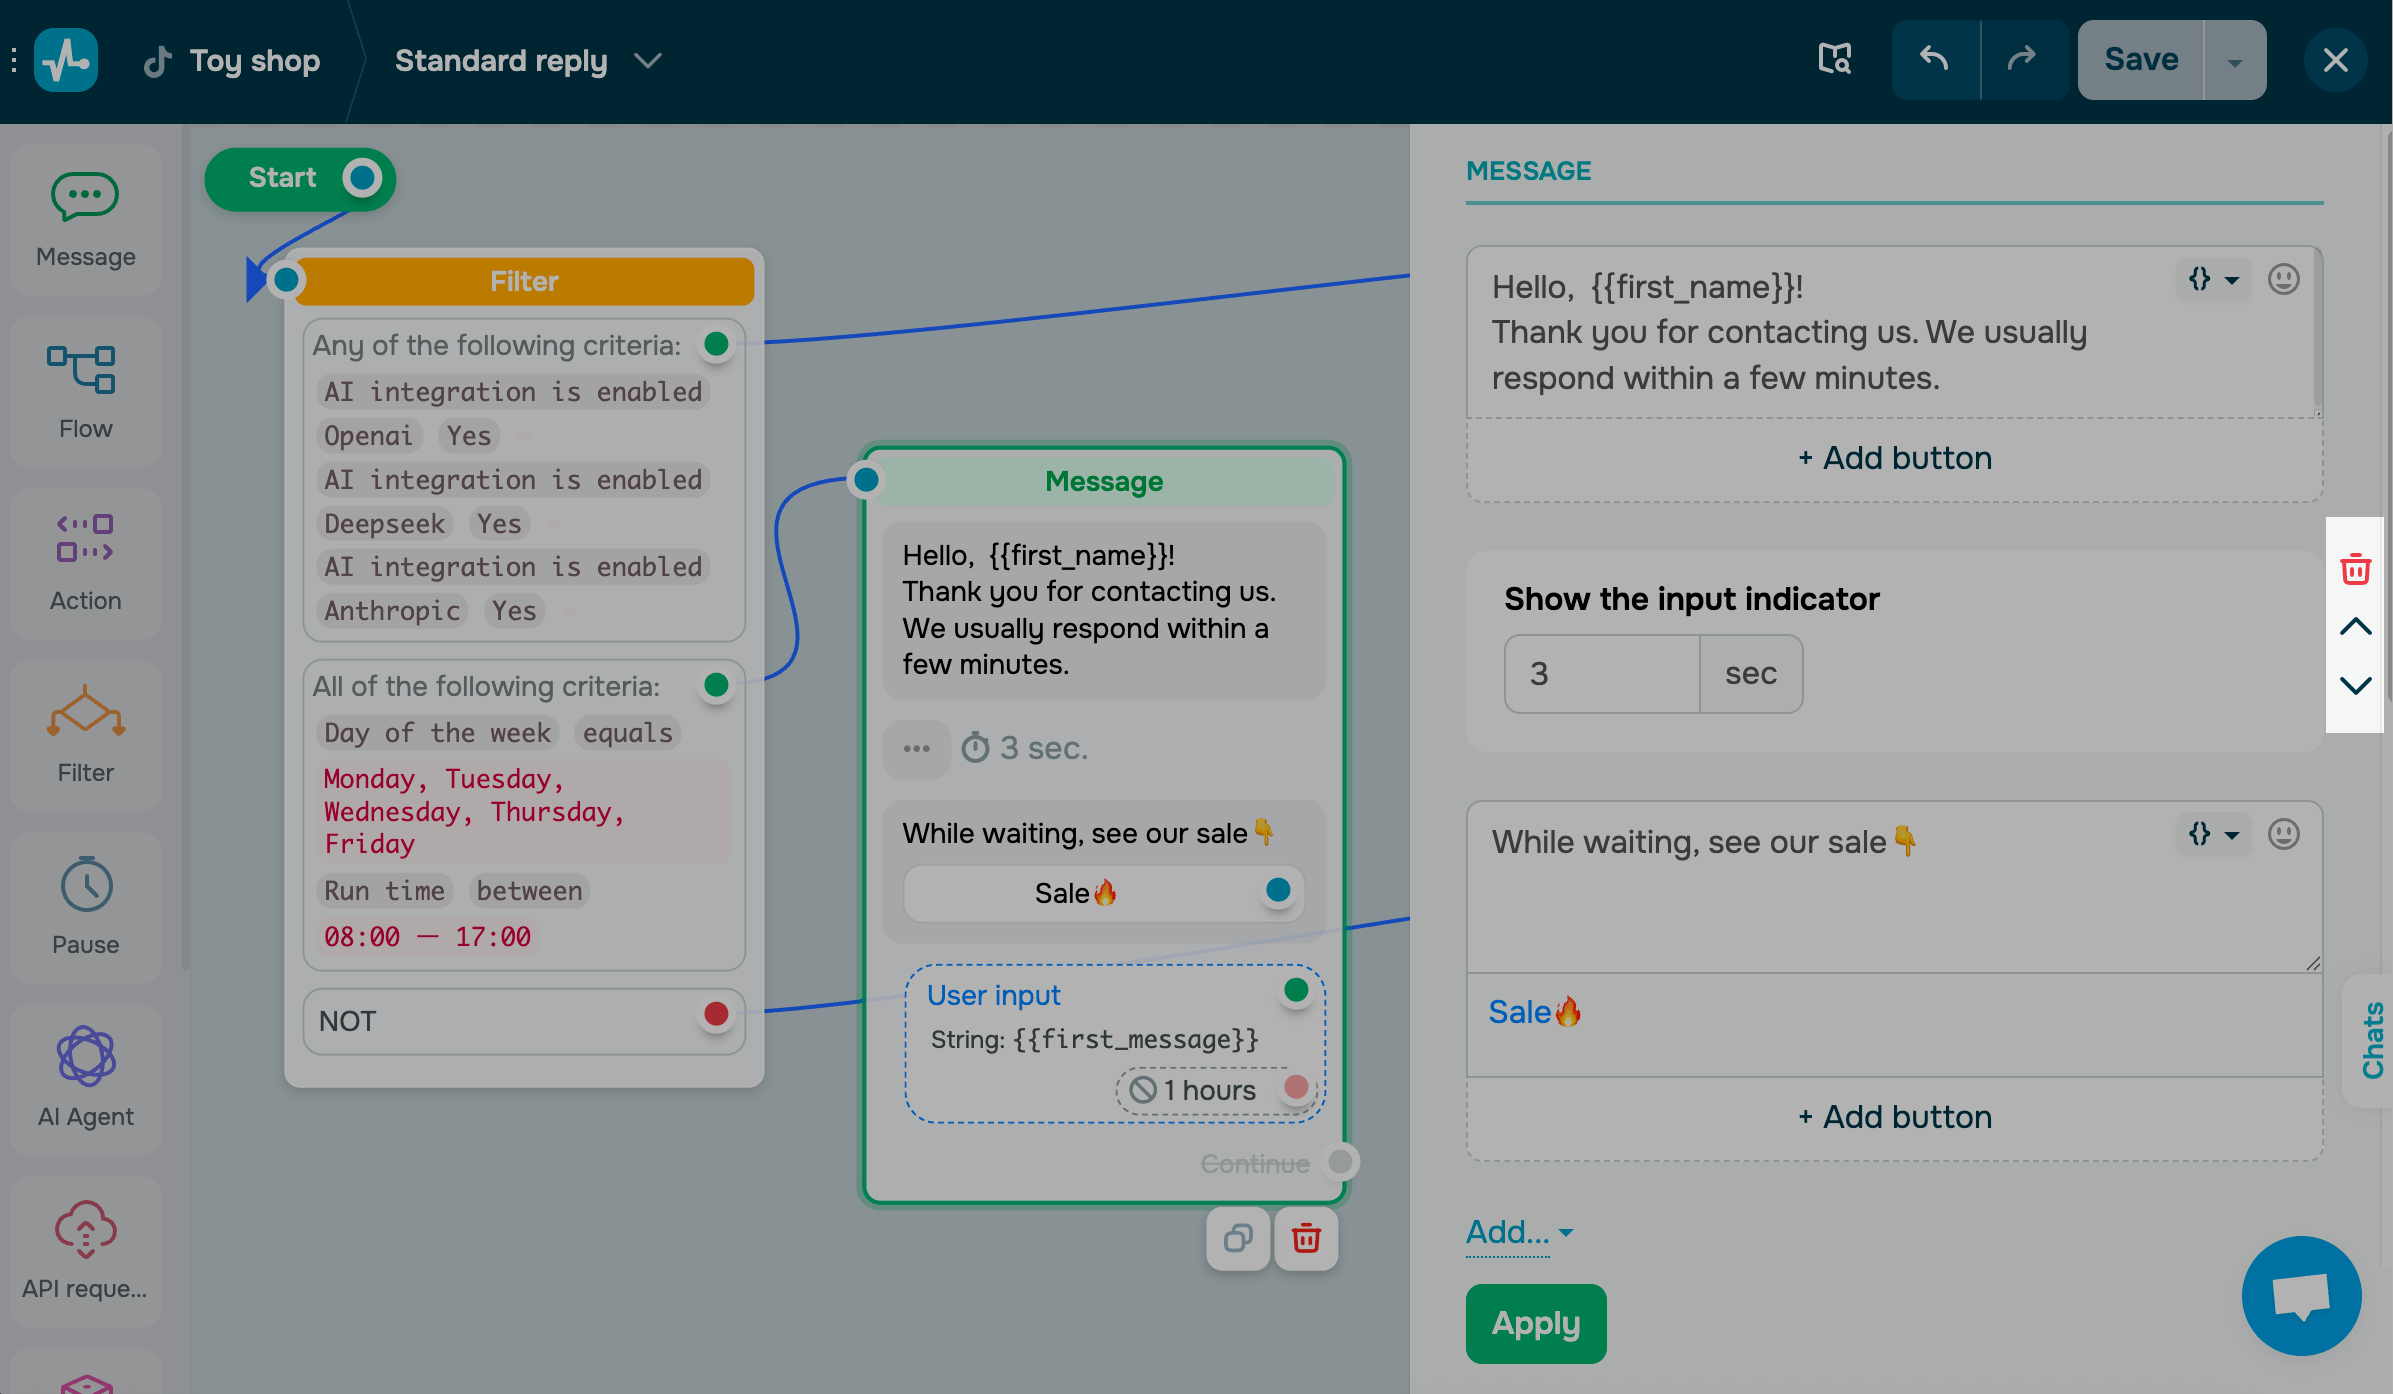
The Message element
With the Message element, you can send a text message, add a button of the Continue flow type, ask for user data, and more.
For example, you can thank a customer, confirm their booking, or send a message with collected variables to verify the information they’ve entered.
Button names can be up to 40 characters long.
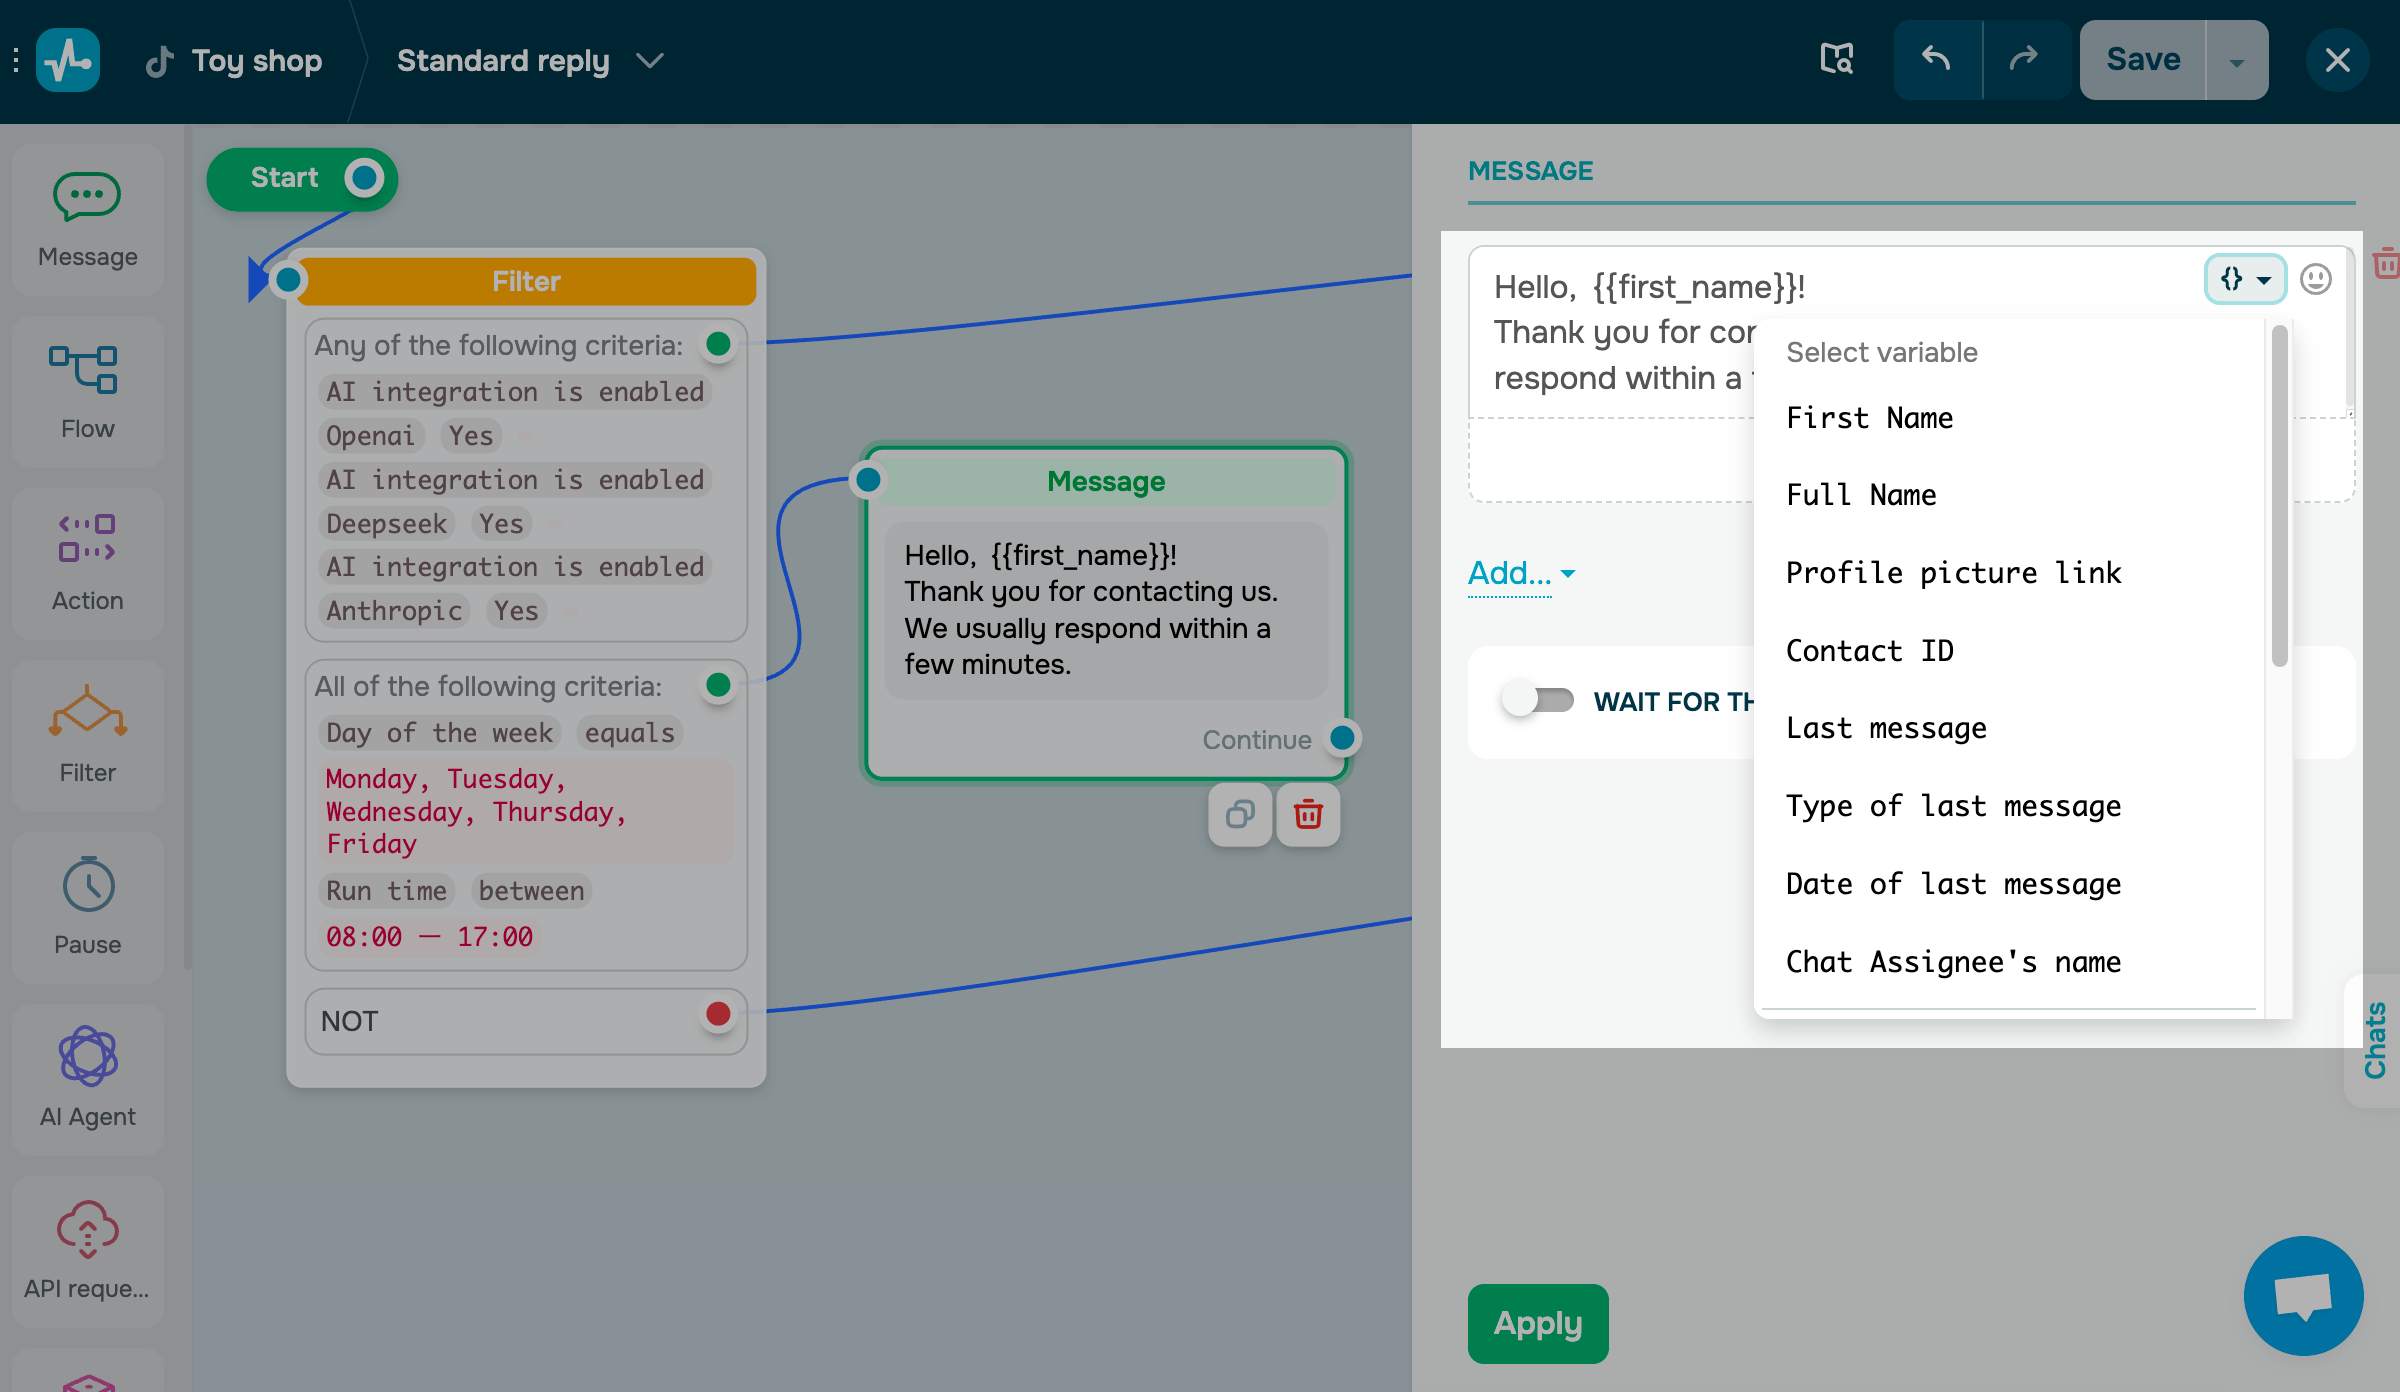
Text
The Text element is used to add a message.
Click Add, select Text, and enter up to 6,000 characters. You can also add variables, emojis, and buttons to your message.
Button names can be up to 40 characters long.
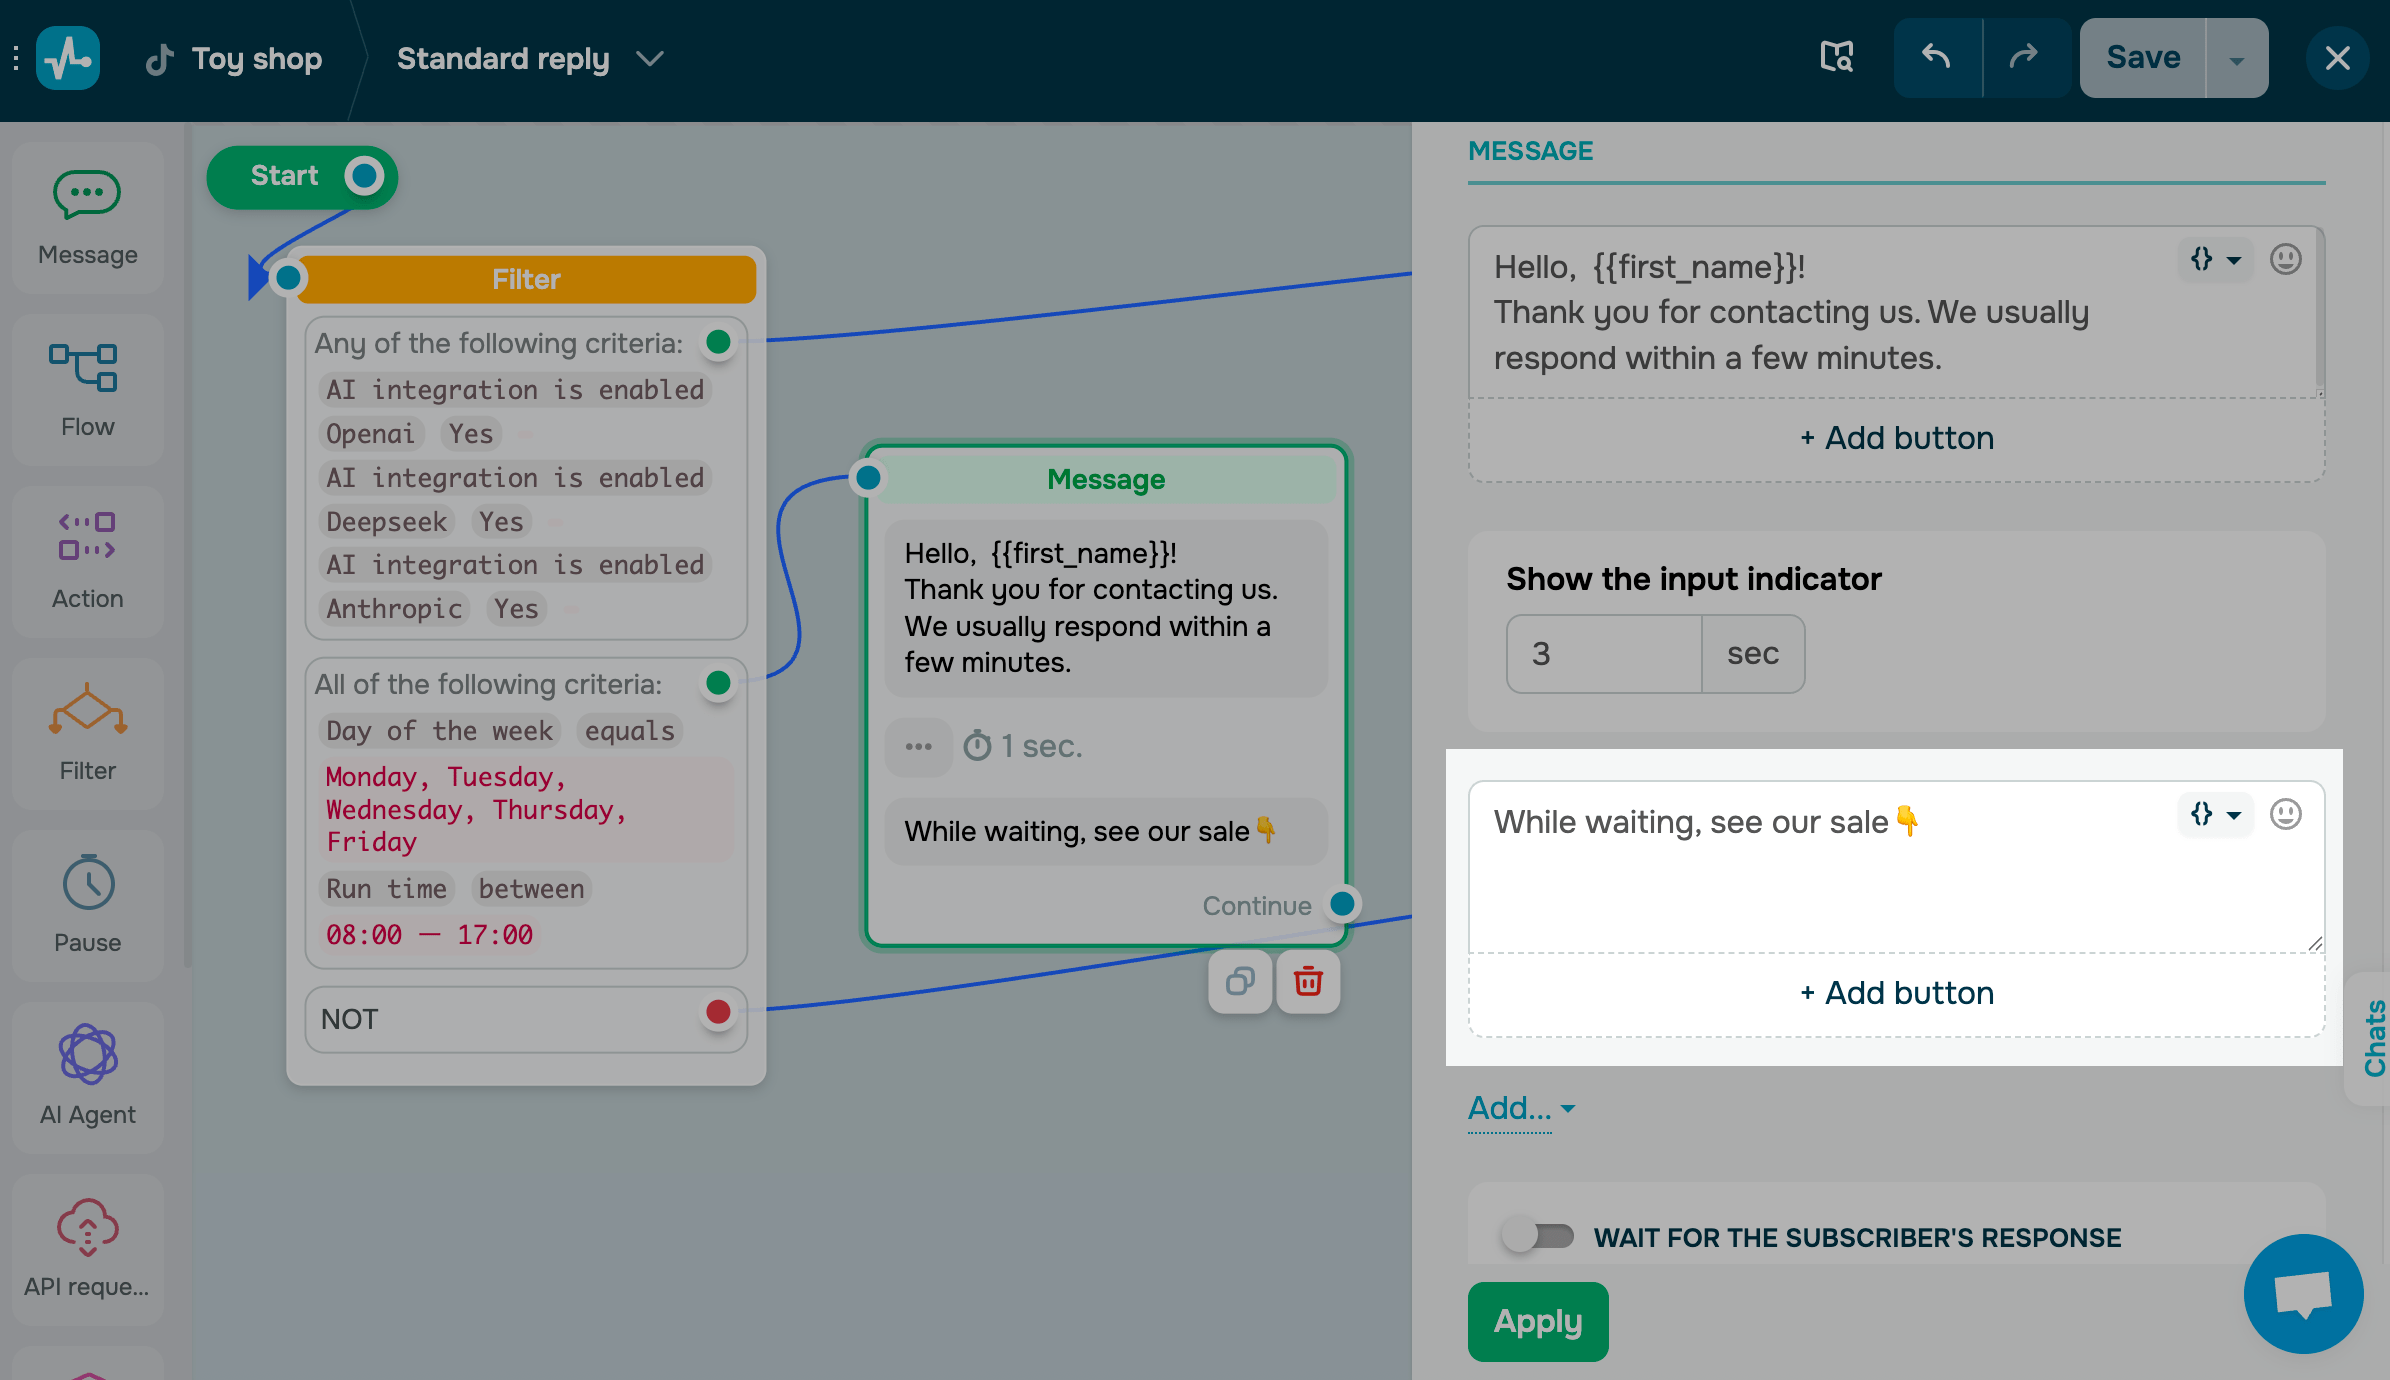
You can also add an image, but keep in mind that TikTok may not deliver it due to regional restrictions.
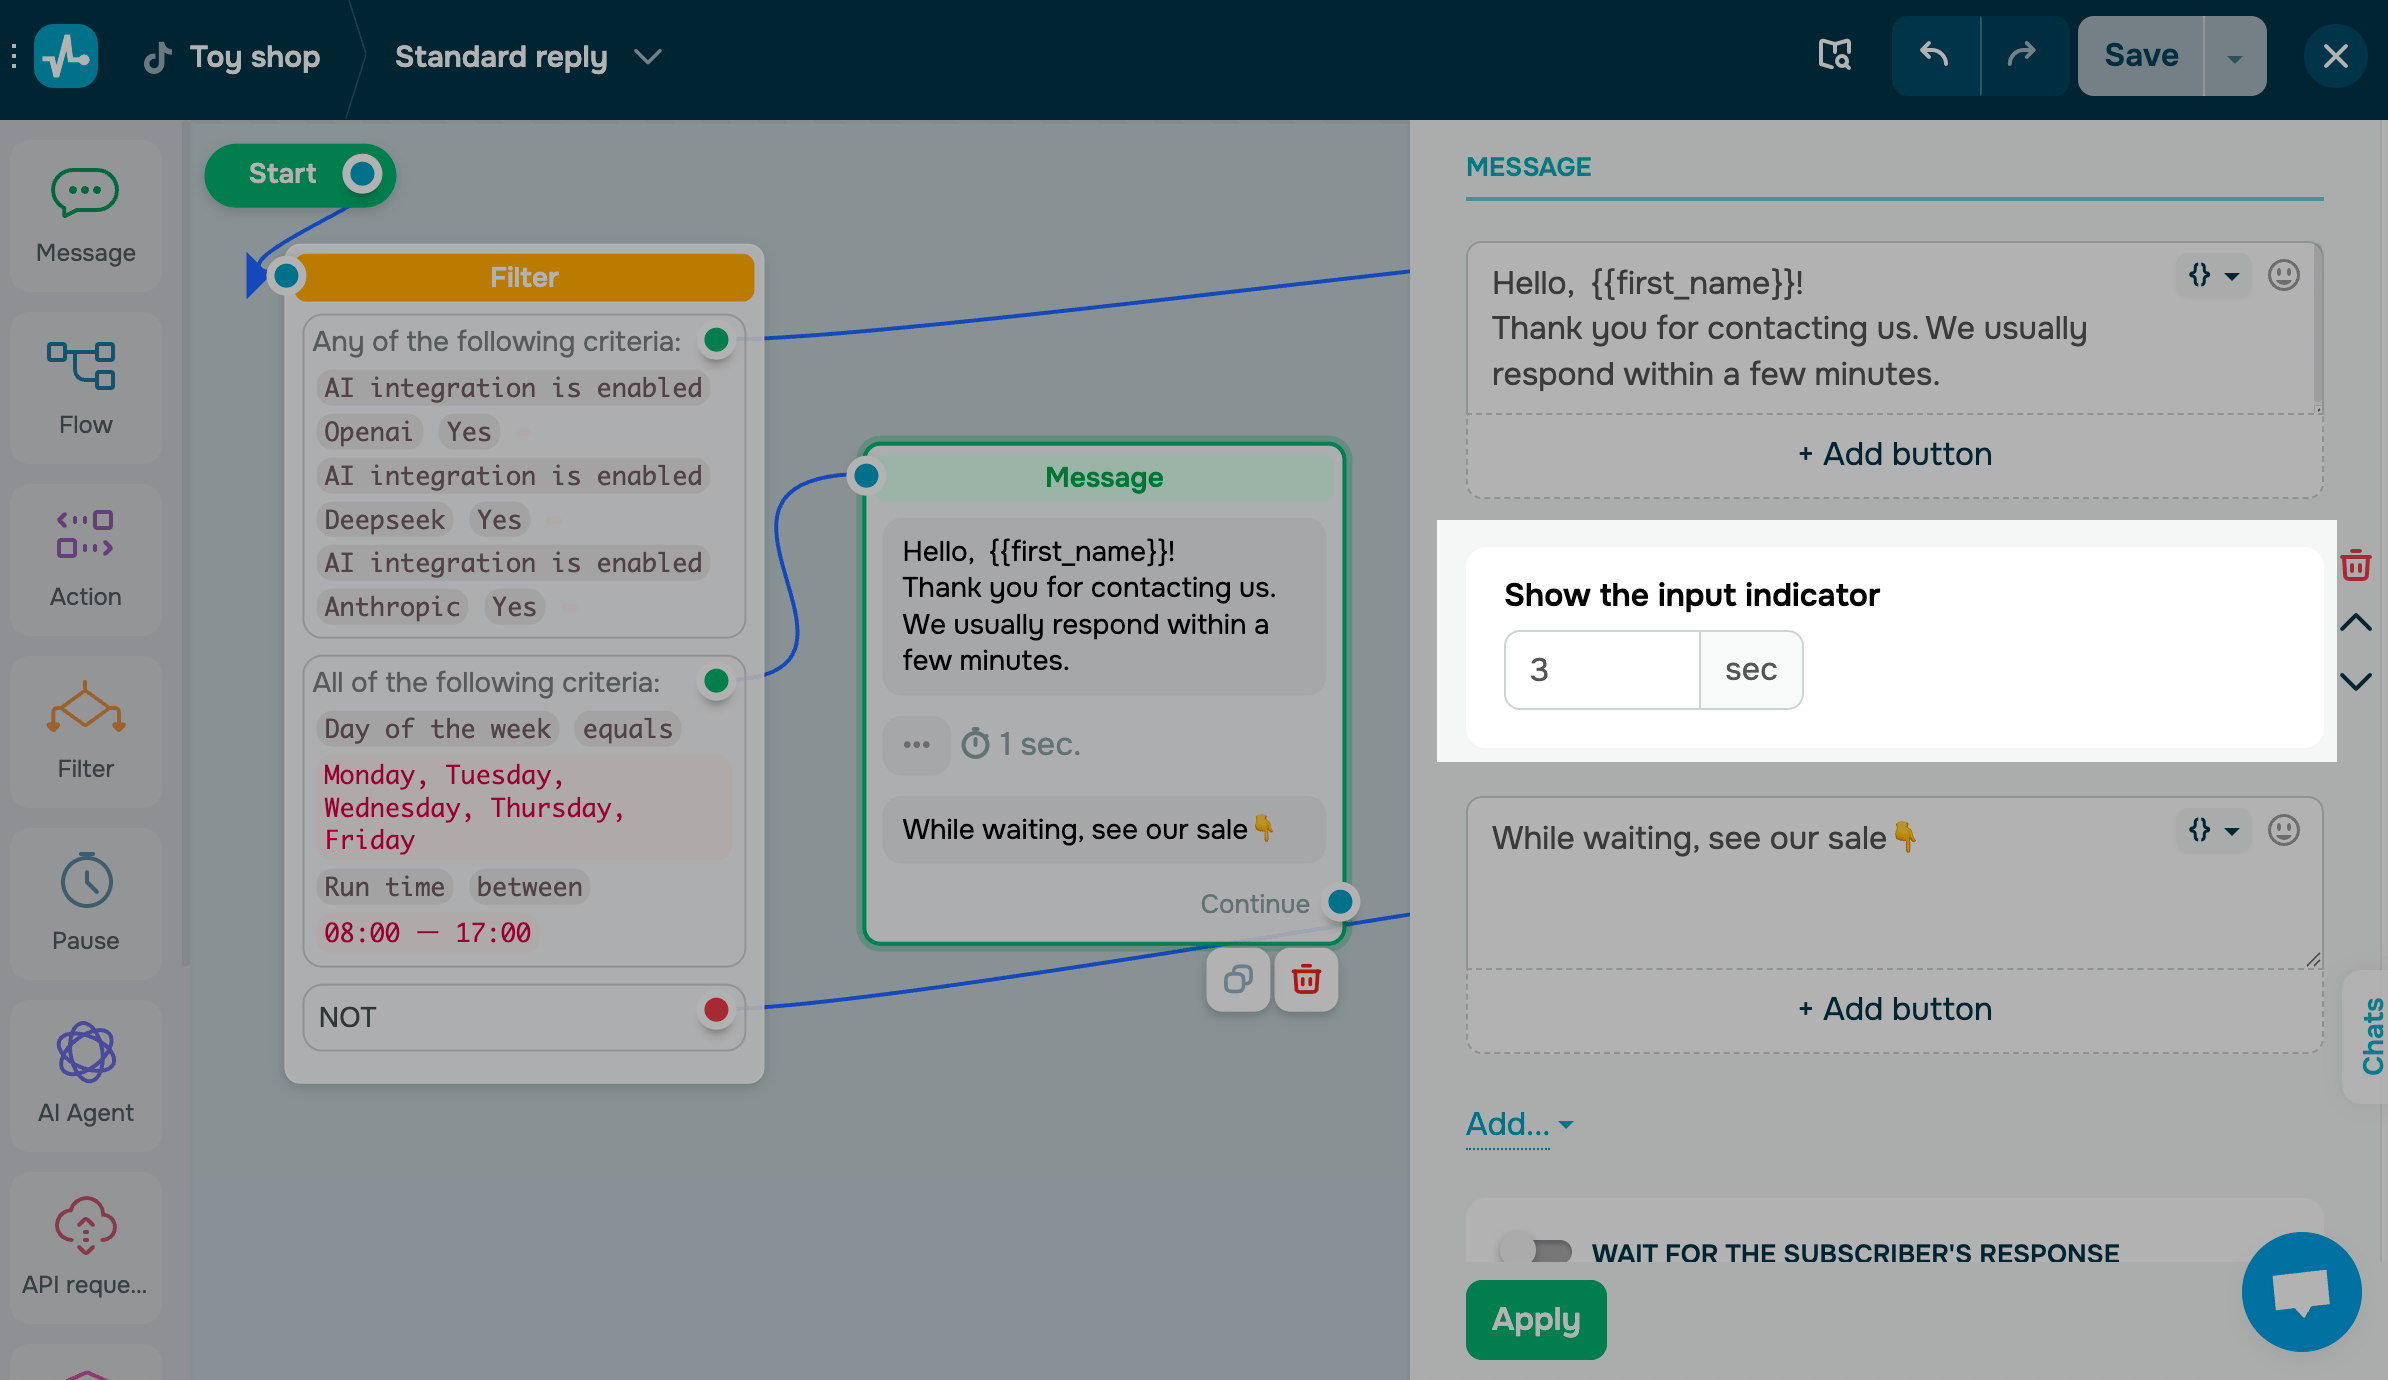
Typing
This element shows a typing animation before your chatbot’s message appears. While your chatbot is “typing,” users see a standard three-dot indicator similar to those in messaging apps.
Click Add, select Typing, and set a typing animation lifetime.
Button
The Button element makes your flow more interactive. When users click a button, they move forward in your flow.
To add a button, click Add button, enter its name, and click Add.
You can add and arrange up to 3 buttons.

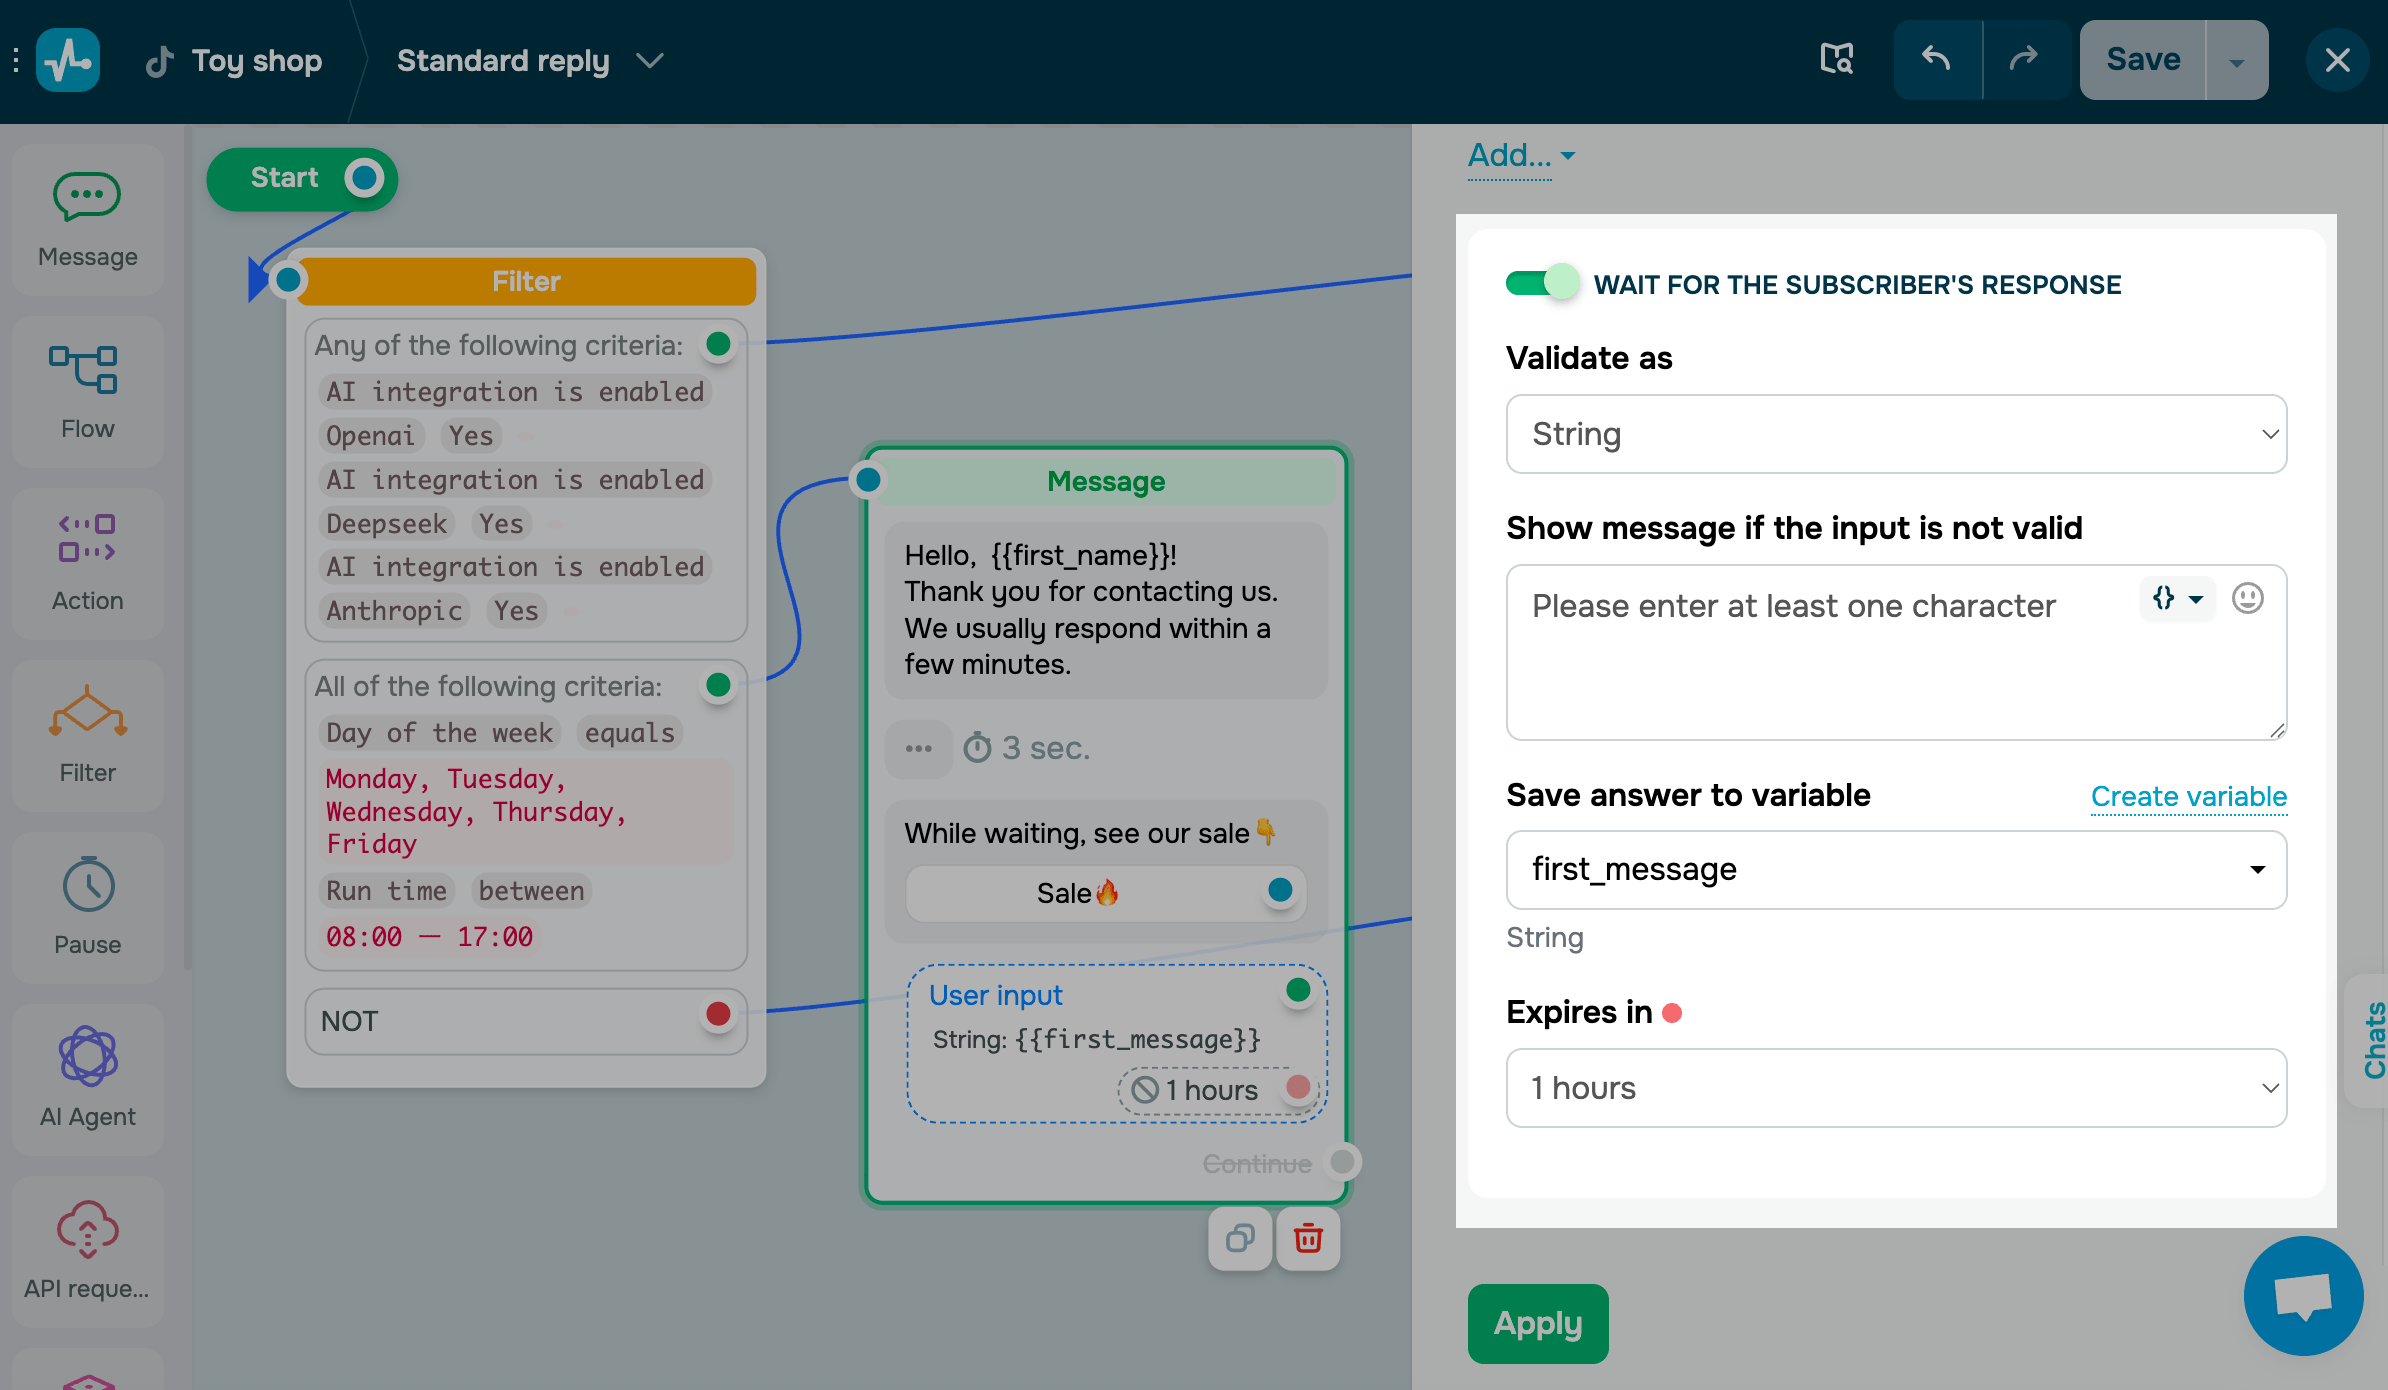
Waiting for the subscriber's response
Use the Waiting for the subscriber's response element to collect and save subscriber replies to variables.
Turn on the Waiting for the subscriber's response toggle. Select a validation type, type in a message users will receive if they enter invalid data, and select the variable to which you want to save the data.
Element arrangement
By default, each element you add appears at the end of the message element you are working on. Hover over the element that you want to move and click the up or down arrow.
Expand your flow
On the left sidebar, select an element and place it after your tracked element.
You can also set your flow to continue after a user's response. It’s best to use this together with the Pause element to see if a subscriber interacted with your flow and send a follow-up message after a set time.
You can link an unlimited number of interactive elements and up to 100 regular elements using Continue.
Element linking
To link elements, drag a line from the blue dot of one element to another. To unlink them, double-click the line.
Unlinked elements are highlighted in yellow. Make sure to link each one to another element.
Elements with empty fields are highlighted in red to remind you to complete them. For example, if you add a button without text, it will be highlighted. You won’t be able to save your flow until all required fields are filled in.
The Flow element
The Flow element helps simplify your chatbot’s structure and move a user to another flow.
In its settings, choose an existing flow from the list.
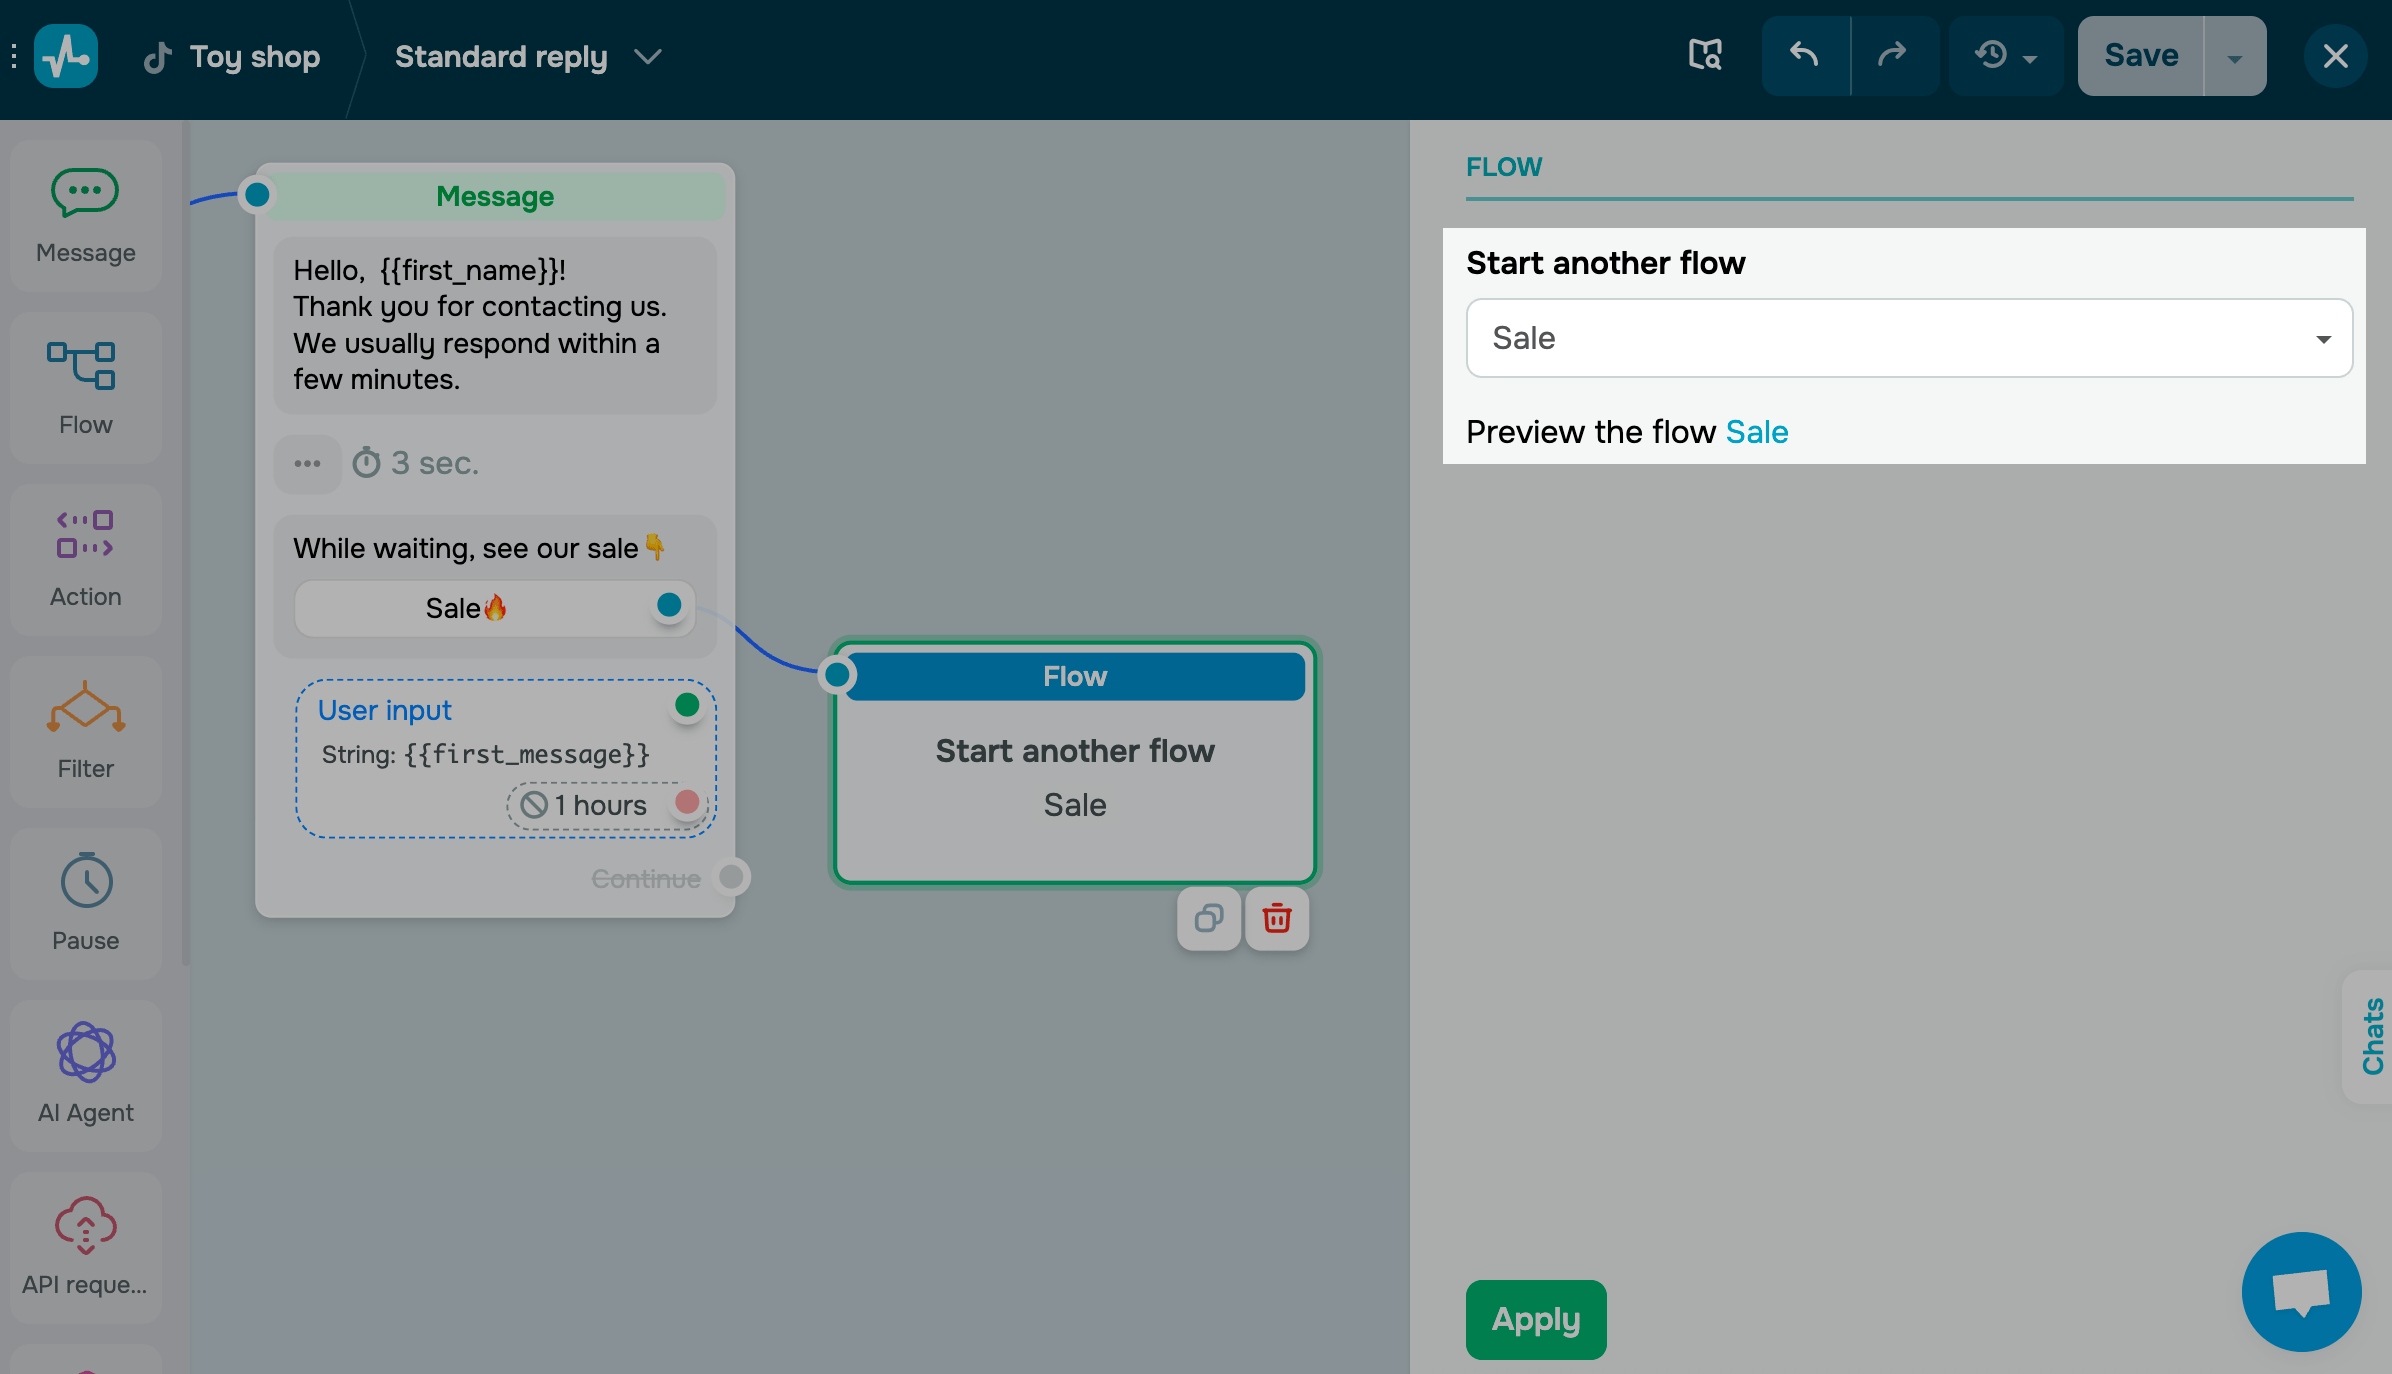
The Flow element marks the end of a branch. You can’t link it to other elements to keep the main flow going.
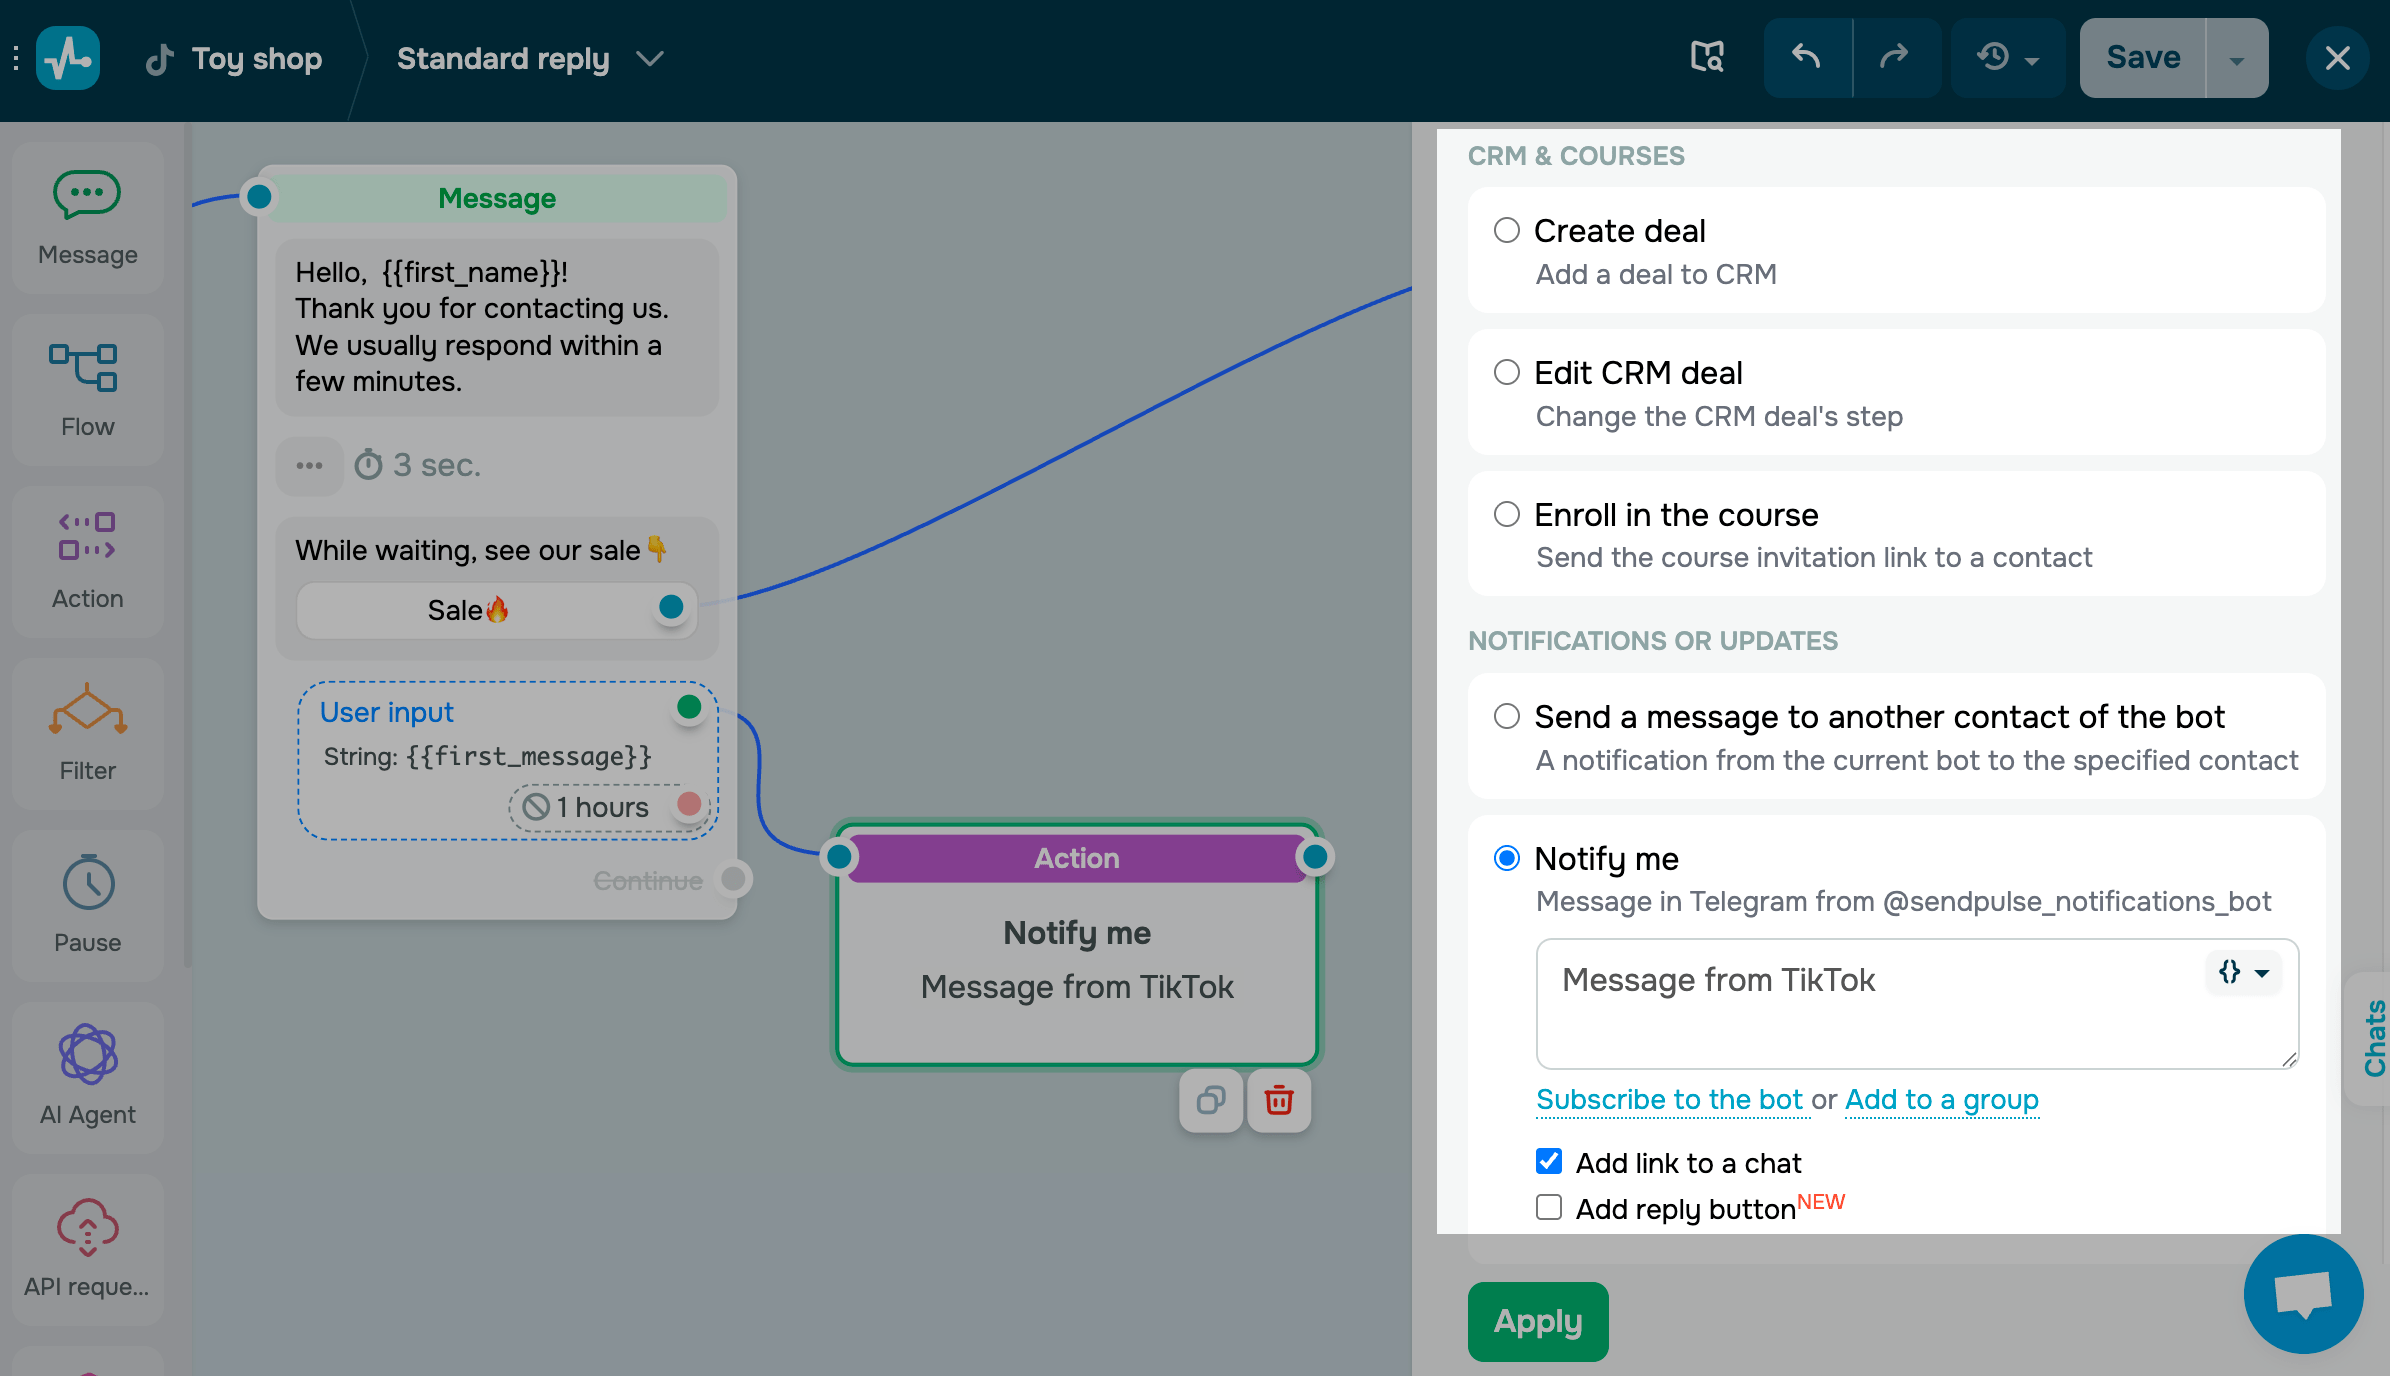
The Action element
The Action element helps perform specific actions on a contact or its data. Choose the action you want to perform.
The Filter element
The Filter element helps segment customers based on their personal data and previous messages received.
Choose a condition. You can combine conditions using the any or all operators and add independent conditions.
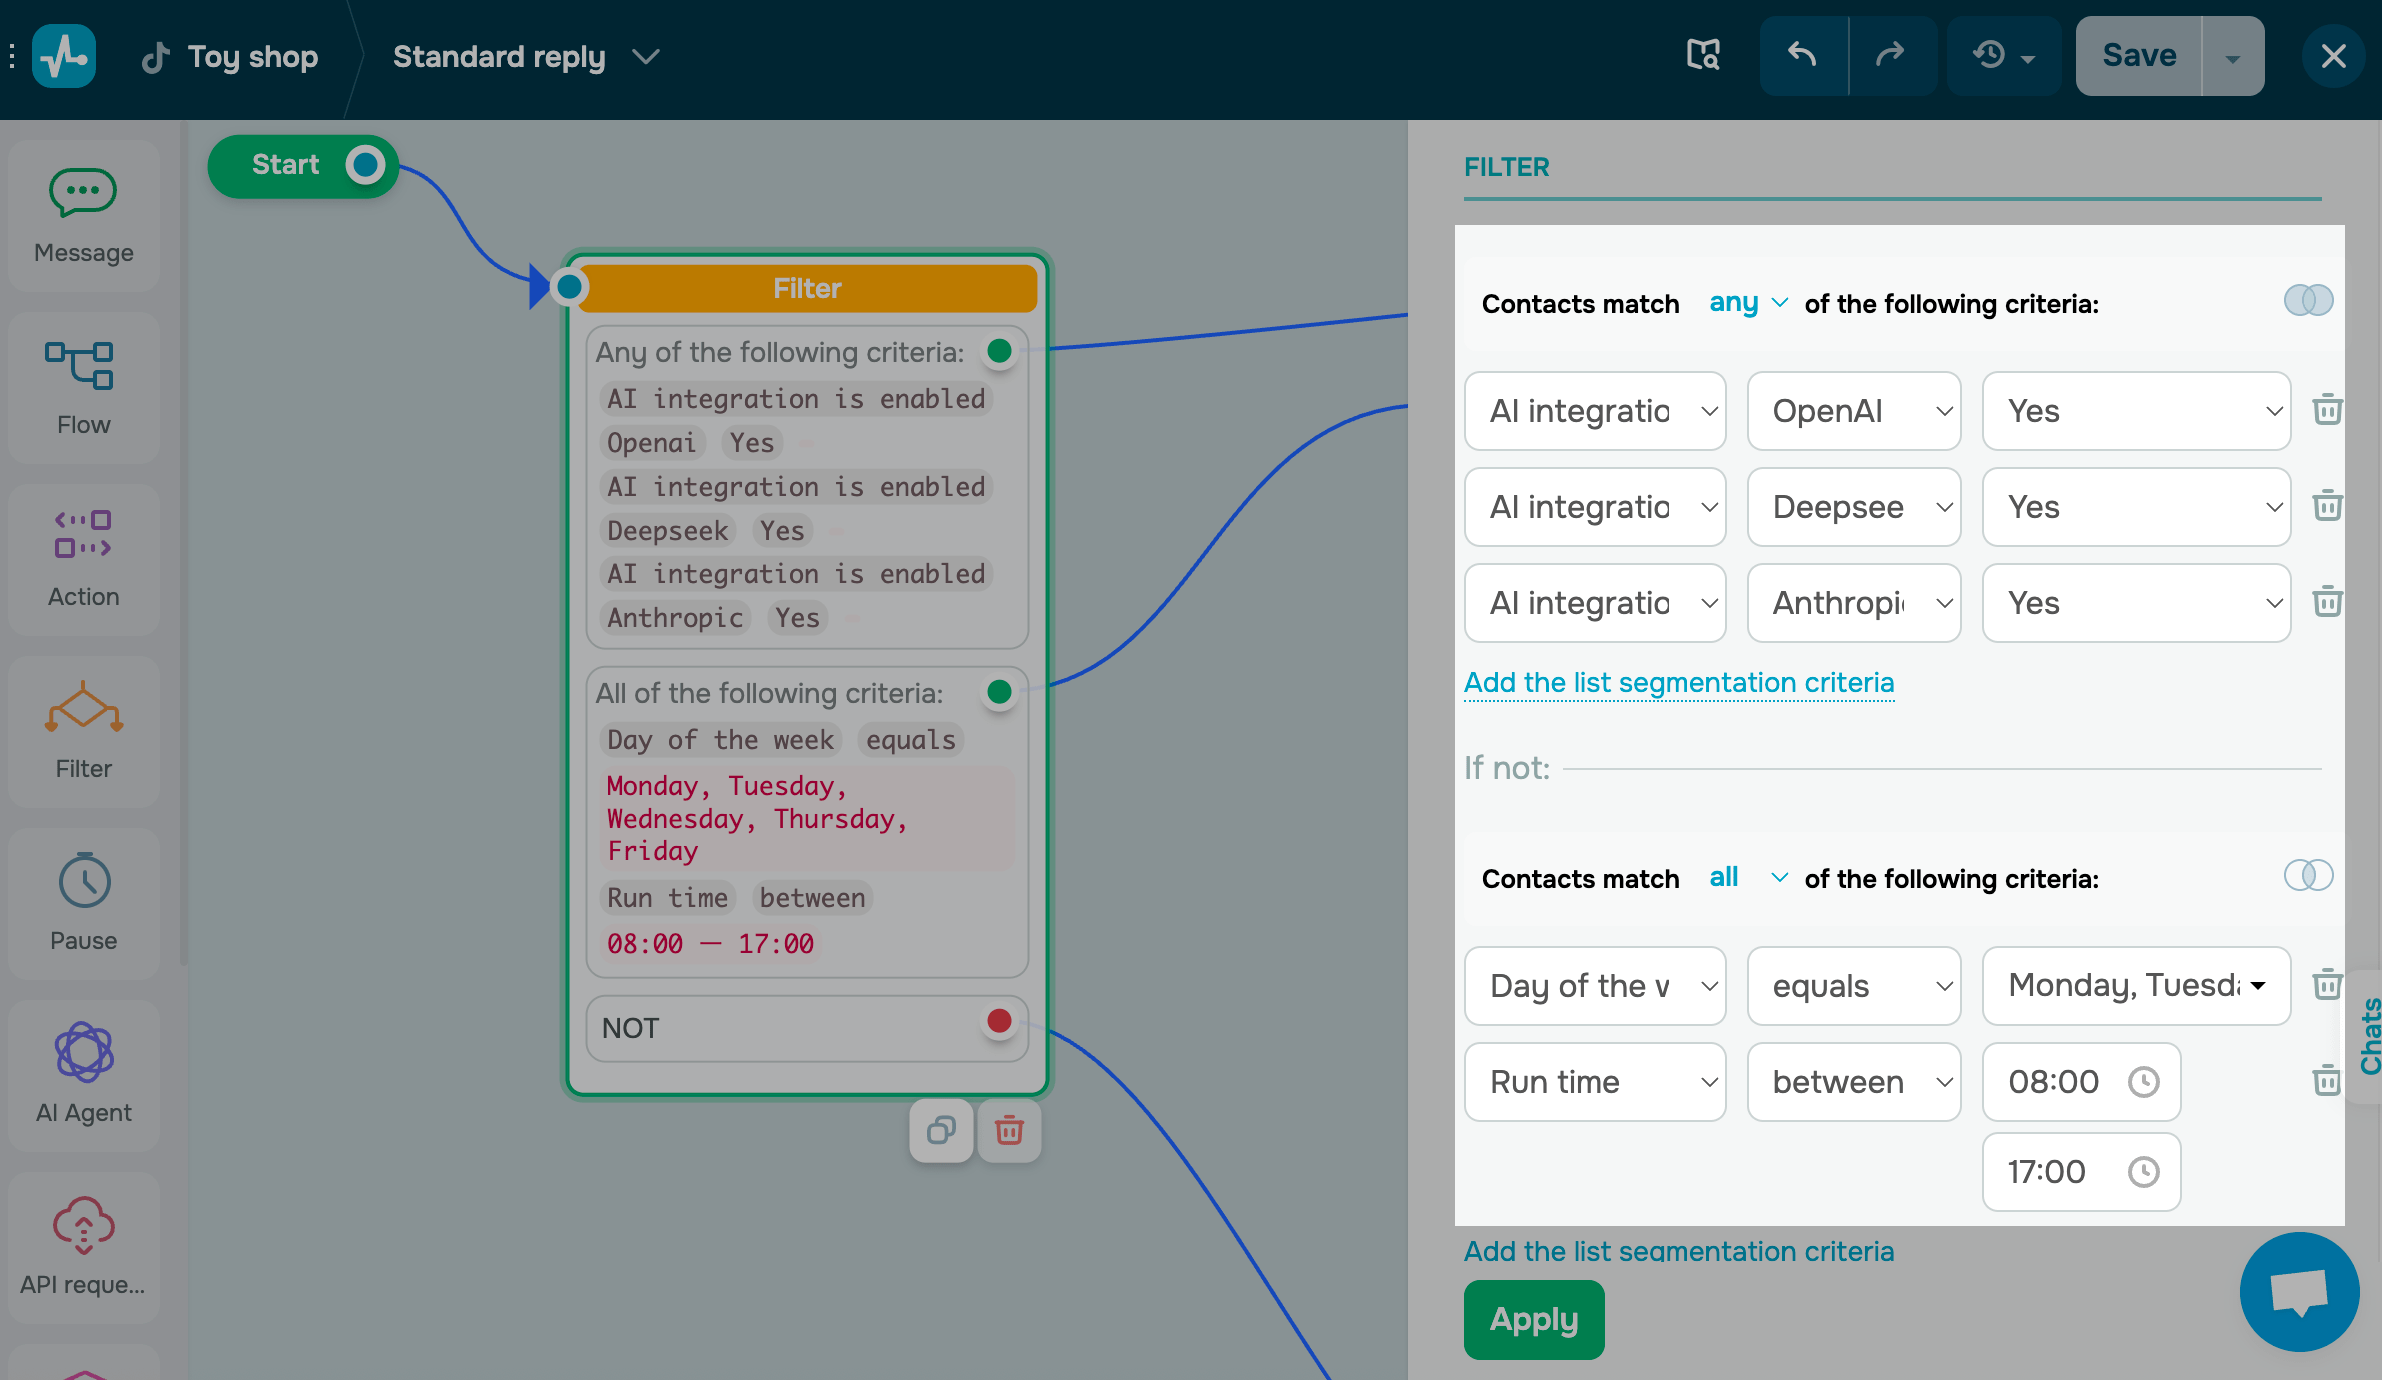
Once you add conditions, link flow elements to your Filter. Use the green dot for when a condition is met and the red dot for when it’s not.
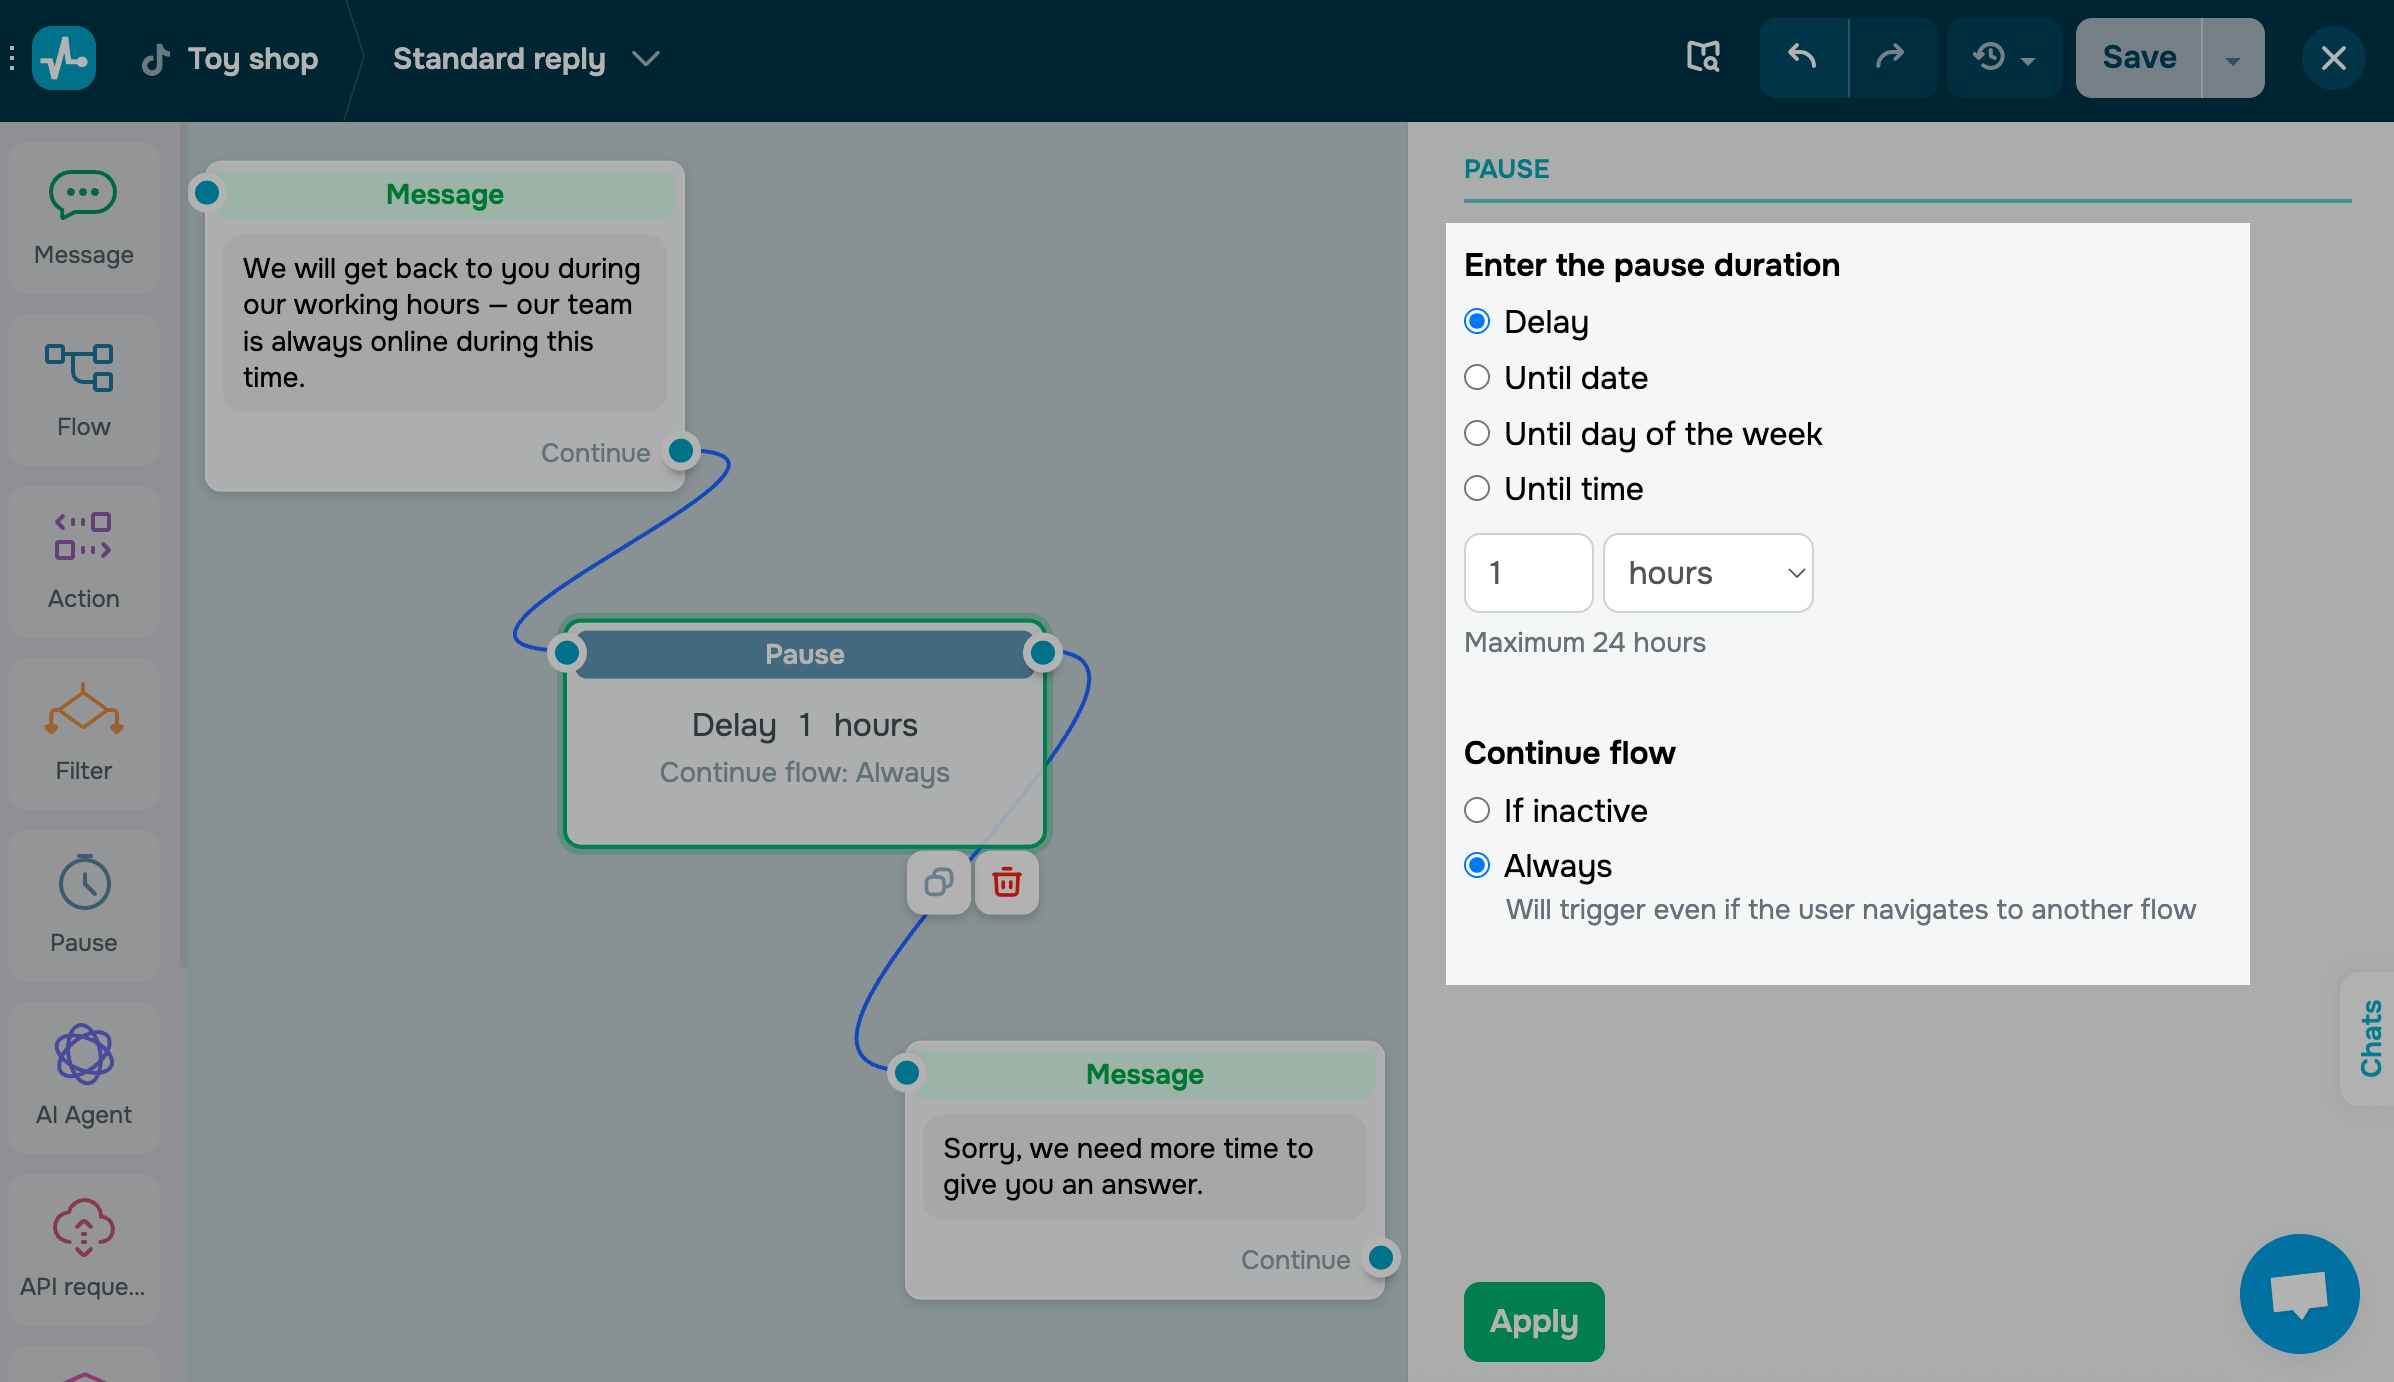
The Pause element
The Pause element stops automated messages for a specific amount of time. You can set a pause in minutes, hours, or days.
To give you an idea, use it to set your business hours or active promotion times.
Set your pause conditions on the right.
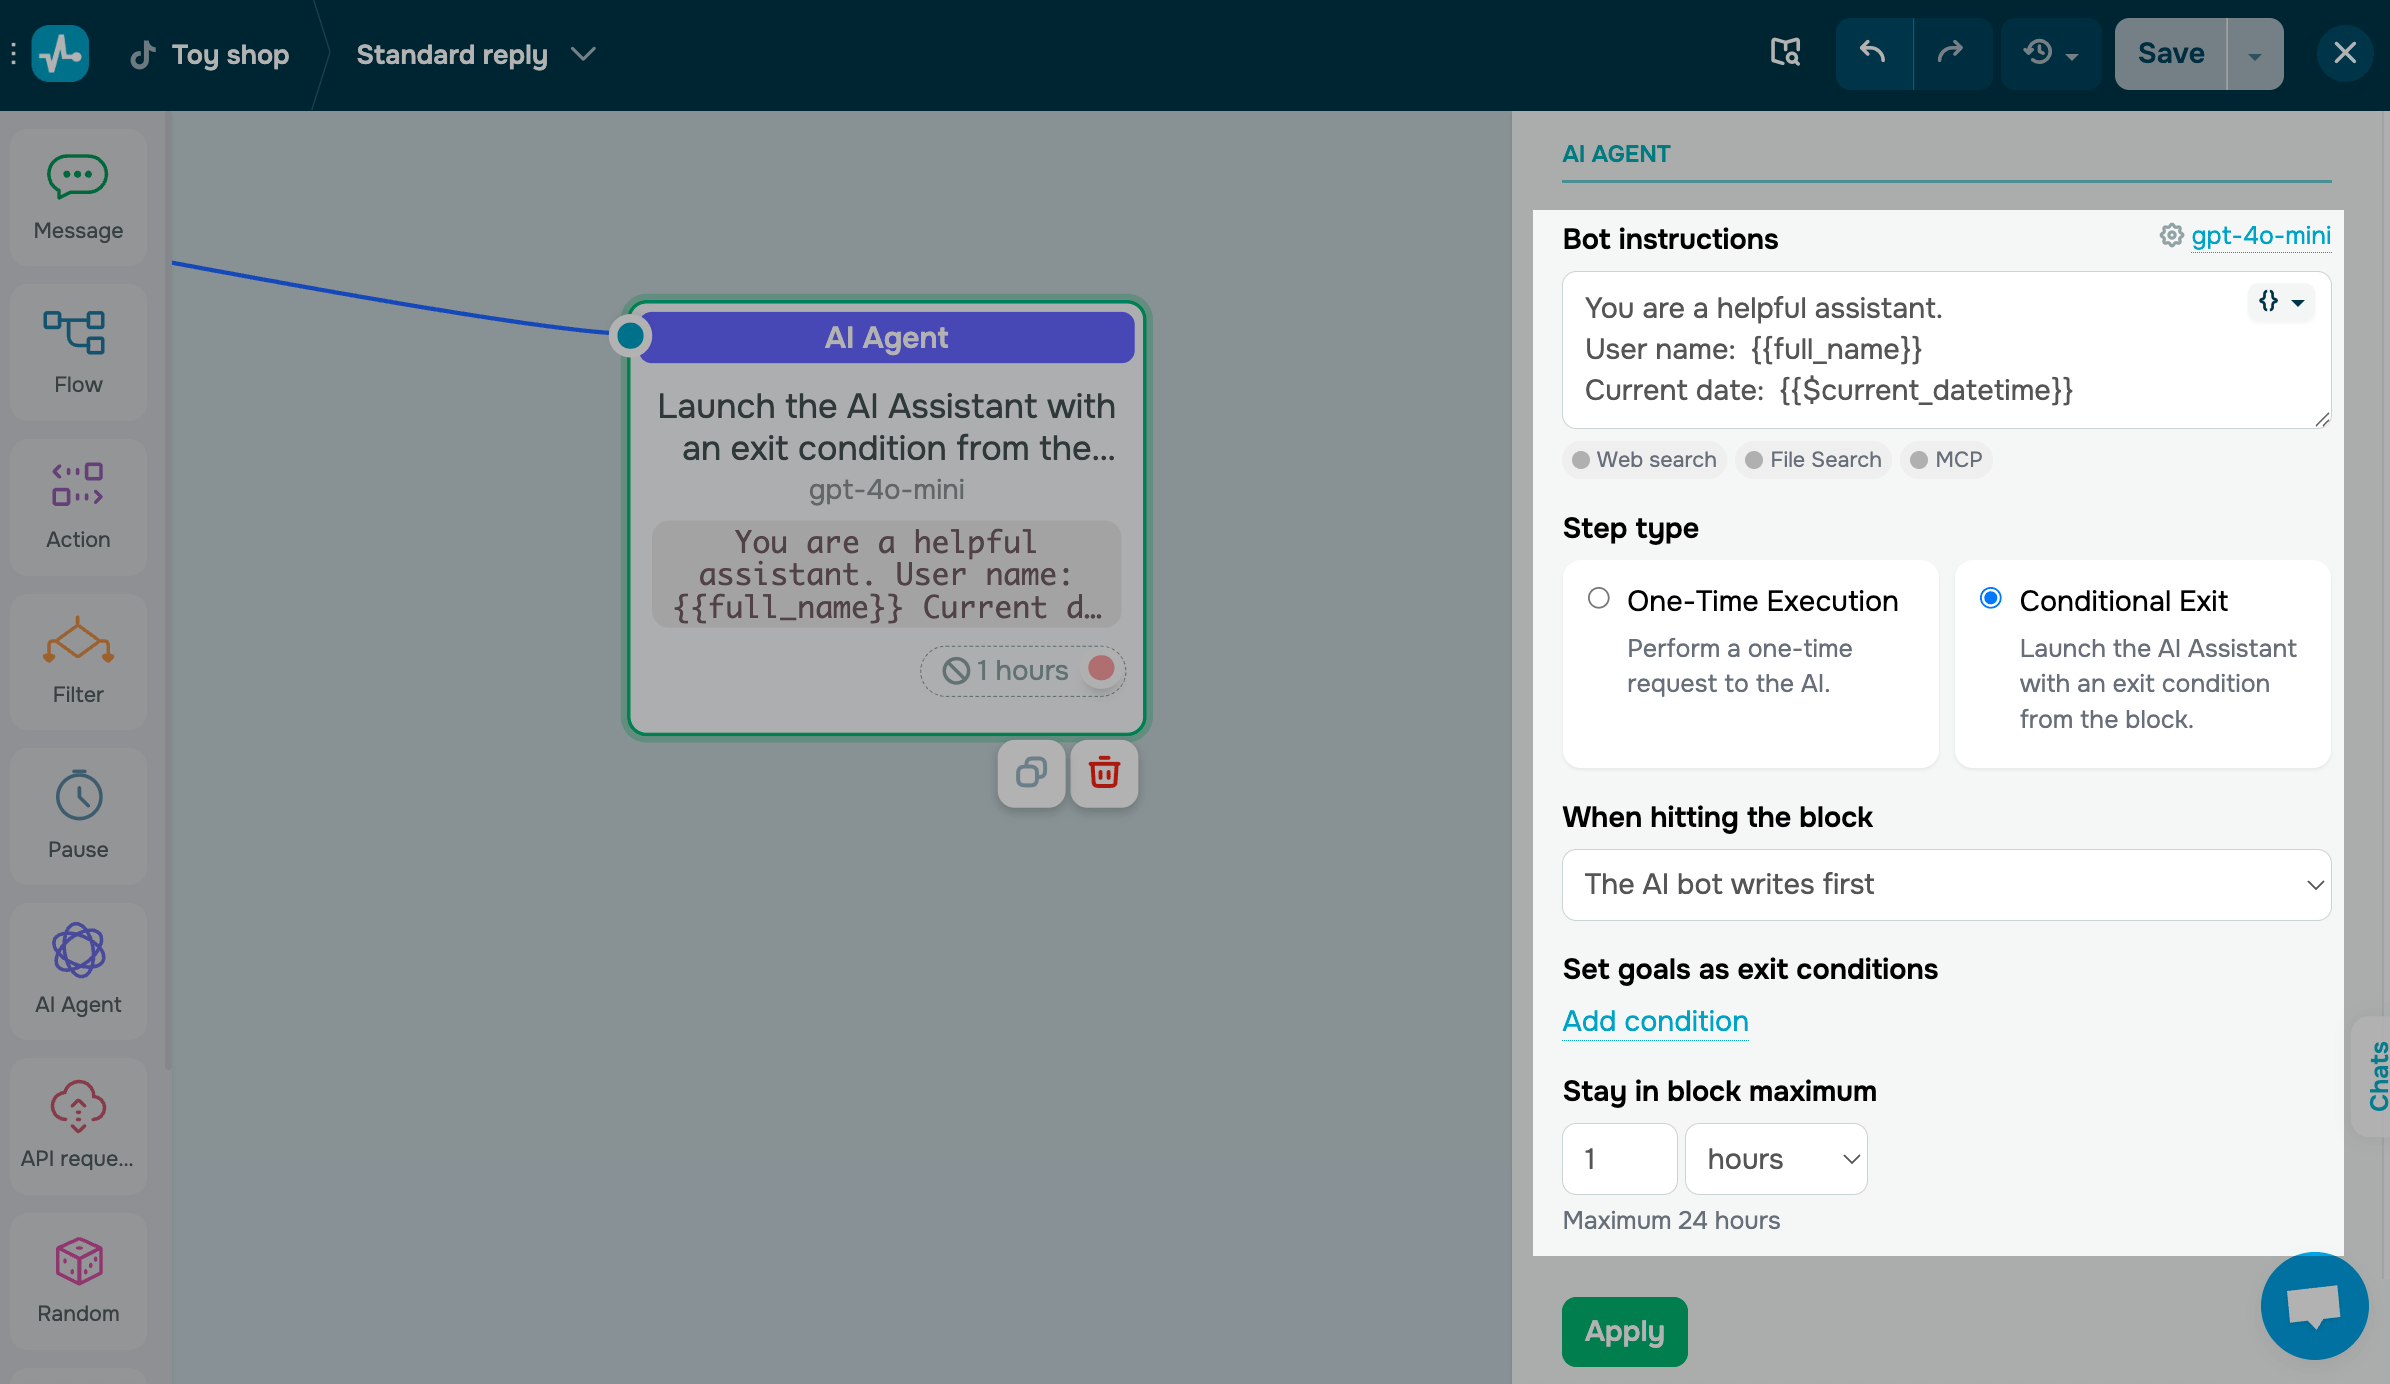
The AI Agent element
Use the AI step element to incorporate AI into your chatbot flows to analyze client needs and conversation tone, process user responses, and branch your flow depending on the goal completion progress.
The API request element
Available with the Pro pricing plan
Use the API request element to send requests to third-party servers to create objects and retrieve data.
You can save received data points to a variable or add them to a chatbot message as JSONPath.
Choose a request type and enter the URL to send the request to.
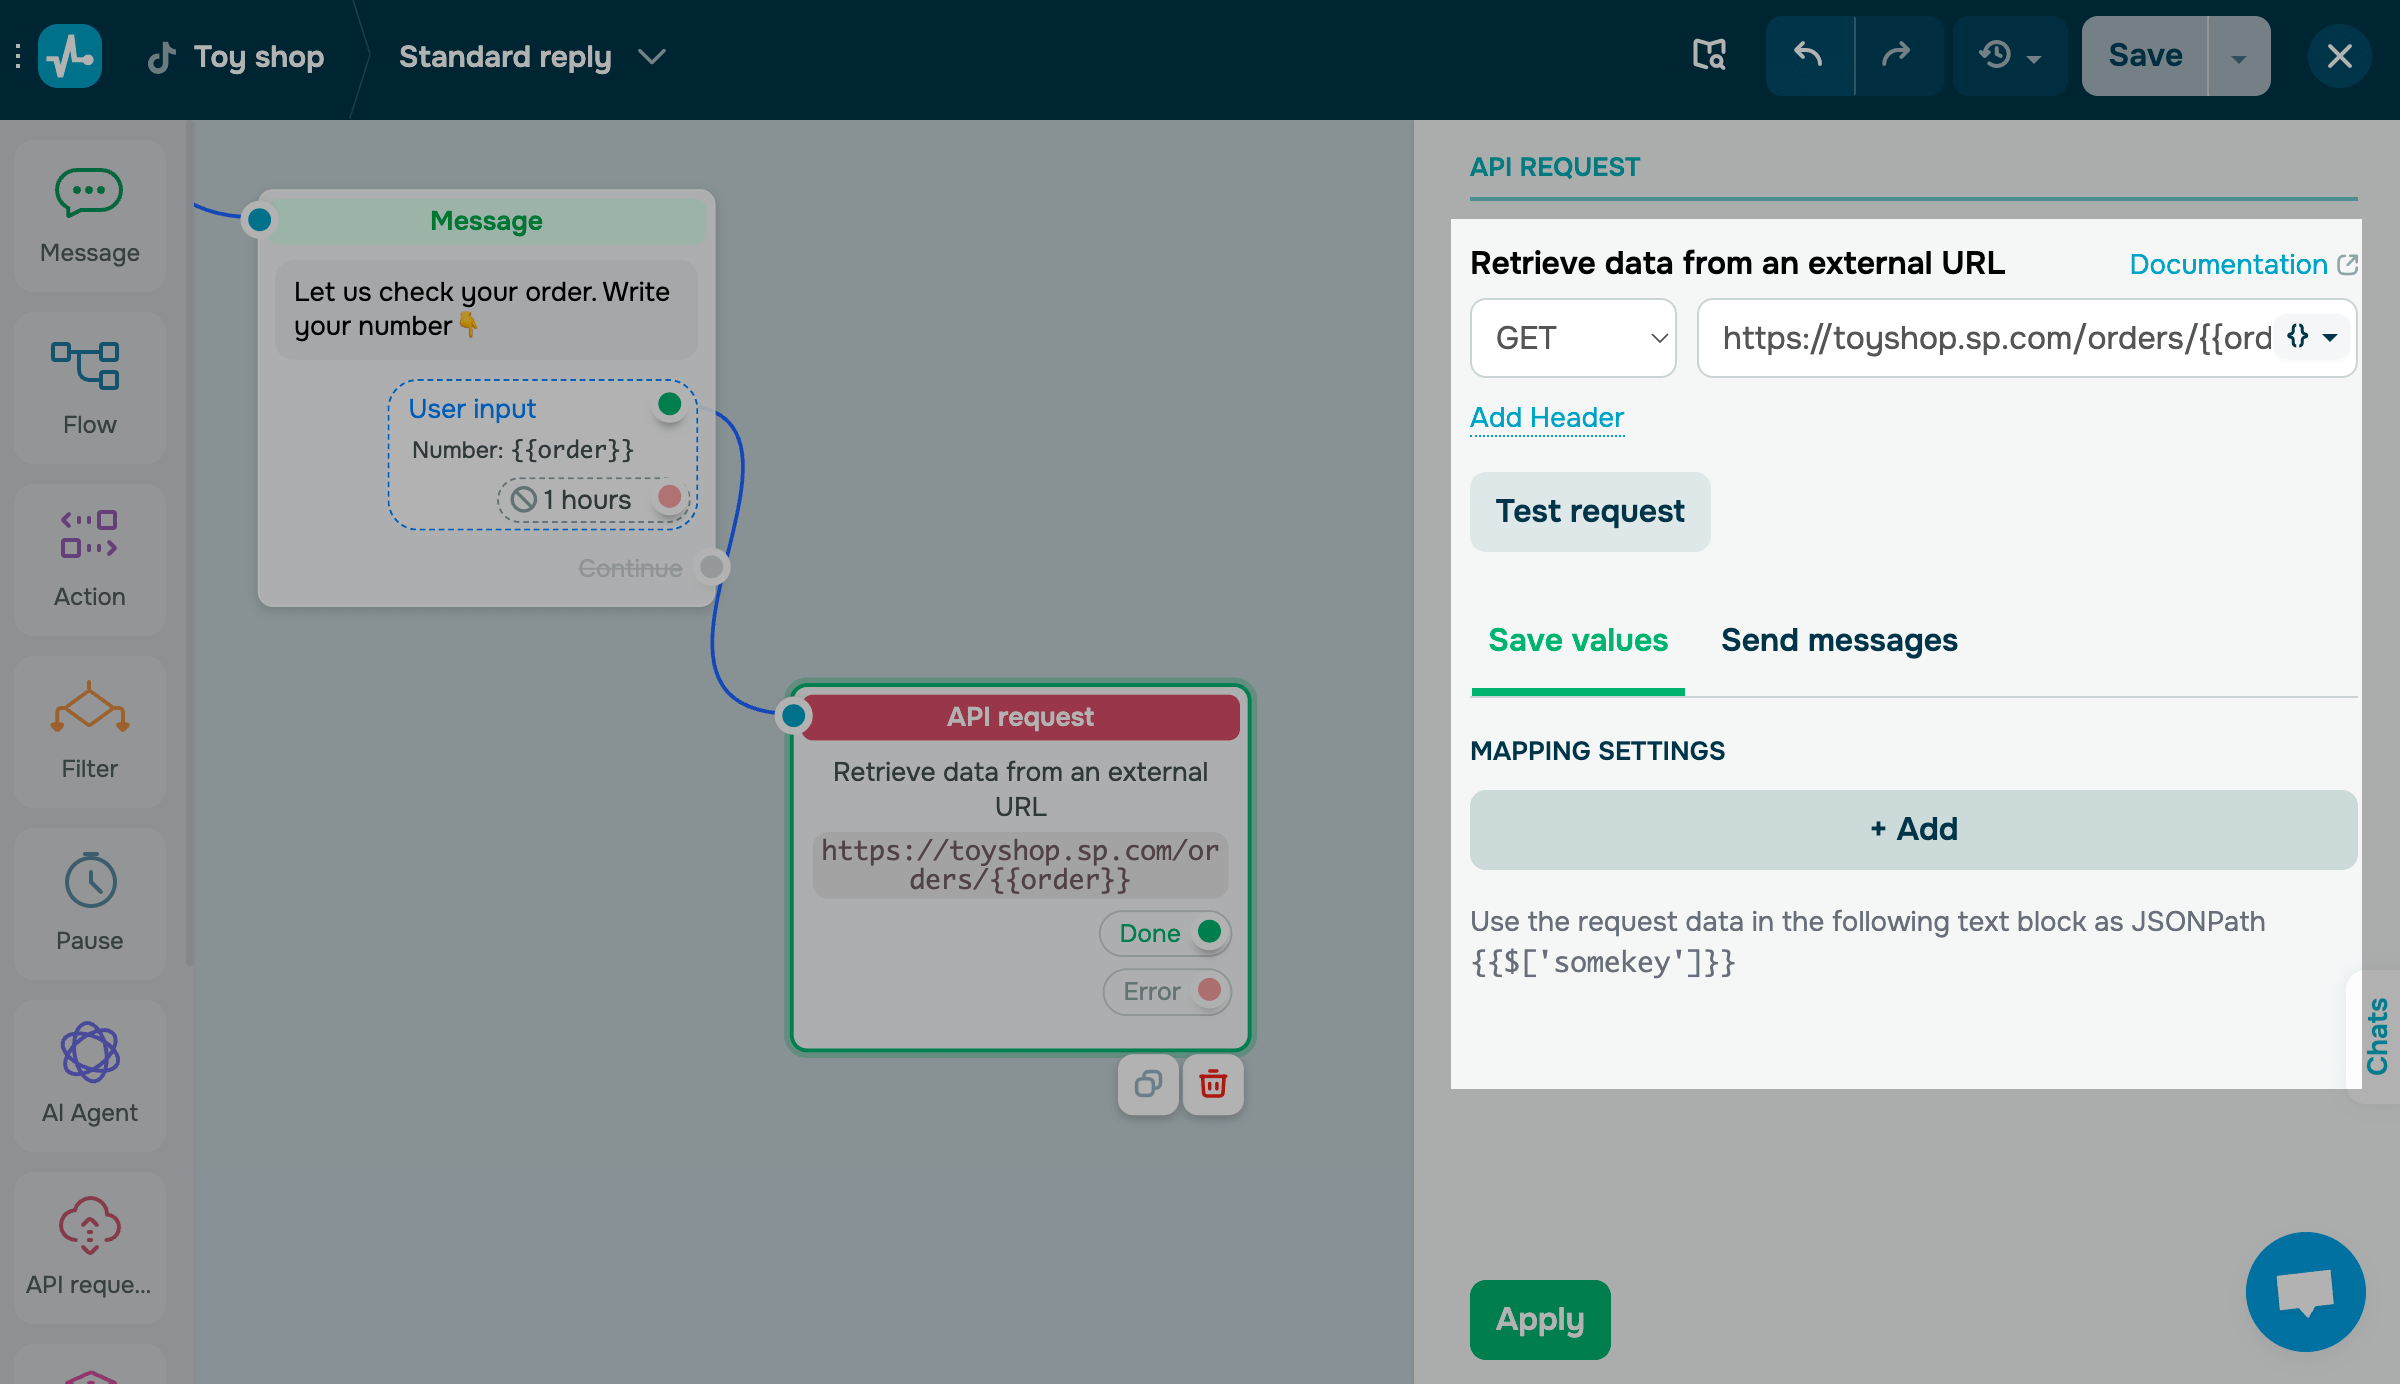
Once a test request succeeds, map your fields.
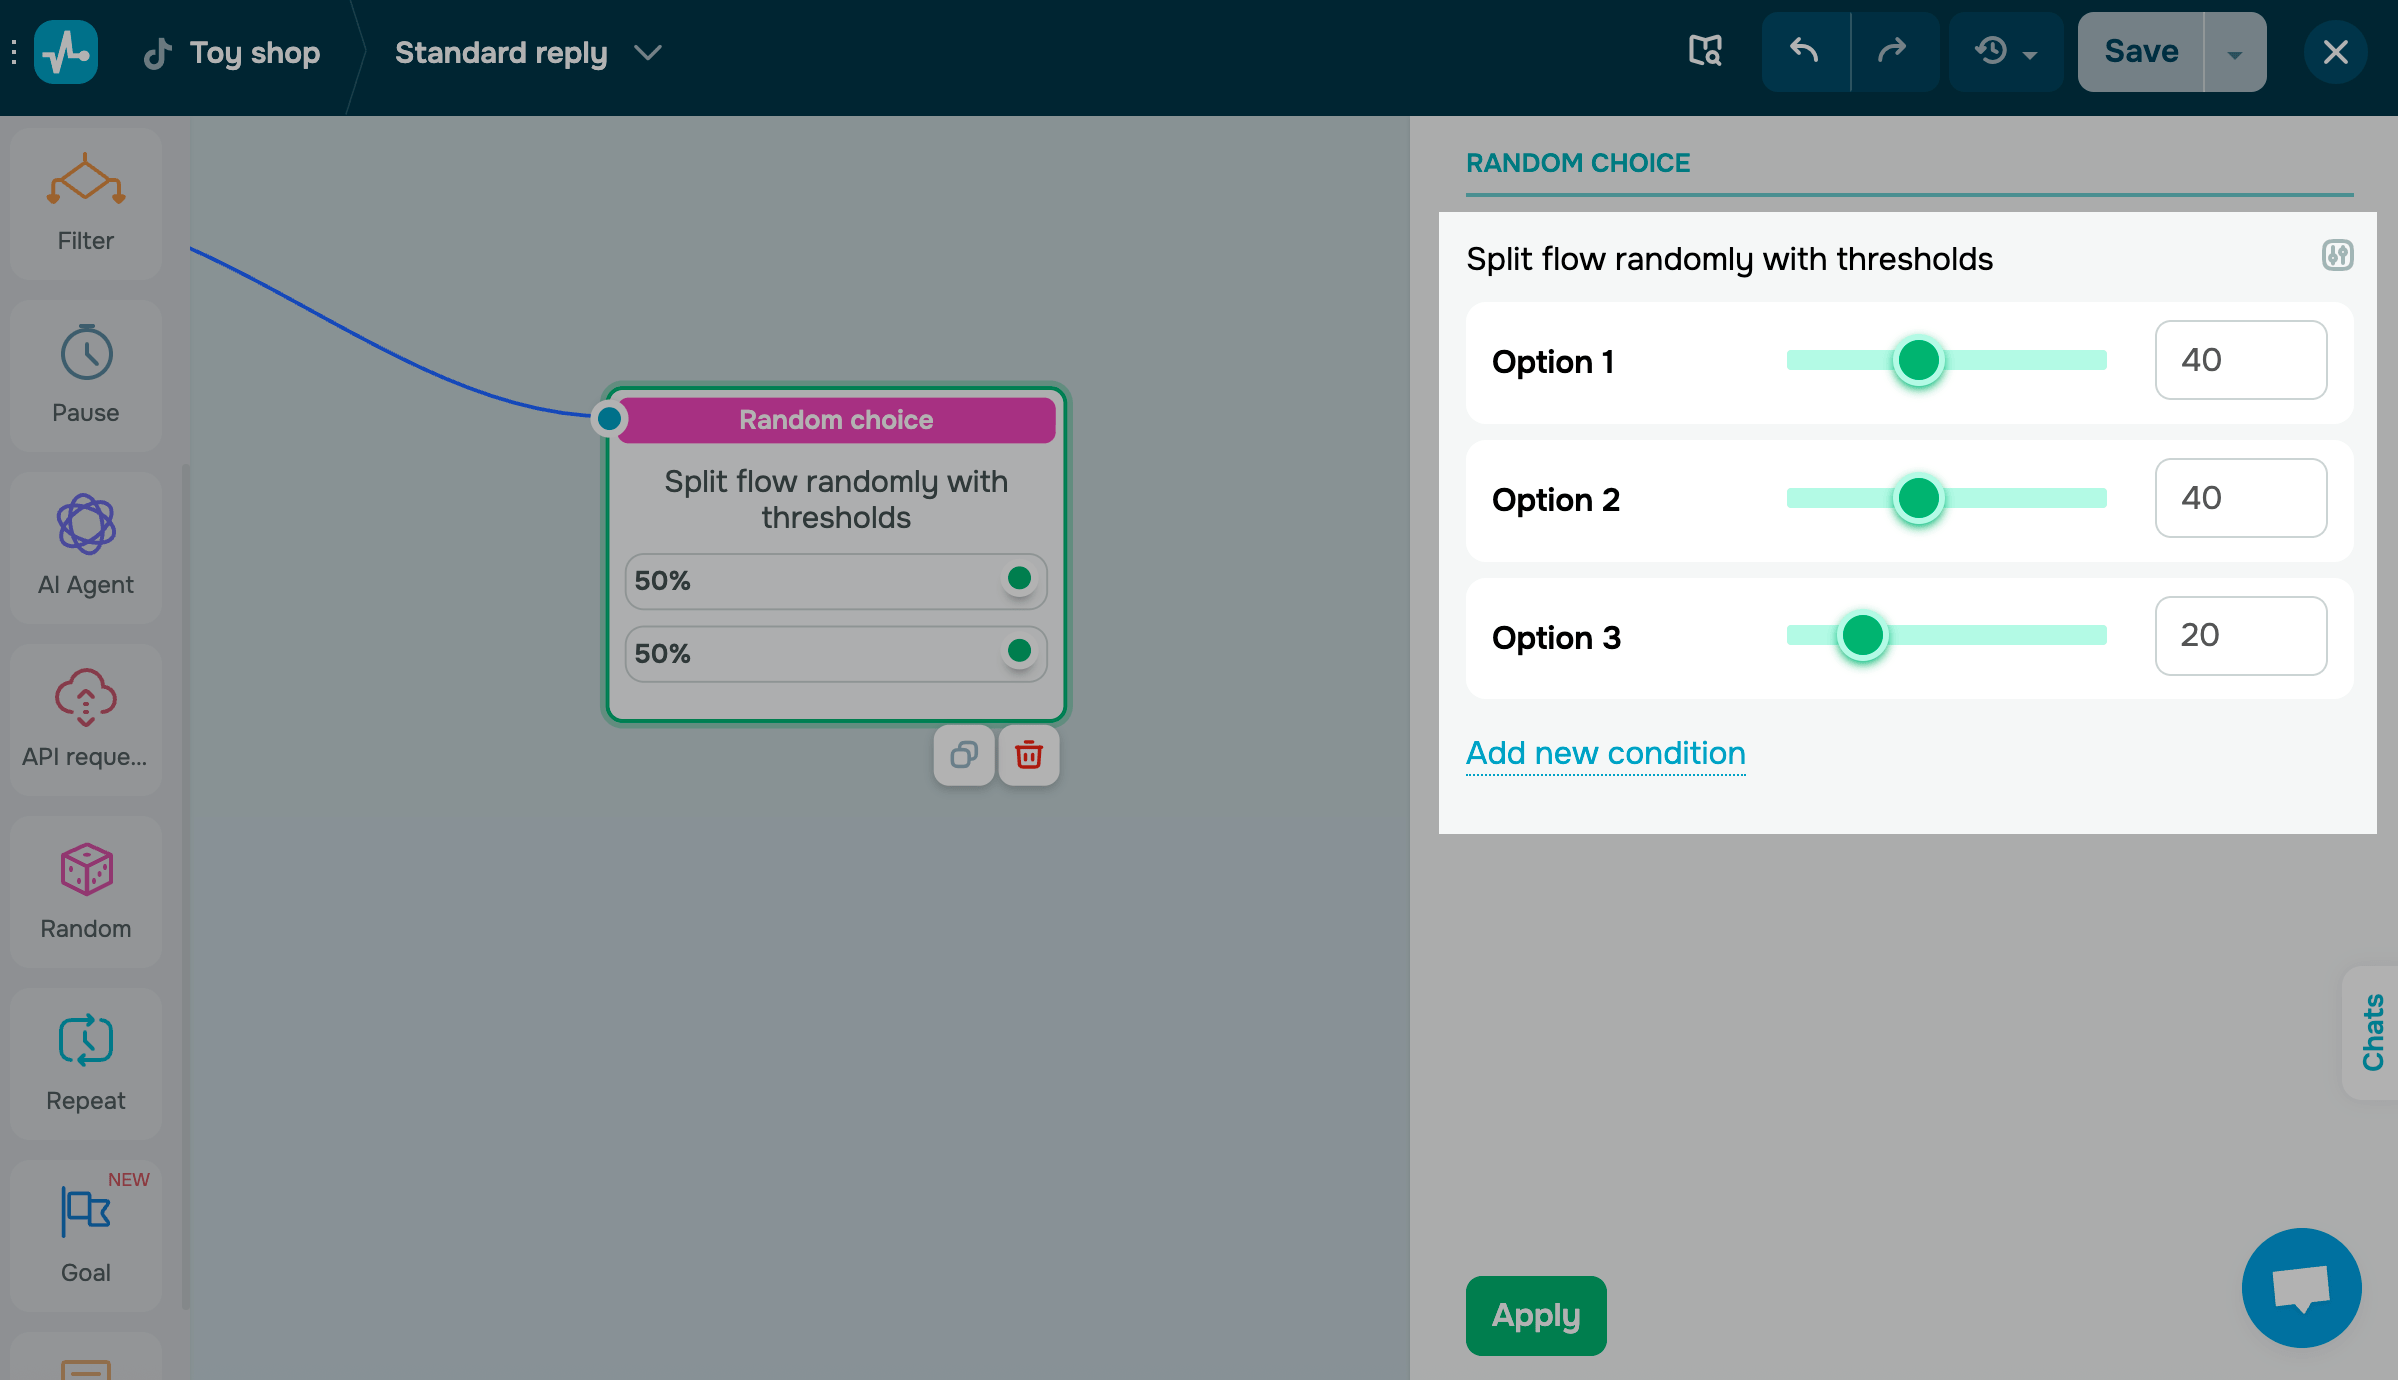
The Random element
Use the Random element to send elements from your chatbot script at random for A/B testing, create quizzes, and more. You can adjust the recipient group size for each option, send random information, and experiment with chatbot scenarios.
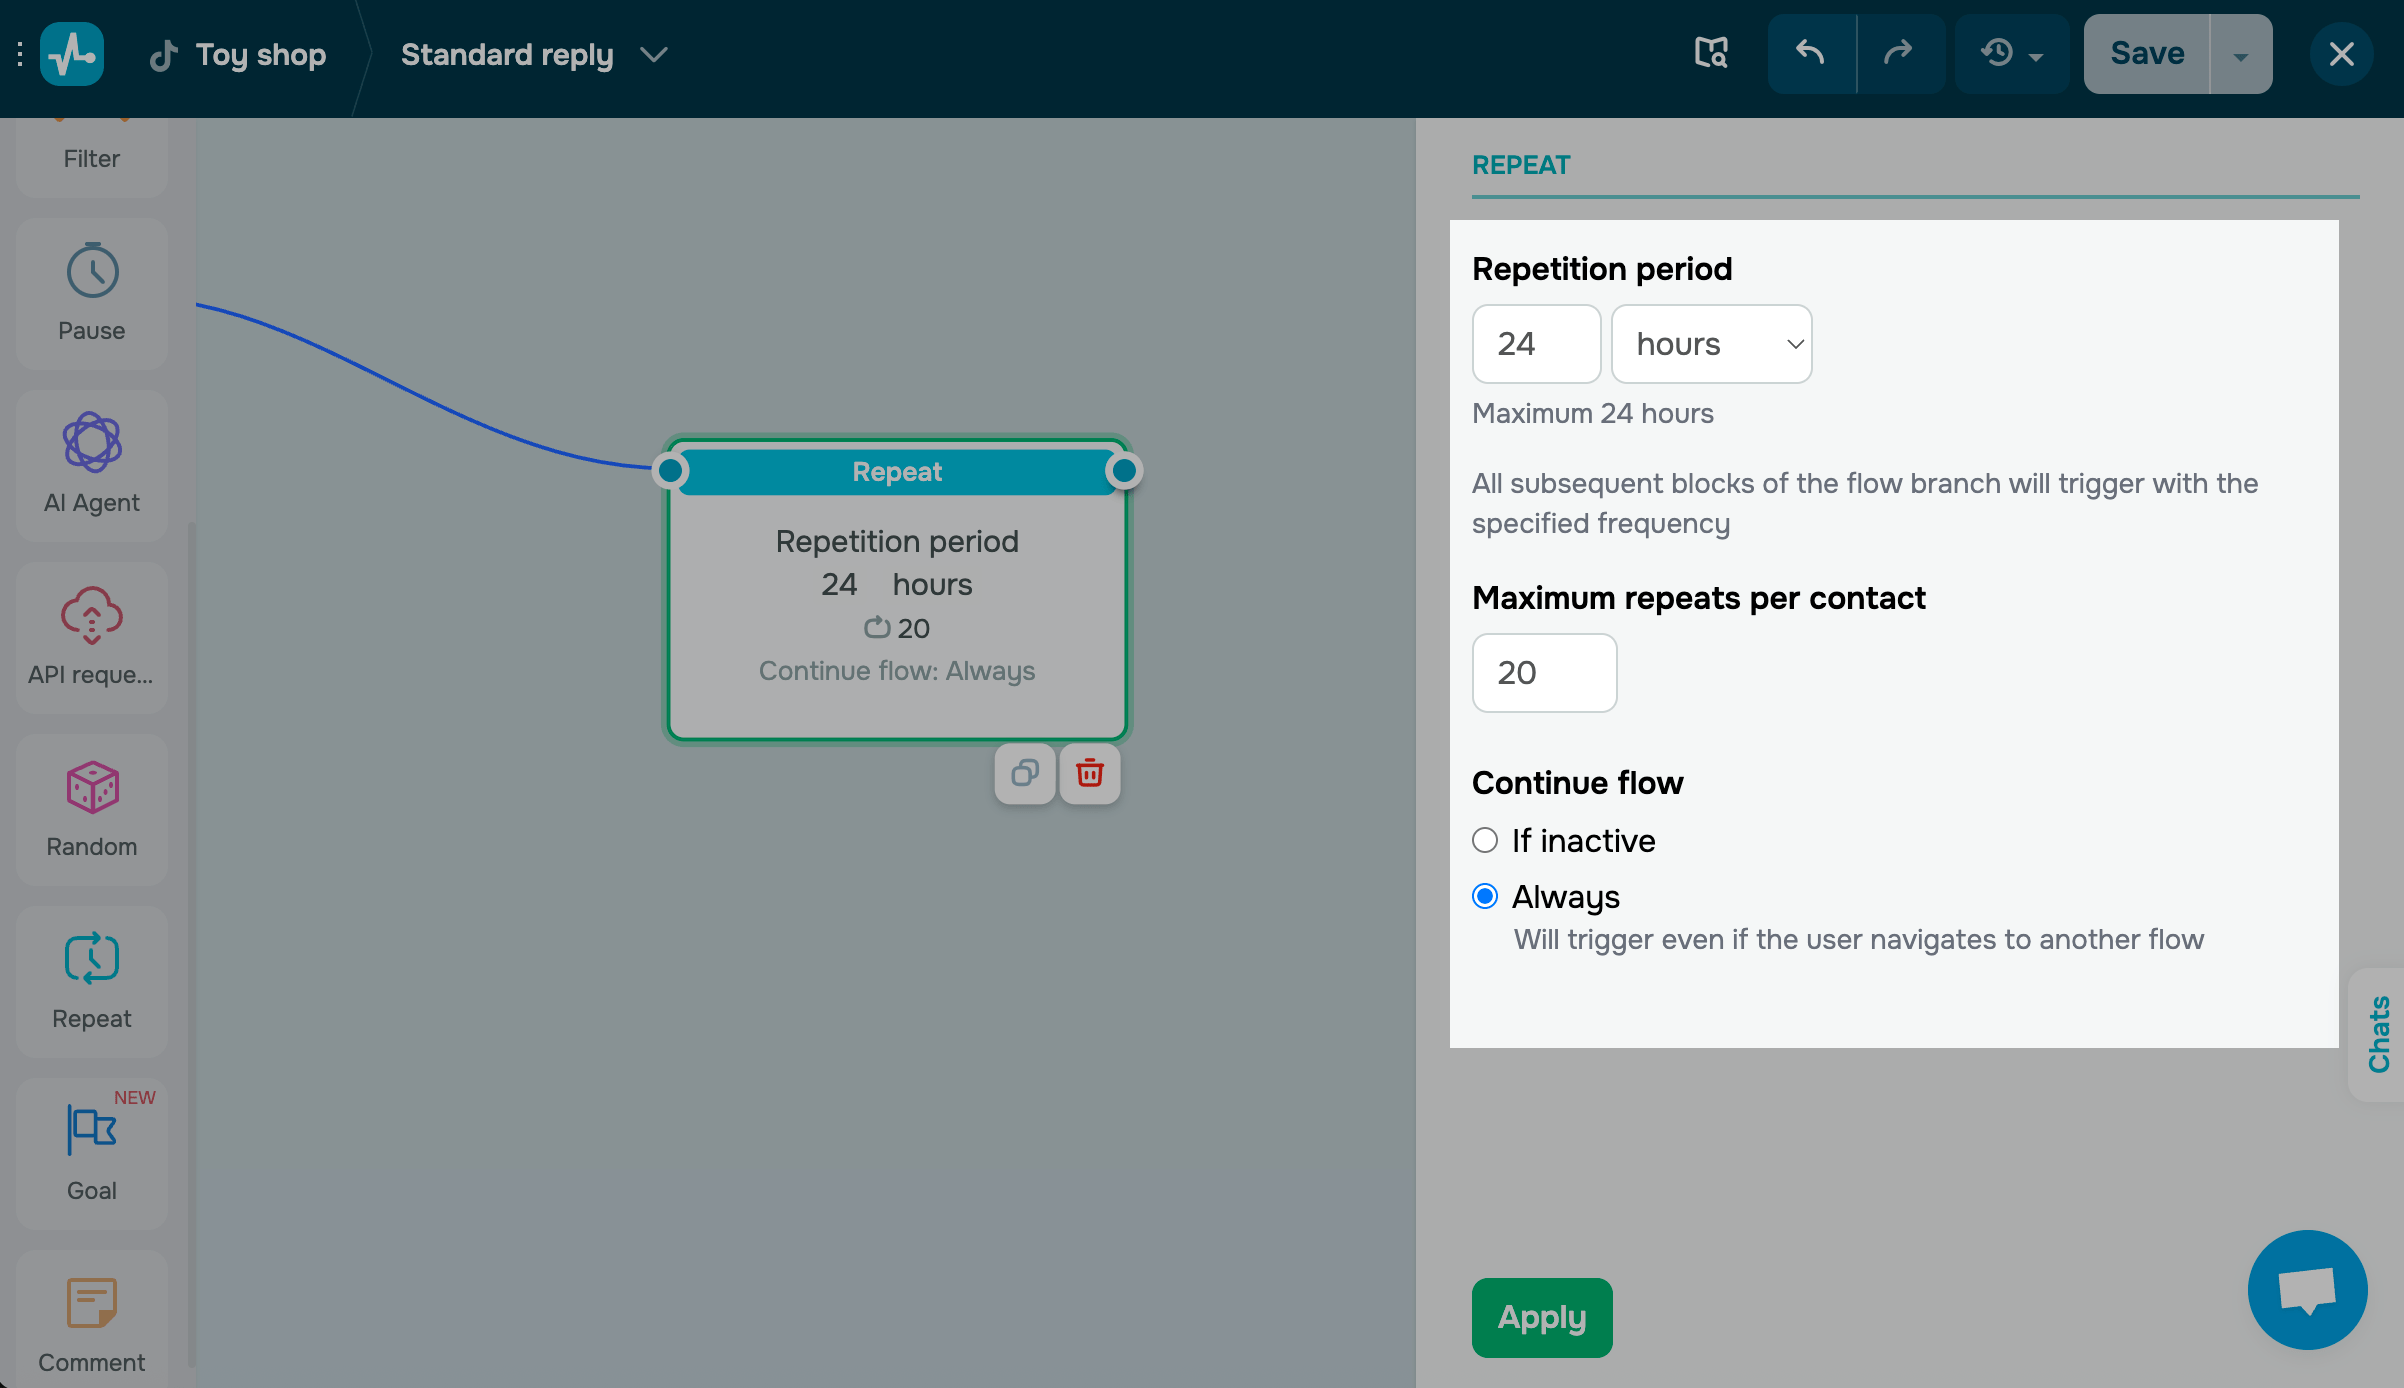
The Repeat element
The Repeat element helps schedule actions at regular intervals to send payment reminders, recurring notifications, or other updates automatically.
Your TikTok chatbot can send messages within a 48-hour window.
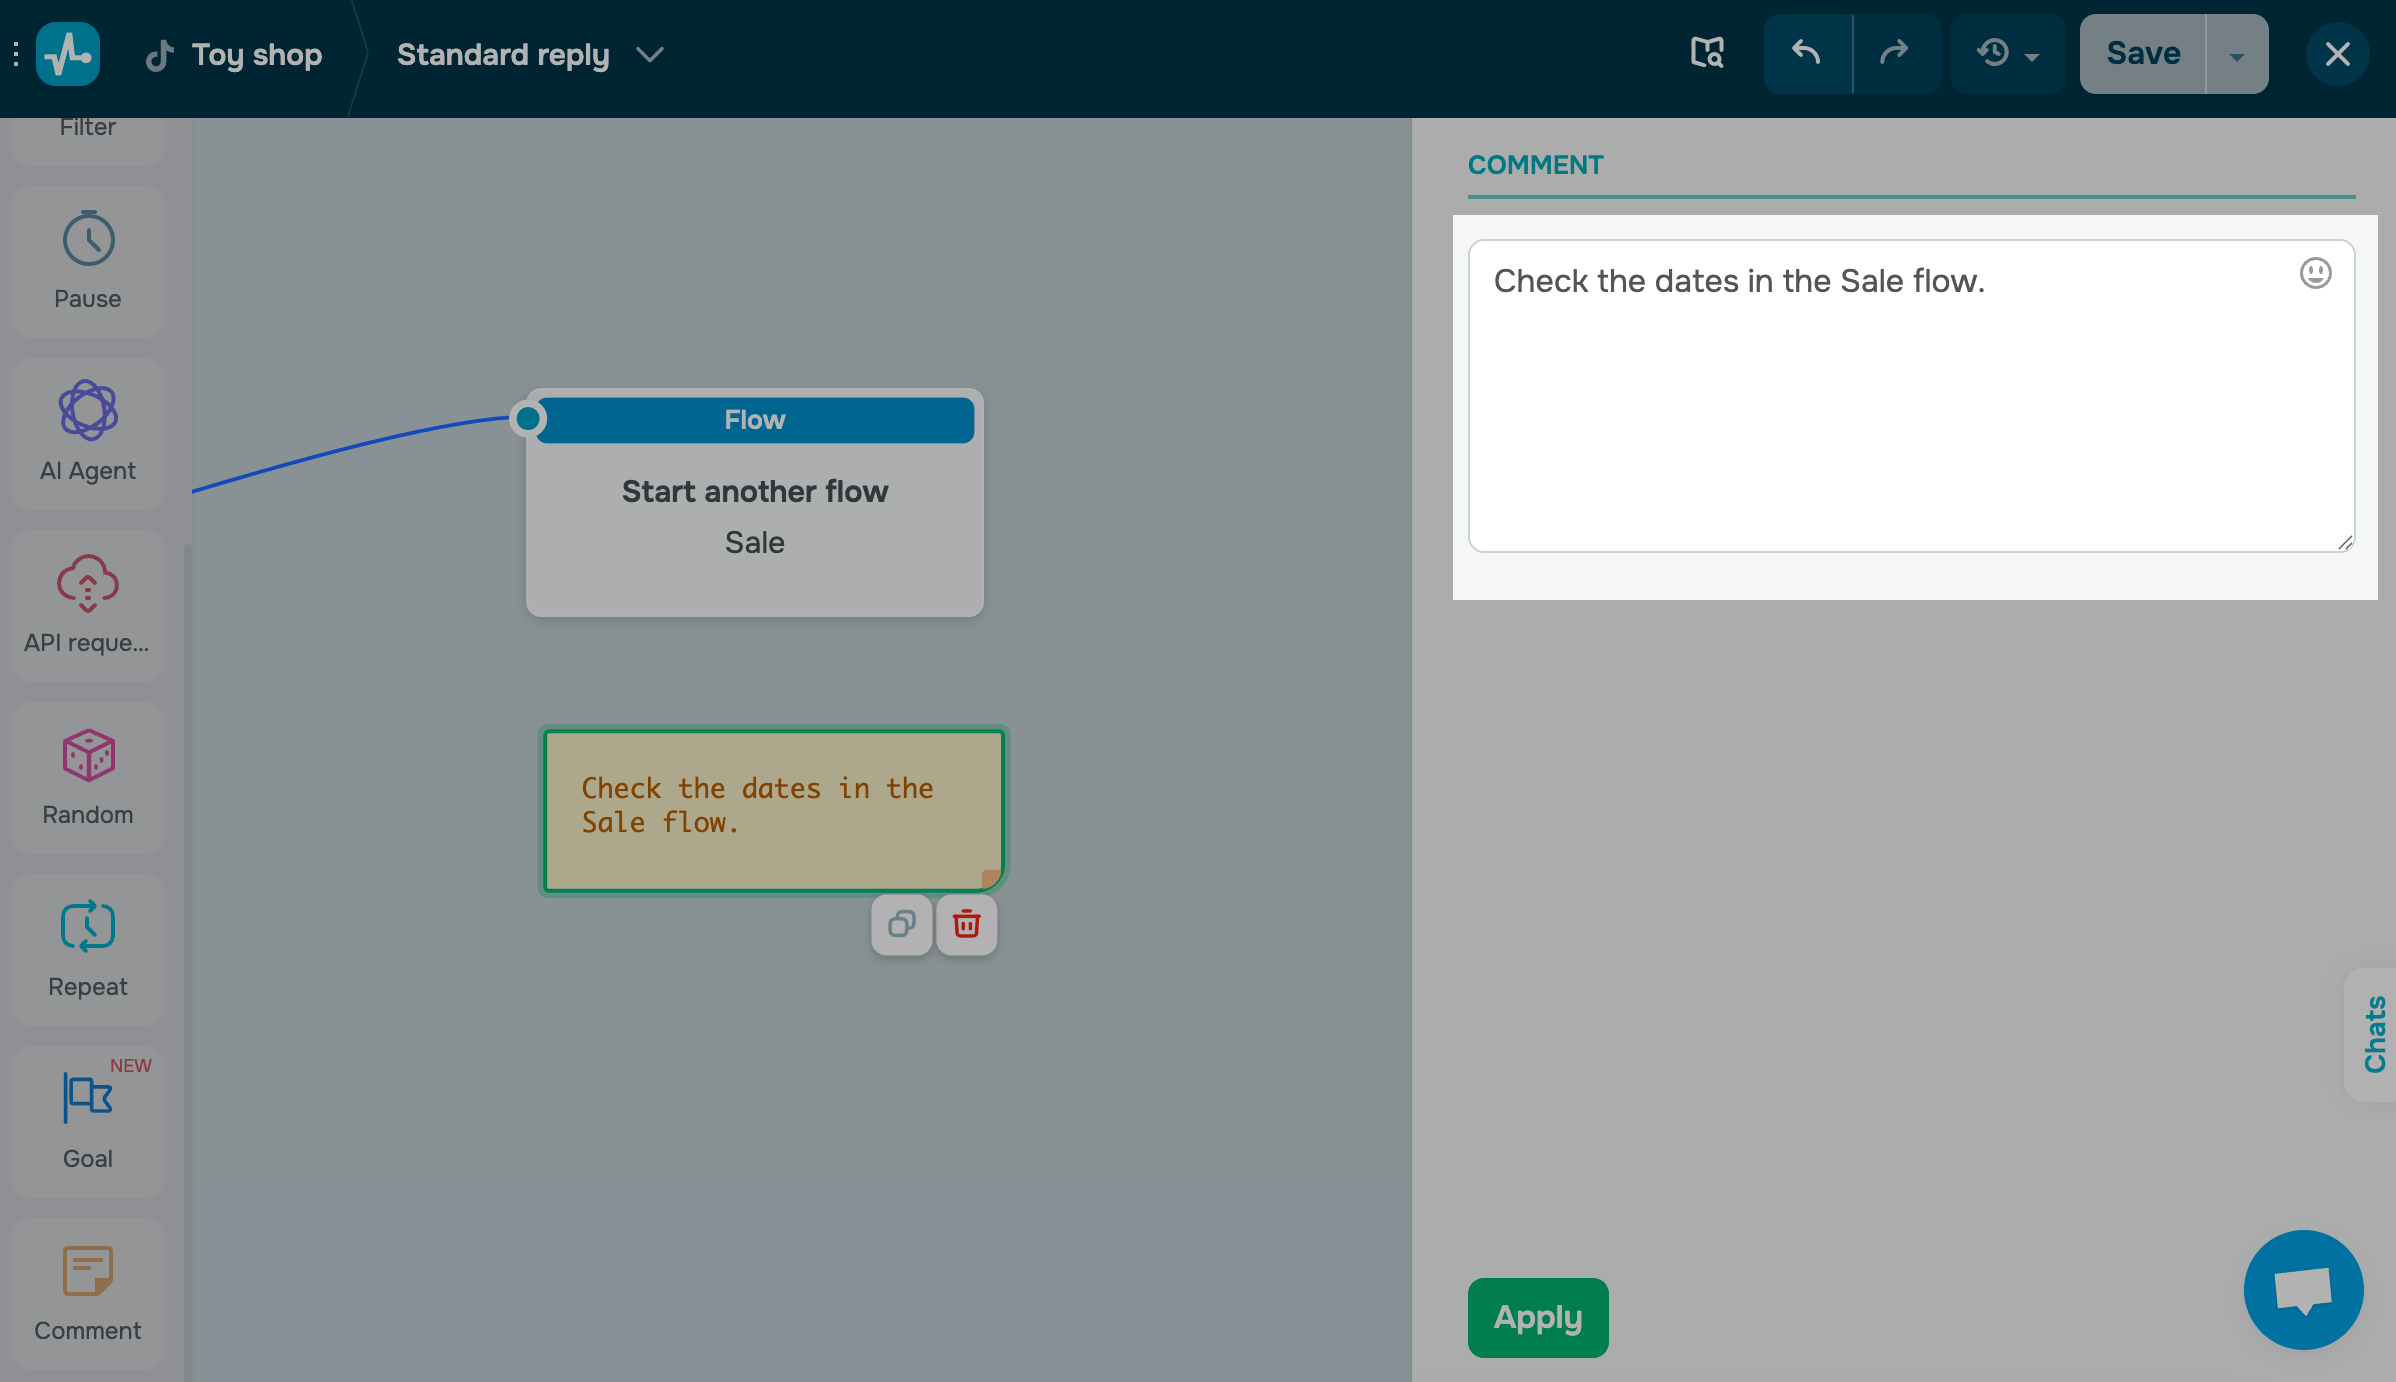
The Comment element
Use the Comment element to add notes about your flow performance for yourself or your team. Comments are visible only to you and your team.
You can add up to 512 characters of text, links, and emoji.
Save and launch your flow
Once you’ve added and linked all the elements, save your flow before exiting. Click Save and send it to yourself to test your flow. Then, click Save and exit.
Make sure to add at least one Message or Action element.
You can view the total number of sent and read messages and clickthroughs in your flow and its messages in the Bot structure tab.
You can also track button clickthrough statistics in flow messages. Click the number on a button to see who clicked it.
Last Updated: 03.11.2025
or