Set up a custom tracking domain
Every link in an email is wrapped in a domain for tracking. When a recipient clicks on a link from an email, the link is first redirected to the domain for tracking, and then to the original link. This redirection process happens quickly and is used to track statistics about clicks. To remove the generic tracking link and add your branded domain, configure your DNS record to track clickthroughs on your domain.
By default, users are redirected to our sender service domain with the SendPulse domain certificate: https://s6619822.stat-pulse.com.
Add your domain to Sendpulse
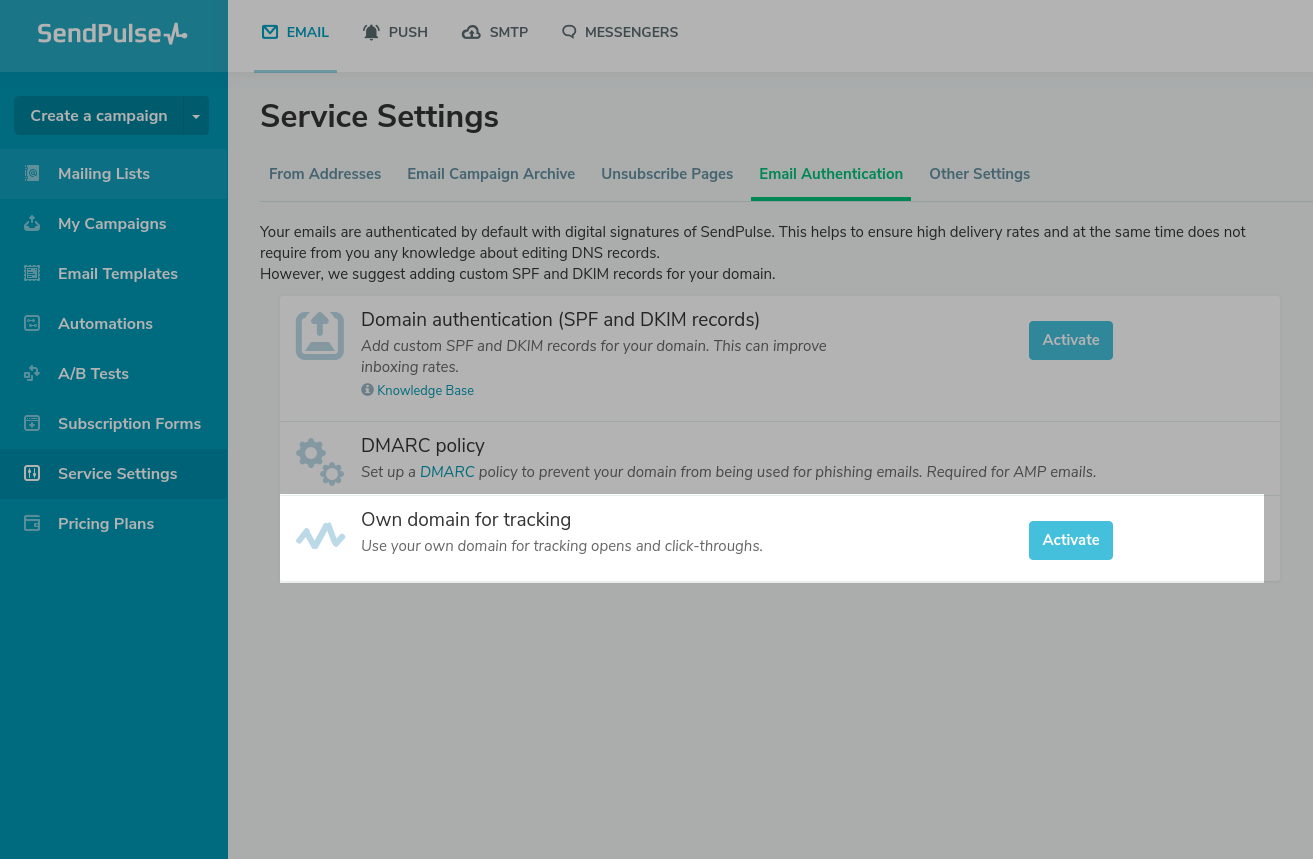
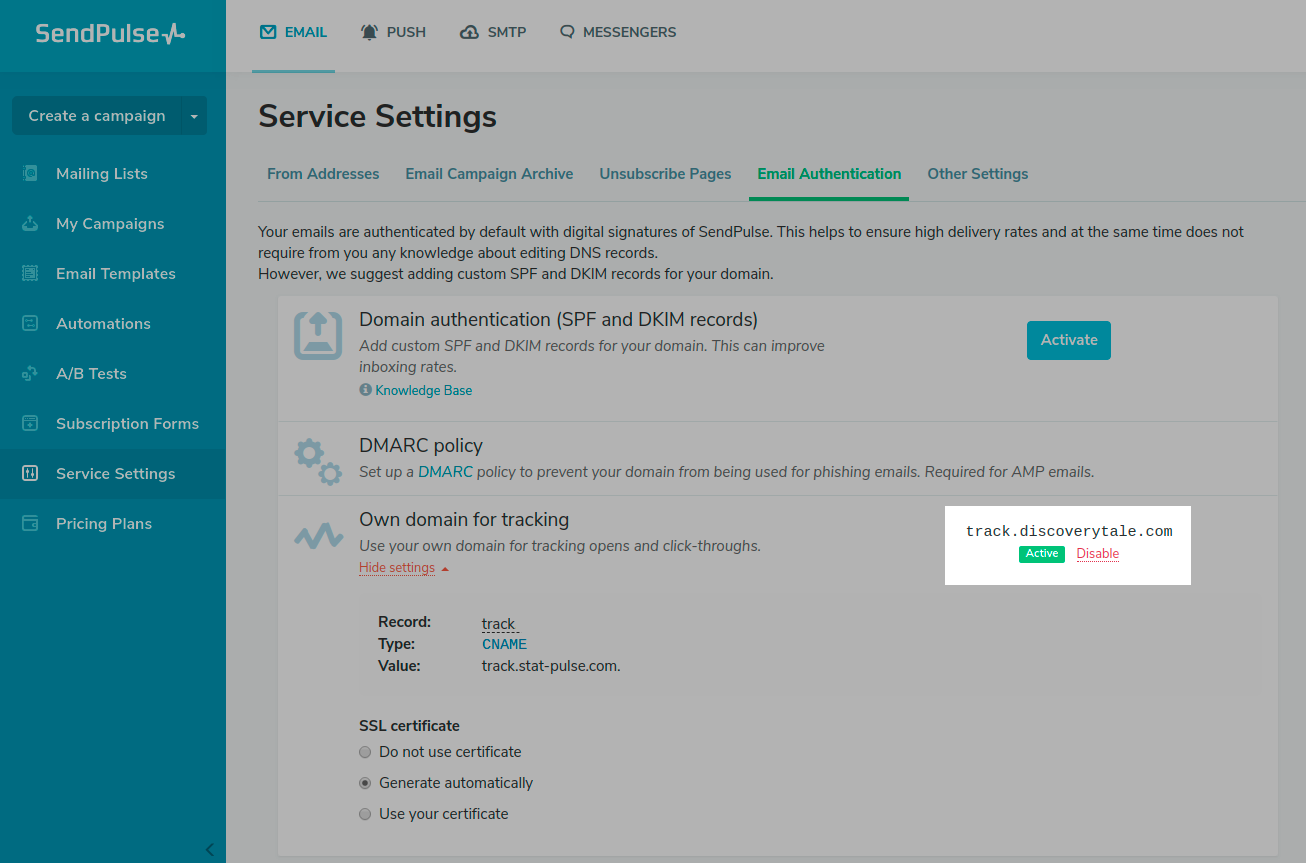
Go to Email > Service settings > Email Authentication. In the Own domain for tracking section, click Activate.
Enter the domain that you want to set up a CNAME record for in the domain field.
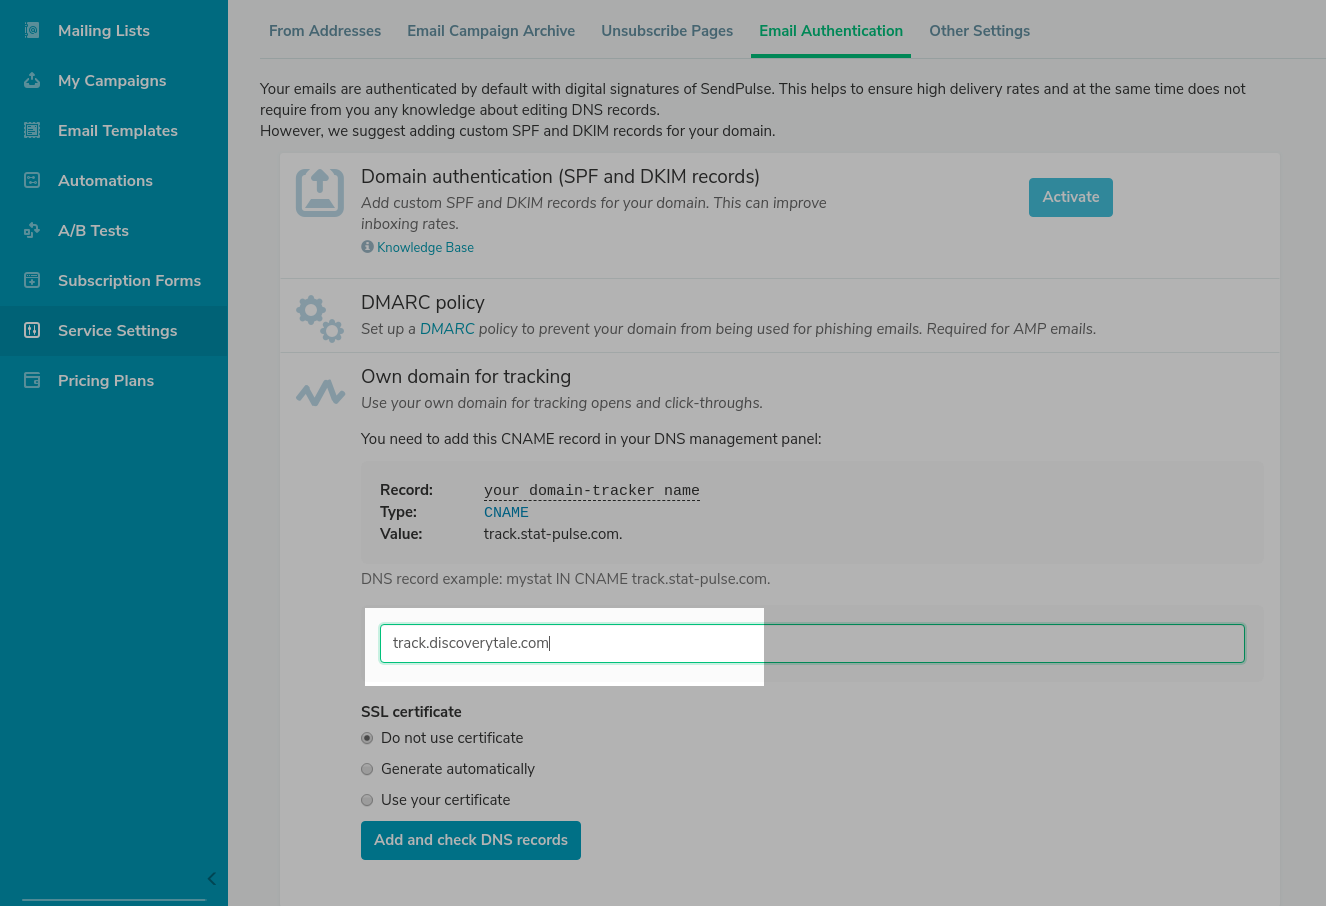
Choose your SSL certificate preferences.
| Do not use certificate | Tracking links will not have SSL certificates. |
| Generate automatically | An SSL certificate from SendPulse will be added to your tracking domain. |
| Use your certificate | To add your certificate, fill in the Certificate body, Private key, Ca chain certificate fields. |
An SSL certificate provides an encrypted connection between users and a site, domains with SSL certificates start with https://.
Browsers add a warning for click-throughs on insecure http:// sites, suggesting that they are dangerous or suspicious.
Browsers mark click-throughs from SSL secured https:// links as safe and add a green padlock in the address bar.
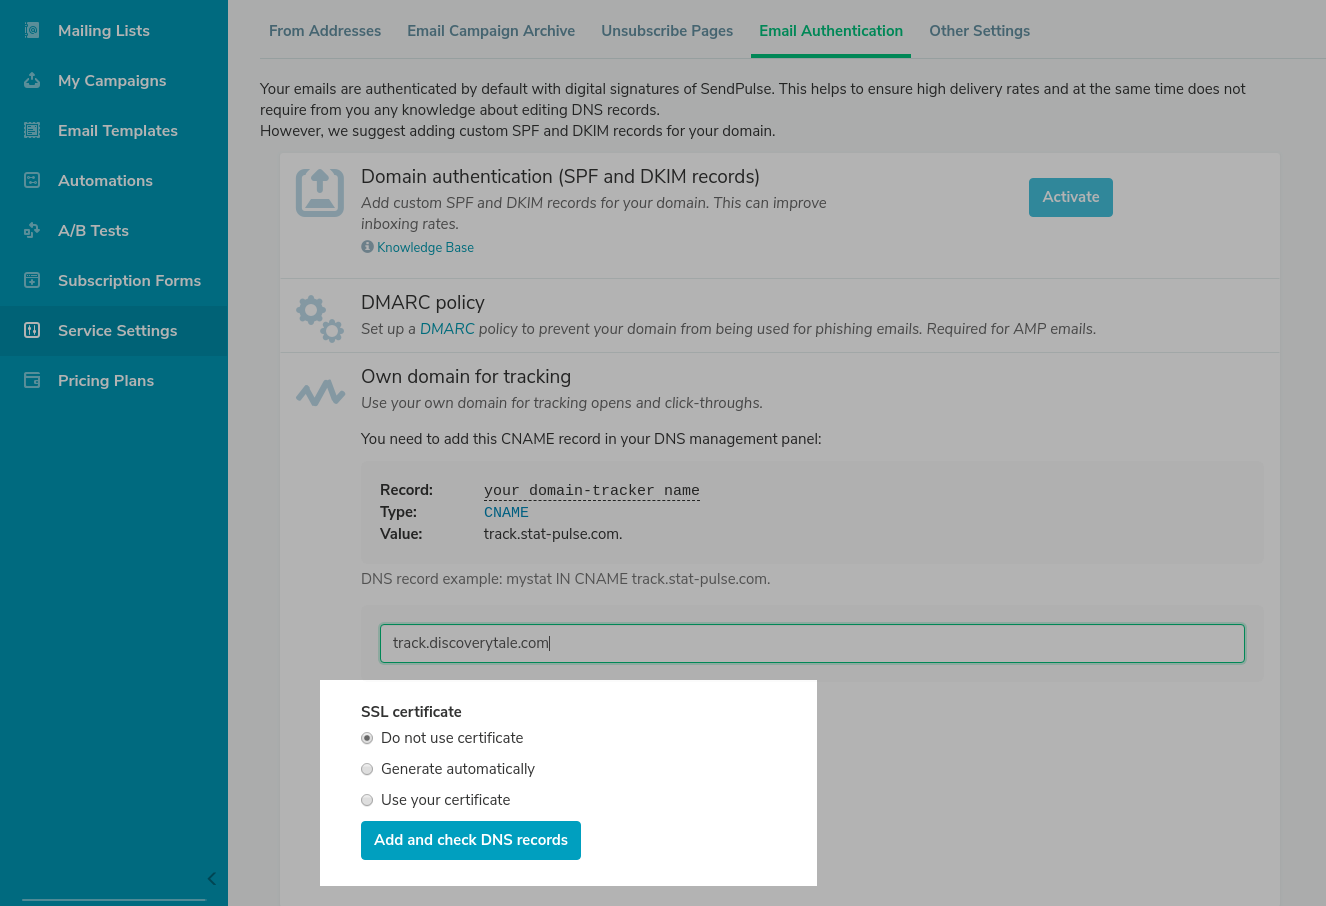
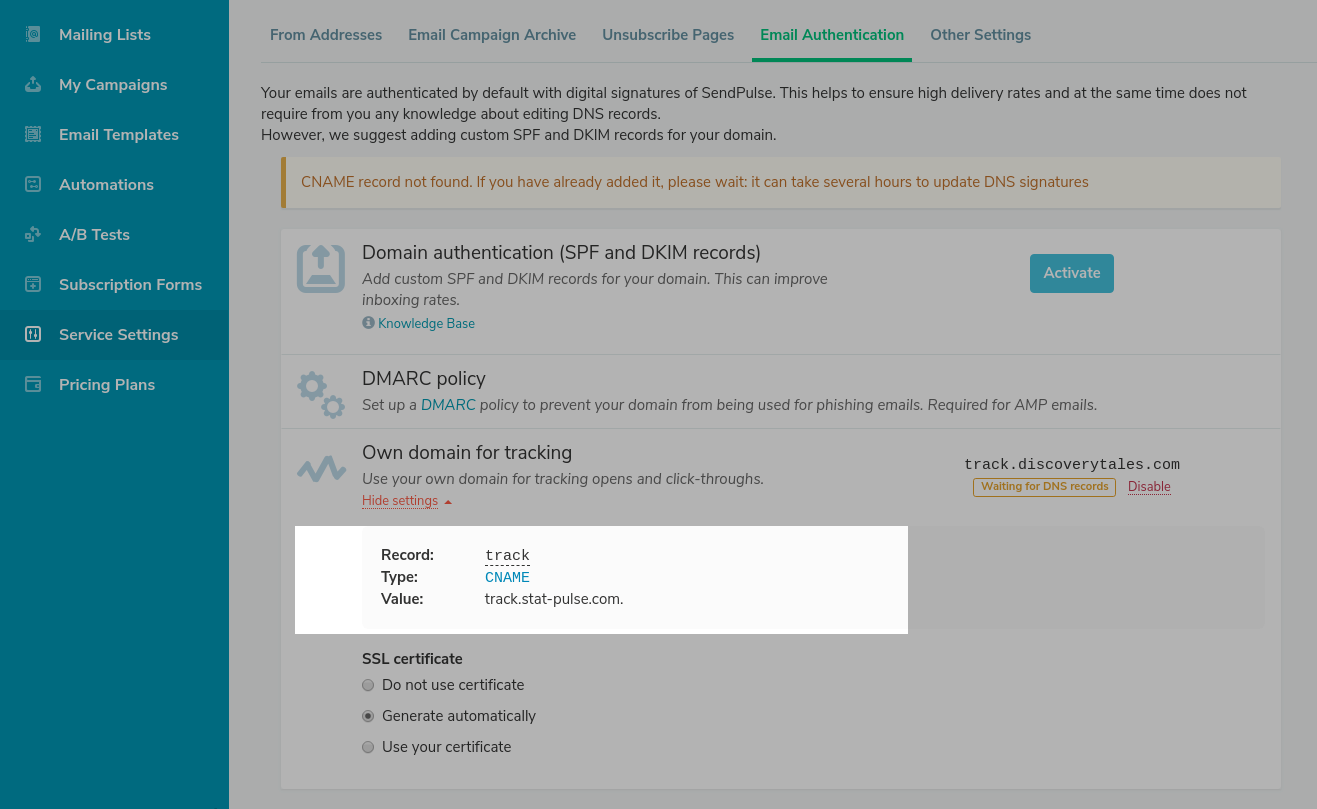
Click Add and check DNS record.
Copy the values from the Record and Value fields — you will need to paste them in your domain panel settings.
Add a record to the registrar's website
To connect a domain, you need to add an A record to the registrar website of your DNS settings.
You can check where your domain's DNS settings are located using the MxToolbox tool. Follow the link and enter your domain. Select SOA Lookup from the drop-down list and click on the button.
If your registrar does not provide default DNS servers, you can activate this service separately, for example, with cPanel.
In our example, we will use cPanel to add a CNAME record to our site's DNS registrar.
Learn more about how to set up CNAME records in cPanel documentation.
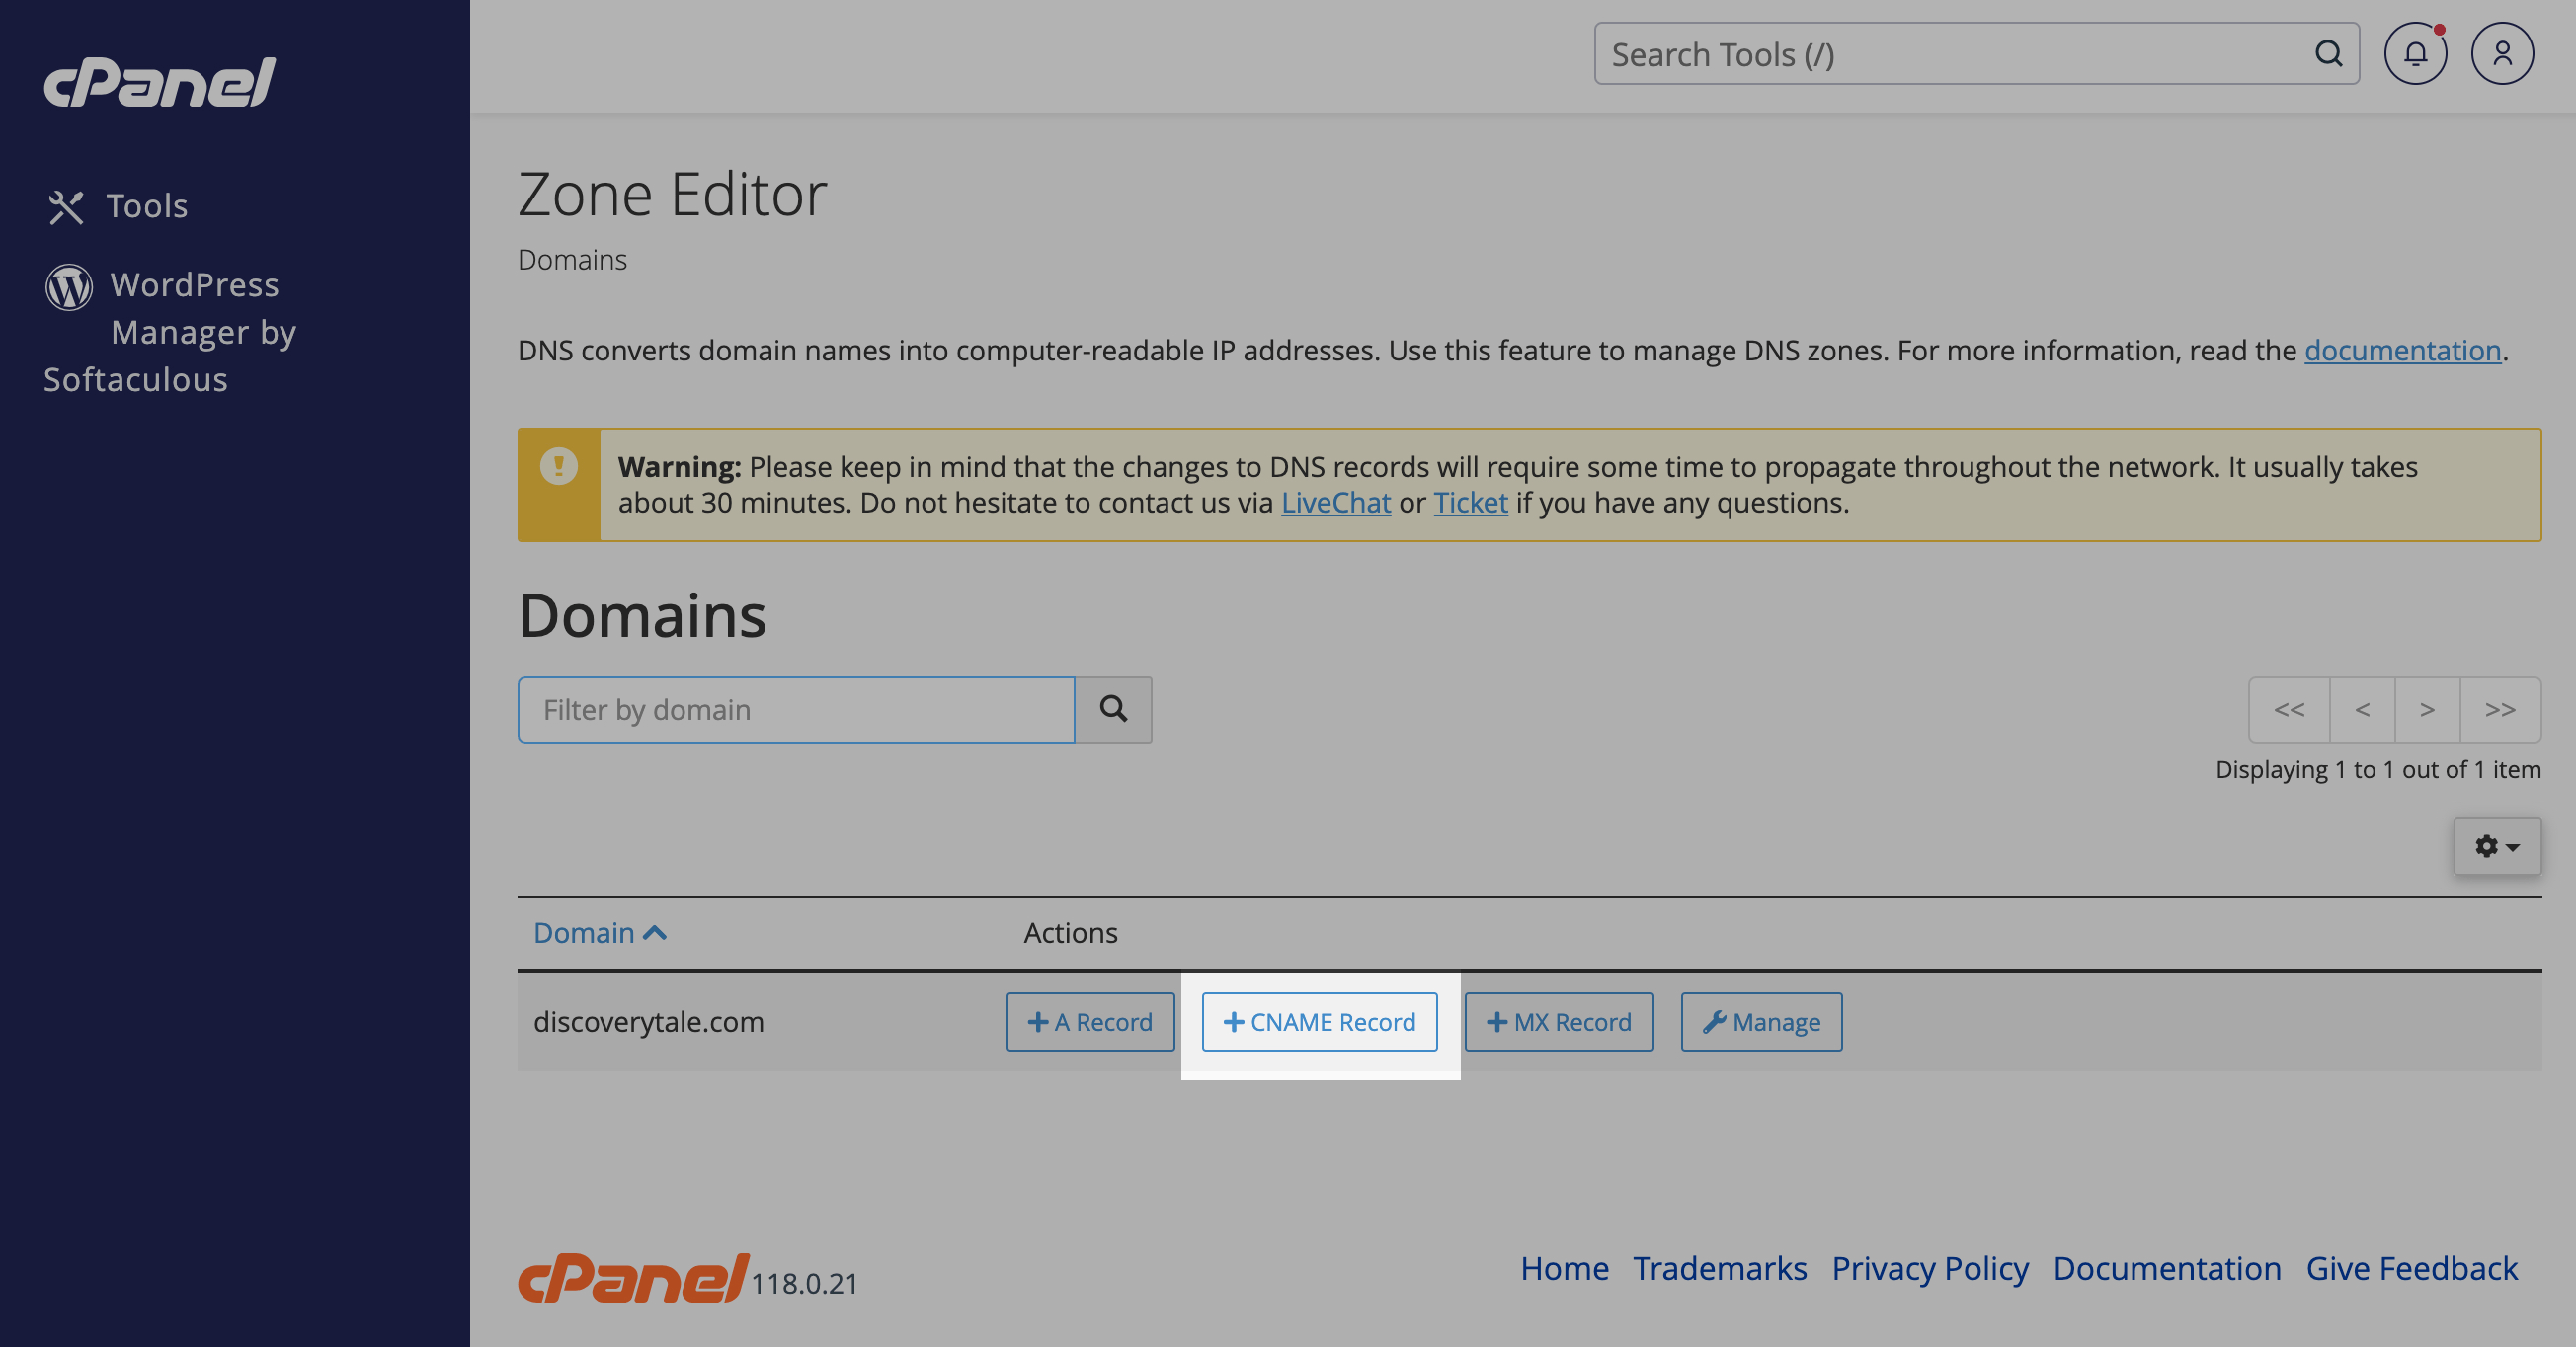
In the domain control panel, select Zone Editor.

Next to your domain, click + CNAME record.
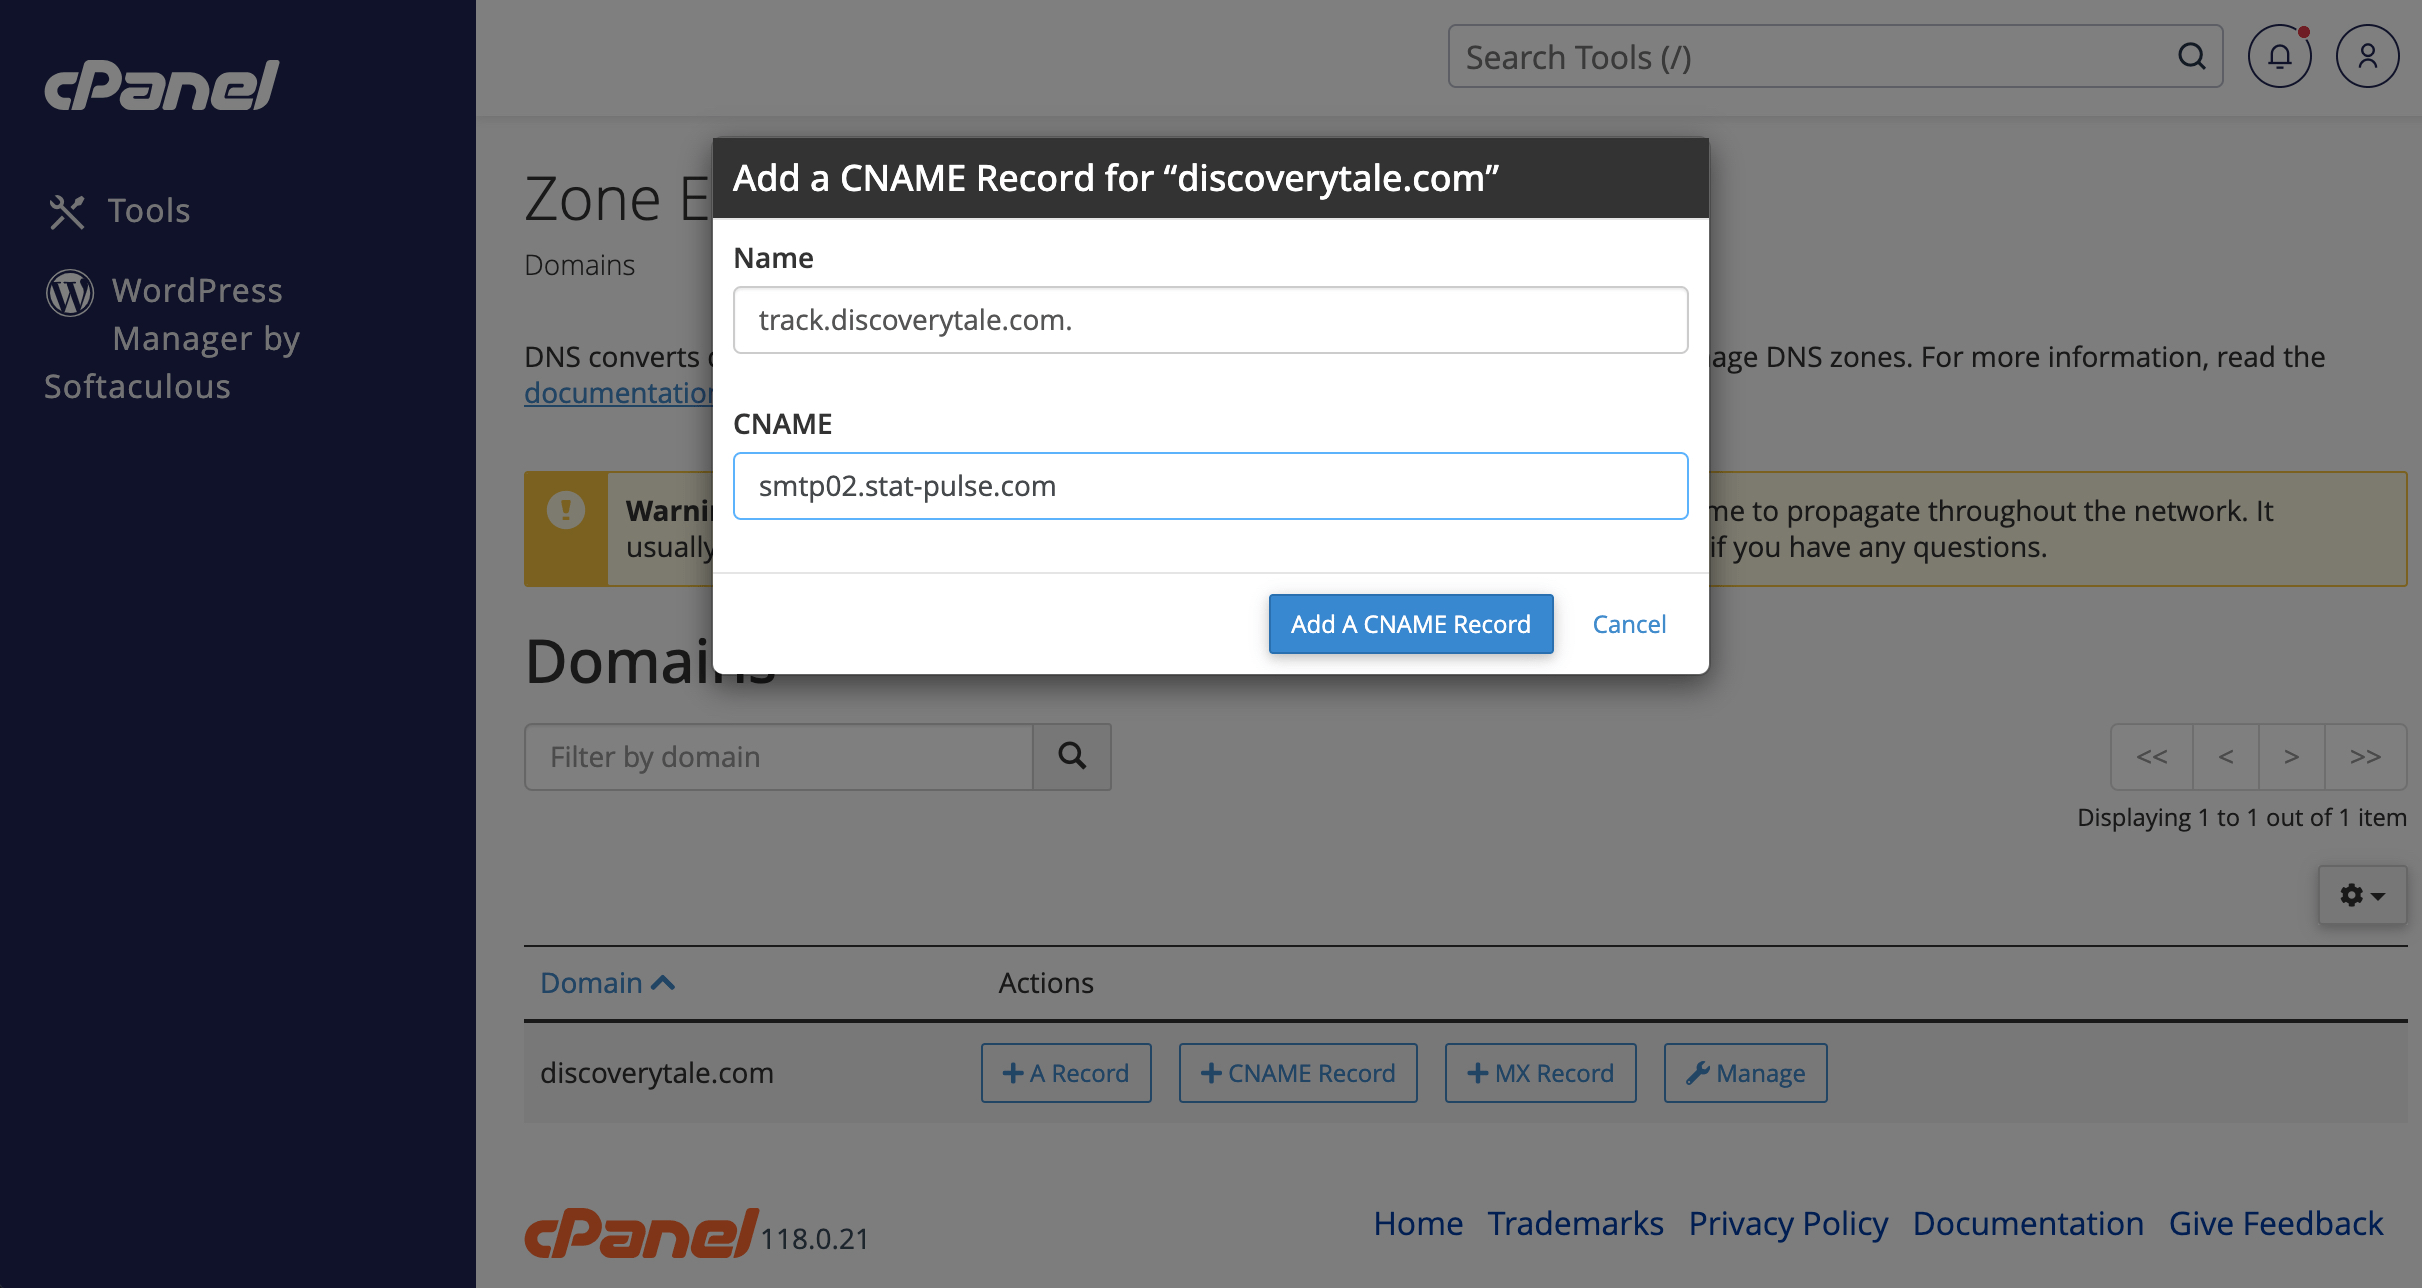
In the Name field, enter your record name. In the CNAME field, enter the record value you copied from the SendPulse settings. Click Add A CNAME Record.
After adding a record, activation can take up to 24 hours, depending on your hosting provider.
Check your record status
You can check the presence of a CNAME record using the same tool MxToolbox or Google Admin Toolbox. Follow the link and paste your domain. Select CNAME Lookup from the dropdown list and click the button.
When everything is done, you will see the new domain status change to Active in your SendPulse dashboard.
Now all emails for which you enabled tracking using your server, links, and service headers will have this domain instead of the SendPulse service domain.
Following the example, you can add the CNAME record to another registrar service.
Read also:
Last Updated: 13.12.2023
or