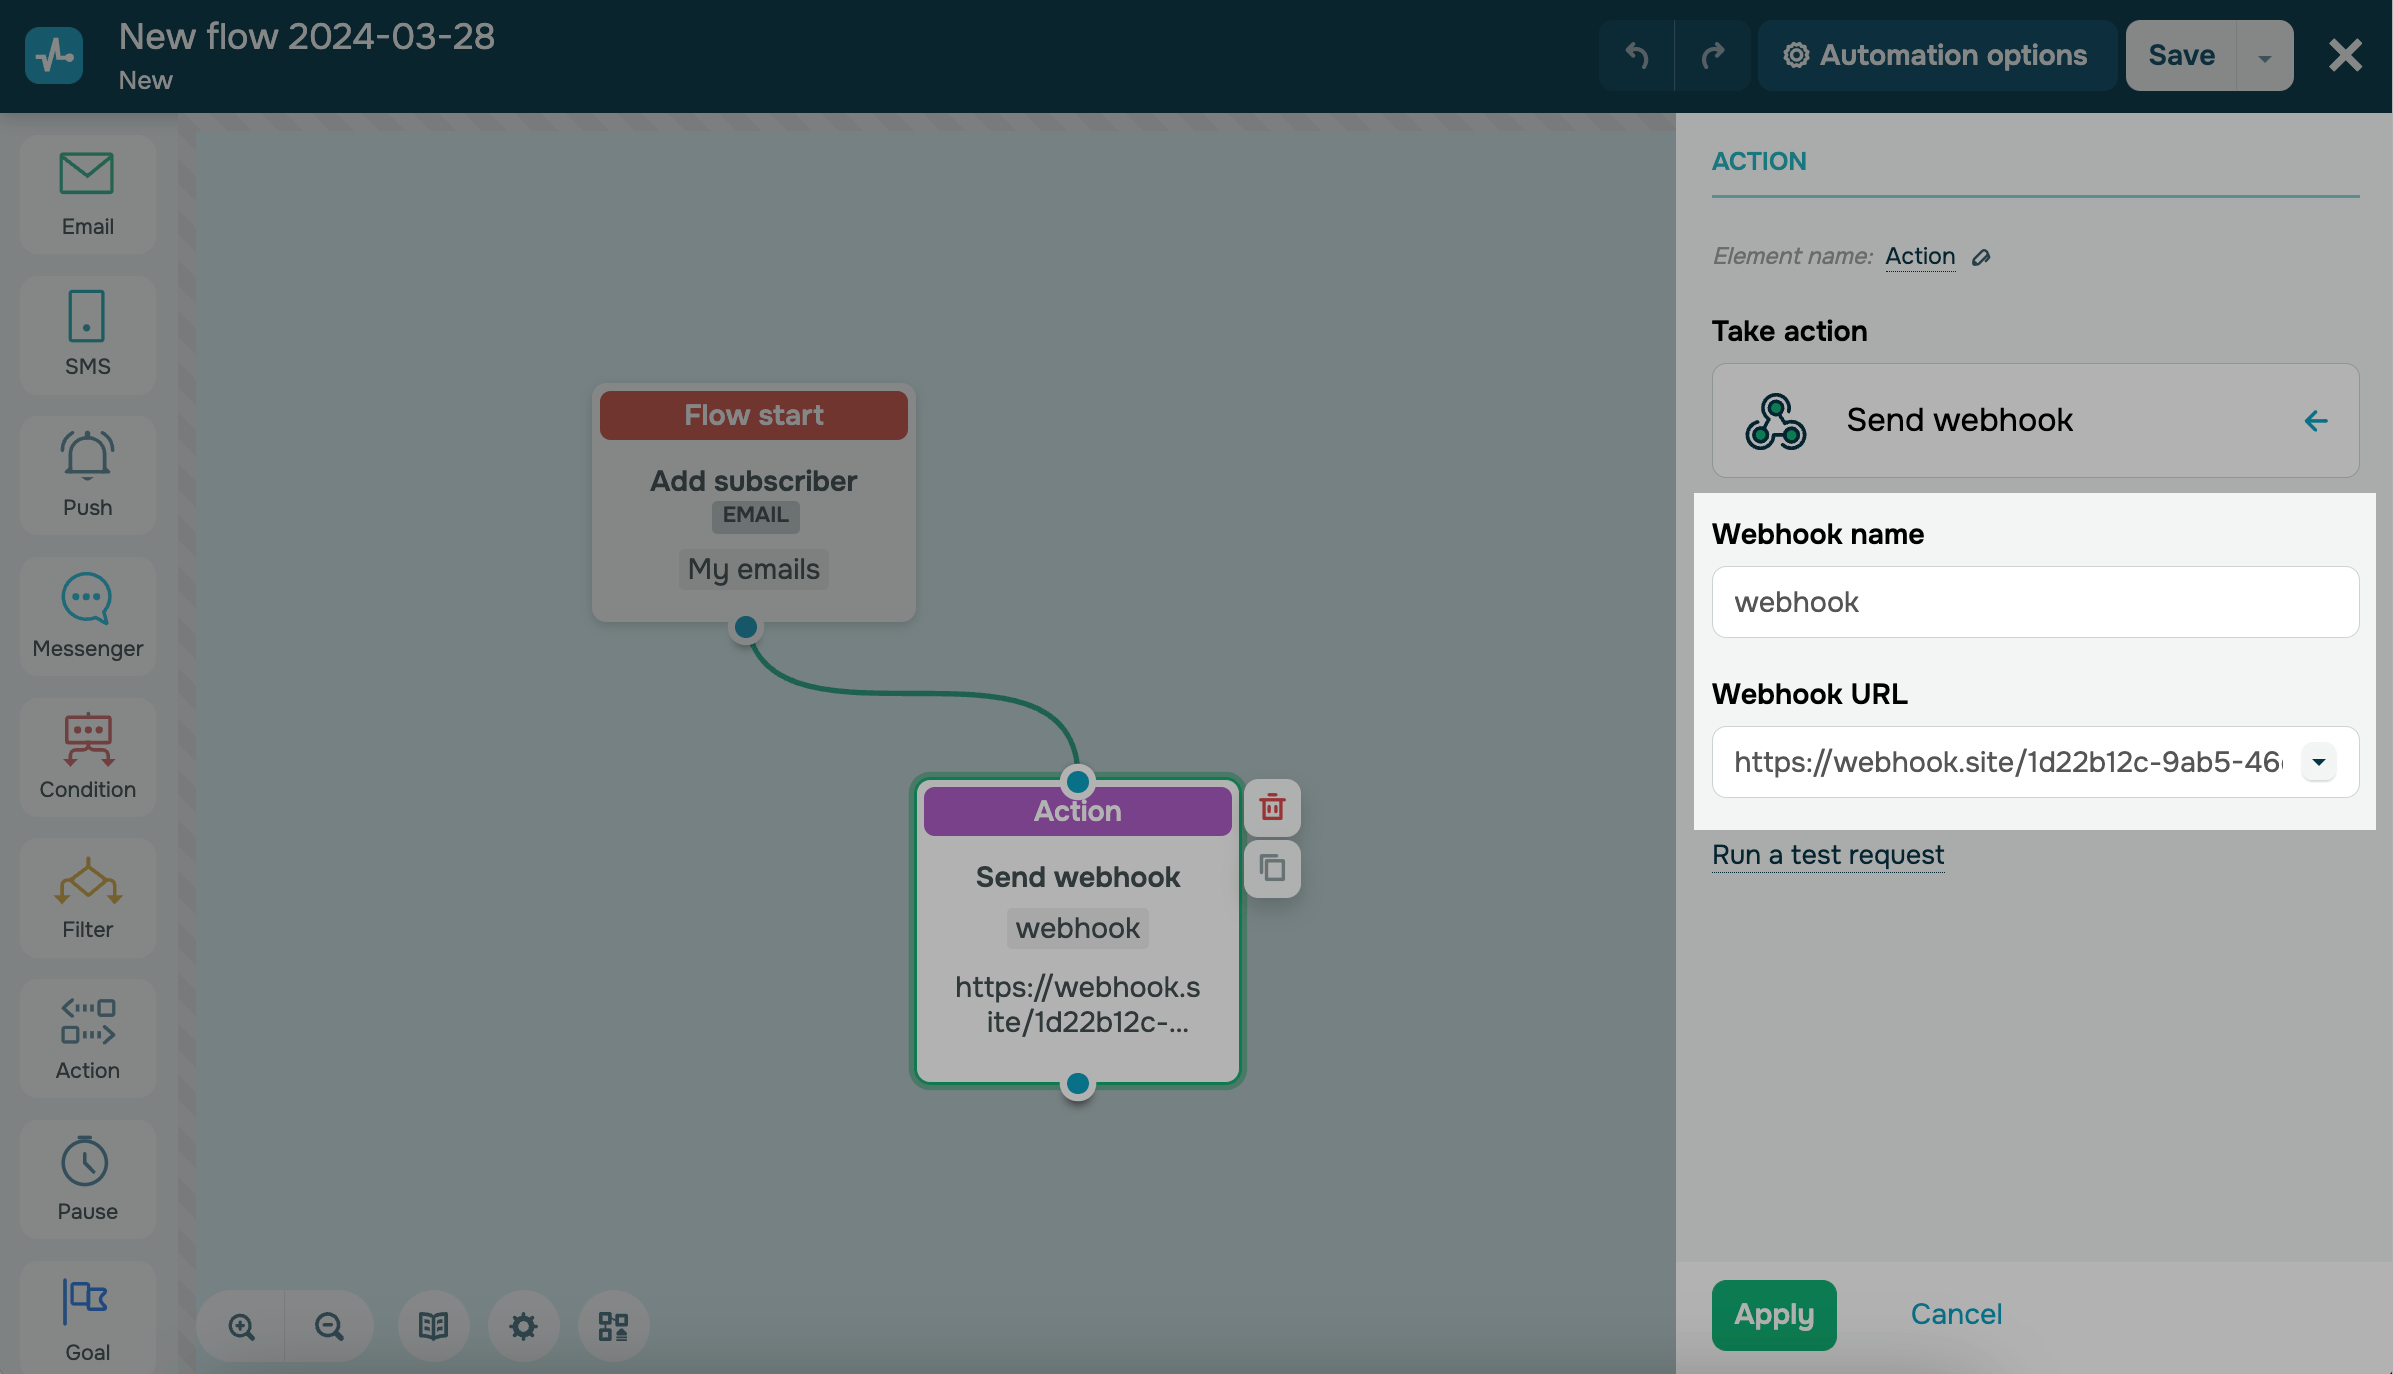
Send webhook in the Action element
A webhook is a mechanism for notifying a system about events. Using webhooks in Automation 360 is a way to notify your system about events that happen.
What can a webhook do
Sending webhooks allows SendPulse service you to receive updates when customers' status changes or when the automated series reaches a specific goal.
For example, leads leave requests on your site; their contact details are sent to your CRM system and sync with SendPulse. An Automation 360 flow helps with warming up your leads. You want to call everyone who opens the third email in the flow. To do this, you need to change the status of the leads in your CRM. You can do this with the help of a webhook by sending data about an event to your system.
How to send a webhook in an automation flow
To send event notifications to another system, link the Action: Send webhook element to the element from which you want to track an event. You can track receiving or opening an email, filtered by a specified condition, achieving a goal, or any other action performed by a subscriber within an automation flow.

Specify a webhook name and a URL to which the webhook will be sent. Only numbers and Latin characters are allowed in a webhook name.
To add automated flow variables into your request, add parameters to the webhook URL as shown below:
?key1={{variable1}}&key2={{variable2}}
For example:
https://webhook.site/3579a6ad-2824-4dee-b75d-626093c7faec?email={{email}}&product={{product_id}}
You can add variable names based on your flow’s trigger, such as custom, CRM, online course, or mailing list variables.
All special and non-Latin characters are URL-encoded automatically during the request, so you’ll always receive correctly encoded values in the response.
Configure sending the key in response to the first webhook to remove the limit for sending webhooks. Otherwise, the service allows you to send one webhook per hour.
Webhook structure
A webhook transmits such data:
- a flow ID;
- a webhook name;
- a webhook trigger date;
- an email address and a phone number of a subscriber for whom the webhook is sent;
- variable data.
If an automation starts with a mailing list, variables from the mailing list are sent to the webhook. If automation begins with an event, variables from the event are sent to the webhook.
[
   {
      "automation_id":"123456789",
      "title":"New Automation",
      "execution_date":"2022-01-04 09:02:39",
      "email":"example@example.com",
      "phone":"+380631234567",
      "variables":[
         {
            "name1":"value1"
         },
         {
            "name2":"value2"
         }
      ]
   }
]
How to send a test request
You can send a test request to check if your settings are correct and pinpoint any potential issues or errors. Select Run a test request.
In the dialog window, you can find a test request with your website's URL, webhook, and webhook response.
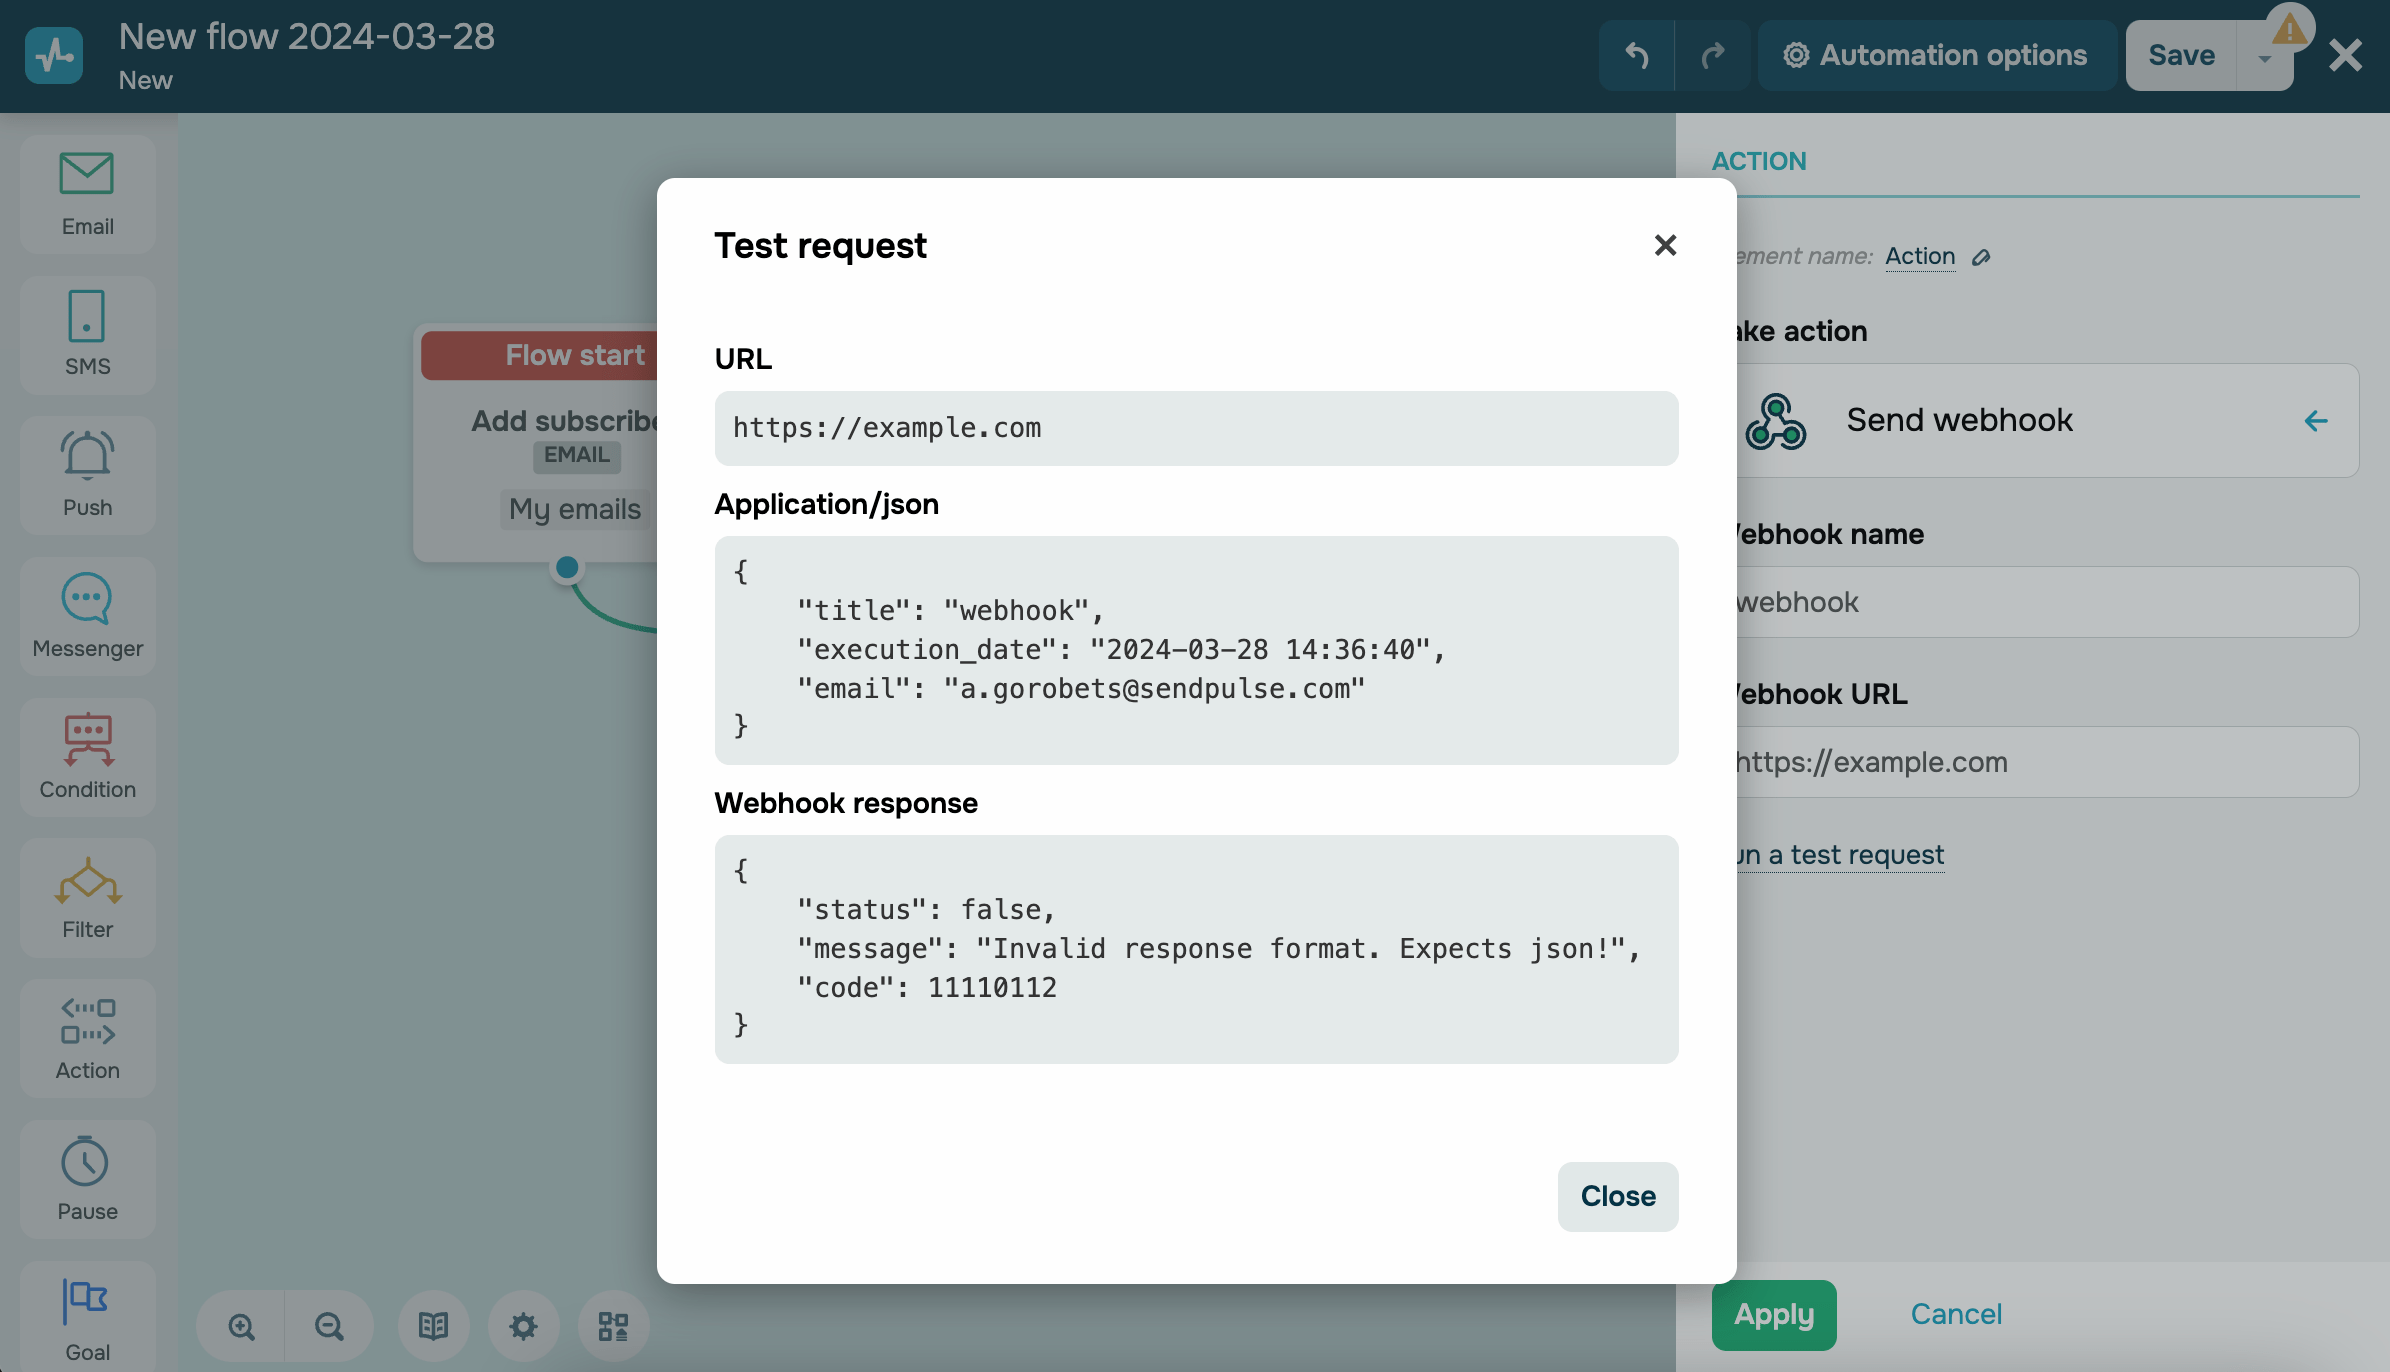
The webhook returns different responses depending on your request parameters or system status.
The webhook response contains the following parameters:
status |
Indicates if the operation triggered by the webhook was completed successfully (true) or unsuccessfully (false). |
message |
Contains a webhook response or an operation result notification. |
code |
Indicates a specific status or operation result. |
The webhook can return the following responses:
In case of a code error:
[
   {
     "status": false,
     "message": 'Error during query execution',
     "code": 21111011
   }
]
In case of a request execution error:
[
   {
     "status": false,
     "message": 'The request failed',
     "code": 11110111
   }
]
In case of an error caused by the user not responding in JSON format:
[
   {
     "status": false,
     "message": 'Invalid response format. Expects json!',
     "code": 11110112
   }
]
In case of an error caused by an incorrect verification code for free pricing plan users:
[
   {
     "status": false,
     "message": 'The request did not pass code verification',
     "code": 11110113
   }
]
In case of an IP address verification error, such as when the IP address is blocked or local:
[
   {
     "status": false,
     "message": 'Incorrect url ip',
     "code": 11110114
   }
]
In case of a successful request:
[
   {
     "status": true,
     "(string)message": (webhook response),
     "code": 1
   }
]
How to track unsubscribes and spam complaints
You can configure tracking unsubscribes and spam complaints in your account settings.
An example of a spam complaint webhook:
[
   {
      "timestamp":1496827422,
      "event":"spam",
      "task_id":3668141,
      "email":"john.doe@sendpulse.com",
      "source":"automation360",
      "automation_id":"123456789"
   }
]
An example of an unsubscribe webhook:
[
   {
      "task_id":"3668141",
      "timestamp":"1496827872",
      "from_all":1,
      "email":"john.doe@sendpulse.com",
      "reason":null,
      "book_id":490686,
      "event":"unsubscribe",
      "categories":"",
      "source":"automation360",
      "automation_id":"123456789"
   }
]
Last Updated: 02.04.2024
or