Viber element in Automation
In SendPulse's Automation 360, you can add a Viber element to send service messages, for example, about order confirmation and status, delivery of goods, or debiting or crediting bonuses.
Add an element
Drag the Viber element to the flow. Connect it to the element after which you need to send the message.
You can also rename your element to distinguish it from others. Click Element name and enter up to 253 characters in the field. Once you save the settings, the new name will appear in a pop-up window when hovering over the element in the builder.
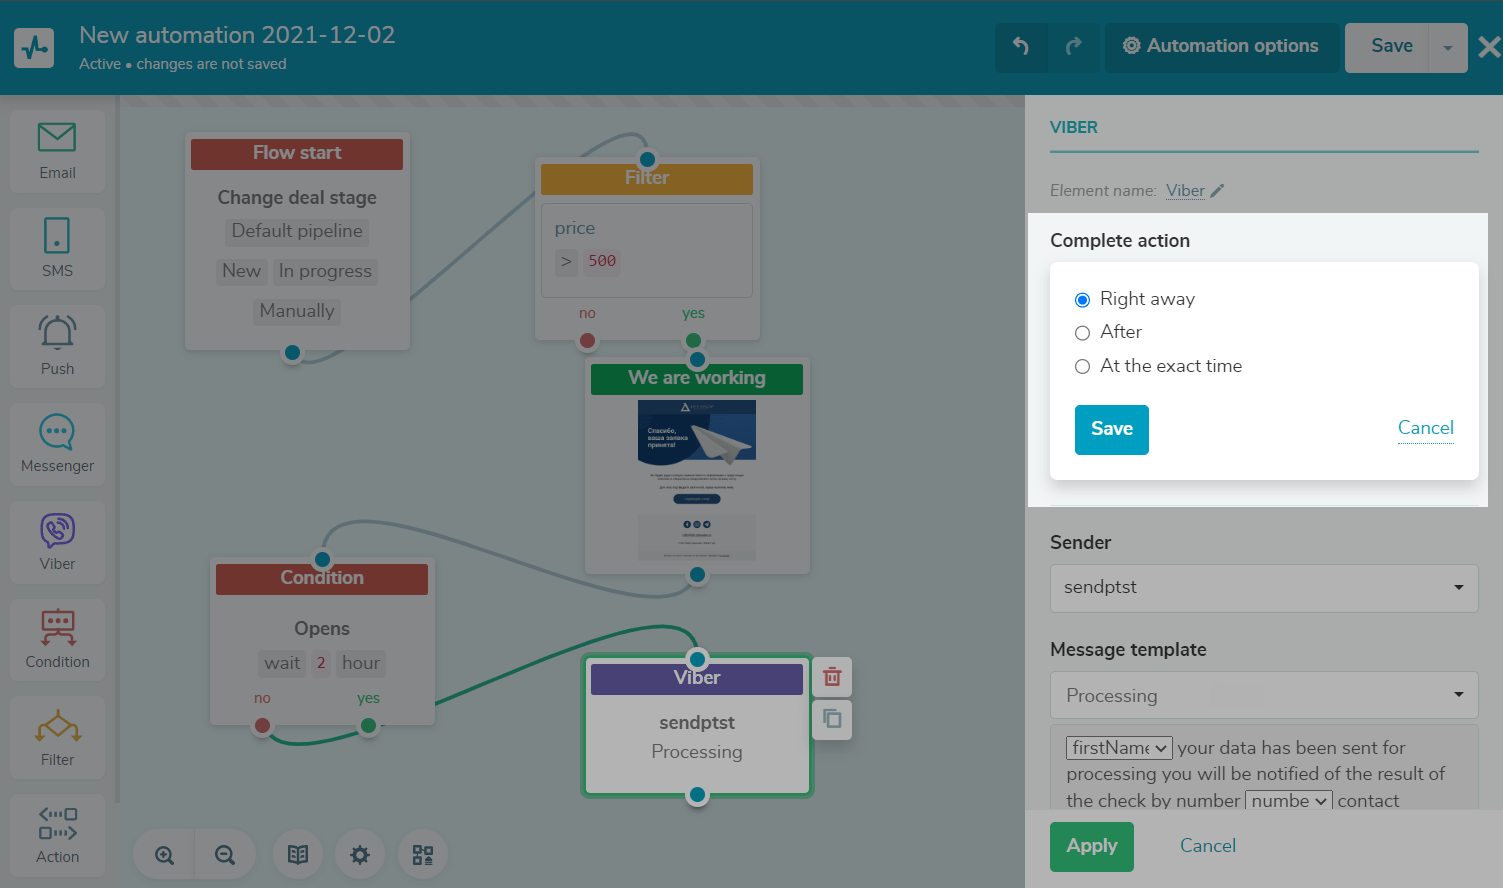
Specify your sending time
Select the time at which you want to send the message. You can choose Right away to send the message immediately, After to delay the sending time, or Exact time to set the time yourself.
Read more about block execution conditions in the article: Element (Block) Execution Time.
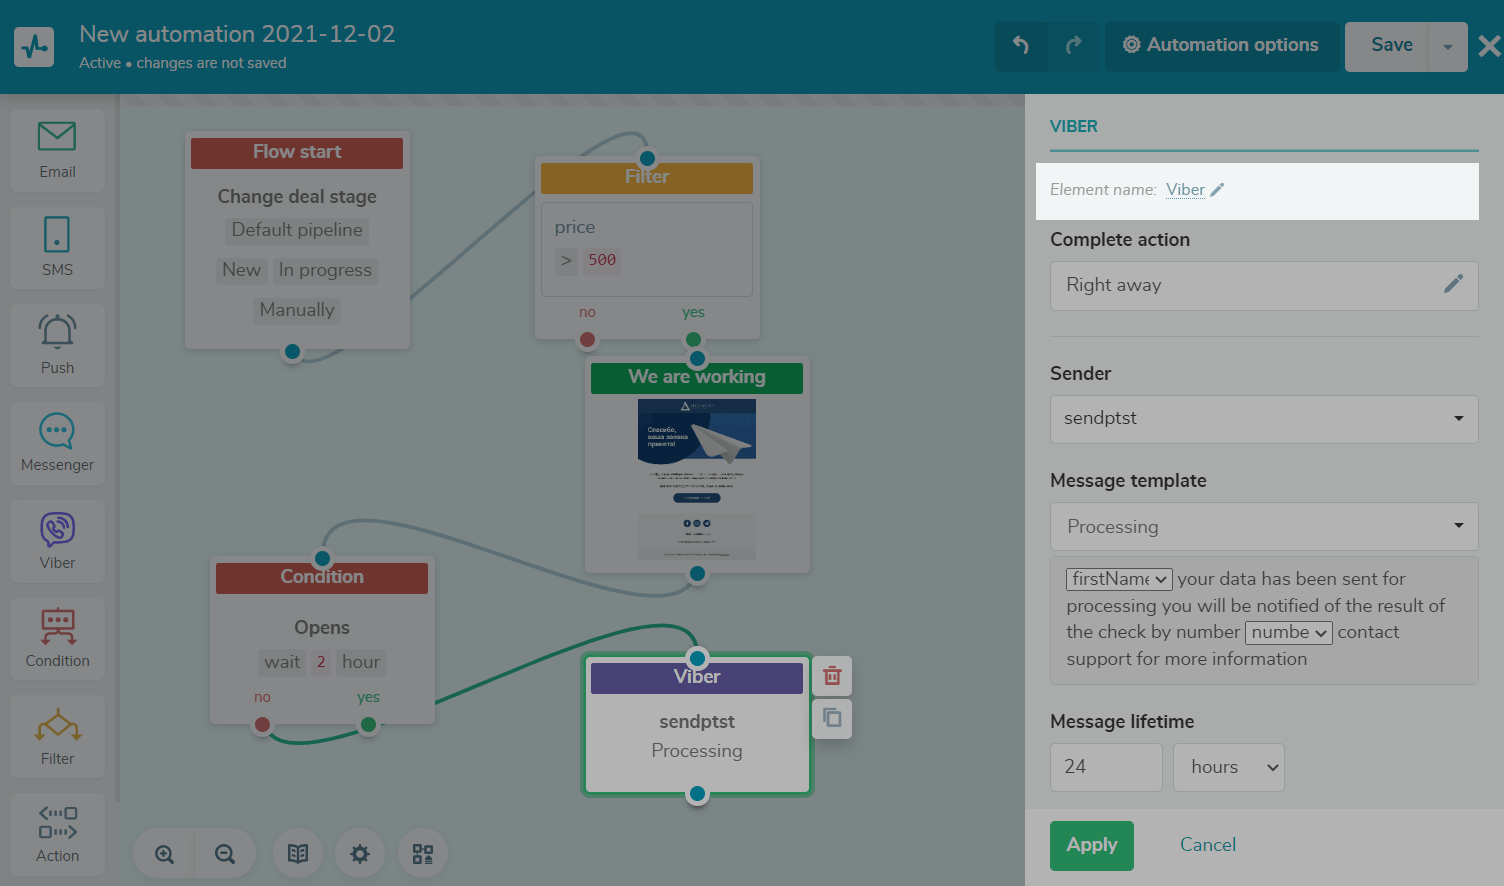
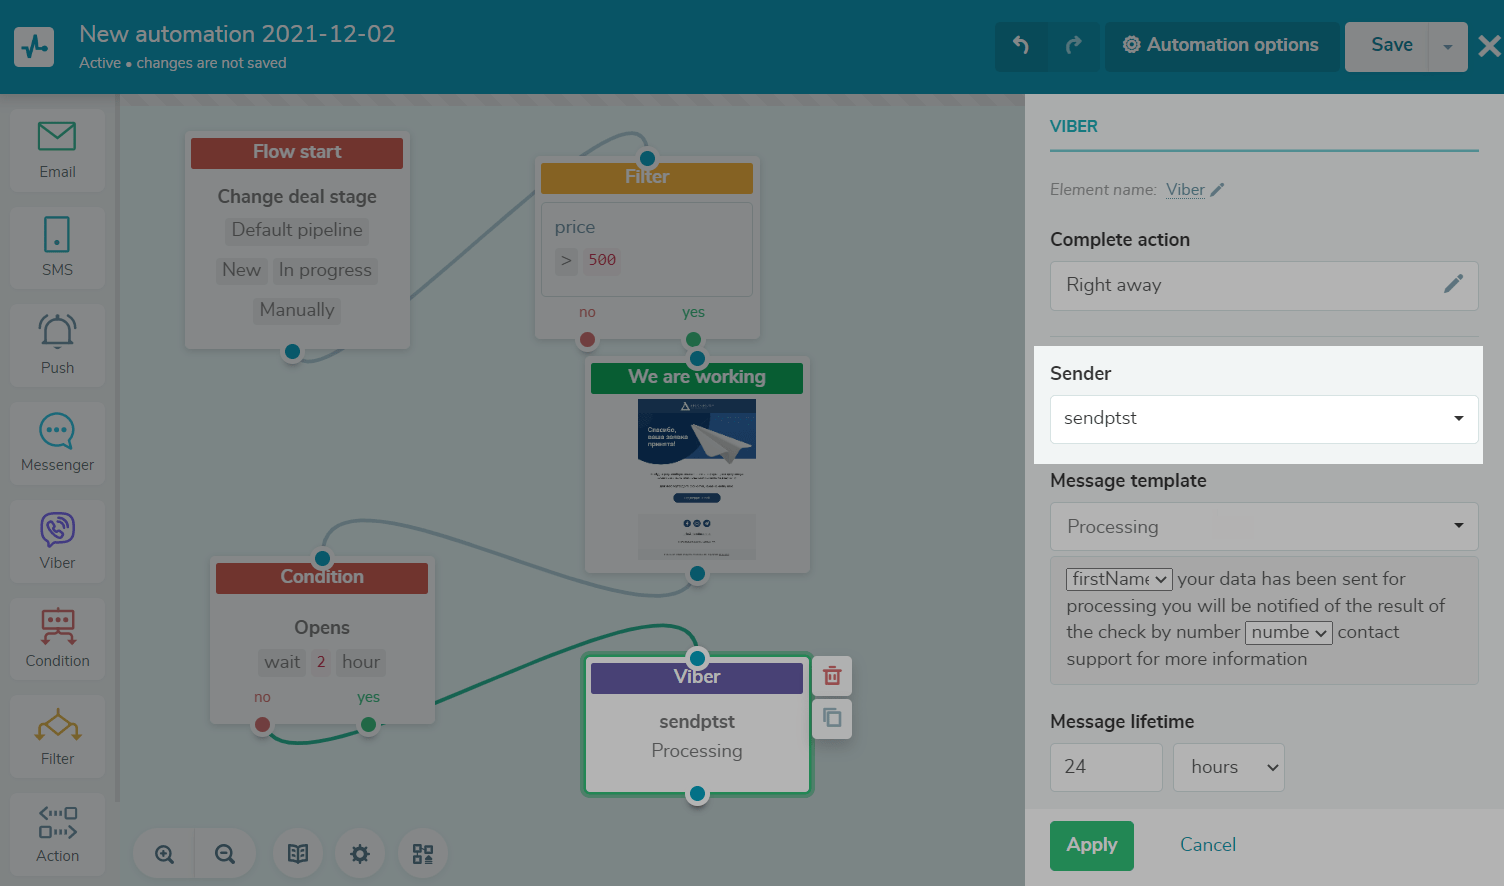
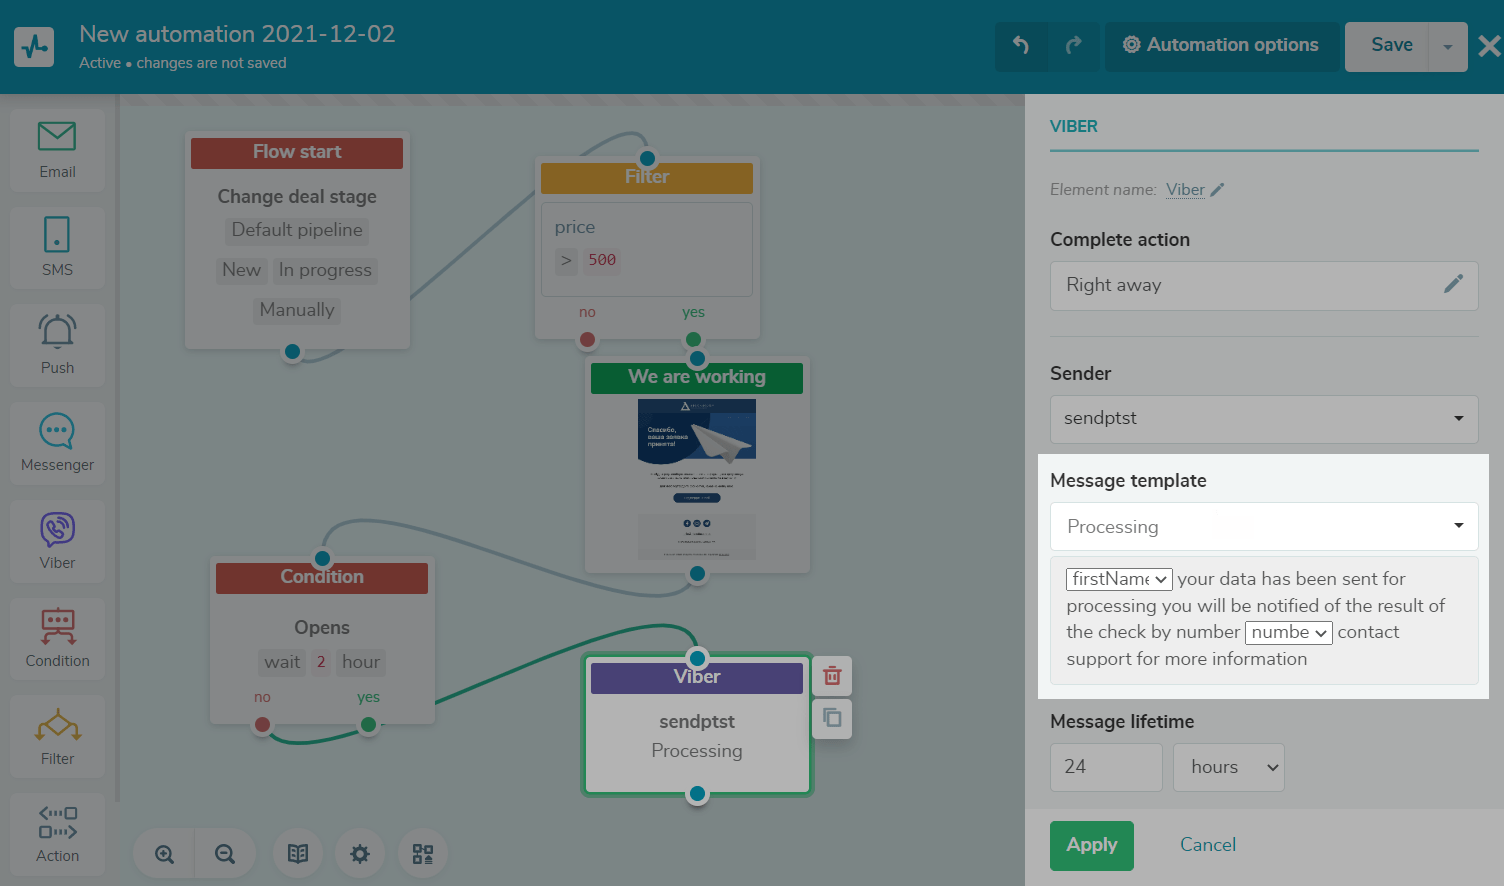
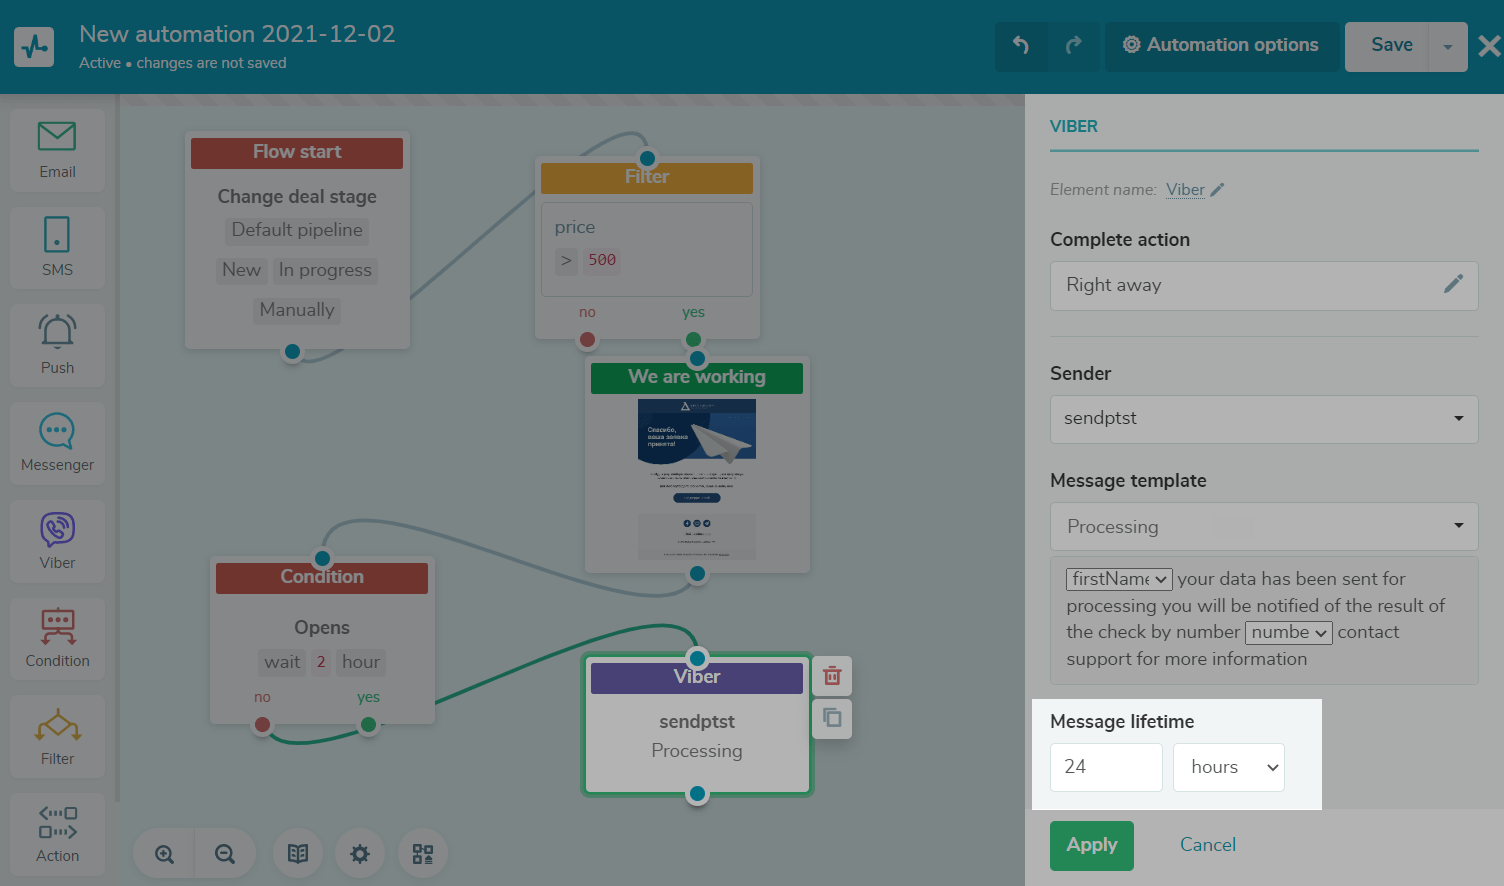
Select a sender
Select the sender on whose behalf users receive messages.
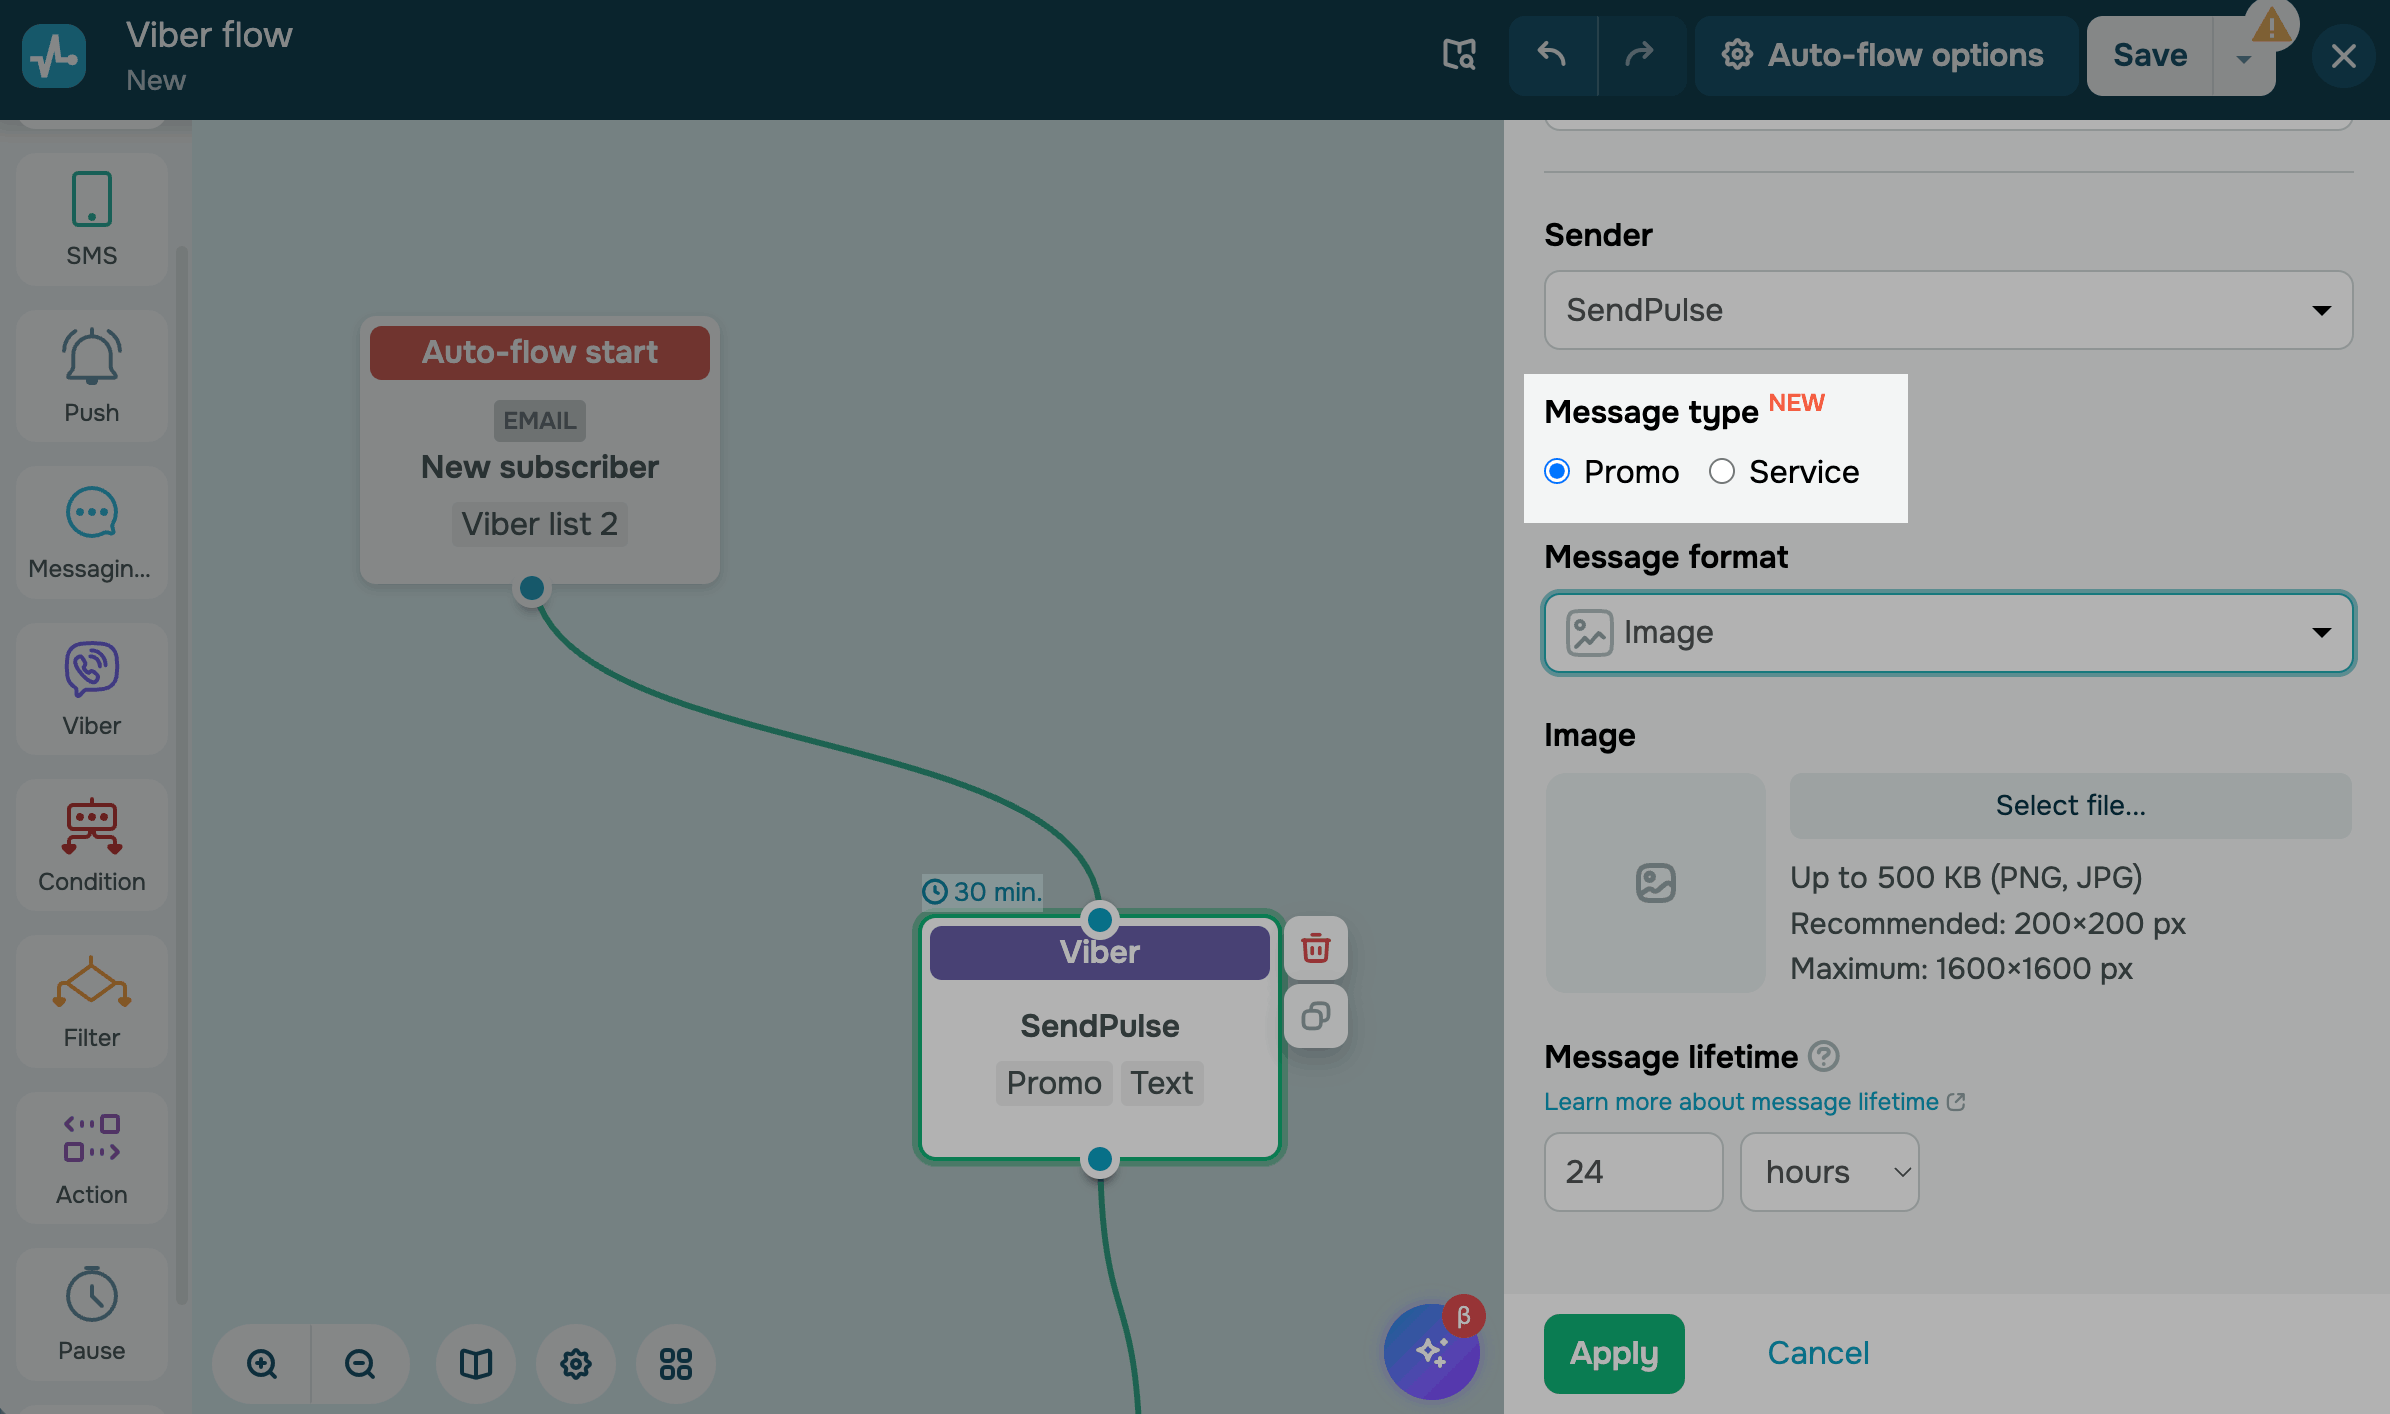
Select a message type
In Message type, select the type of message you want to send:
| Service |
Sends a service message using an approved template. Use it for transactional messages, such as order updates, payment notifications, or password resets. |
| Promo |
Sends a promotional message. Use it for offers and campaigns, such as discounts, special offers, and product announcements. Promotional Viber messages require moderation. If the Viber element is under moderation or blocked, contacts without a linked phone number move to the next element, while contacts with a linked phone number stay at this Viber element until moderation is completed. |
Add message content
Configure your Viber message content. The available settings depend on the message type. Select a template for Service messages. Add the content for Promo messages, including text, an image, and a button.
Service message
If you’ve chosen the Service message type, select a message template. The selected template must have the Active status.
Please note that you can only choose a template to send service messages. The system sends your template as it is and replaces variables with contact data.
Select variables from the list.
If in the Flow start element you have selected Add subscriber, Special date, Contact webhook, or Change variable, then they will be filled in from the specified mailing list.
If in the Flow start element, you have selected Create a deal or Change deal stage, then the variables with the _deal suffix will be filled in from the fields in the selected CRM pipeline.
If you chose to start the flow by event, then the variables will be filled in from the body of the event that the contact sends. If a mailing list is selected, the system will also use the event body and the mailing list, provided your contact is included in that list.
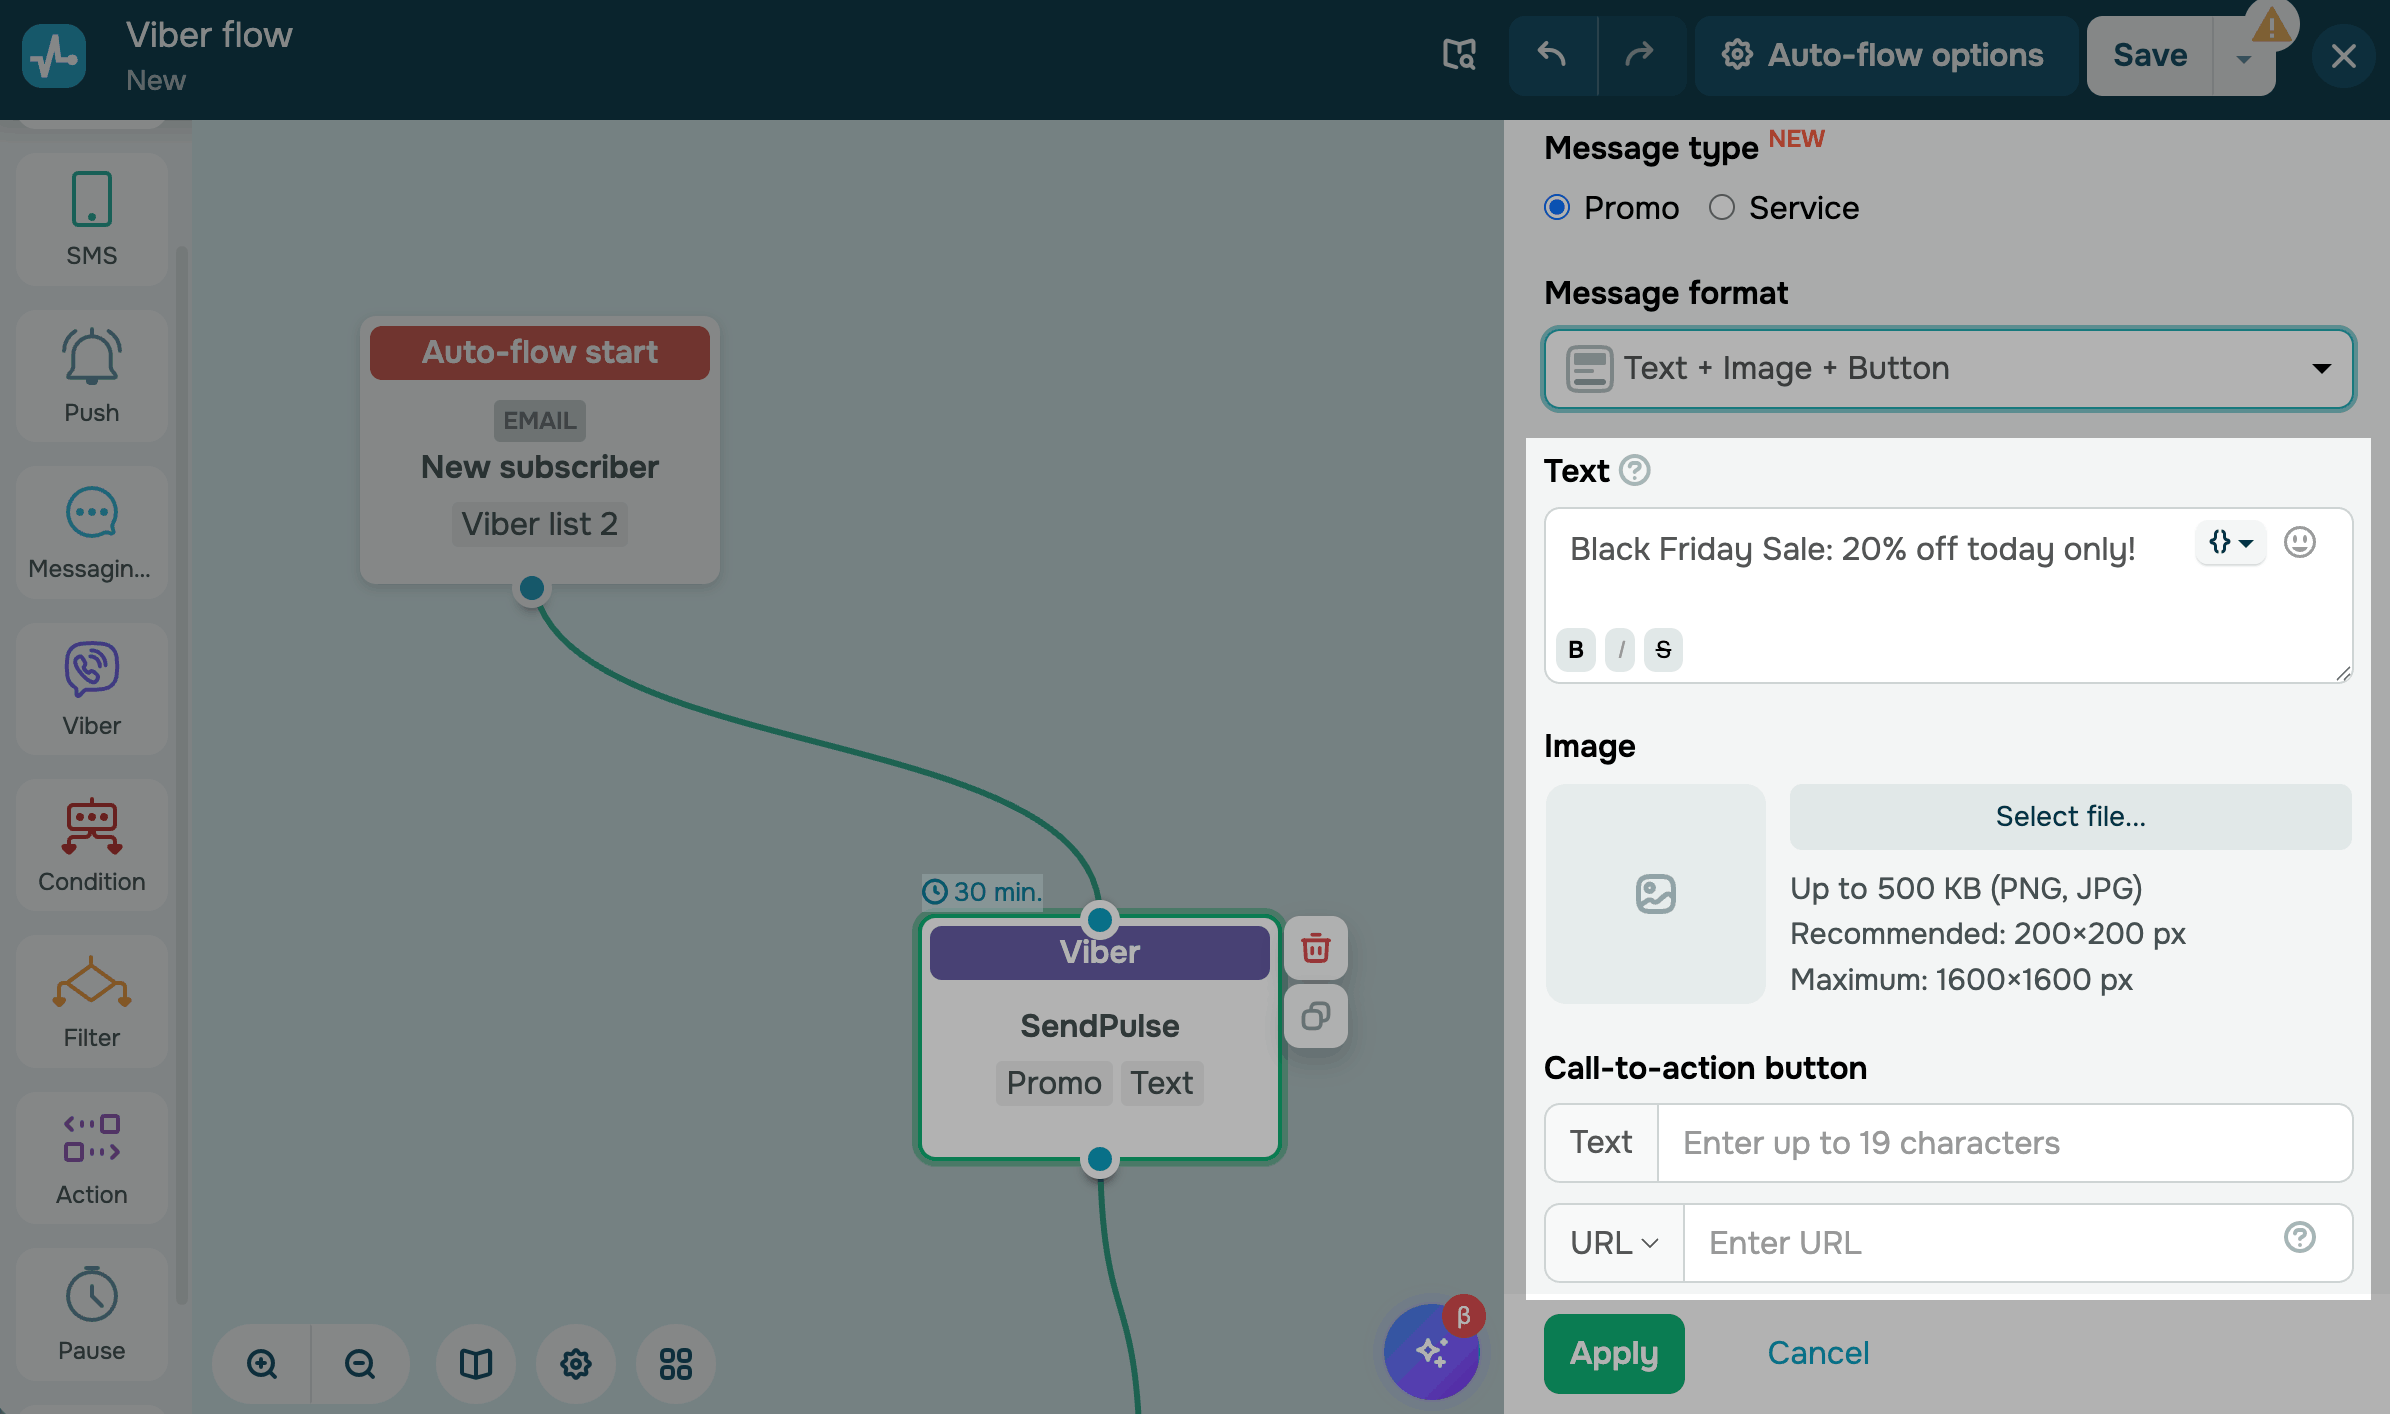
Promo message
If you’ve selected the Promo message type, choose what your message should include in Message format. The Viber element shows fields depending on your selected format:
| Text | Sends a text message. |
| Image | Sends an image. |
| Text + Button | Sends a text message with a call-to-action button. |
| Text + Image + Button | Sends a text message with an image and a call-to-action button. |
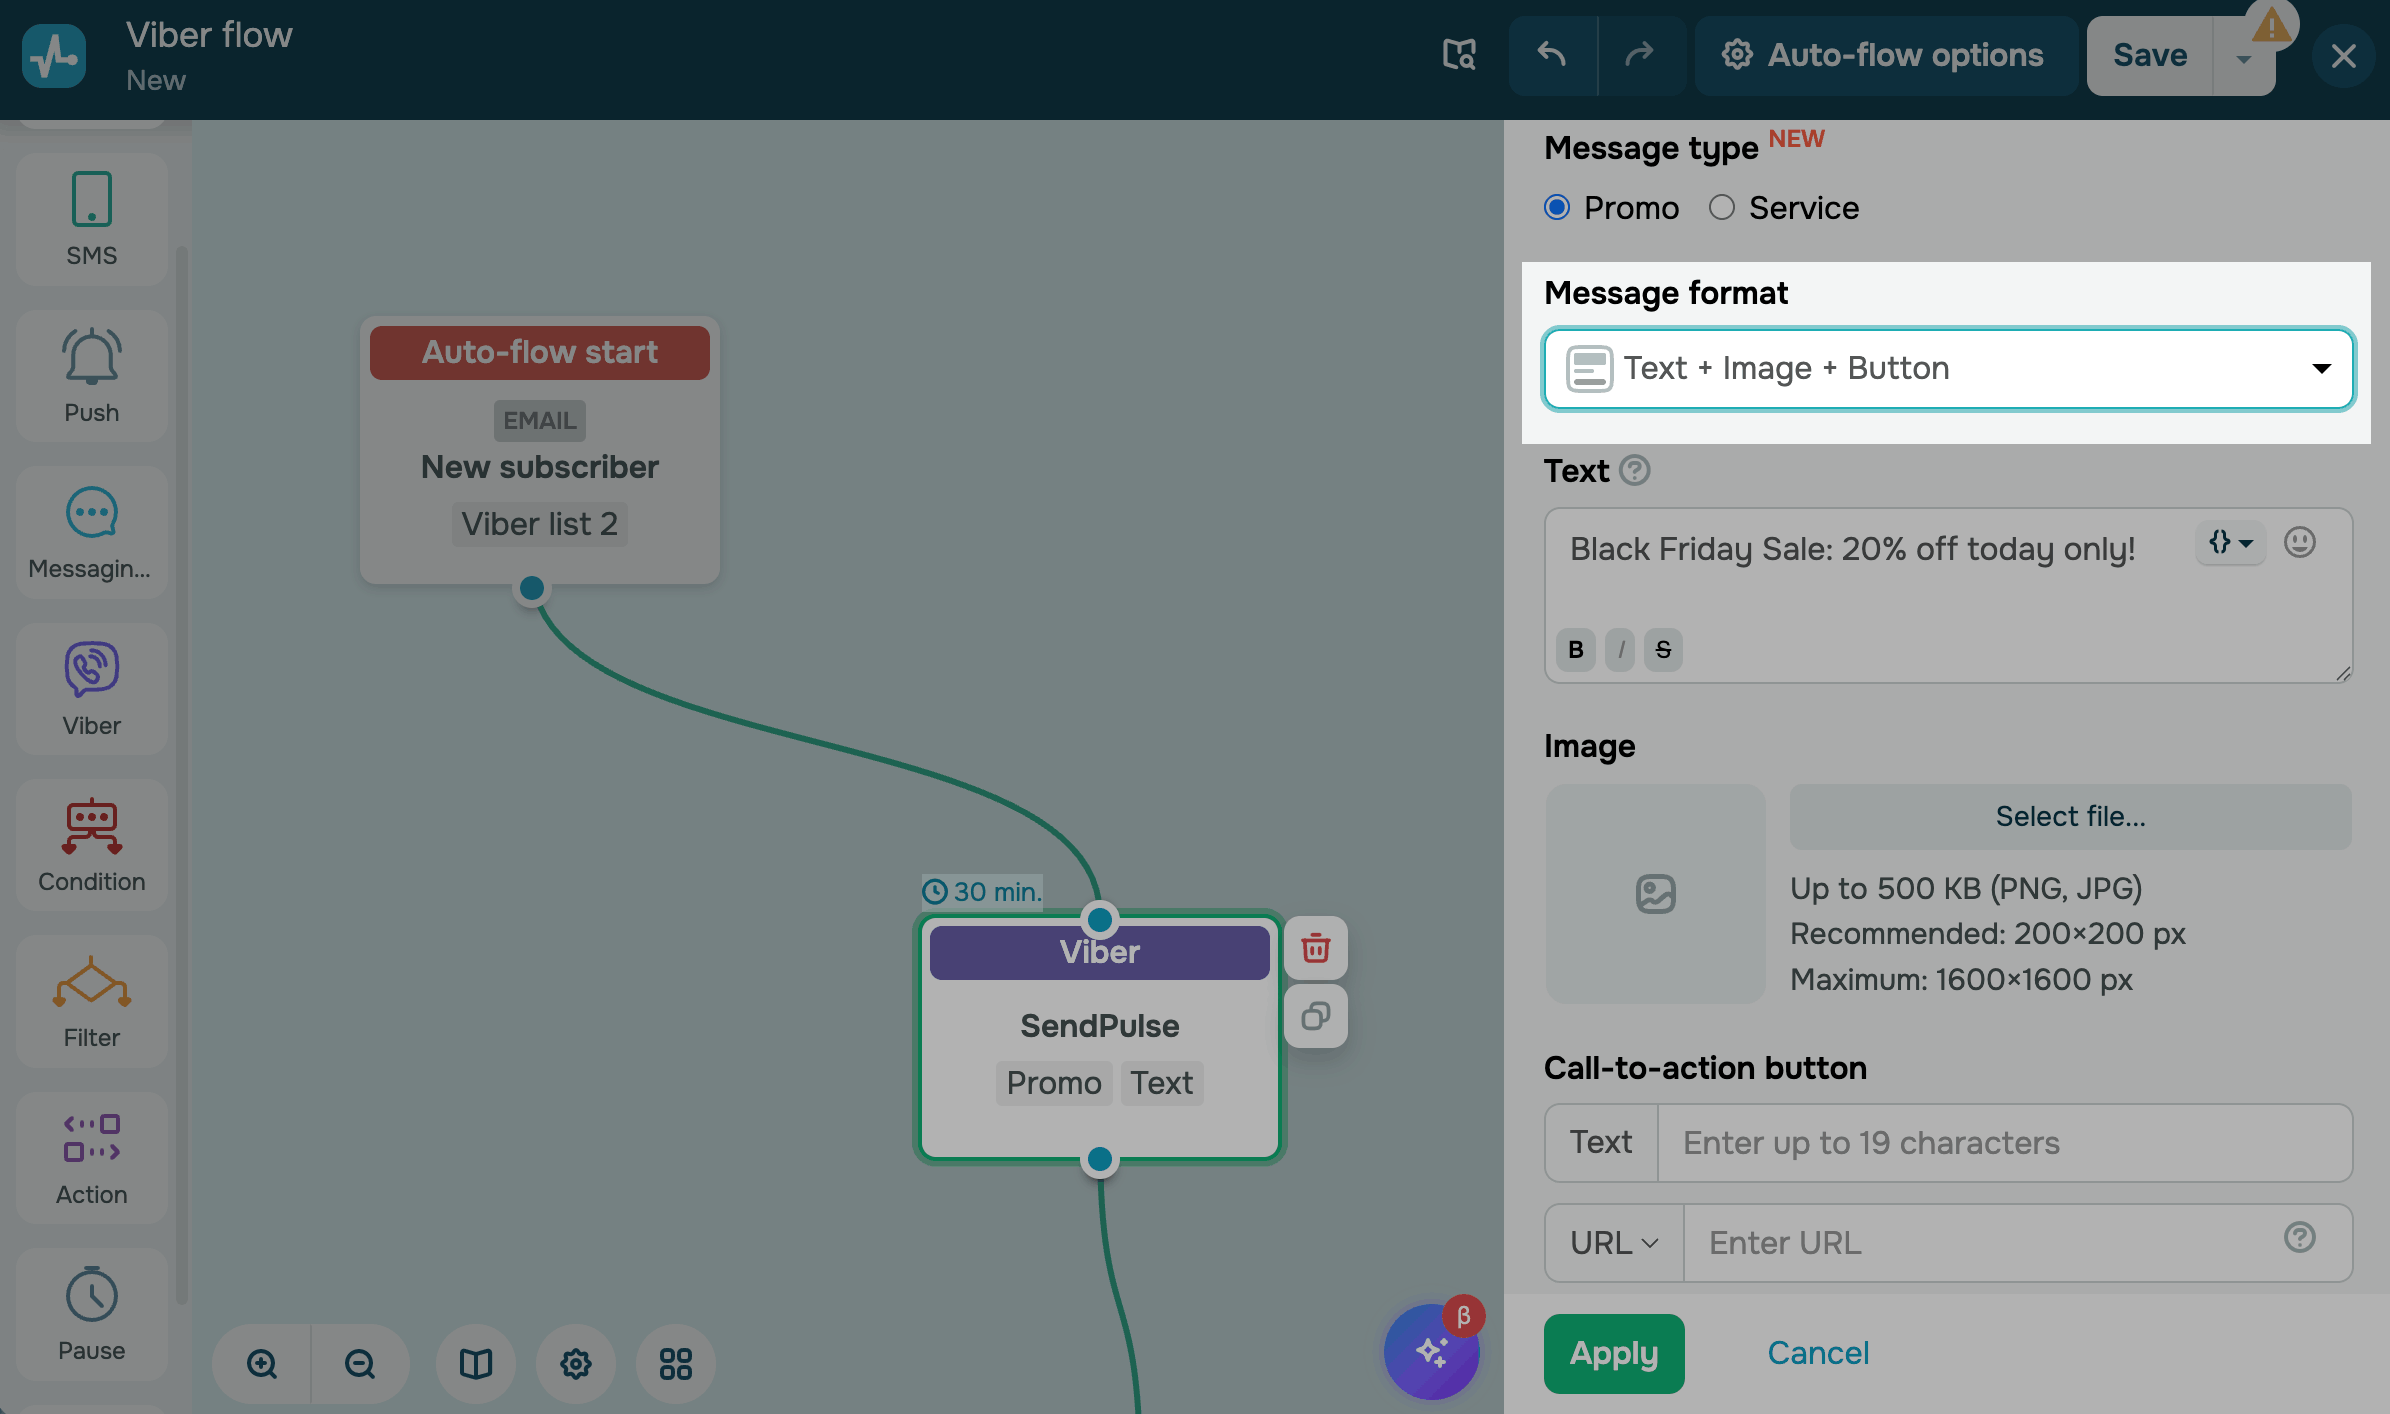
In the Text section, enter your message of up to 1,000 characters. You can also use Unicode characters.
To format text, select it and click the formatting icon. To add an emoji, click the emoji icon.
If you’ve selected a mailing list, you can personalize your message using variables.
In the Image section, click Select file and upload a square image sized at up to 500 KB. Recommended resolution is 200 × 200 pixels.
In the Call-to-action button section, configure the button fields:
| Text |
Enter a button label of up to 19 characters. |
| Action |
Select an on-click action for your button. Options include: URL adds the link users will be directed to. TEL adds the phone number users will call. Using the URL option, you can insert variables in an entire link or in its specific parts. Add a variable as |
If a variable value exceeds the field limits, SendPulse truncates the text or link. If a URL variable resolves to an empty value, the button does not appear in the message.
Set up a message lifetime
Set the message lifetime — the period during which the service will try to deliver your message to subscribers who were unavailable at the time of sending. The minimum message lifetime is one minute, and the maximum is 24 hours.
You can also add the Condition element and track the Delivered event to branch the flow script depending on the delivery status. For example, if the message was not delivered to the user via Viber, you can send an SMS. To do this, add the SMS element to the No branch.
View element statistics
To view detailed information about an element, exit the editor, and hover over the required element in the Flow tab.
Last Updated: 02.01.2024
or