Generate chatbot replies using n8n
Use n8n to integrate with AI models and other tools. Send chatbot data through webhooks and return AI-generated replies back to your chatbot as messages.
For example, you can send a subscriber’s latest message to an AI model in n8n, process it, and return the generated reply in your SendPulse-powered chatbot.
Let’s talk about how to configure an n8n flow, add an AI agent, pass data through a webhook, and send the reply back to your chatbot.
We’ll use an OpenAI-powered AI agent as an example. You can, however, choose any other AI provider and follow the same steps outlined here.
Add a webhook trigger
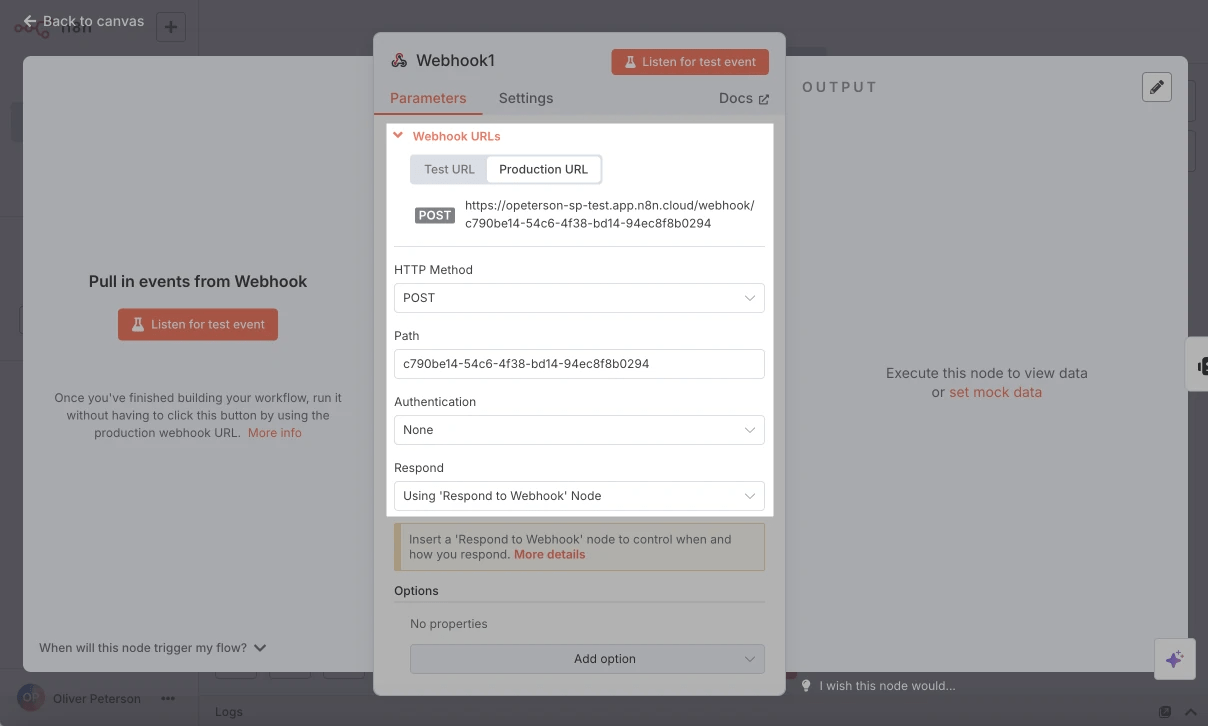
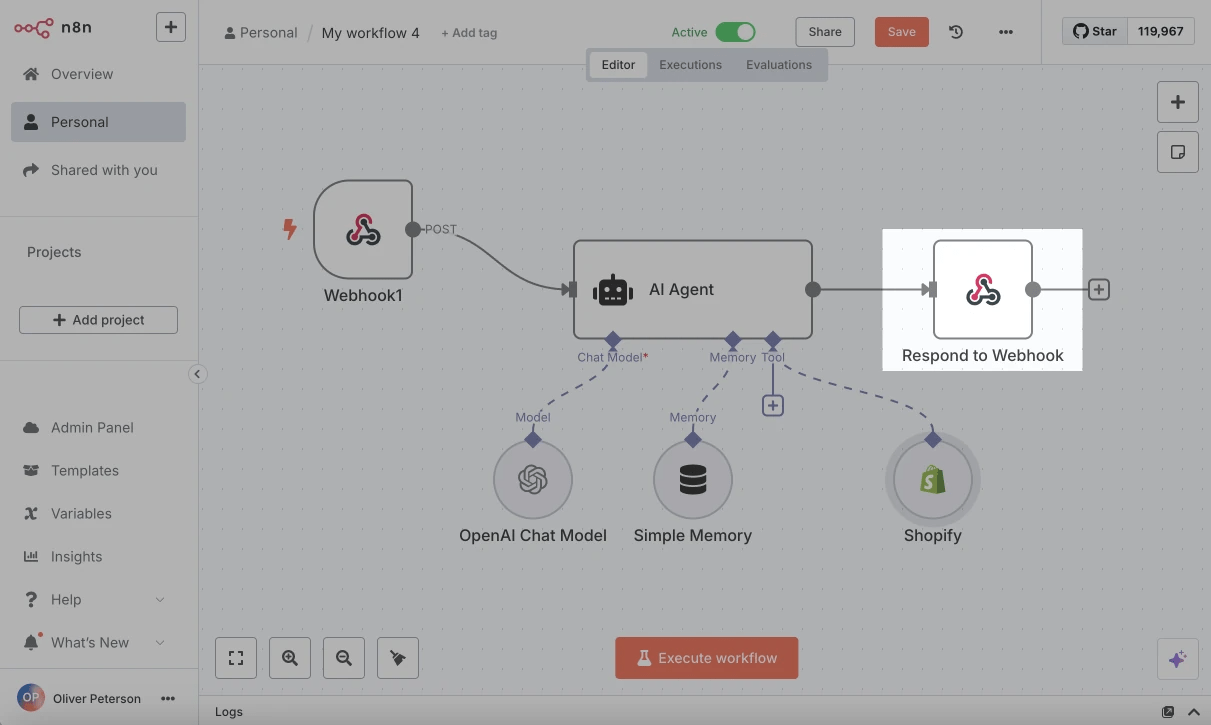
Create a new n8n flow and select On webhook call as your trigger.
In the Parameters tab, under HTTP Method, select POST. Under Respond, select Using 'Respond to Webhook' Node.
Copy the webhook URL.
Configure data fetching
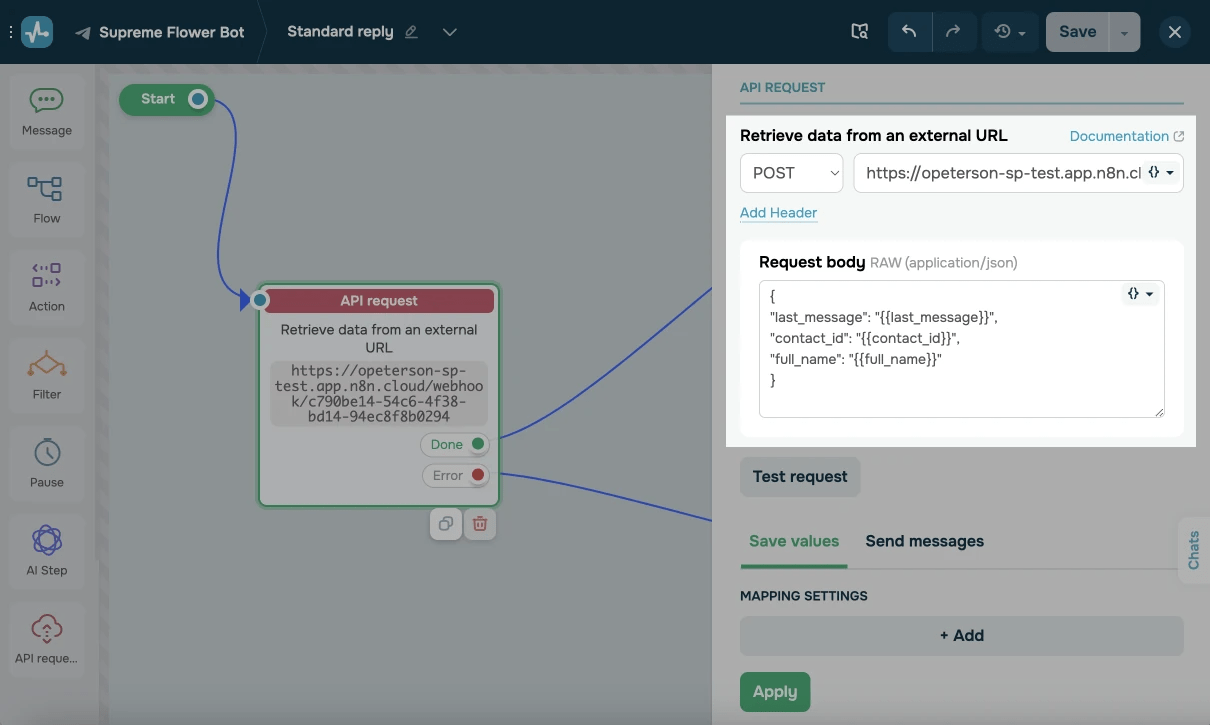
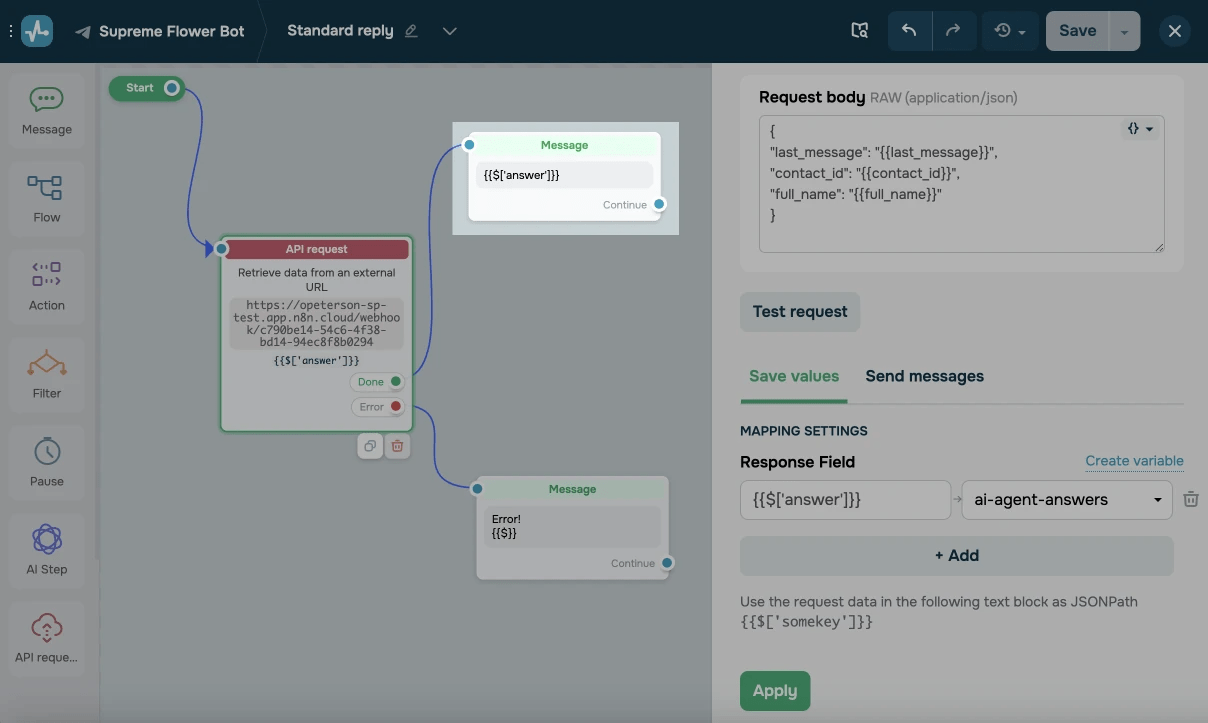
In SendPulse’s chatbot flow builder, add the API request element. Paste the n8n webhook URL into Retrieve data from an external URL and select POST.
In Request body, enter a JSON payload and add standard variables with the last message. Here’s what this can look like:
{
    "last_message": "{{last_message}}",
    "contact_id": "{{contact_id}}",
    "full_name": "{{full_name}}"
}
Test your request
To help n8n detect data structures in upcoming nodes, run a test to receive a webhook from SendPulse.
Go back to your n8n flow, and in On webhook call, click Listen for test event.
Then, in your SendPulse flow, click Check request in the API request element or click Send to myself in the builder.
Add an AI agent
The AI Agent node generates replies for subscribers in your SendPulse-powered chatbot using an OpenAI model and data from other tools available through n8n.
Add AI Agent (from the AI category) and integrate your model using an OpenAI API key.
If you haven’t added your credentials yet, click Create Credential. Select OpenAI and click Continue, enter your OpenAI API Key, and click Save.
Configure your AI agent
You can use fields from the webhook data structure once you run a test to receive data from SendPulse. If you haven’t tested it yet, do so before proceeding.
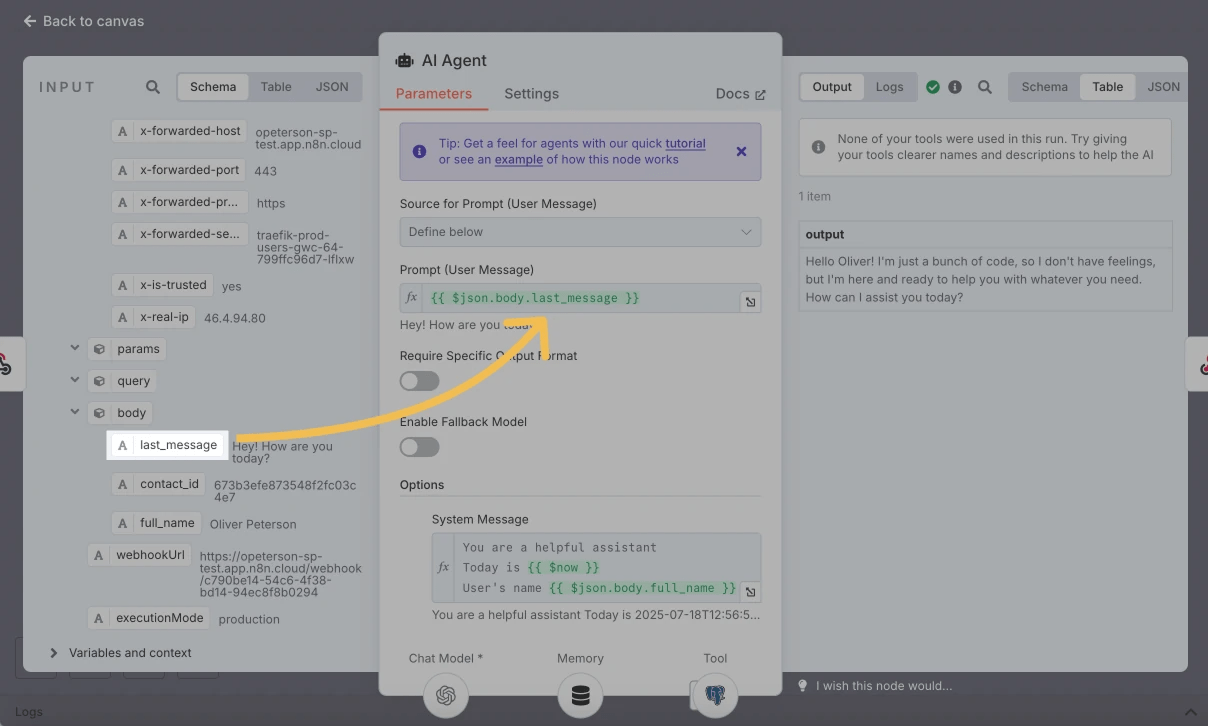
To set a data source for your AI model, in Source for Prompt (User Message), select Define below.
Once you run a test, you’ll see the data structure sent from SendPulse in the Input tab on the left. Find body in the request — it’s the array of variables you’ve added to the API request body.
In this array, find the last_message variable and drag it to Prompt (User Message). From now on, the AI Agent will use your subscriber’s last message as the prompt.
To save conversation history, open Memory and set Session ID to Define below. In Key, set the user ID as: {{ $json.body.contact_id }}.
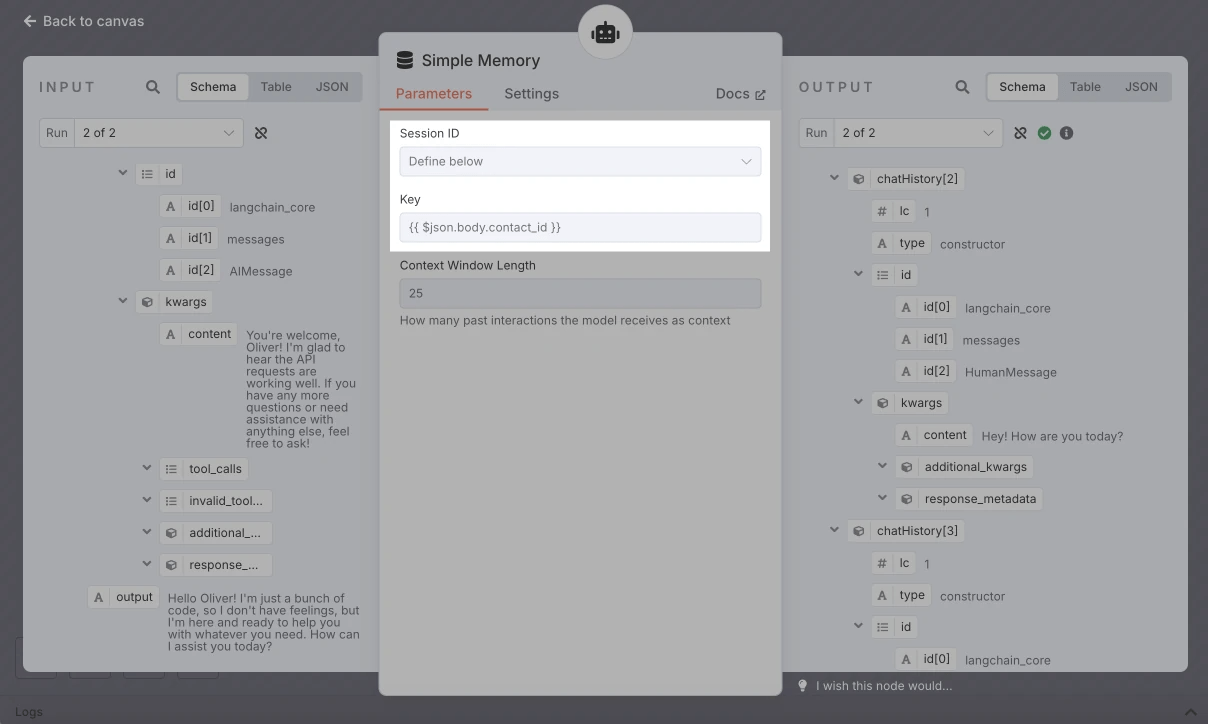
Optionally, set Context Window Length to control how many recent messages your AI agent remembers.
Add Tool subnodes if you need to automate workflows in other systems, including databases, CMS, CRM systems, and more.
Return the AI agent’s reply to your chatbot
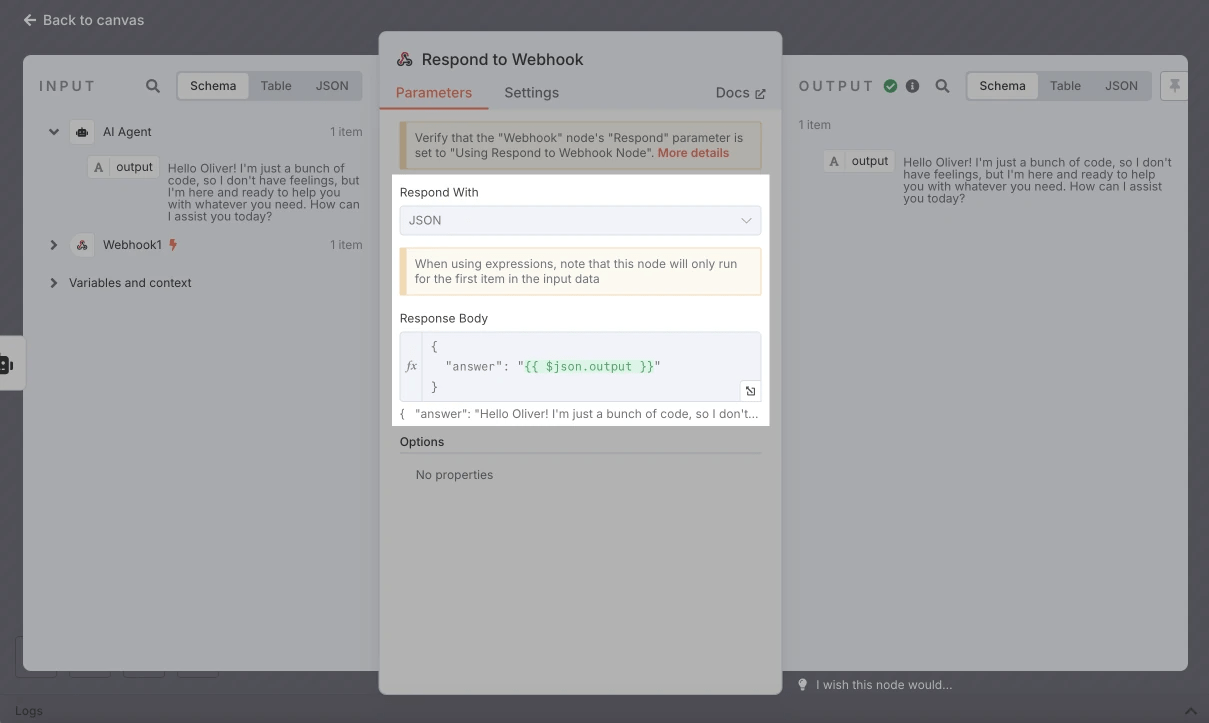
At the end of your n8n flow, add the Respond to Webhook element to send the data back.
In Respond With, select JSON and set a response body. Here’s what this can look like:
{
    "answer": "{{$json.output}}"
}
Here, answer is the field your chatbot will receive, and json.output is the value generated by the AI Agent.
In your SendPulse flow, add the Message element to the Done branch and insert the reply value.
Optionally, add an error message for failed AI requests.
Last Updated: 20.08.2025
or