Send data arrays with Automation 360
With data arrays, you can create product cards and send personalized dynamic emails. For example, you can automatically send emails with personalized data when the number of elements, for example, products, is different for each recipient.
Let's talk about how to create an event using a data array and add variables to your email template.
What are dynamic email templates?
Dynamic emails are emails that contain personalized information, such as order data.
You can add text, images, and links as variables to dynamic template parts. Depending on the number of products a user has selected, one or more products will be displayed in your email.
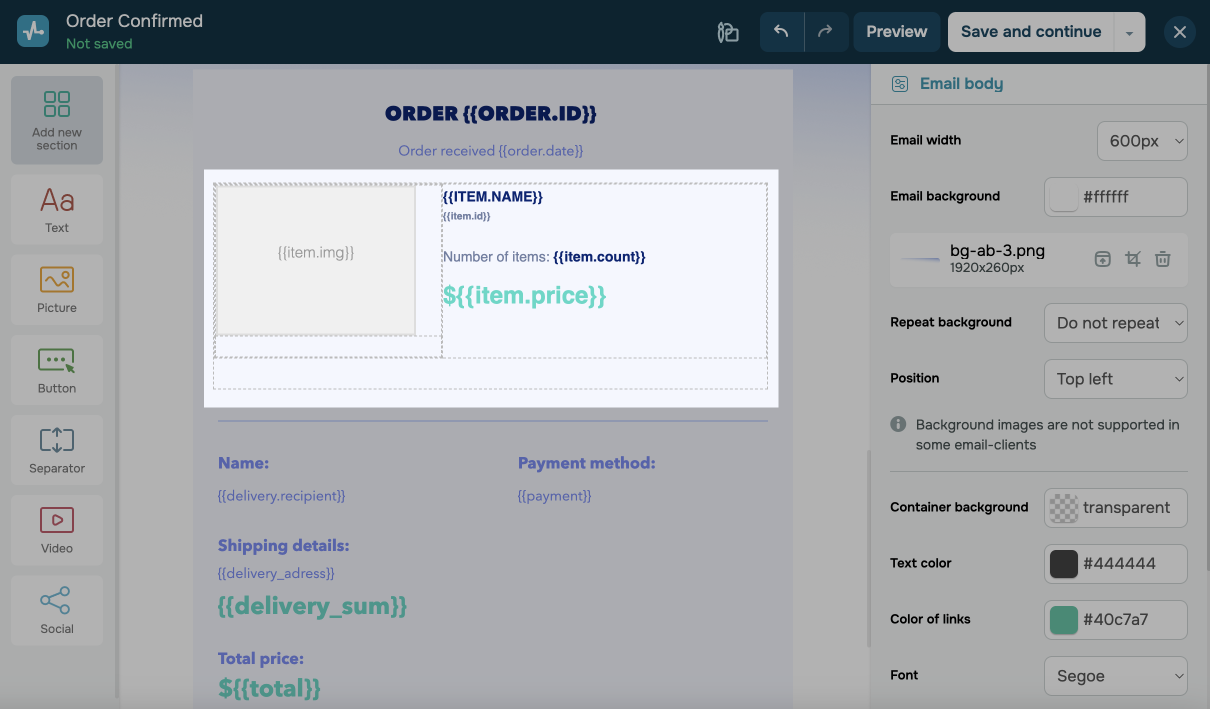
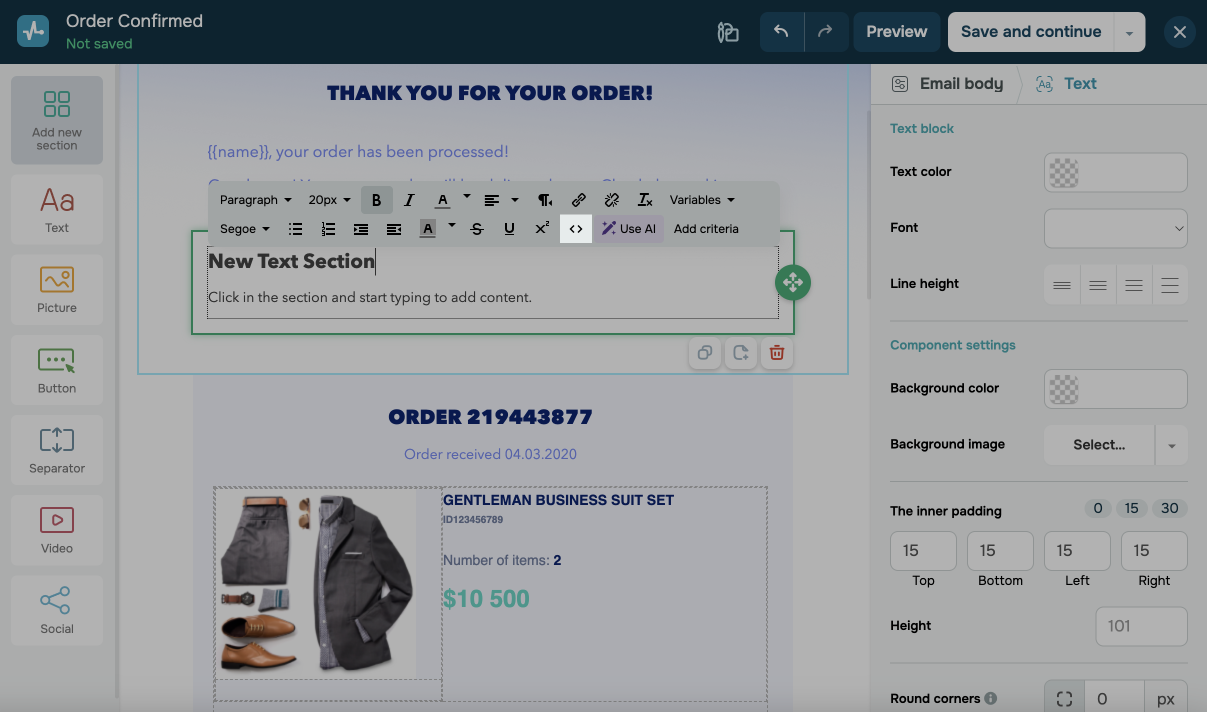
Below is an example of how you can build an email with a product card using our email builder.
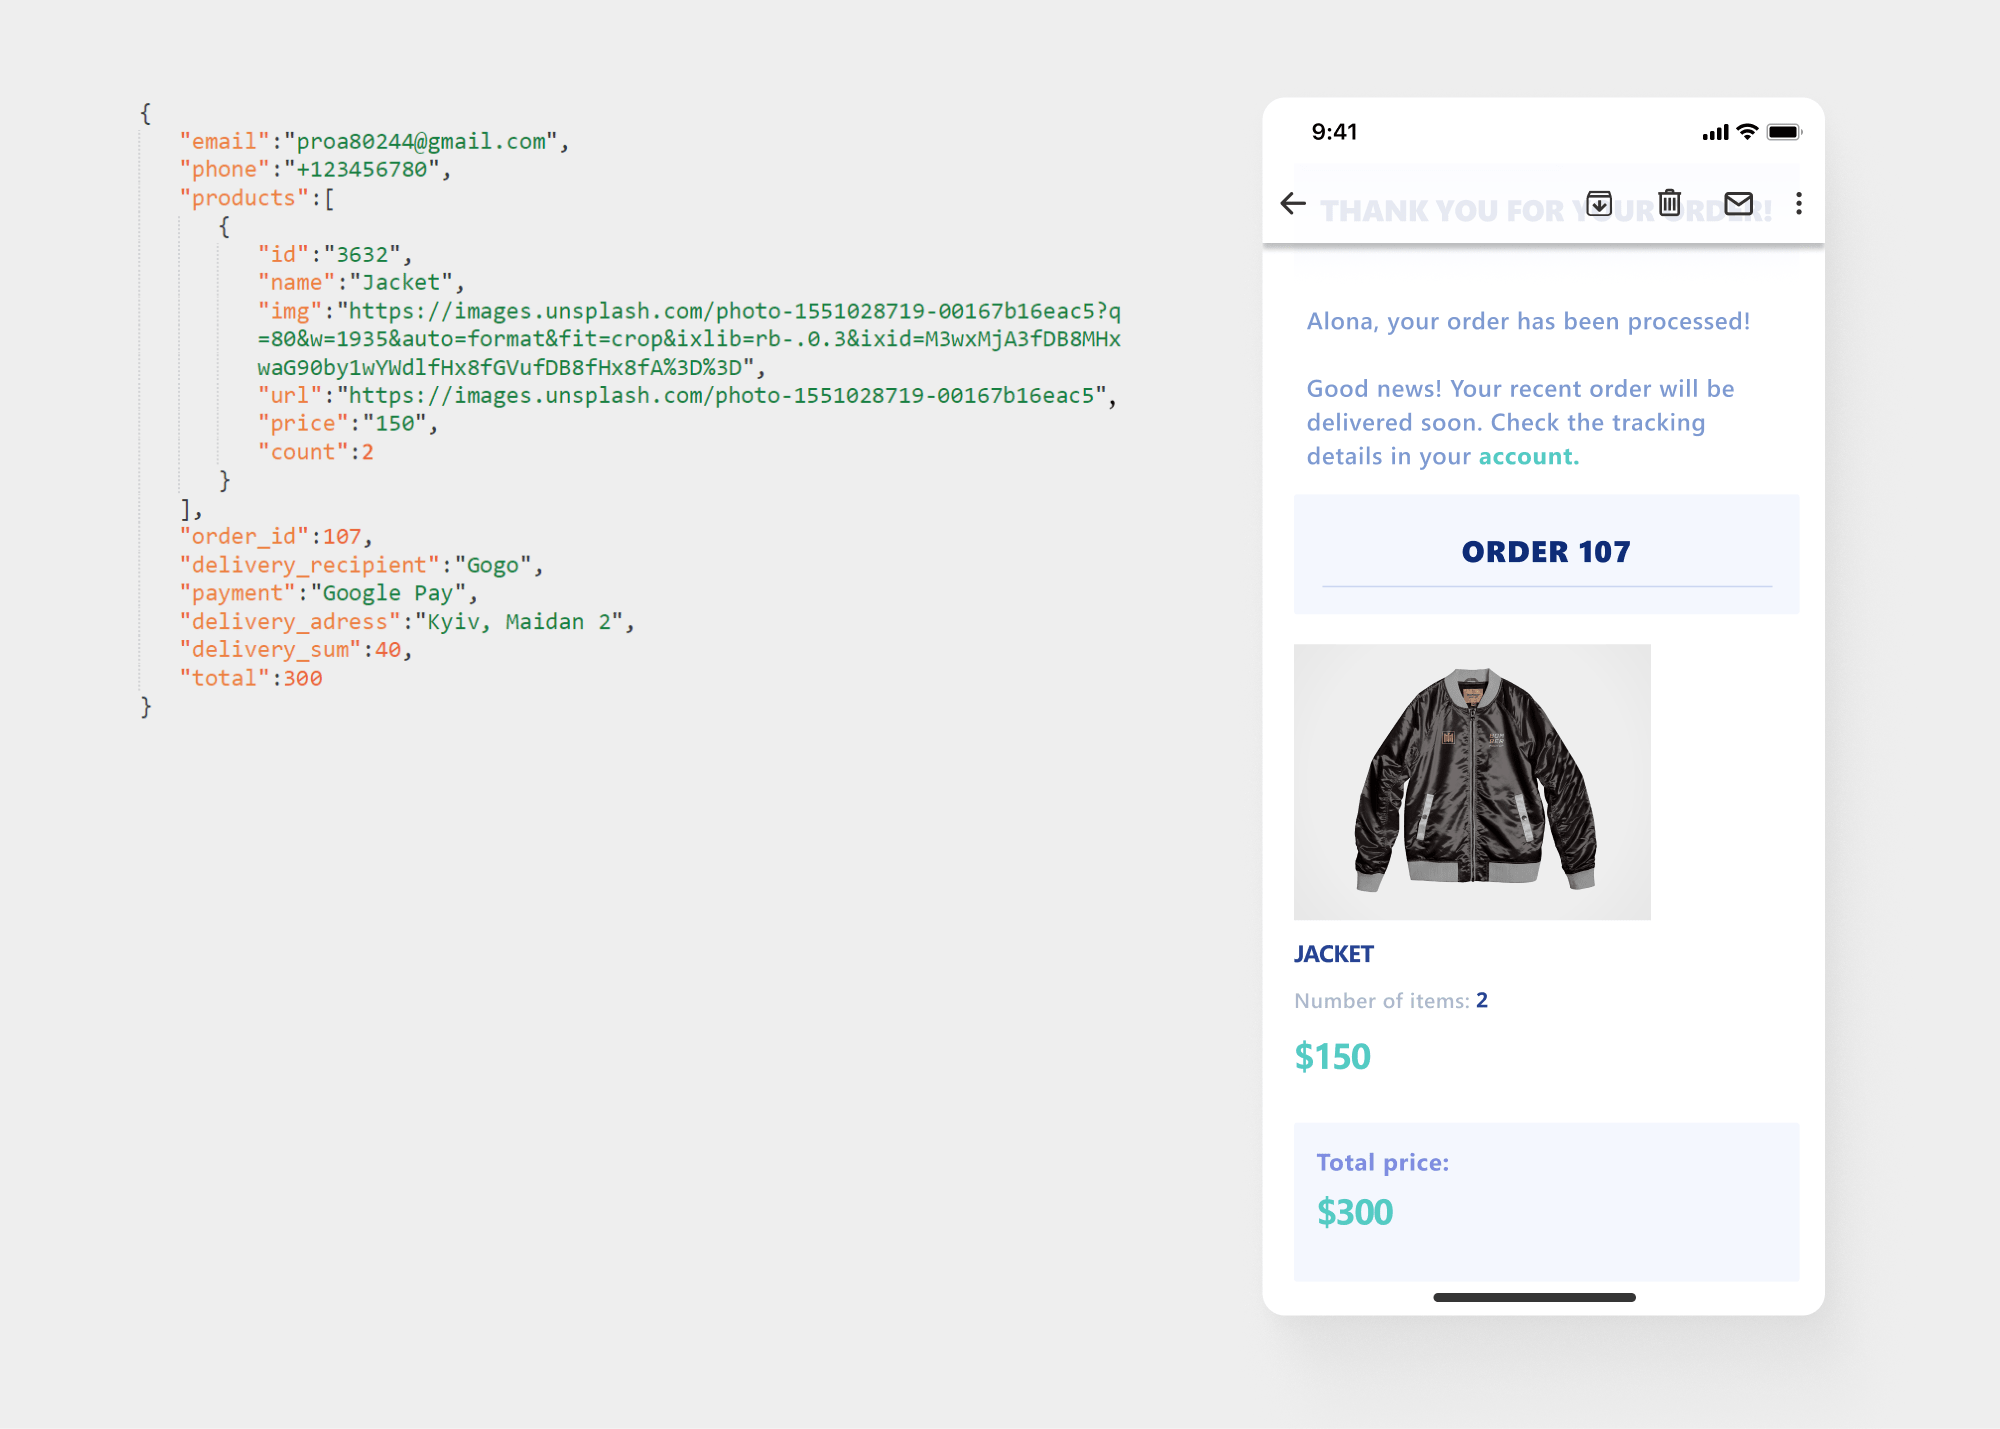
Here are request and example of email when user has ordered one product.
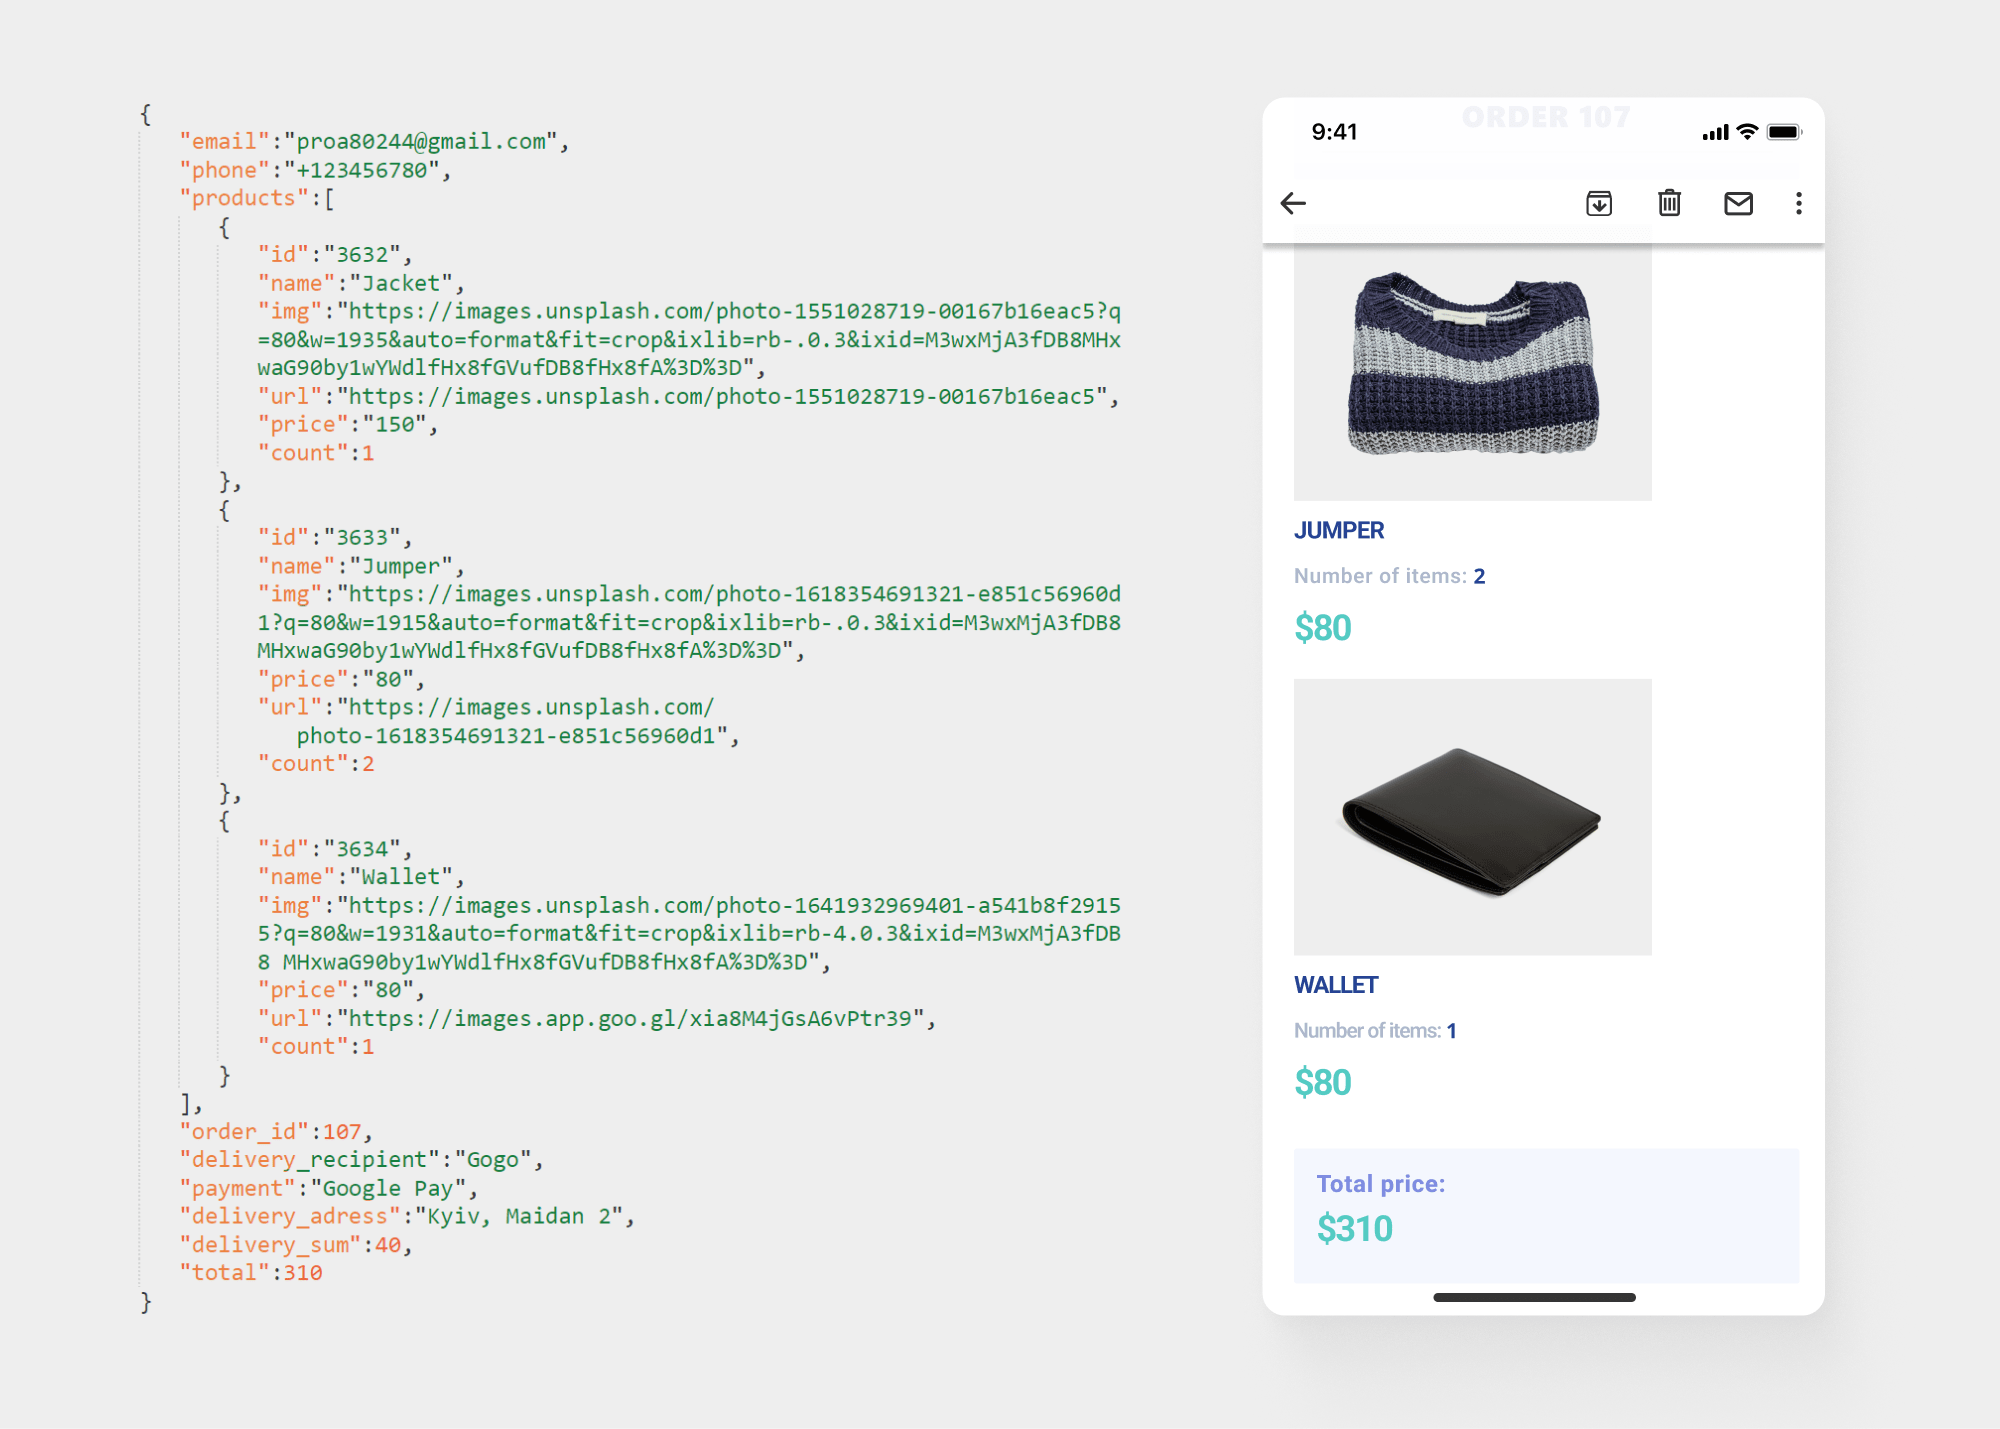
Here are request and example of email when user has ordered three products. The email layout does not change.
How to send data arrays
Create an event
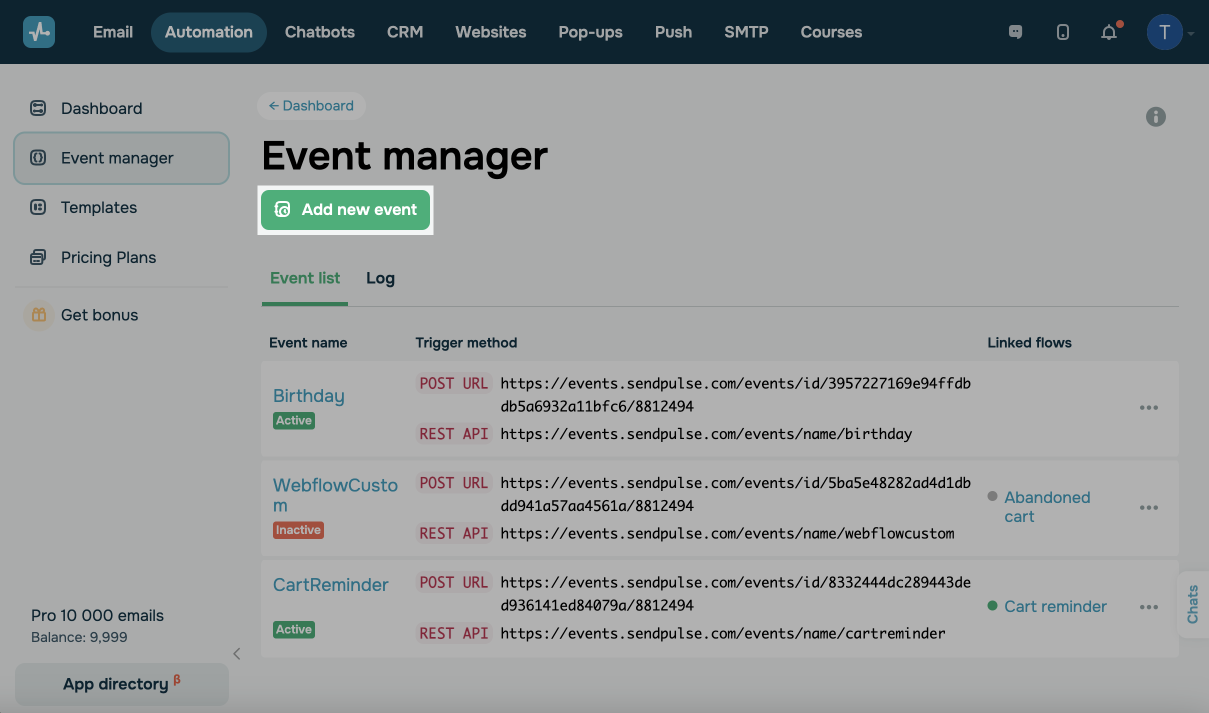
Go to Automation > Event manager. Click Add new event, and select Custom event.
Read also: How to create an event.
Next to the name of the variable you will use to send your data array, select the Structure type. Add product variables to your structure.
To pass a link to a product image, use a variable of the String type.
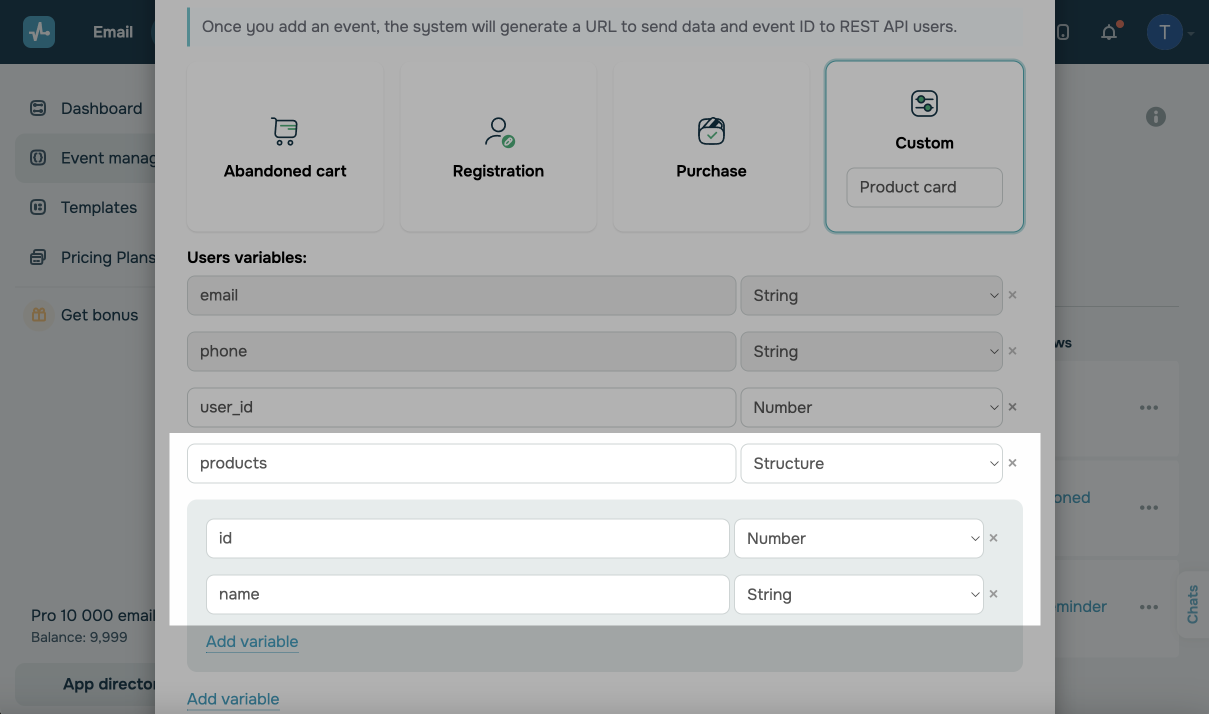
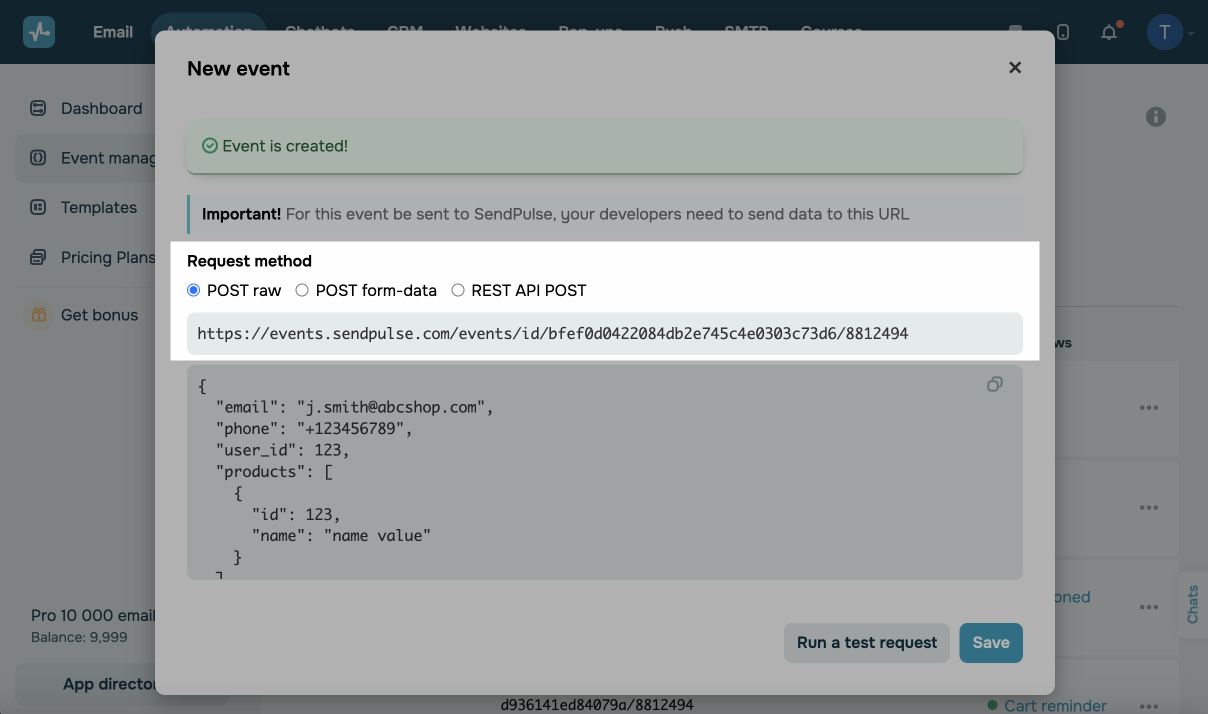
Once you add all the variables, click Add. Your event will be successfully created. Copy the URL to which the data will be sent and the body of your data structure. You need to send it to your developer to be able to send data from your website via a POST request.
Add a data array to your template
You can add data arrays to your templates to send emails with personalized order data.
Read more: How to create dynamic emails triggered by events using pre-made SendPulse templates.
How to place array data in a template
You can insert a data array into an email template using the HTML or drag-and-drop editor. A table layout, where each element (image or text) is in an individual table cell, helps arrange product data as a card.
To mark the start and end of a data array, add |[ for item in products ]| after your element's opening tag (which needs replication) and |[ endfor ]| before your closing tag, where products is the name of the variable representing your array.
You can select a variable with your array name from the list of all variables — the array structure will be inserted into the email body.
Make sure to place your array once. This way, the element within your array and code will be displayed repeatedly based on the number of products transferred during the event.
To specify a variable from a structure variable, you need to add an item. For example, if you are passing a link to a product image using the img variable, you need to add a variable in the {{item.img}} format.
To display an image, use its tag with the source attribute, where you pass the link to your image as <img srс="{{item.img}}" alt="image">.
To add a clickable link, include the tag used to create links with the URL attribute: <a href="/{{item.url}}">link</a>.
Creating a product card
To create a product card, it is recommended to create a table. To display each array element (product) in an individual table cell, you need to duplicate template parts displaying these elements. To place your structure data, add variables within the cell (<td></td>).
Here is an example of code with an array:
<table>
    <tbody>
        <tr>
            <td>|[ for item in products ]|
                <p>product name: {{item.product_name}}</p>
            </td>
        </tr>
        <tr>
            <td>
                <p>price: {{item.product_price}}$</p>
                    |[ endfor ]|
            </td>
        </tr>
    </tbody>
</table>
You can add inline styles to your table using the style attribute to tailor your product card to your design preferences. You can also build emails without any HTML knowledge using templates.
Here is an example of code with styles:
<table>
    <tbody>
        <tr>
            <td align="left" style="padding: 0; margin: 0;">|[ for item in products ]|
                <p style="margin: 0; font-family: arial, helvetica, sans-serif; line-height: 22px; color: #000000; font-size: 16px;">product name: {{item.product_name}}</p>
            </td>
        </tr>
        <tr>
            <td align="left" style="padding: 0; margin: 0;">
                <p style="margin: 0; font-family: arial, helvetica, sans-serif; line-height: 22px; color: #000000; font-size: 16px;">price: {{item.product_price}}$<br></p>
                    |[ endfor ]|
            </td>
        </tr>
    </tbody>
</table>
Displaying Products in a Row
Products in a card are arranged in one column vertically, meaning that there is 1 product in a row. To arrange products in a row horizontally, add the following lines inside the <tbody> tag:
<table>
    <tbody><!--{% set columns = 4 %}--> <!--{% for item in products%} --> <!--{% if loop.first or loop.index0 is divisible by(columns) %}-->
       <tr><!--{% endif %}-->
            <td>{{ item. product_name }}:{{ item.product_price }}</td>
       <!--{% if loop.last or loop.index is divisible by(columns) %}--></tr>
    <!--{% endif %}--> <!--{% endfor %}--></tbody>
</table>
Where:
| Code | Description |
<!--{% set columns = n %}--> |
Setting the n columns. |
<! --{% for item in products%}-->
|
Looping through all products from the products array. |
<!--{% if loop.first or loop.index0 is divisible by(columns ) %}-->
|
Checking the number of array elements for a multiplicity of n. |
<!--{% if loop.last or loop.index is divisible by(columns) %}-->
|
Adding a data array using the template editor
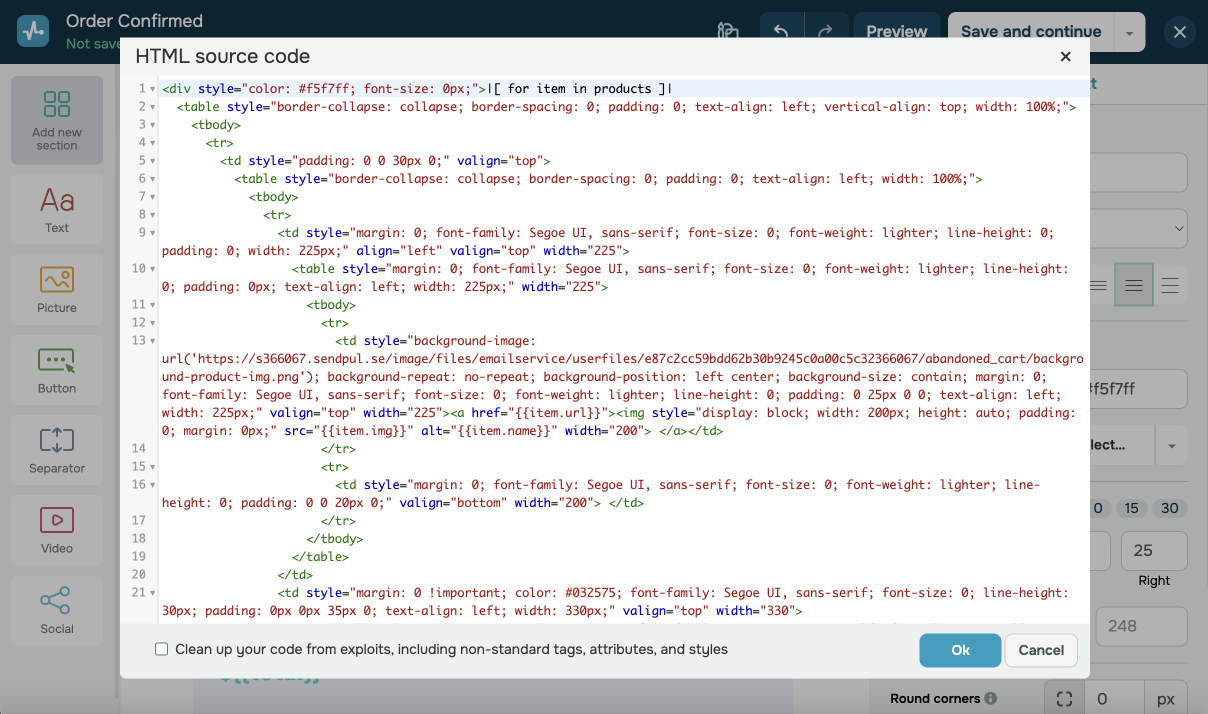
Switch to the template editing mode. Open your source template code.
If you're creating a template using the drag-and-drop builder, add the Text element, and click <> in its editing panel to open the source code.
Insert array data with table styles.
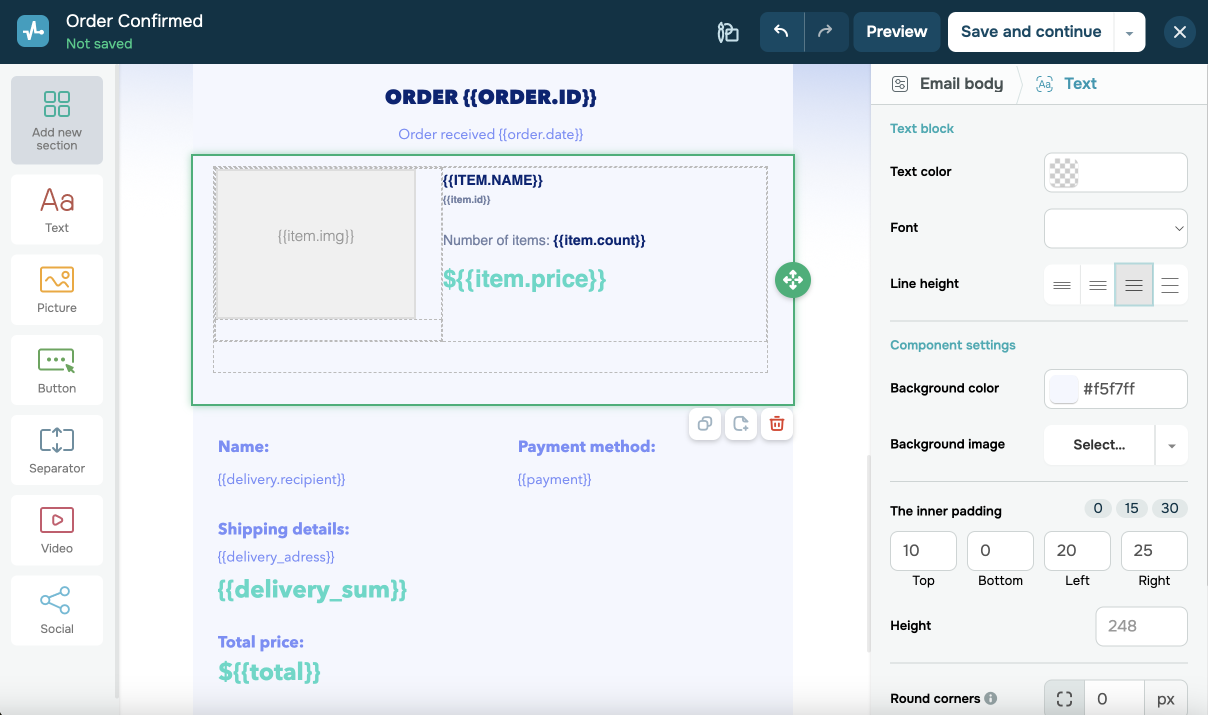
Here is a template example after adding a table layout to the source code.
How to check the result
To see what your template looks like, create an automated campaign using this template in the Email element, start the flow, and send an event with your email address and other data.
If any of the elements are not displayed in your email, make sure that the element name in the event matches the variable in your template.
You can send an email to the same email address no more than once every 5 minutes.
You can test how the elements appear in your email by actually sending it after making changes and saving them. For example, send an event to the specified URL with email data in variables and your email address, and check the received email.
Read more and see an example: Test what you created.
Last Updated: 22.12.2023
or