Create an automation triggered by an event
With event-triggered automation, you can send messages when certain actions or changes occur in the system. It's designed for cases where interactions or actions should only start once an event takes place.
For example, you can remind a customer about an unfinished purchase, send a welcome email after signup, confirm changes to account credentials, update users on their order status, or send other notifications.
Let’s talk about how to create an automated flow triggered by an event and configure its settings.
Configure automation settings
Go to Automation and click Create flow.
Name your automation and choose a sender. Optionally, you can integrate with Google Analytics, choose an unsubscribe page, including its language and category, and set a priority time.
Add an event-based trigger
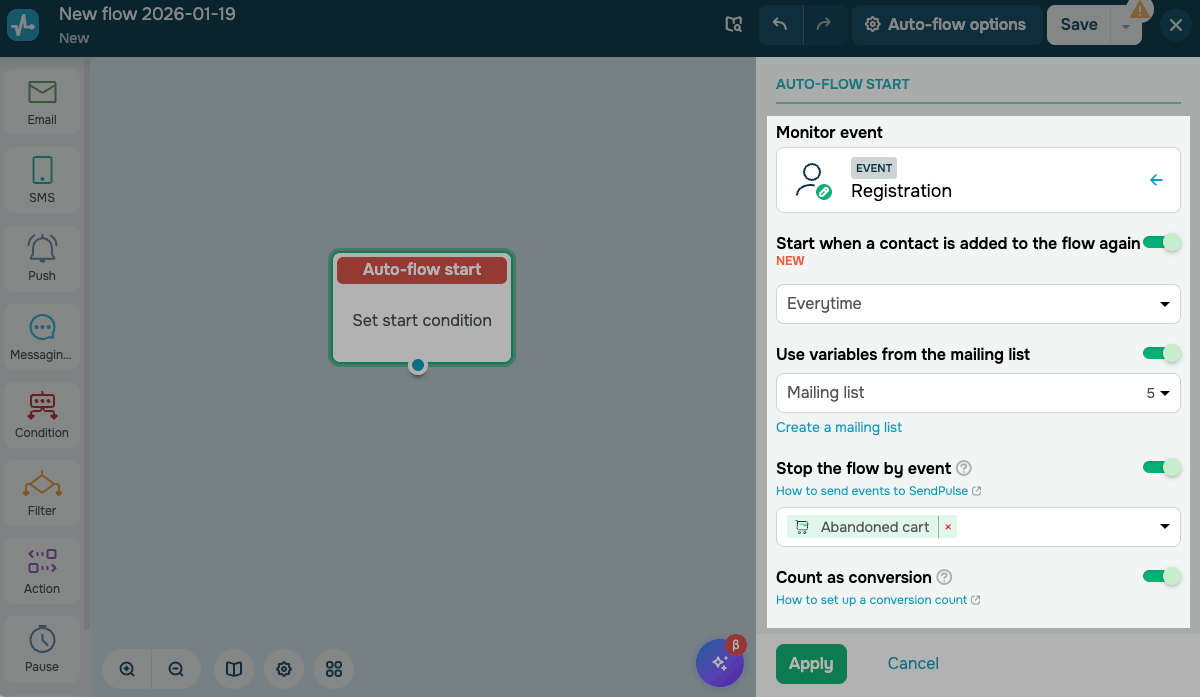
In the Auto-flow start element, expand the Events section and choose an event.
Read more: Create events.
Optionally, you can enable and configure the following options:
| Start when a contact is added to the flow again |
Configure your automated flow to avoid sending emails on the same day. Choose a frequency: Everytime; Once a week; Once a month; Custom (your own number of days). |
| Use variables from the mailing list |
Choose a mailing list to use its variable values. You can use mailing list variables for additional contact filtering. If an event variable and a mailing list variable have the same name, the event variable takes priority. To use variables from a mailing list, your contact’s email address or phone number must match your event variables. |
| Stop the flow by event |
Stop your flow when an event occurs. Choose the event. |
| Count as conversion |
Mark an event as a conversion in flow statistics. |
Build your flow
Decide on the actions your automation needs to perform and start building it. You can use ready-made templates to quickly create flows that match your business needs.
Read also: Automation elements and Automation templates.
Sending elements
Use sending elements to interact with your customers through various communication channels. For example, you can send notifications about order confirmations, delivery updates, or bonus credits.
|
Sends emails to contacts, including purchase confirmations, order status updates, and webinar invitations. Set a sender and customize your email template. You can use variables from the mailing list in your email. |
|
| SMS |
Sends short SMS notifications, including OTP codes, delivery updates, and reminders. Set a sender and add your message. |
| Push |
Sends web push notifications to users who subscribed to them. Select a website and add your message. |
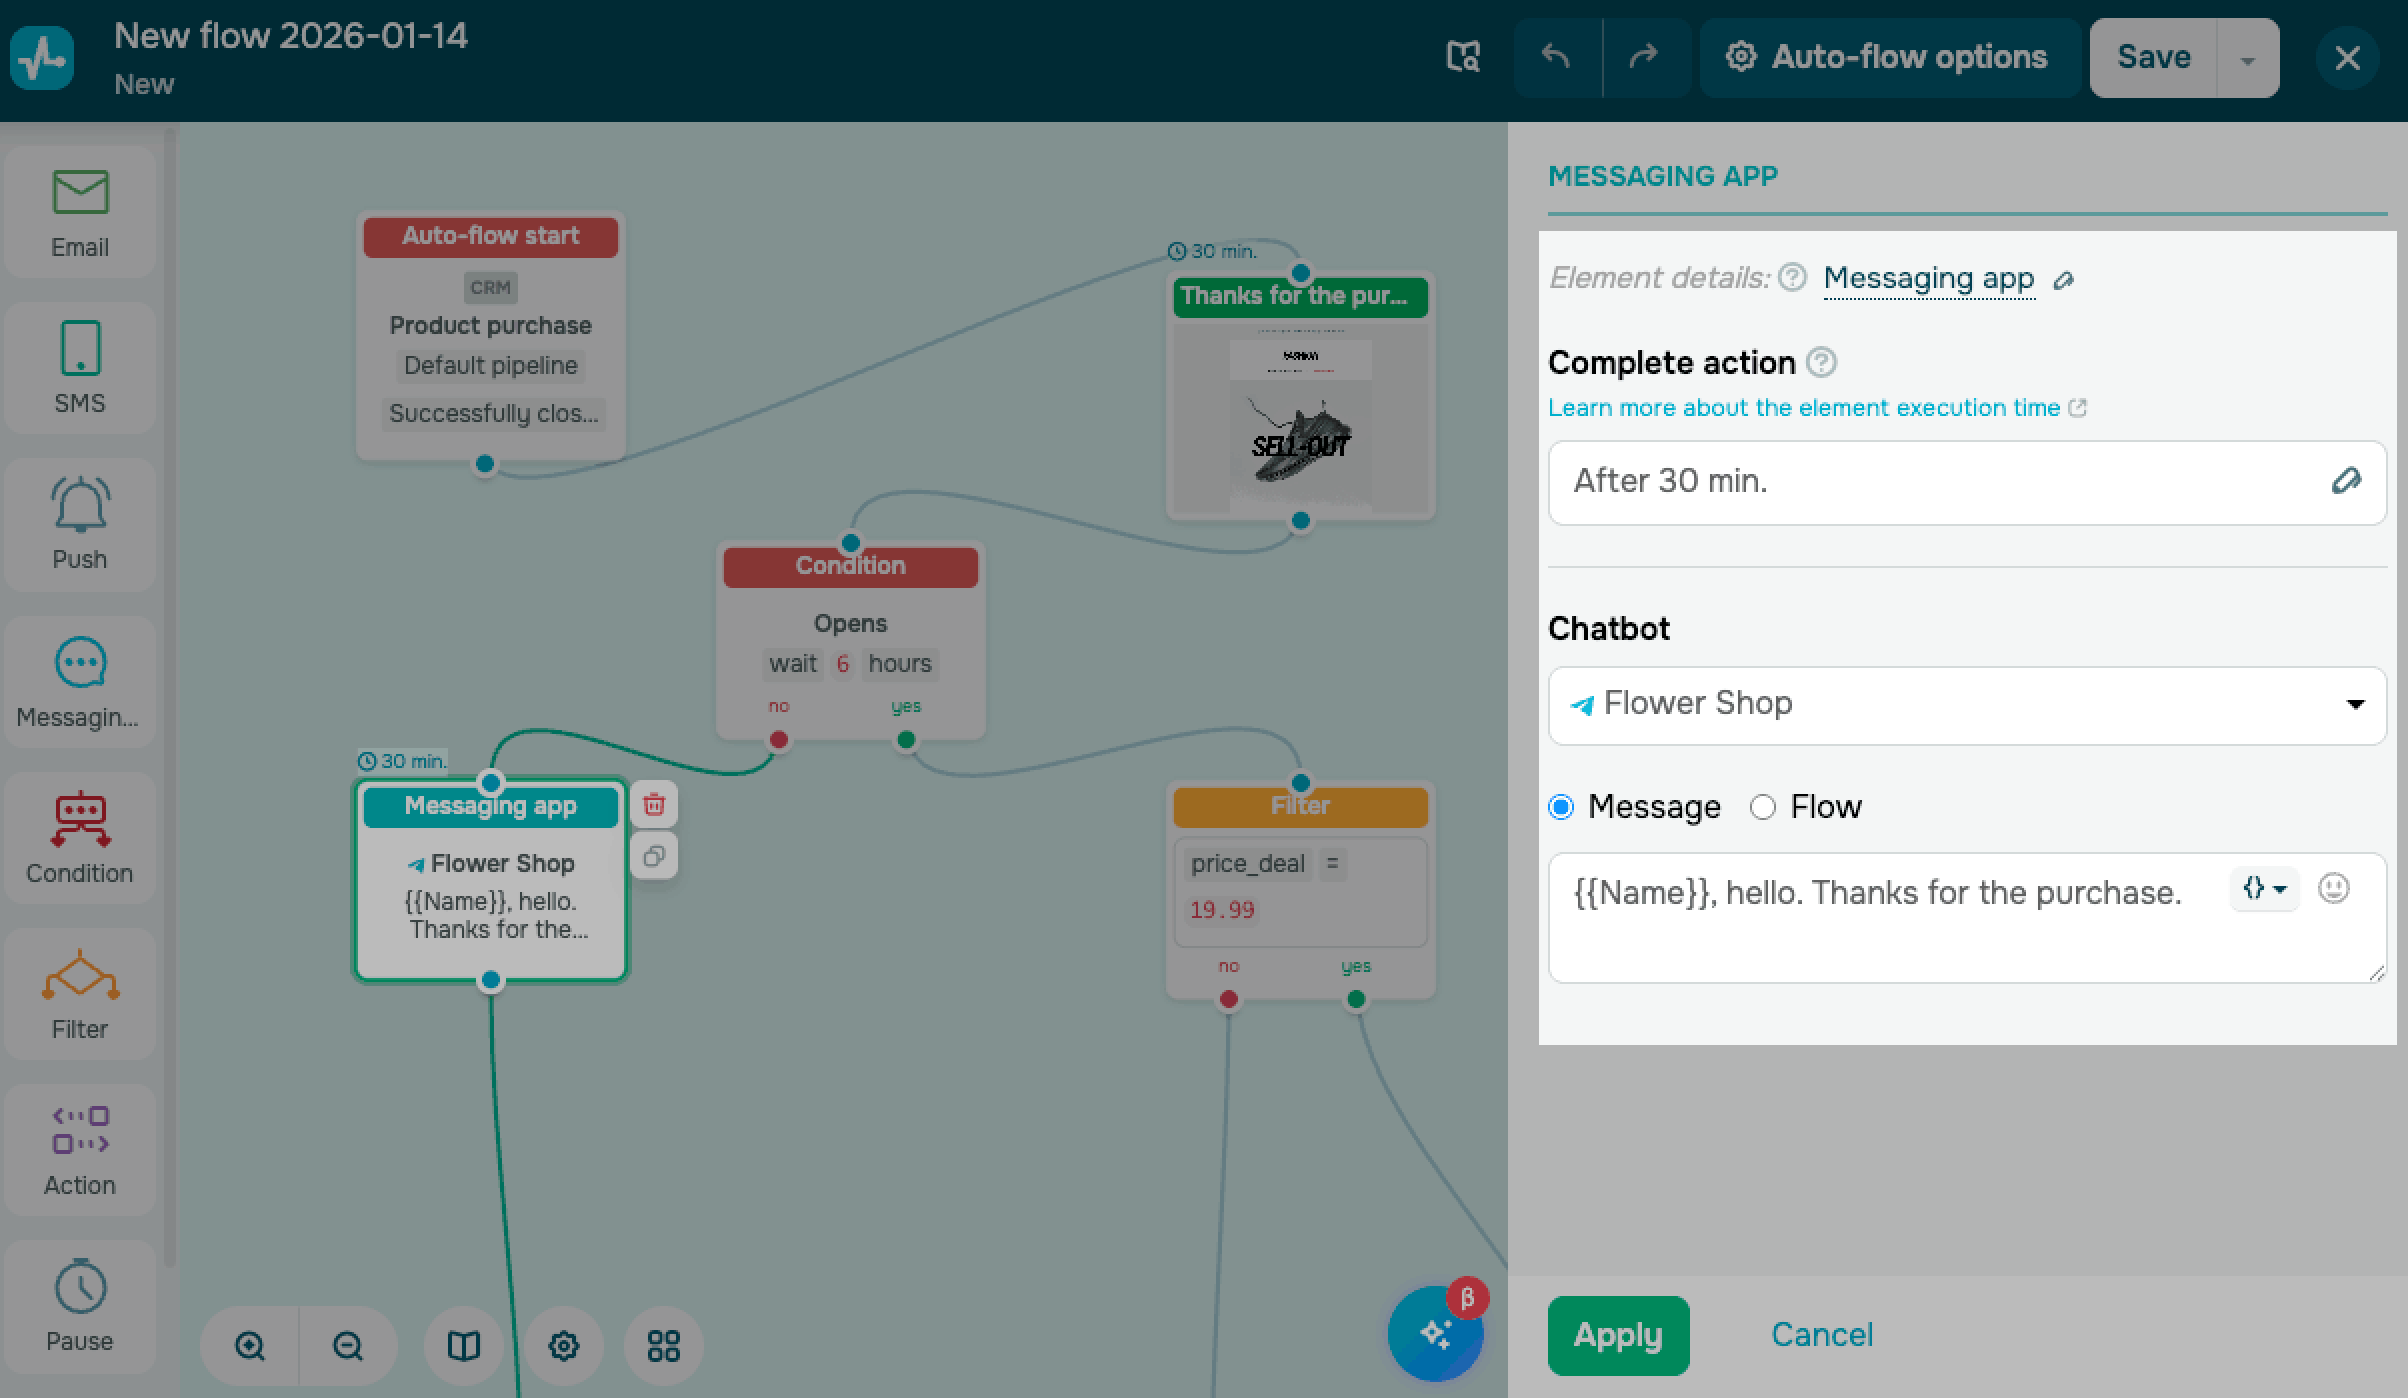
| Messaging app |
Sends chatbot messages or starts a flow on a relevant platform. |
Additional elements
Use other elements to control timing, segment contacts, and branch your flow. Add these elements to personalize your flow and guide contacts:
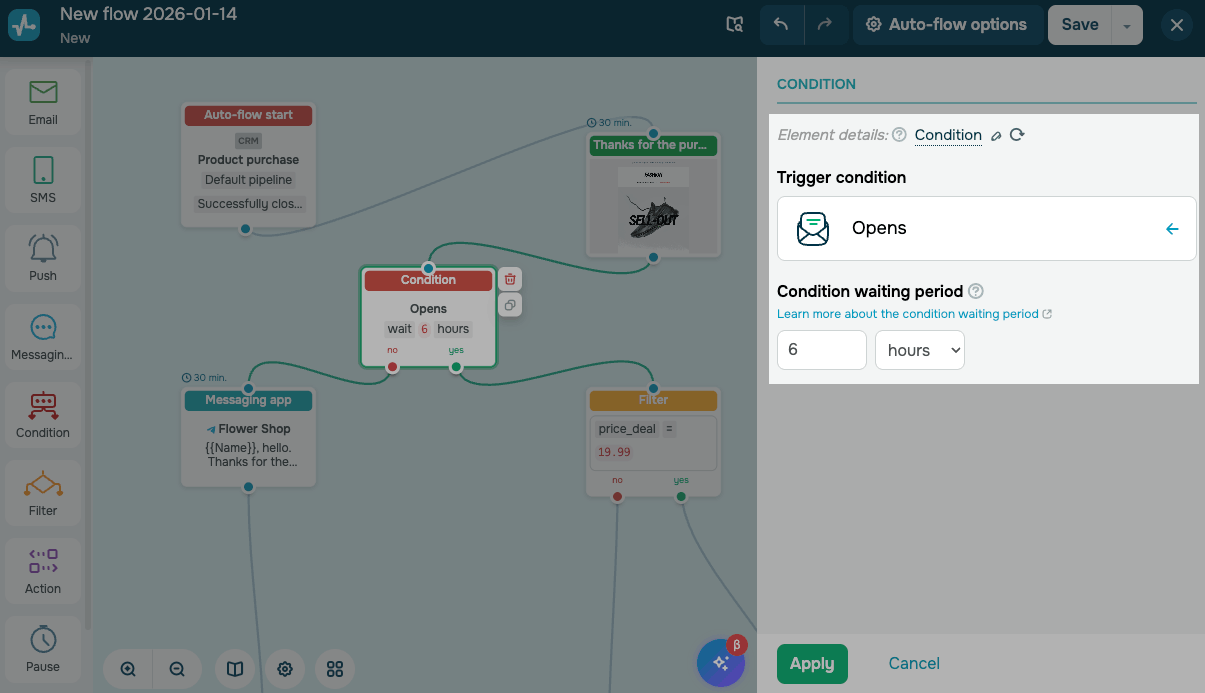
| Condition |
Branches your flow based on contact actions, such as an email open or a click-through. |
| Filter |
Segments contacts by event or mailing list variables, and personal data to send different messages to different groups. |
| Action |
Applies changes in SendPulse tools. For example, you can change data in the Email section or send more notifications to your system. |
| Pause |
Delays contacts and controls when they move to the next element. |
| Goal |
Tracks when a contact completes a target action. For example, you can track when your contacts go through a specific branch to buy a product. |
Save and launch
Once you've finished setting up your flow, click Save and select Save and launch. Your flow will become active.
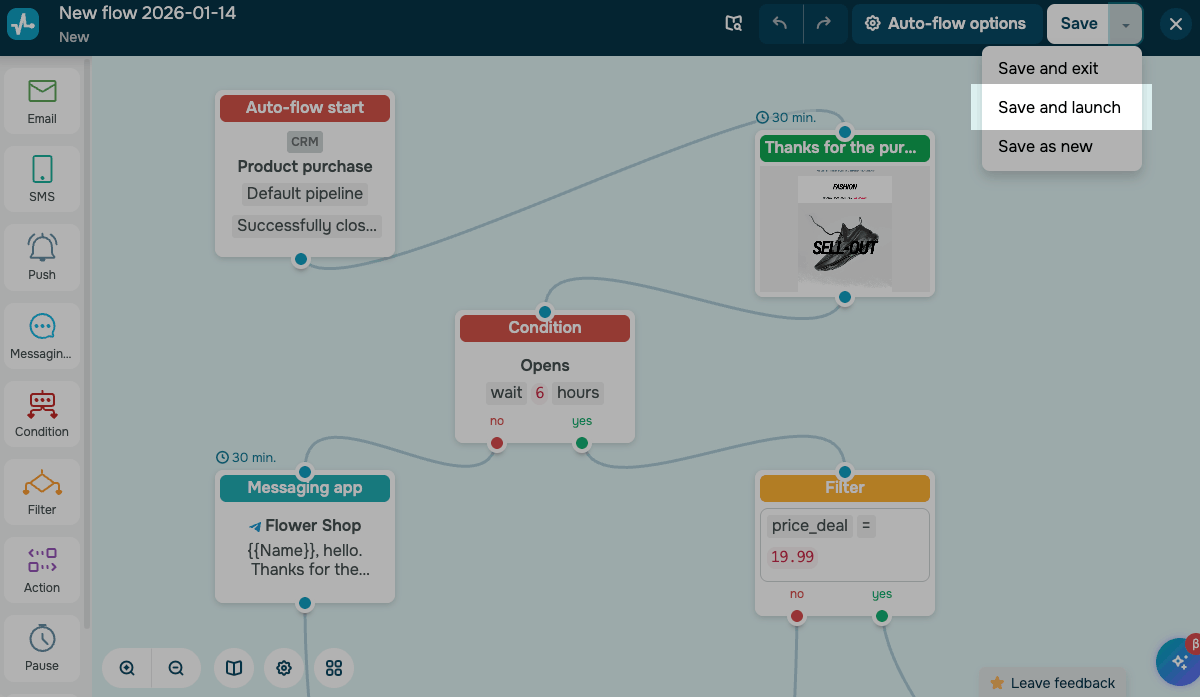
When contacts enter your flow, the start event triggers, and they receive messages based on your timing settings.
Last Updated: 26.12.2023
or