Add a custom domain using Cloudflare
You can add your domain to Cloudflare to customize it more precisely. This will ensure the reliability and security of all your incoming website requests.
In this article, we will talk about how to configure DNS records in Cloudflare and connect an SSL certificate for a secure connection.
Add a website to Cloudflare
If you have already added your domain to Cloudflare, skip this step and carry on with the next one.
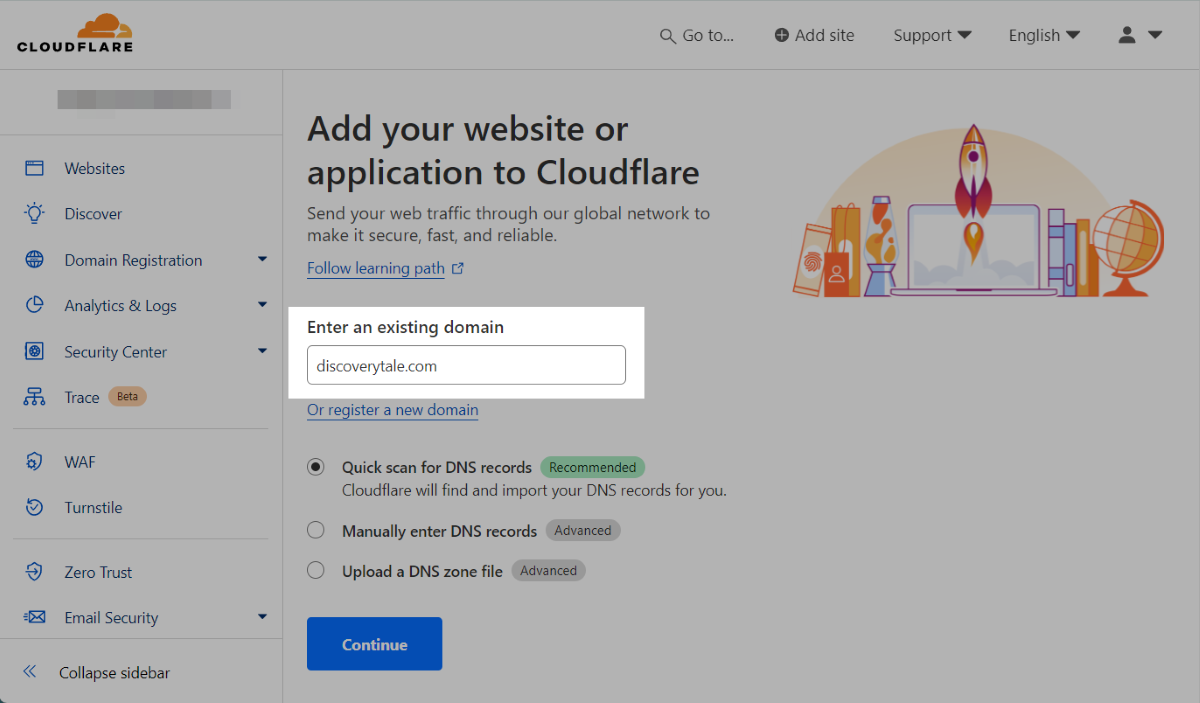
On your Cloudflare account home page, click Add a site. Enter your root domain and click Continue
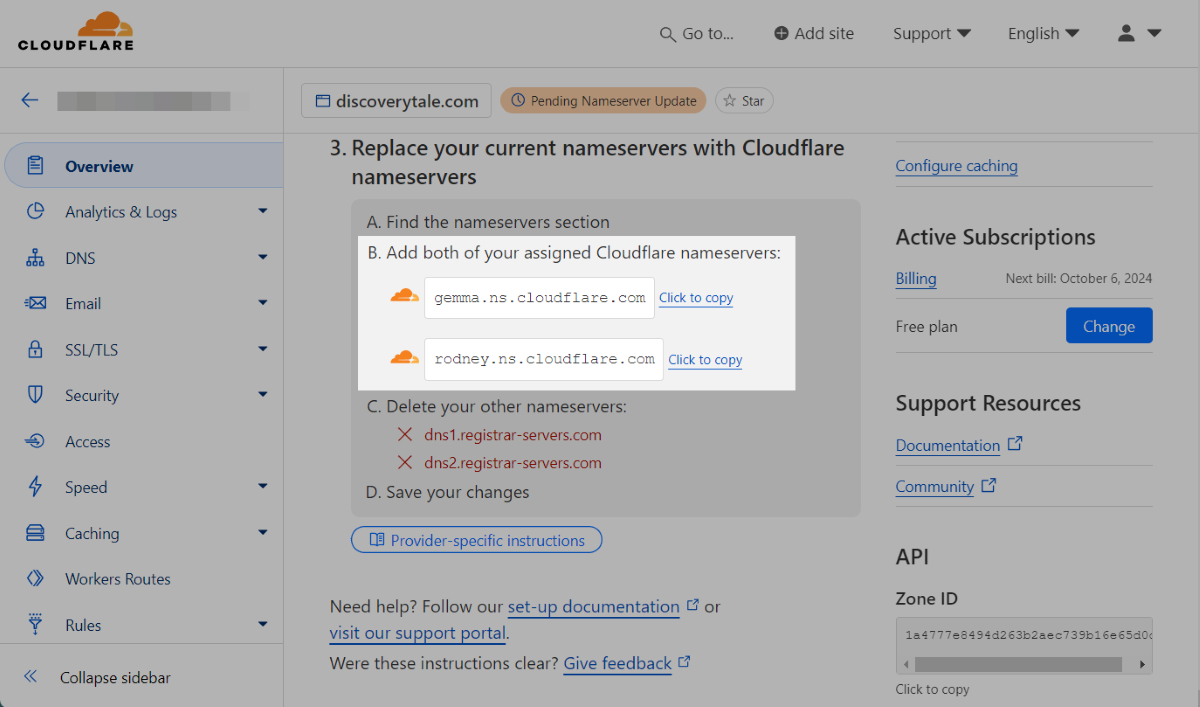
The next step will allow you to:
- Copy nameservers assigned in Cloudflare;
- Go to your registrar and enter the nameservers;
- Disable DNSSEC at your registrar.
Read more: Add a site.
Add a domain to SendPulse
Go to your website settings in the General tab, and click Add domain. Paste your domain address into the field.
Copy your IP address to configure an A record.
Read more: How to add a custom domain to your site.
Add an A record to Cloudflare
To connect your domain, add an A record to your DNS settings.
You can add DNS records only after activating your website as described in Add a website to Cloudflare.
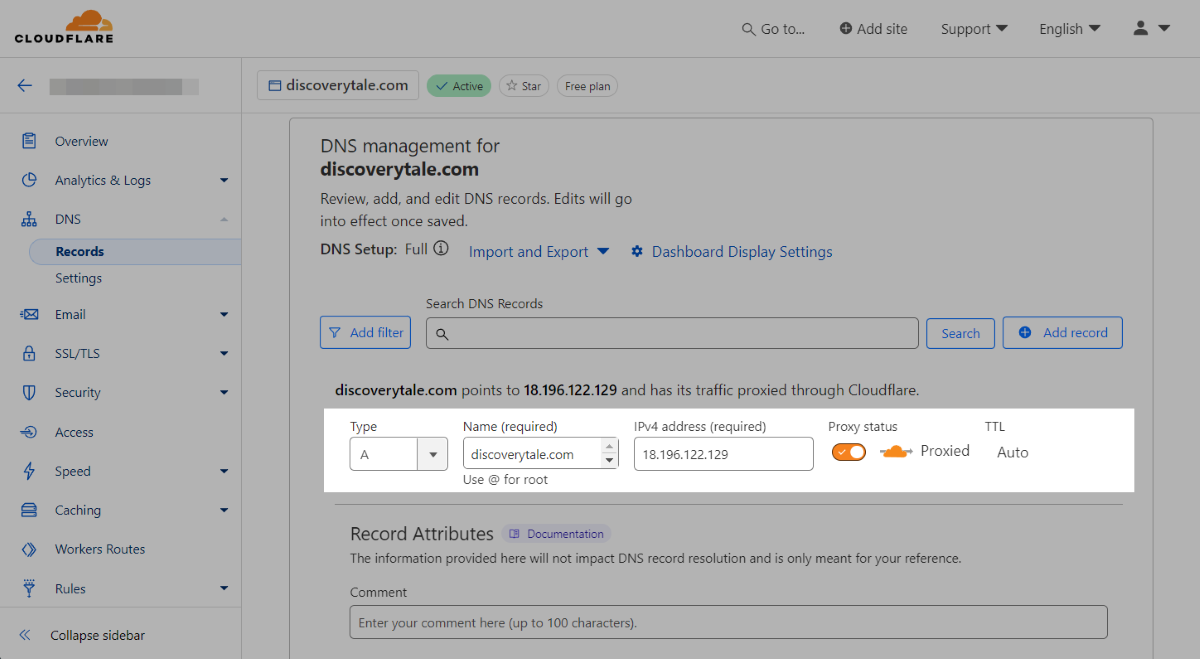
Go to DNS > Records and click + Add record.
In the Type field, select the A record type. In the Name field, enter your domain name. In the IPv4 address field, paste the IP address you copied from SendPulse.
You can also additionally activate a proxy for your entry. We recommend activating a proxy server for your record if you plan to add your own SSL certificate. However, it's best to deactivate it if you want to use SendPulse's SSL certificate.
Once you fill in all the fields, click Save.
Read more: Manage DNS records.
Check your record status
You can check whether an A record has been validated using MxToolbox or Google Admin Toolbox. Follow the link, and paste your domain. Select DNS Lookup from the list, and click the button.
If your records are valid, your published page will be available at the new address.
If you add your domain through Cloudflare, its status in your website settings will remain gray. This happens because the A record check detects Cloudflare’s IP address instead of the SendPulse server’s IP.
Add a certificate
When you add a domain, SendPulse automatically generates an SSL certificate for it.
If you use a SendPulse certificate, follow these steps to update your domain connection settings:
- Deactivate the proxy server when adding an A record to your DNS settings panel;
- Wait until SendPulse generates your certificate. Afterward, your HTTPS domain will become accessible. You can track your certificate status next to your domain address in the General website settings;
- Go back to your A record settings, and activate the proxy server.
You can also add your custom certificate.
Read more: How to connect an SSL certificate to a domain.
Last Updated: 07.11.2024
or