Starting from April 3, all SendPulse users will be able to access test mode to create free email marketing automation campaigns in Automation 360. The trial period has no time limitations, yet with a free plan, you can create up to five events for the flow start and send up to 15,000 emails.
On April 15, we are shutting down the Sequential Automation feature.
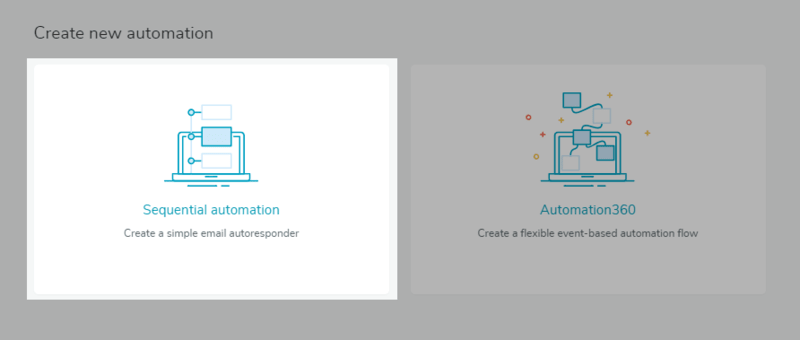 Sequential Automation in SendPulse personal account
Autoresponders which you’ve set up using the old feature will go on being sent to your subscribers, and you will be able to edit them if needed. However, to create a new email series, you’ll need to use Automation 360.
From this article, you’ll learn how Automation 360 functions and how to create an automated email flow. We will also provide you with a list of useful resources, so you can dig deeper into the ins and outs of the feature.
Benefits of Automation 360 for business
According to Benchmark research, email automation campaigns outperform bulk campaigns by 600%. So nailing the new functionality will enable you to be one jump ahead of your competitors and enjoy the benefits listed below.
Advanced email marketing automation
Automation 360 allows you to create series of automated messages which are sent to users based on their behavior in your campaign or events at your website — registration, purchase, or abandoned cart.
You can create any custom event which will allow sending emails with dynamic blocks. It could be an abandoned cart email, abandoned browse, product recommendations, and many more.
Besides, Automation 360 enables you to make email series triggered by a special date — user’s birthday, anniversary with the brand, or a reminder about the expiration of the pricing plan.
You can also segment your subscribers according to their gender, location, content preferences, and other conditions you predefine.
The system allows you to redirect subscribers to other automated series based on their behavior in previous campaigns — opens or click-throughs. For example, if you launched a bulk campaign and a part of your subscribers clicked through the links in it, you can direct them to an email automation flow for more engaged leads.
In addition, Automation 360 enables you to track conversions, so you can effectively cooperate with your leads.
Multiple channels
You can combine email, web push, and SMS in a single flow of triggered messages. Moreover, SendPulse is planning to add an option of sending campaigns to Facebook Messenger with Automation 360.
A look at Automation 360 interface
In the left panel, you can find the following blocks: “Email,” “Push,” “SMS,” “Filter,” “Condition,” “Action,” “Goal.” Check out our knowledge base to learn more about the functionality of these blocks. You can drag the blocks to the working area and assign the settings for each block in the right panel. This way, you create the conditions and the sequence of messages you’ll send in the flow.
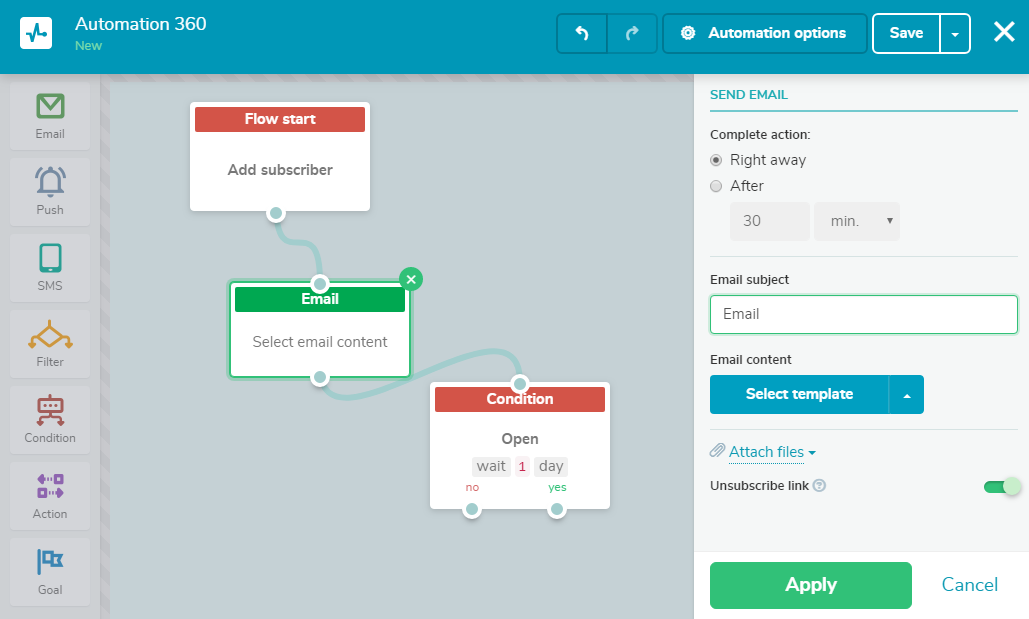 Automation 360 interface
How to create a sequential email flow in Automation 360
Step 1. Set up the flow start
Choose the condition to start the flow from the drop-down list of events in the right panel. We chose “Add subscriber” to trigger our automated series.
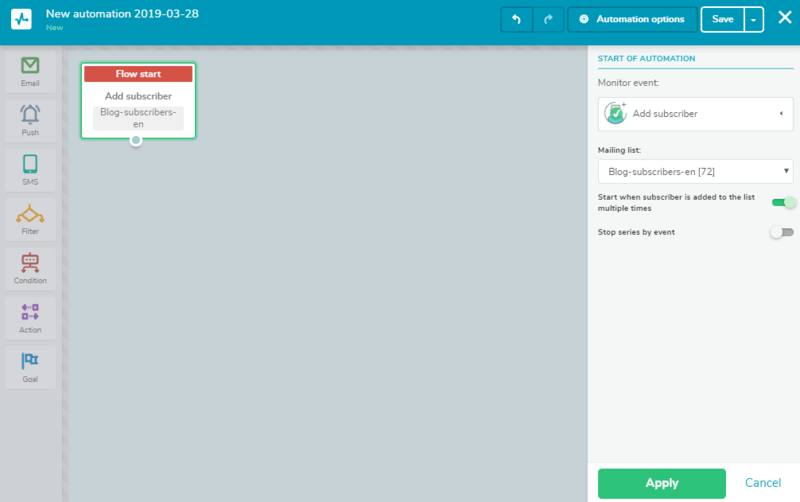 Flow start in Automation 360
You can create a new custom event that will start the automated email flow or manage the events and transmit them from your system to SendPulse.
There is also a list of predefined events for the flow start:
- Add subscriber. The flow is sent after a new user has been added to the indicated mailing list. Email addresses can be added in various ways: through a subscription form, integrations with third-party apps, REST API, or copying the segment of addresses from another mailing list.
- Special date. This condition can be used to start a flow dedicated to a user’s birthday, any holiday, or a service reminder. Your mailing list should contain the date variables which will trigger the start of the flow.
- Change variable. You can use this event to send an email series if the variable in the mailing list has changed. Say, a user subscribes to a particular webinar. Save the date of the webinar as a variable for this mailing list. Once the date comes, the flow dedicated to the webinar will be activated.
- Contact webhook. Email subscribers who have previously been engaged with your bulk campaigns. For example, you have invited users to your tutorial through a bulk email campaign. A part of subscribers has opened the email, which means they are interested in your offer. In case you’ve set up a contact webhook which starts provided the subscribers open the email, a premade flow of messages will be sent to those subscribers. Such flow can contain emails for more interested leads — information about the speakers, the event program, or the procedure of obtaining the certificate.
Step 2. Add a necessary number of messages to the flow
After you’ve predefined the event which will trigger the flow, you can set up all messages within it. Drag necessary blocks from the left menu to the working area and connect them sequentially.
We’ve created a flow using emails, SMS, and web push notification. You can send web push notifications if users have previously subscribed to them and add “SMS” block provided the selected mailing list contains the subscribers’ phone numbers.
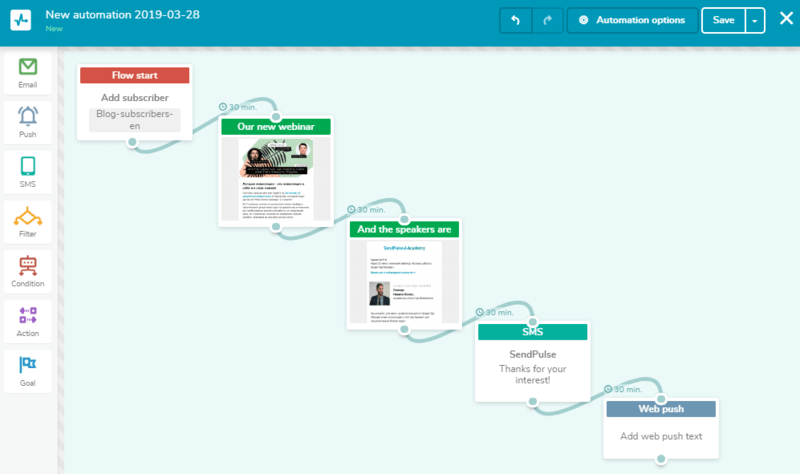 Automated flow with multiple channels created with Automation 360
Step 3. Choose a template and specify sending time
You can schedule each message of the flow using the settings in the right menu. Specify the sending time and subject line, and choose a template. There is also an option to attach a file. This way you should set up each message in the flow.
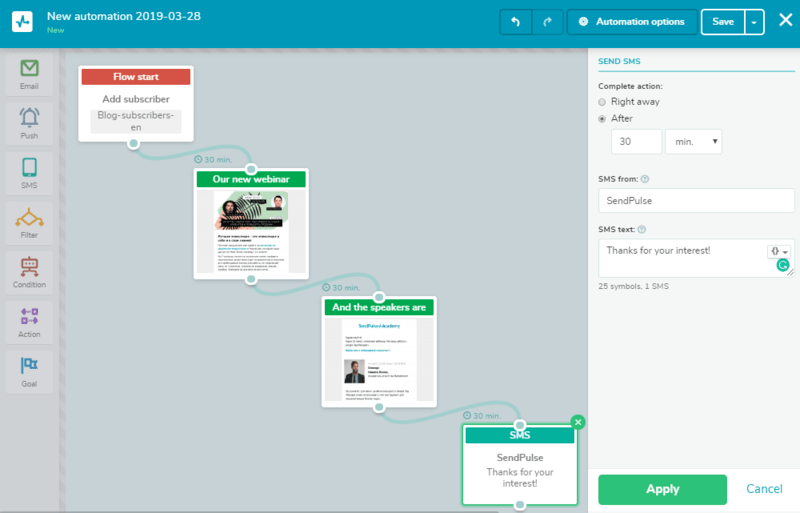 Settings for blocks of the automated flow
And you’re done! Automated messages will be sent according to the conditions you have predefined; you’ll just have to track their effectiveness.
Useful content to rely on while setting up automated messages
We have created a simple example of the automated flow. Check out our video tutorials and articles to dig deeper and use Automation 360 to create more complex flows and upgrade your business.