Automation elements
With the help of flow automation, you can create custom scenarios and send out a series of emails to each customer branch triggered by any possible event and based on customer data. All of your flow elements can be dragged to the working field by left-clicking on them.
In this article, we will talk about the elements you can add to your automation flow.
Start
The first element is Start, and it triggers the flow. You can select and monitor the following events:
- adding a subscriber to your mailing list;
- special date;
- contact webhook;
- changing the variable value;
- creating a deal or changing the deal stage;
- work progress with students;
- event in your system.
Check whether you want the series stop to be triggered by an event, and select this event. You can also count the series stop as a conversion.

After setting up the trigger, select the first element in your flow. To begin your flow with an element, connect it to Start.
Using the Email element, you can send an email to the user, for example, about product purchase or about new products in stock.
Drag the Email element into the editor field. Specify the start message’s sending time, email subject and preheader, and select your template. Additionally, you can attach files and disable the unsubscribe link for transactional emails.
Learn more: How to create an automation triggered by an event and How to send a message triggered by a CRM event.

Push
With the Push element, you can send browser notifications to subscribers with sales promotion, breaking news alerts, or online events notifications.
We recommend using push notifications in cases where the user did not read the sent email and delivering the information using another communication channel.
Drag the Push element, and select the recipients of your message. Specify the notification sending time. Enter the notification title, text, and link. Specify the push lifetime. Additionally, you can replace the standard push notification image.

SMS
Using the SMS element, you can add the SMS message to your automation. Use this block to send messages about customers’ order delivery or the delivery time change.
Drag the SMS element into the editor field, and specify the start message’s sending time. Enter the SMS sender's name and SMS text. You can personalize the message text and insert more variables.
The contact must have a phone number for you to send a message. Contacts with only an email address will not receive the message.

Messenger
Using the Messenger block, you can send messages to the subscribers of the selected chatbot or start a specific flow for them. These messages can be used to send a bonus to an order or a gift for a special date.
The recipients must be subscribed to the chatbot from which you will send them a message and also have an email address or phone number in the Audience tab of your chatbot.
Drag the Messenger element into the editor field, and specify the start message’s sending time. Select the chatbot, and choose an action: send a message or start a flow.

Viber
With the Viber element, you can send service messages to users.
Drag the Viber element into the editor field, and specify the start message’s sending time. Select your sender and message template. Add your variables from the list, and set the message lifetime.

Filter
Using the Filter element, you can filter your contacts by matching the specified conditions and create personalized and relevant automations.
For example, you can create an automation exclusively for men or women. Set the filter to send messages to contacts living in a certain place of residence, then your automation will be received by the contacts living in the city of London, Los Angeles, New York, etc.
Drag the Filter element, select the time, variable, and filter condition. Specify the value of the variable.
On the right, you can create a new variable. To do this, click Add, enter a new name, and select the variable type.

Condition
Using the Condition element, you can build an automation flow based on the subscriber’s actions: opening or not opening an email, clicking on the link in the email or not clicking. Also, you can track student progress updates in the online course builder (EDU).
If user events, such as Registration, Purchase, or others, were transmitted, the automation will be sent according to the conditions set: whether an order was placed or not, whether payment was made or not, etc.
Drag the Condition element, and set the time during which the system will wait for the subscriber’s action.
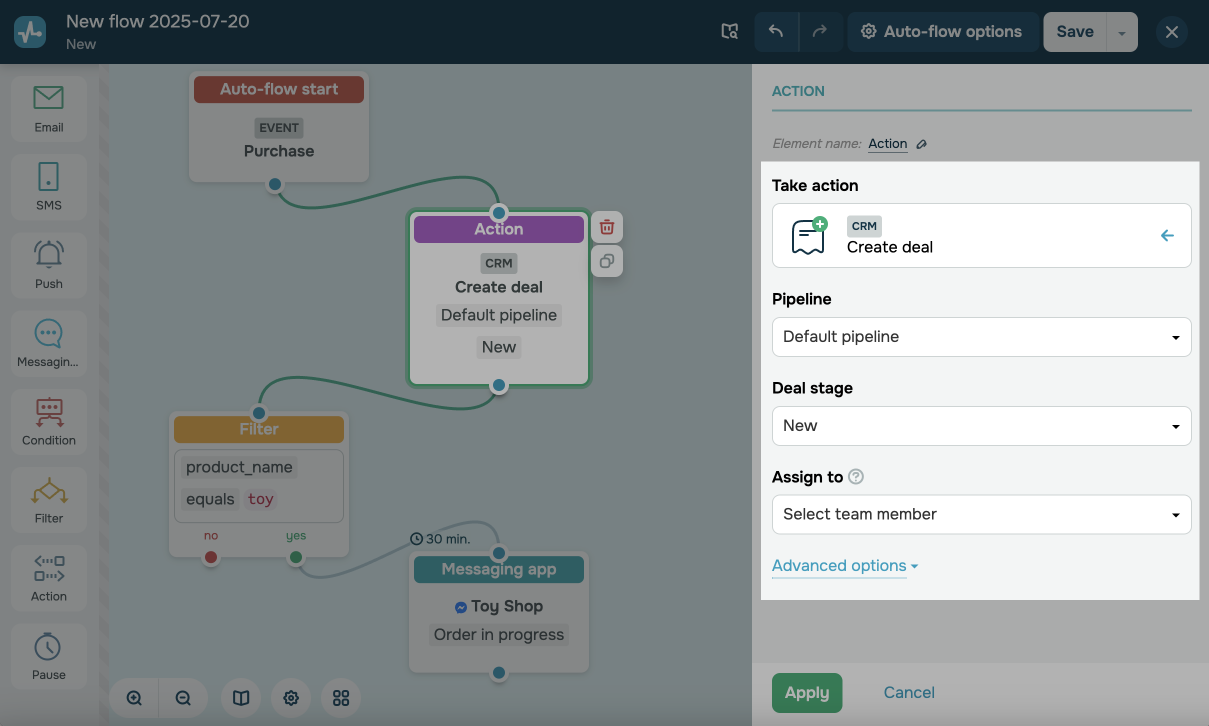
Action
With the Action element, you can do the following:
- edit contact data in the bulk email service;
- edit deal and contact data in the CRM system;
- edit student statuses in the online course builder (EDU);
- conduct A/B tests;
- send notifications to your email address;
- send notifications to your system with webhooks.
Drag the Action element to your workspace, and select an action.

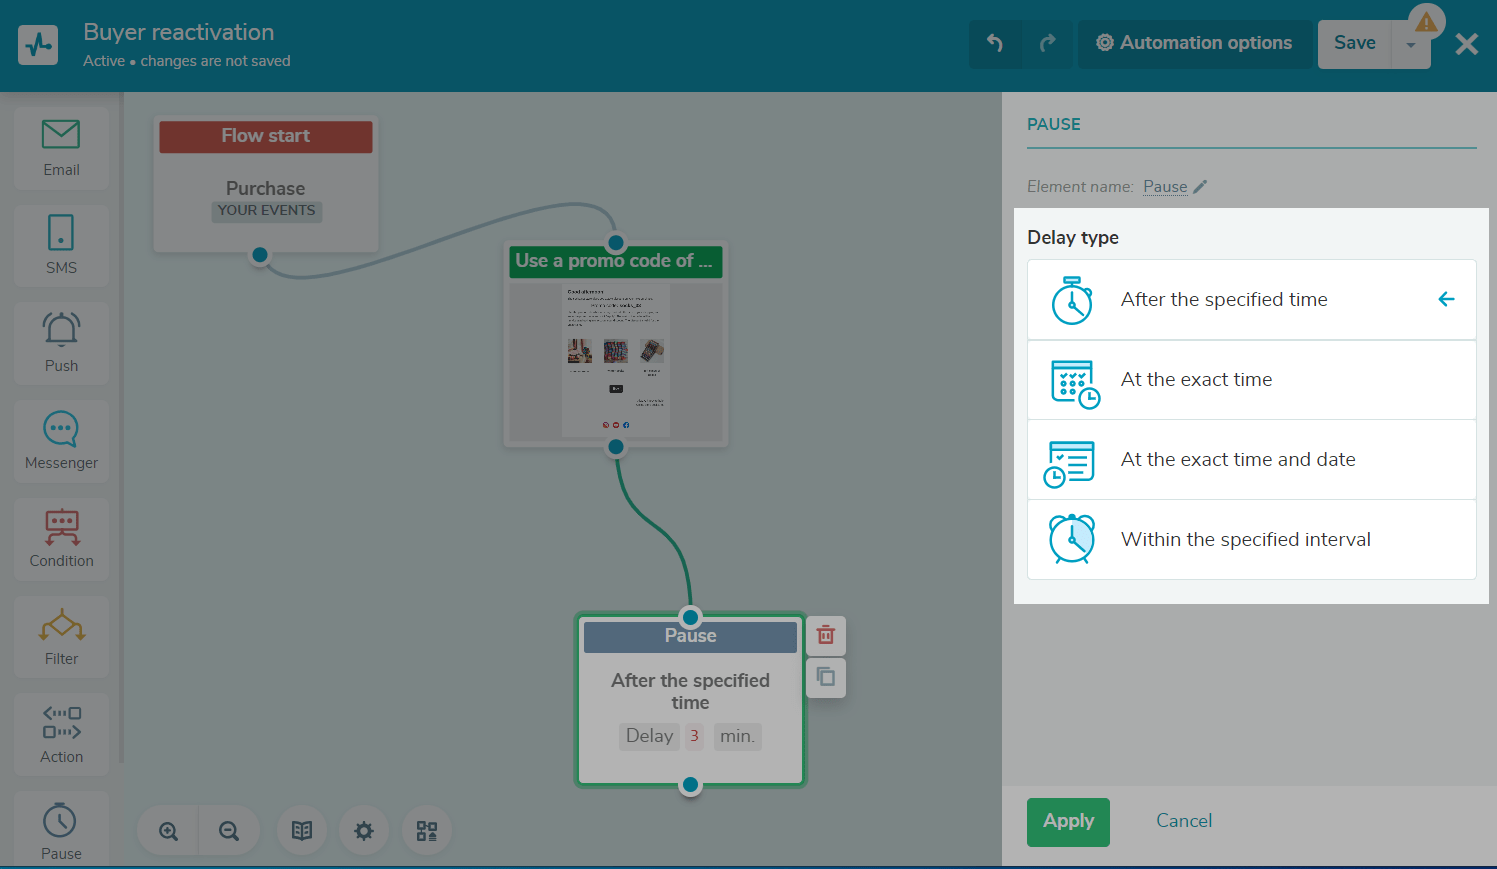
Pause
Using the Pause element, you can pause contact progression through your flow until a specific time, date, or time interval or set a period of time during which contacts will not receive messages.
Drag the Pause element to your workspace, and select a pause type (after the specified time, at the exact time, at the exact time and date, or within the specified time interval). Next, set your time, date, or time interval.
All pause types operate based on the time zone set in your account.

Goal
With the help of the Goal element in your automation, you can indicate the goals achieved. Add the Goal element after the tracked event.
For example, you need to create an automation, the purpose of which is to sell a tour to Spain. If you receive the Purchase event and the contact falls into the Goal element and the Yes branch, the goal will be achieved, and a thank-you email will be sent to the subscriber.
Learn more: How to Set Up a Conversion Count.
After reaching the goal, you can stop the series and no longer send messages in this flow. To do this, check the box Stop series for subscriber if goal is triggered.

Last Updated: 09.09.2024
or