How to verify email addresses
With SendPulse, you can check a single email address or upload a list of addresses from a file, as well as check the entire existing mailing list. This process allows you to confirm that an email address is active and helps you avoid sending campaigns to incorrect or inactive accounts, which can damage your sender reputation. Let's learn about each verification method in more detail.
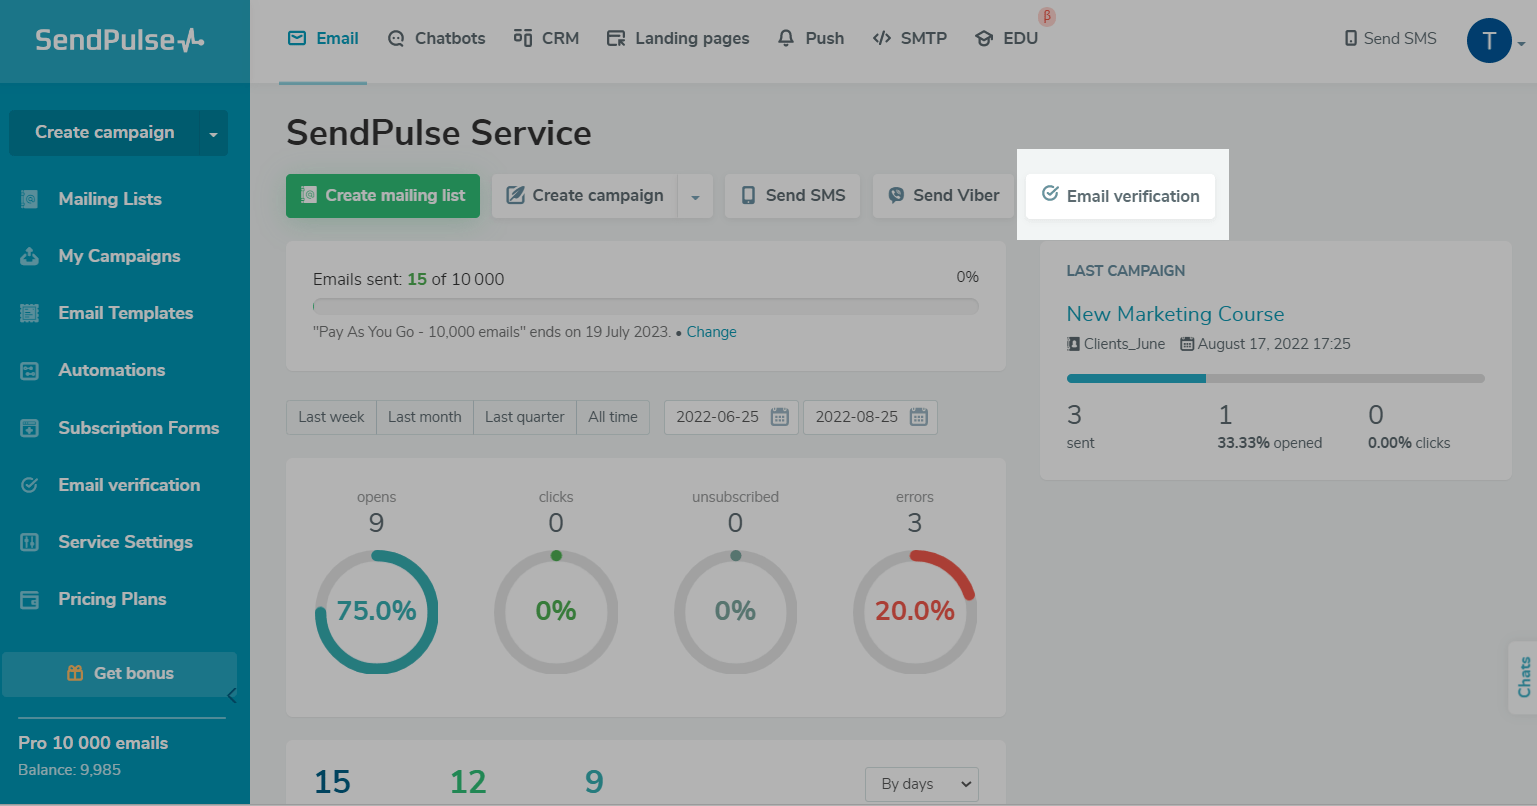
To validate the email addresses on your mailing list, go to Email section and click Email verification.

Checking a single email address
This method is useful if you need to add one or several new addresses to a previously verified mailing list — you don’t have to check the entire list again.
To check one email address, click New verification.

Go to the Verify email tab, enter your email address, and click Verify.

Checking an existing mailing list
You can also check any previously created mailing lists. Go to the Verify mailing list tab, select the mailing list from the drop-down menu, and click Verify.

Checking a mailing list from a file
You can also check a list of email addresses by uploading a file from your device in TXT, CSV, XLS, or XLSX format. Go to Upload mailing list tab, select the file and click Verify.

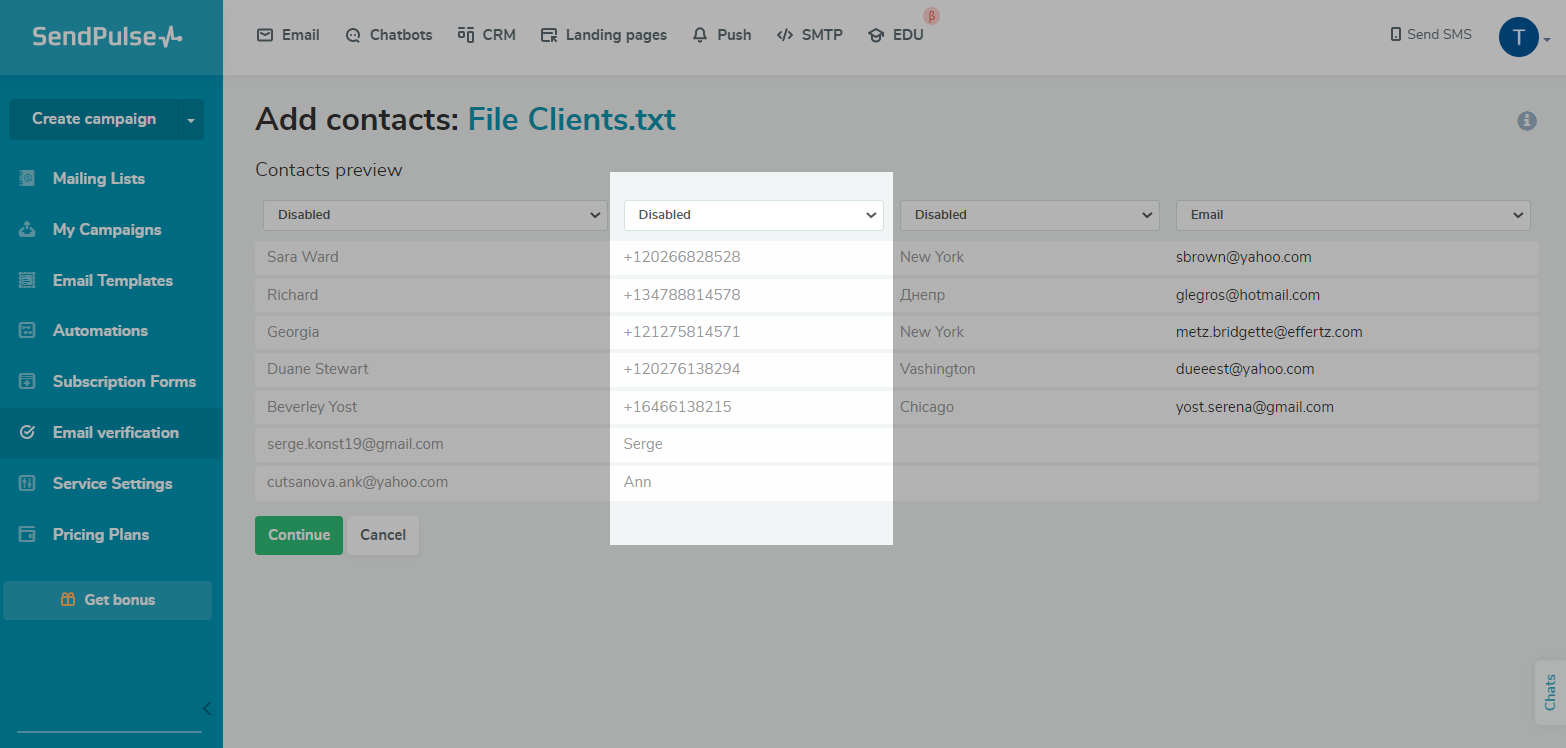
While uploading the file, you can create variables that will be added to the mailing list created after verification. This can be done if your file includes information that you have collected about your users, such as their name, age, phone number, etc.
You can use these variables to personalize your future campaigns. Learn more about why you need custom variables and how to work with them.

Click Continue.

Click To verification history to see the results.

After verification, you will receive a mailing list with variables and validation statuses, which will be displayed opposite each address. Now you can filter valid email addresses and send emails to them.

Rechecking the mailing list
Every verification in the service is dated.

Adding unverified email addresses to a previously verified book increases your chances of having inactive email addresses once again. This can reduce your sender reputation, even though you have a mostly verified mailing list. It only takes a couple of bad addresses to start causing problems.
Thus, it is important to pay attention to when you last checked your mailing list and run a second check. A good rule of thumb is to recheck your mailing list anytime you have a large influx of new subscribers.
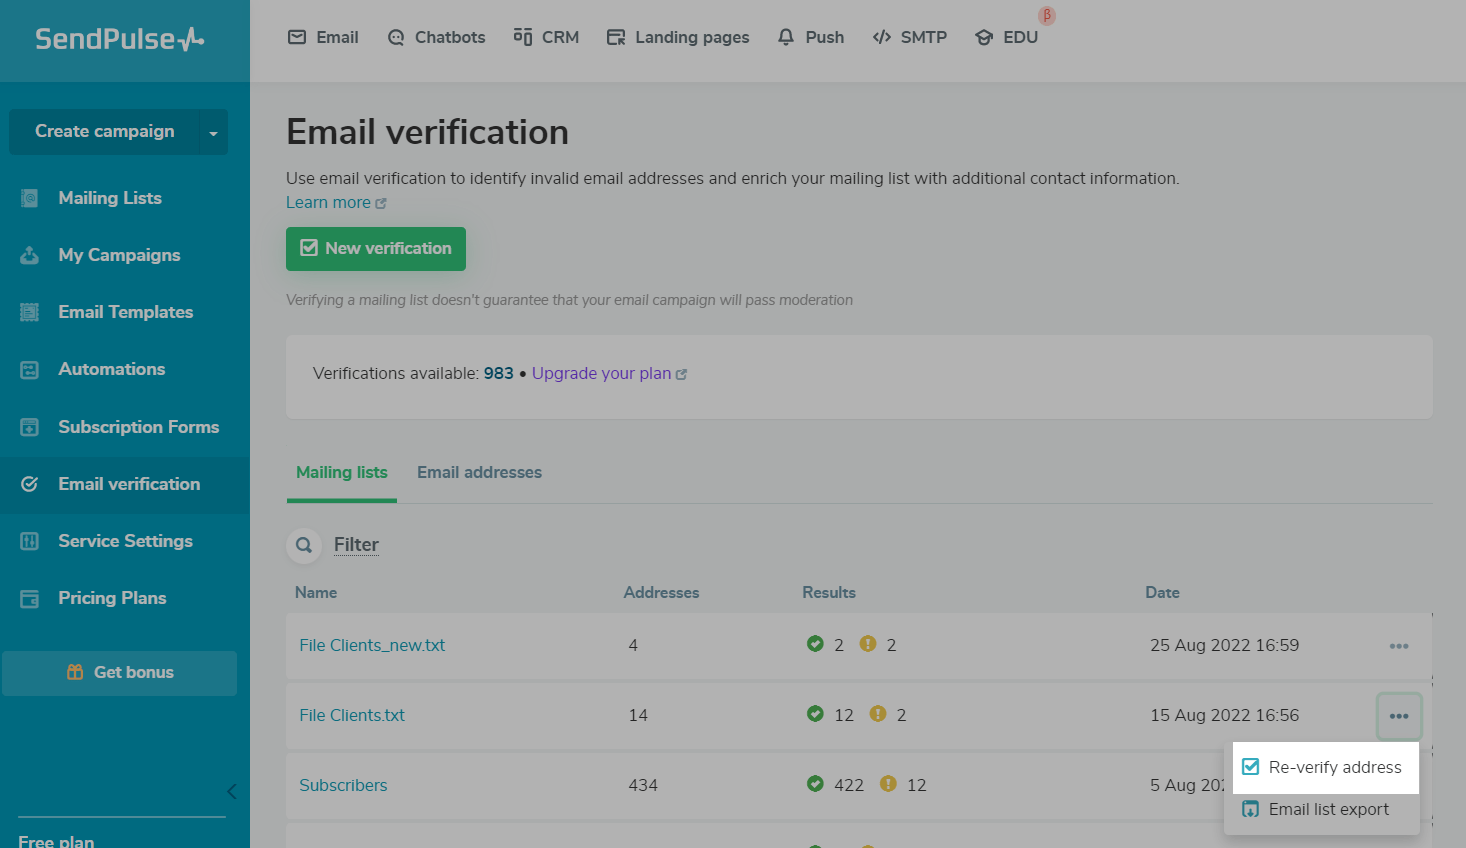
Go to the My Verifications menu, find your mailing list, and click Re-verify address in the context menu.

Checking a single email address added to a verified mailing list
If you do not want to recheck an entire mailing list, use a single email address check.
To do this, navigate to the Mailing list tab and choose the mailing list containing the desired email address. Find the unverified addresses marked with a grey mark. In the context menu of the address, click Verify contact.

For more information about the statuses that are assigned to email addresses after validation, see the article How to Interpret Email Address Verification Results.
How to verify your mailing list
Go to the Email > Mailing Lists.
If your mailing list has been updated, click on the arrow icon next to its name.

You can also reverify your email addresses in any mailing list. Click the three dots menu, and select Verify mailing list.

Last Updated: 02.01.2024

or