Manage student groups
You can create a student group and assign an instructor to it within your course. This can help you segment students by their preferences, skill levels, or pricing plans.
In this article, we will talk about how to create student groups and assign instructors to them.
Create a group
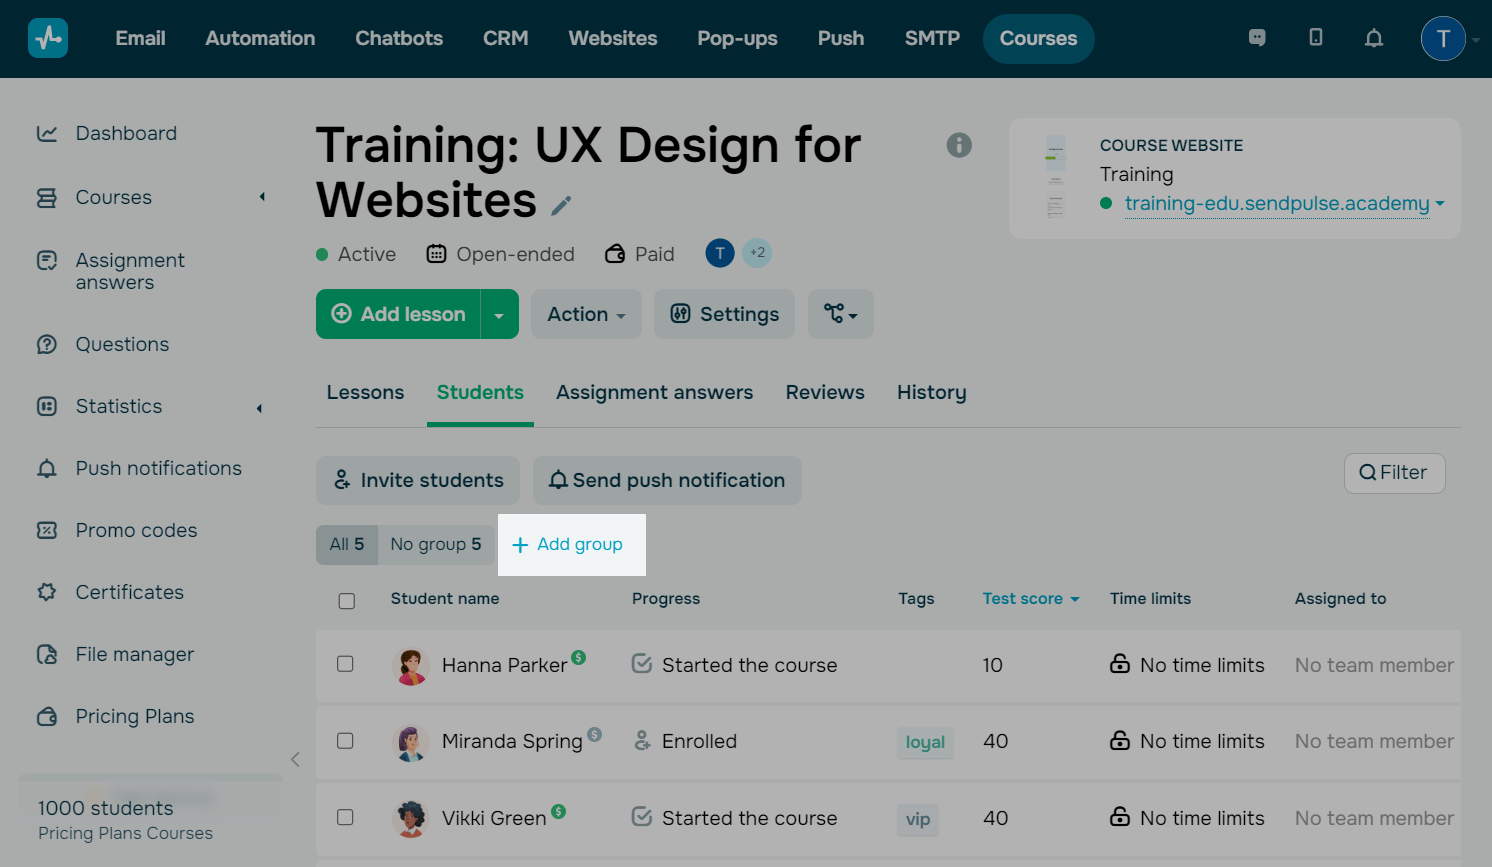
Go to your course, select the Students tab, and click Add group.
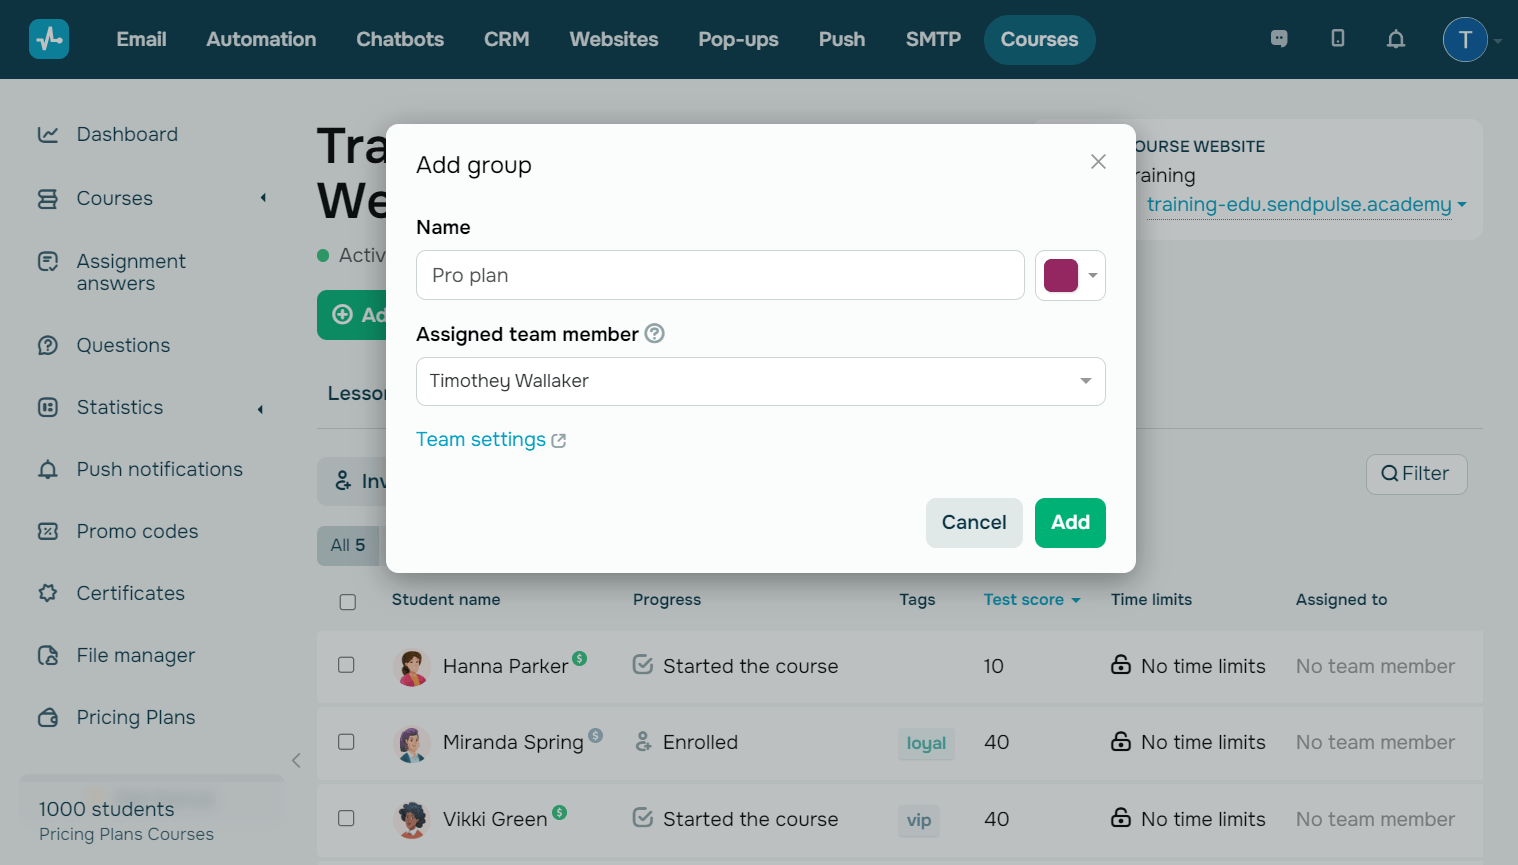
In the modal window, type in your group name in the Name field, and select a group color.
We recommend you select dedicated colors for all your groups so that you can easily find them even if some group names match.
In the Assigned team member field, select an assigned team member from the dropdown list.
This list includes users whom you added to your account in the Team section and gave access to Courses.
Add students to your group
You can add course students to a group individually or in bulk.
To add a single student, click the three dots next to their name, and select Move to group. Select a group, and click Move.
If you need to add multiple students at once, select them from the list, and click Move to group in the panel that appears.
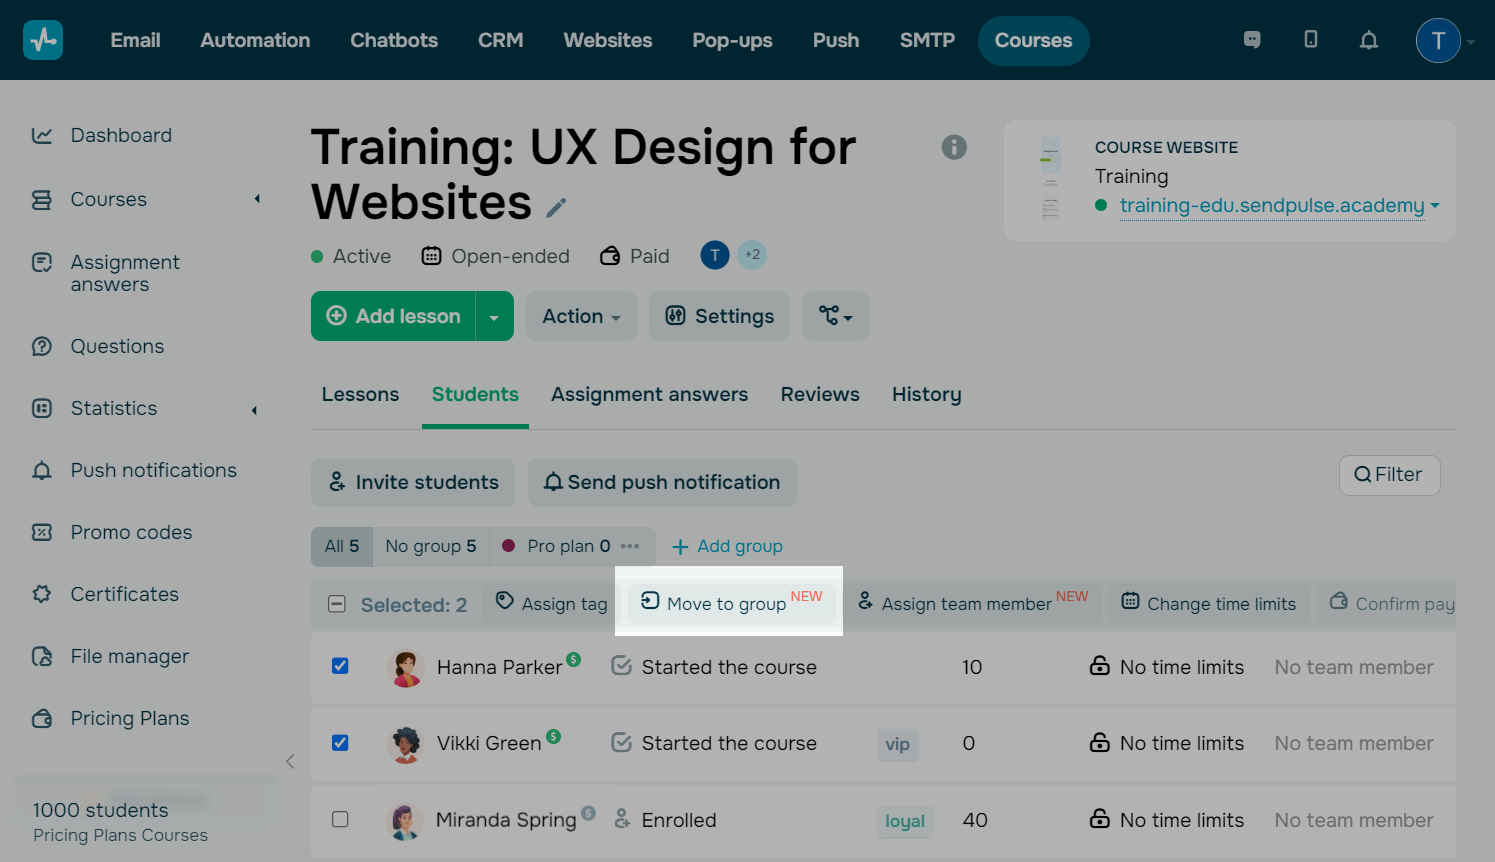
In the modal window, select a group from the dropdown list, and click Move.
If a student is ungrouped or is already in another group, they will be added to the group you've selected.
Manage groups
Once you create a student group, you will see a counter showing the total number of course students, the number of ungrouped students, and the number of grouped students, along with their group names.
In the list of students, the Assigned to column shows instructors assigned to students (no team member or an instructor’s profile picture). Hover over an assigned team member to see their name and group name.
To change your group settings, click the three dots next to the counter, and select Edit. In the modal window, you can change your group’s name and color and reassign it to another team member. Click Save to apply your settings.

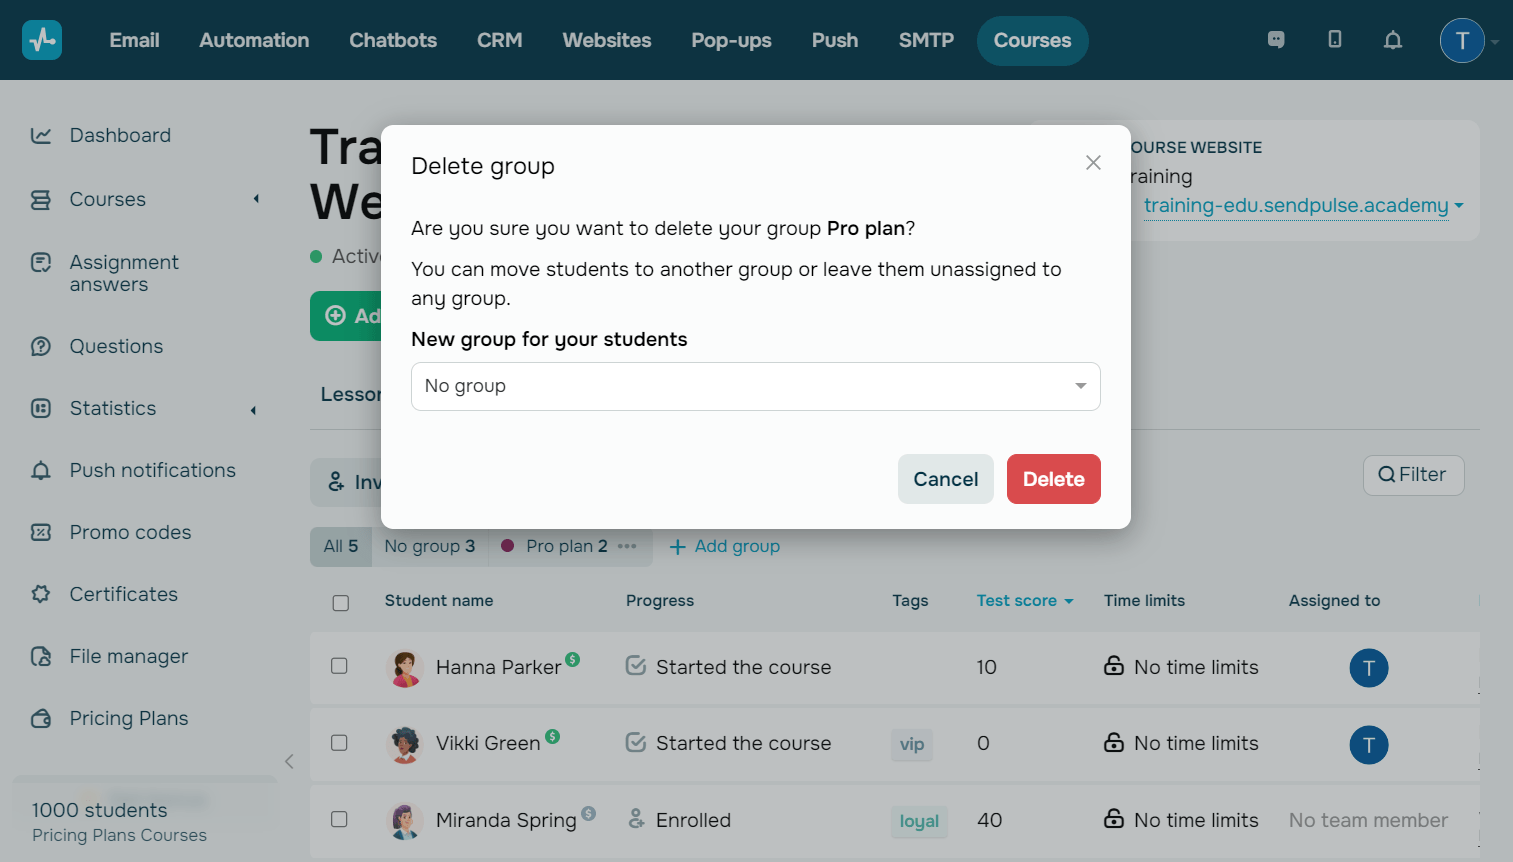
To remove a group, click the three dots next to the counter, and select Delete. In the modal window in the New group for your students field, select what to do with students from this group:
| No group | Students remain in the Students tab without a group and an assigned instructor. |
| Transfer to another group | Students are moved to another group in this course. Select a group from the dropdown list. |
Once you select an action, click Delete.
To filter students by group, click Filter, and select a group from the list in the Group section. Click Apply.
A student may have multiple assigned instructors, for example, one from a group and another one assigned individually. This means that both of these instructors will see this student’s data.
Last Updated: 17.04.2024
or