Set up fields autofill
You can transfer additional data when a user submits a pop-up form from a local browser storage or from your system via API.
Let's take a look at how to create a variable and link it to a pop-up field.
Add a variable
Select a project where you need to transfer data. Go to Settings > Custom variables, and click Add variable.
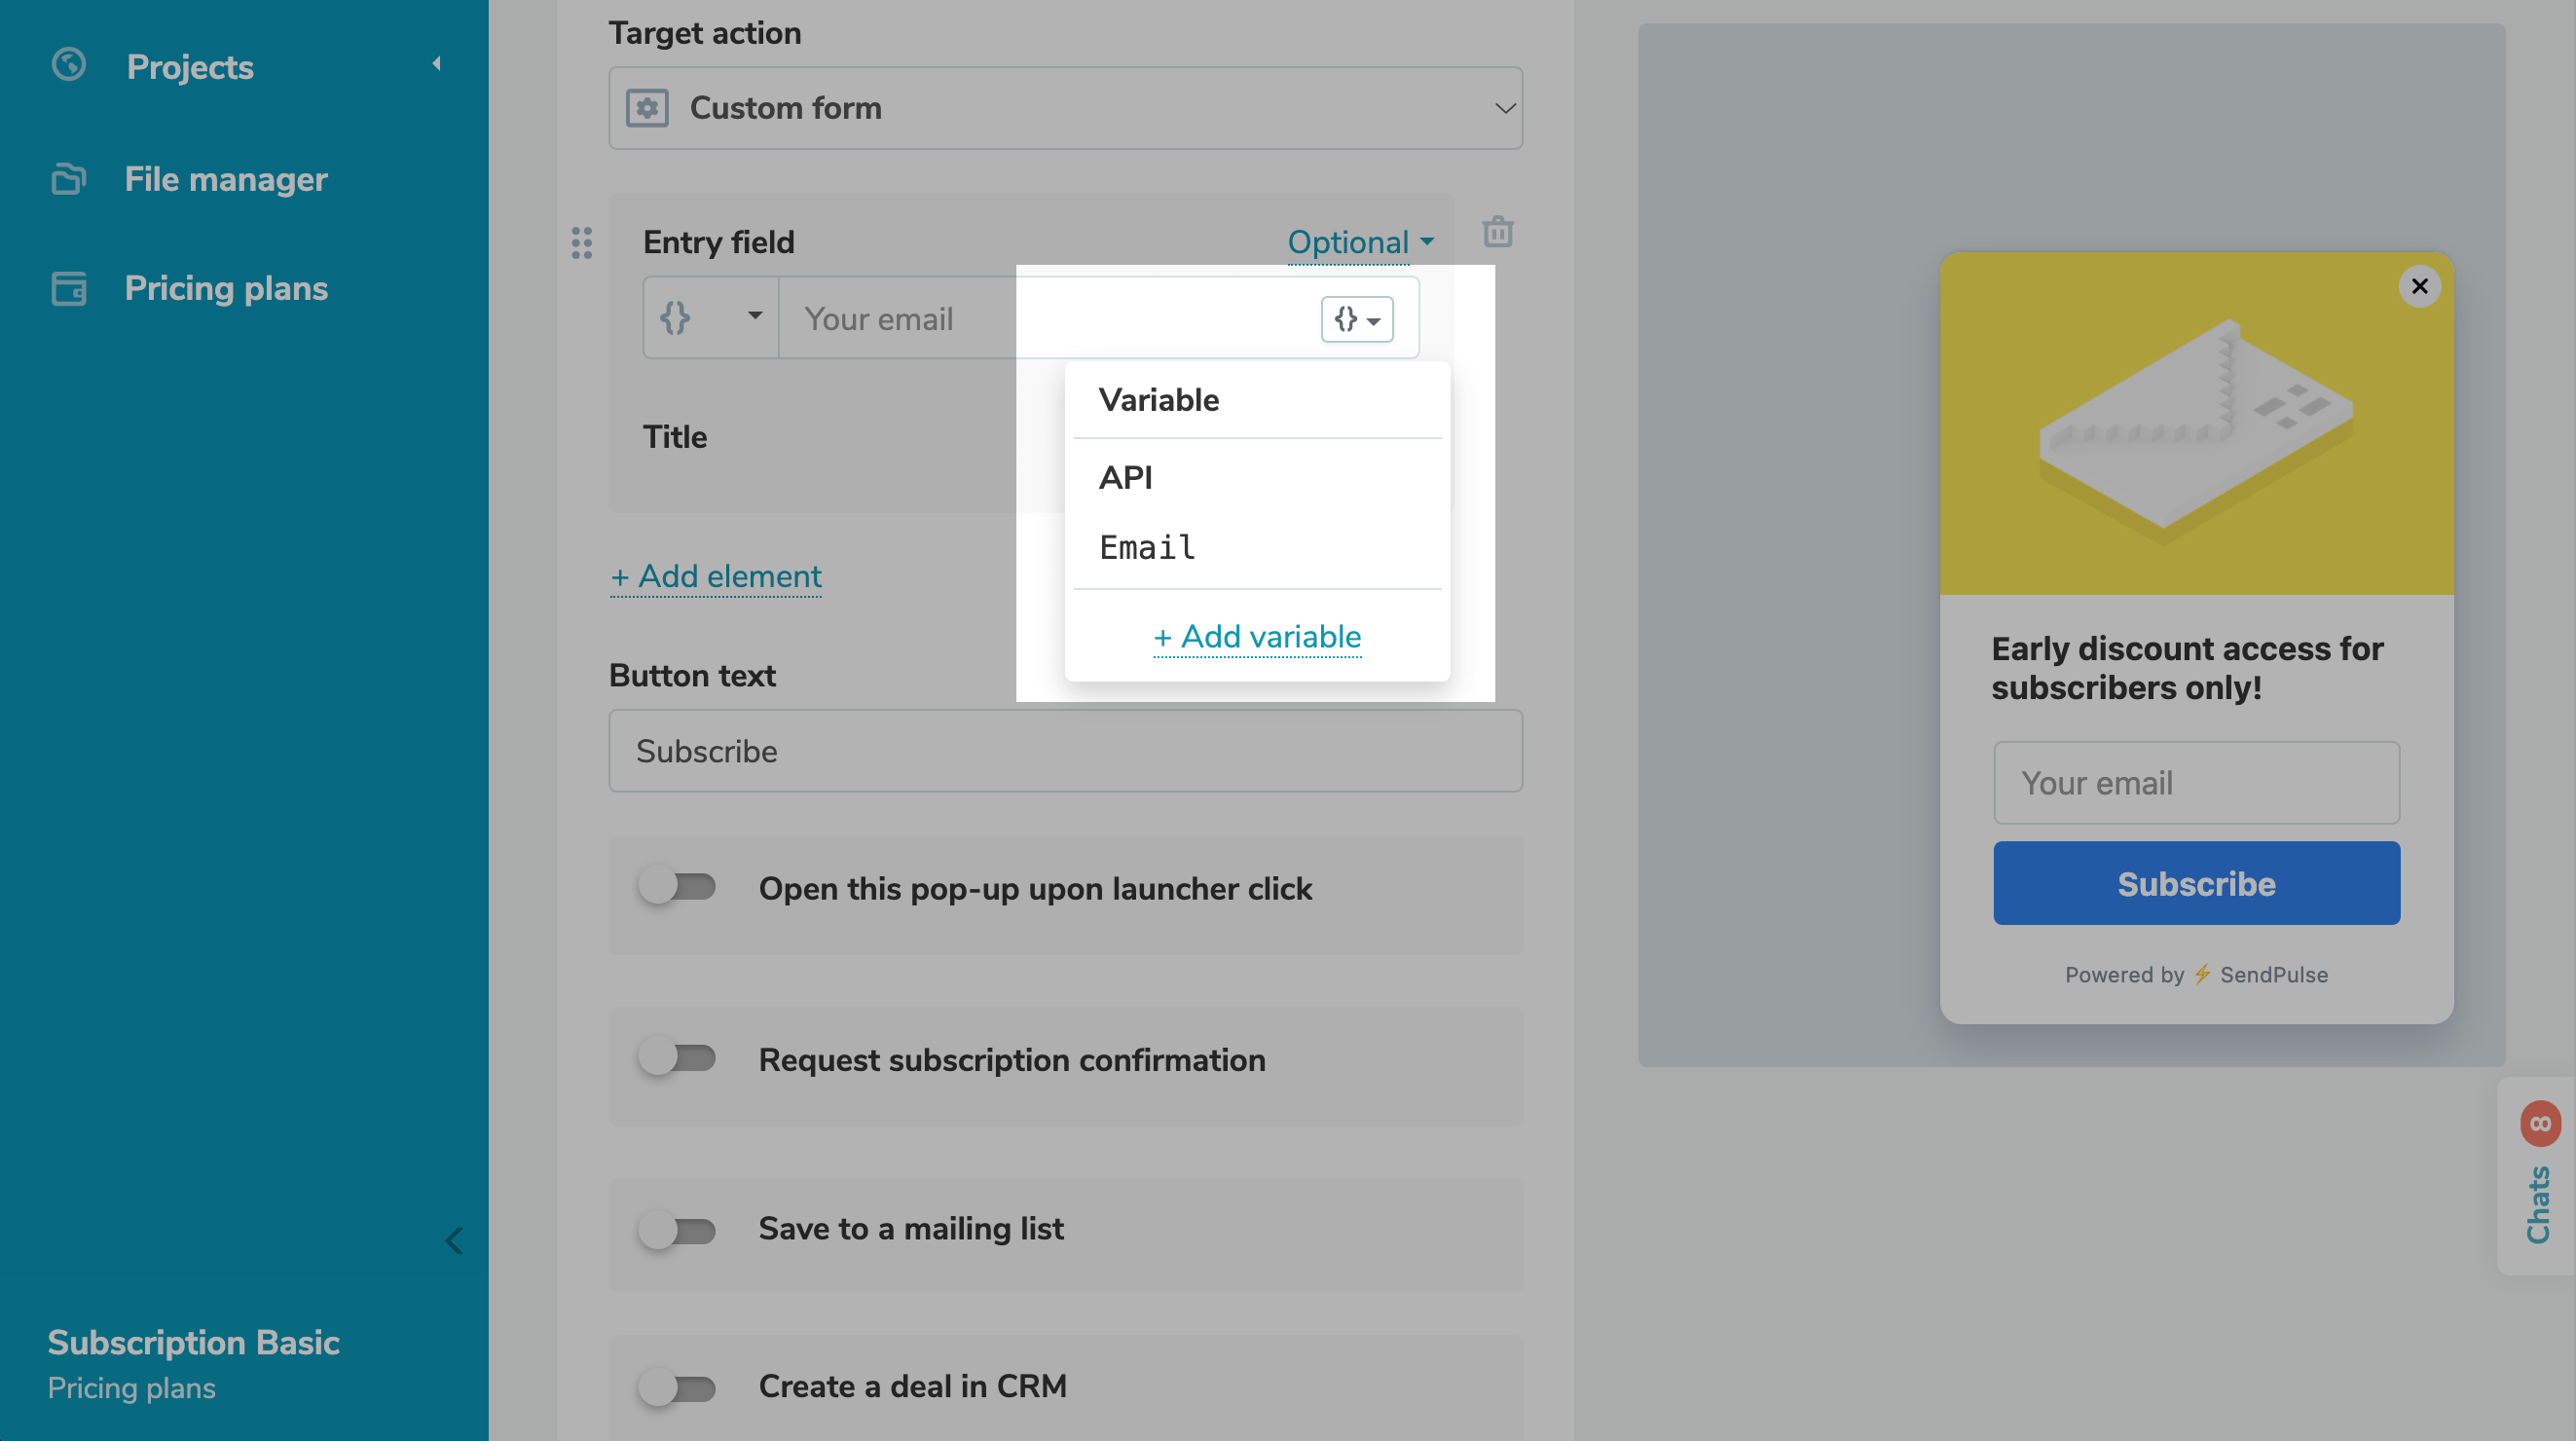
You can also create variables when you build or edit pop-ups. Go to the pop-up builder to edit Entry field element. In the Variable field, click {} and select Add variable.
Select a method you will use to transfer data from your website to your pop-up.
| API | Transferring data using a network request to a server. It can use different HTTP methods (GET, POST, PUT, DELETE, etc.).
Used to send requests to get data from your system. For example, if users have already registered on your website and you already have their data. |
| Local storage | Transferring information from saved data from the localStorage object. Data points are saved between sessions and do not have an expiration date. |
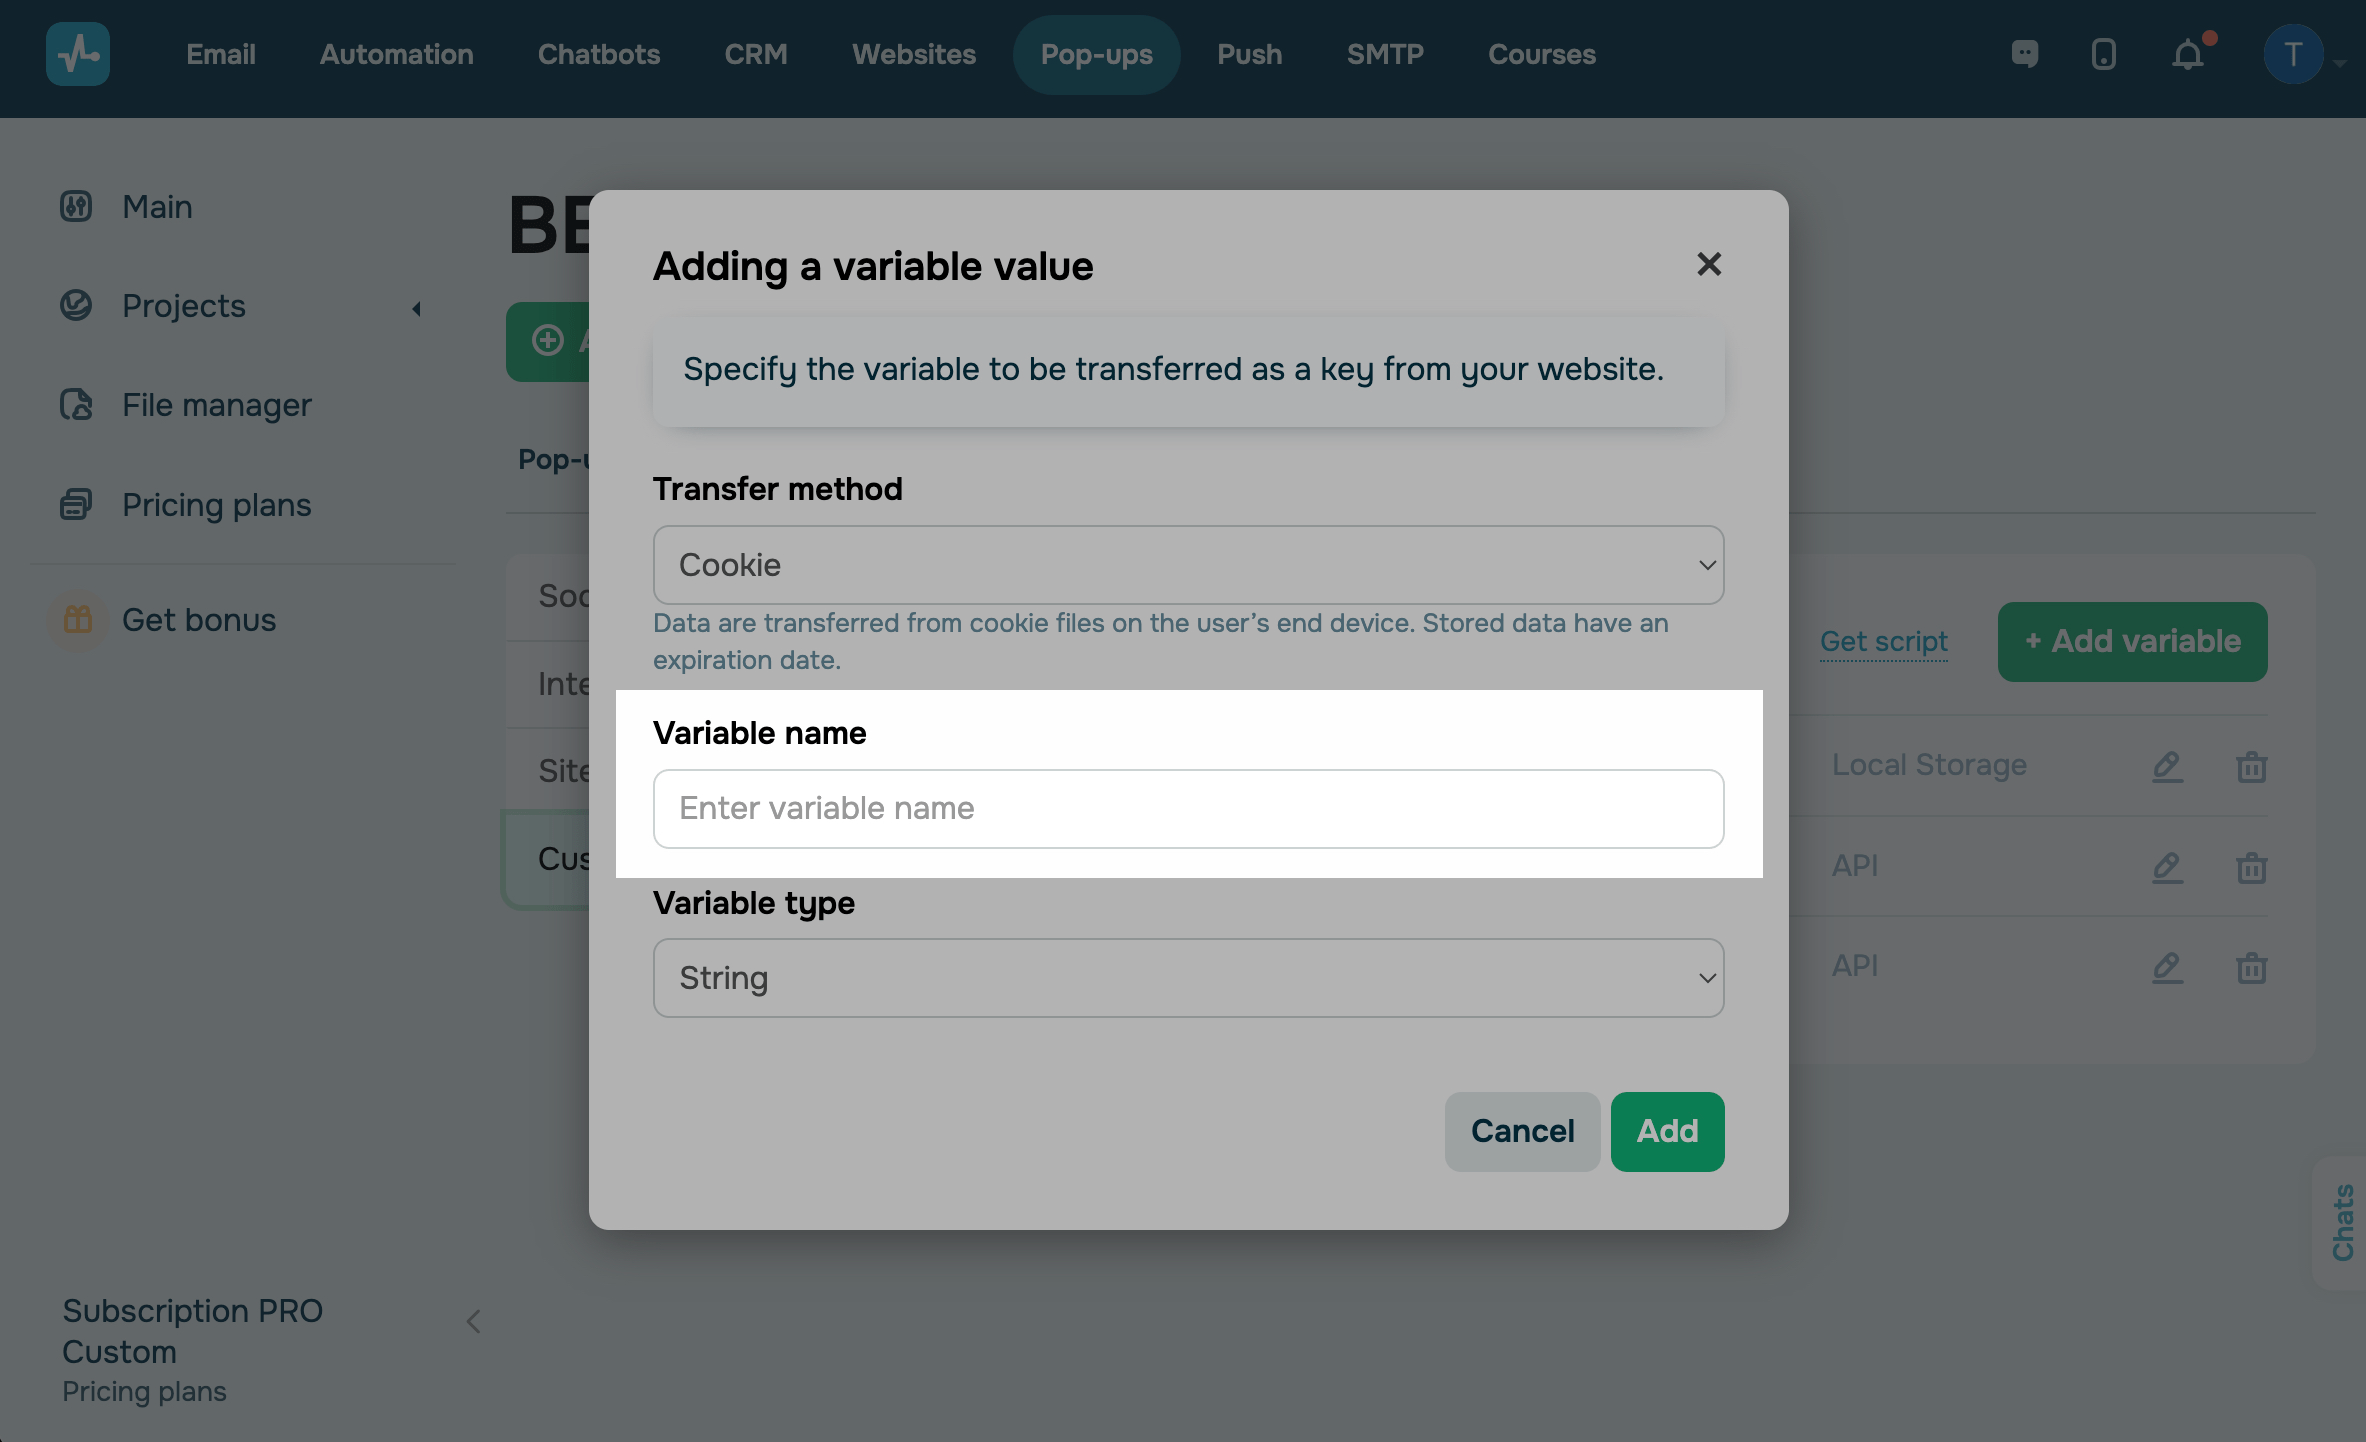
| Cookie | Transferring data from cookie files on a user’s end. Data can have an expiration date (until users clear their browser cache). |
| URL | Transferring data from a website URL. These variables can be found in the URL-address, usually following the ? character. For example, https://example-site.com/index.php?userid=123. |
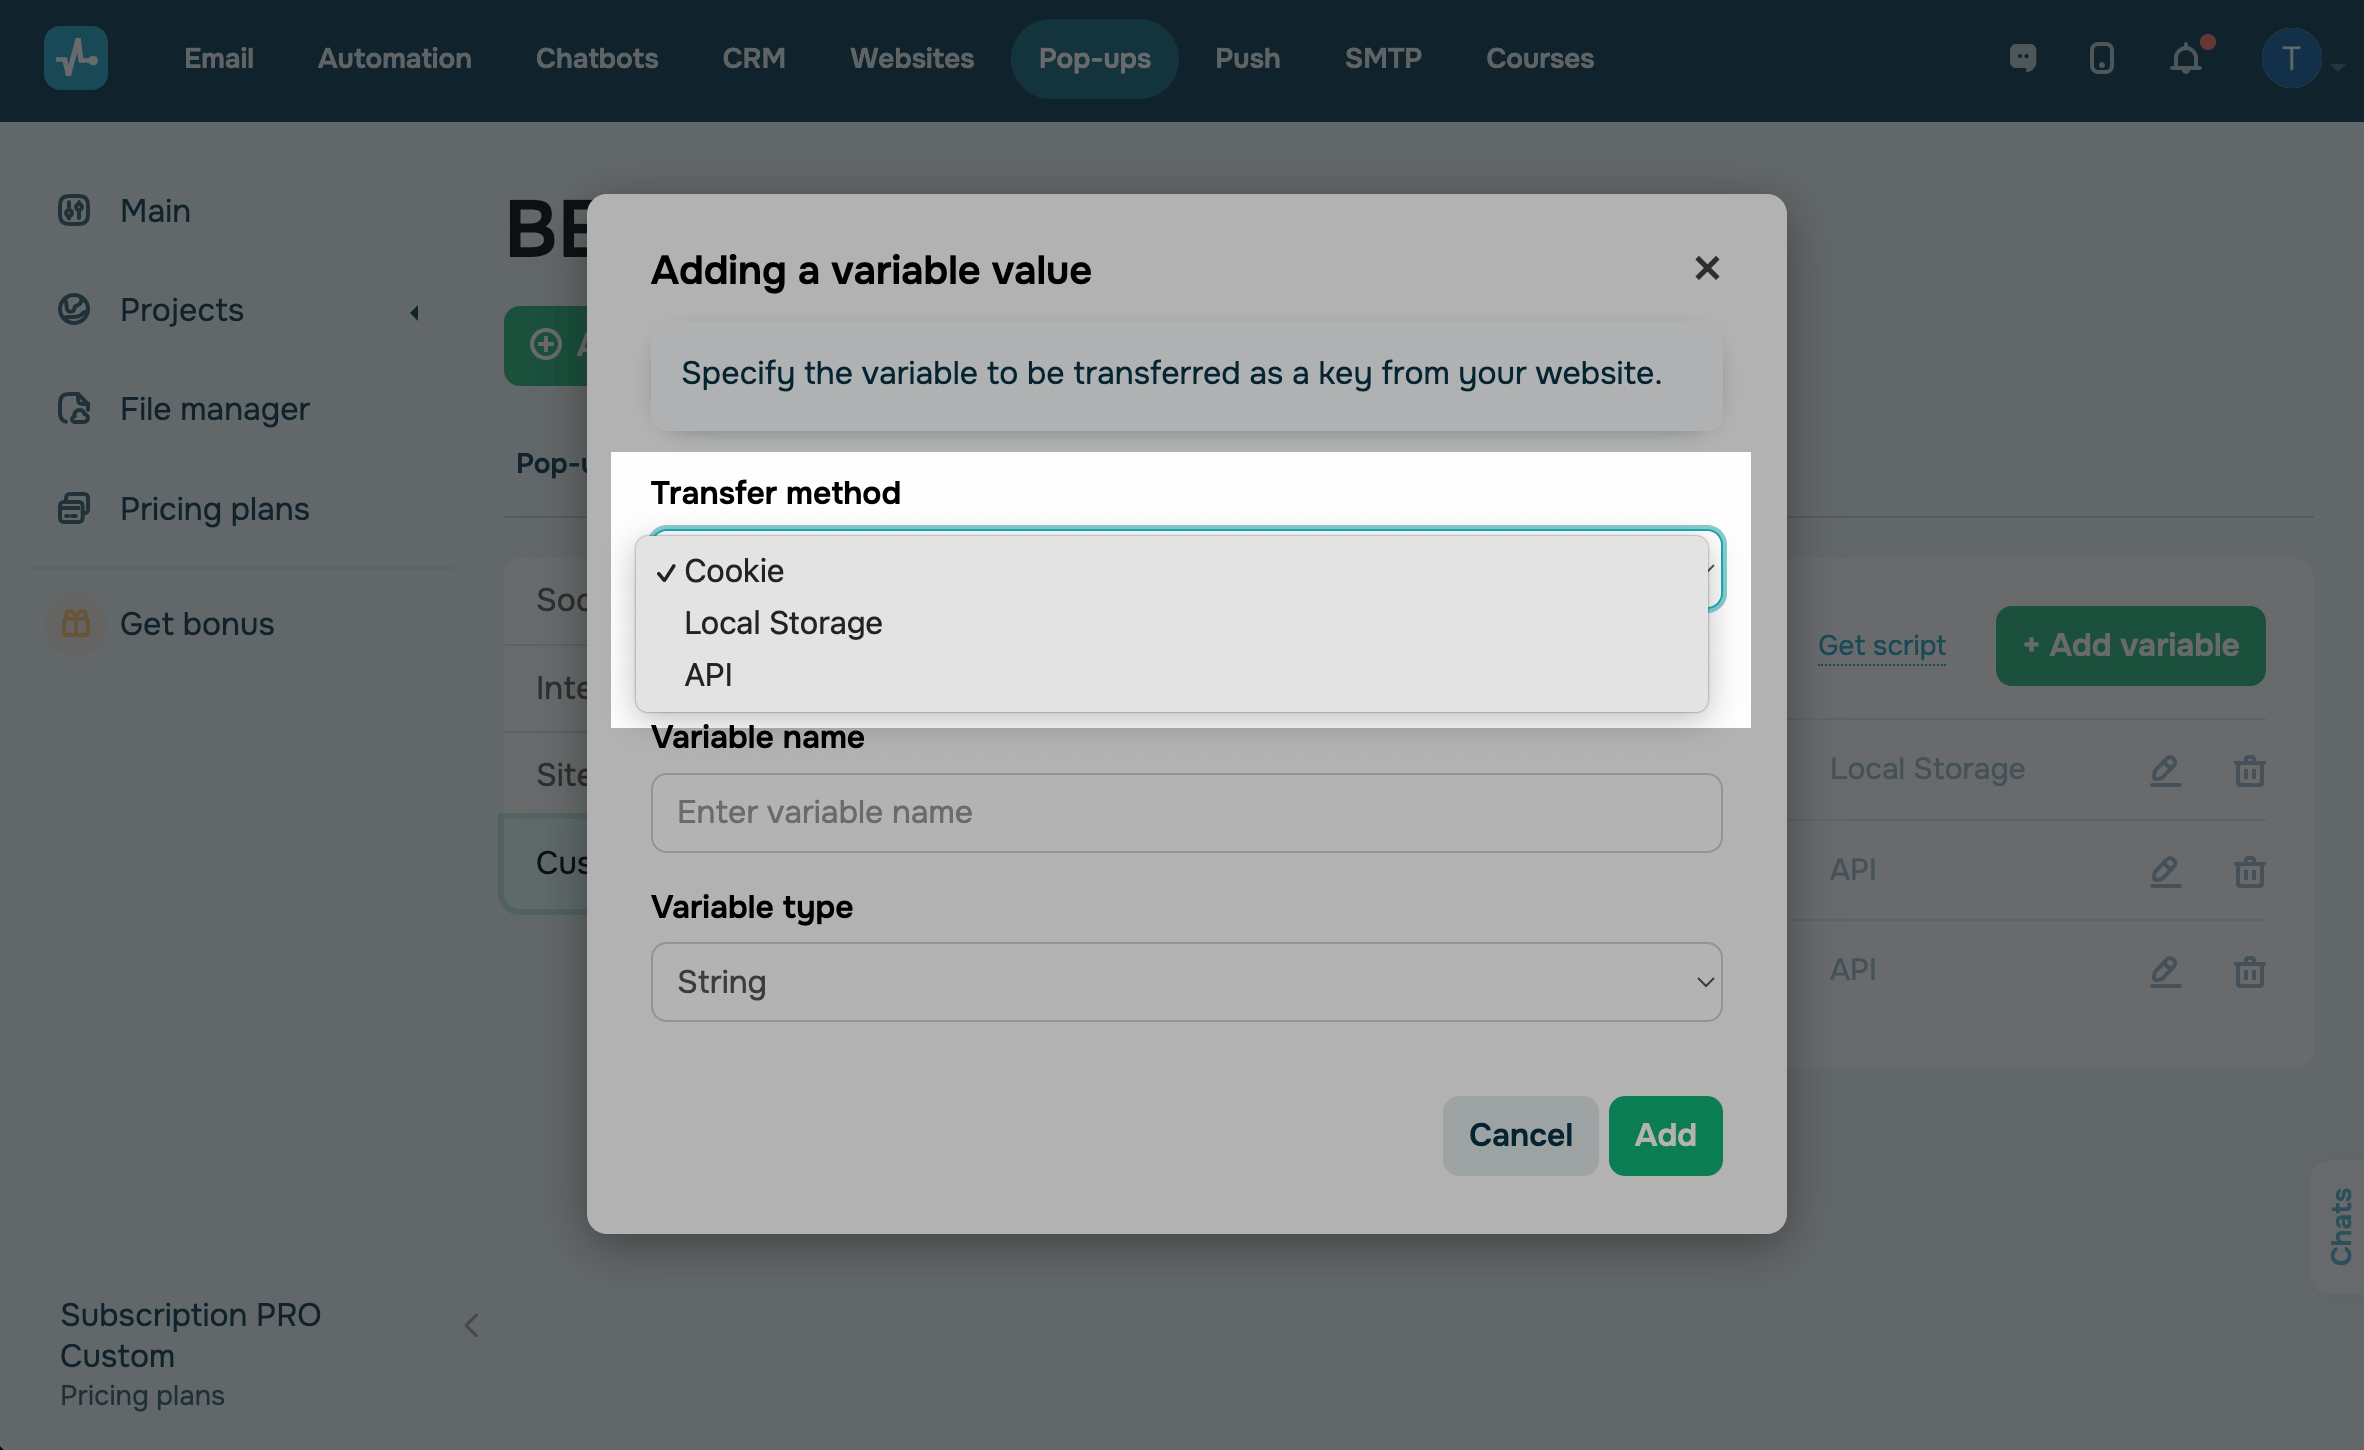
Enter the name of the variable you need to transfer as a key from your website.
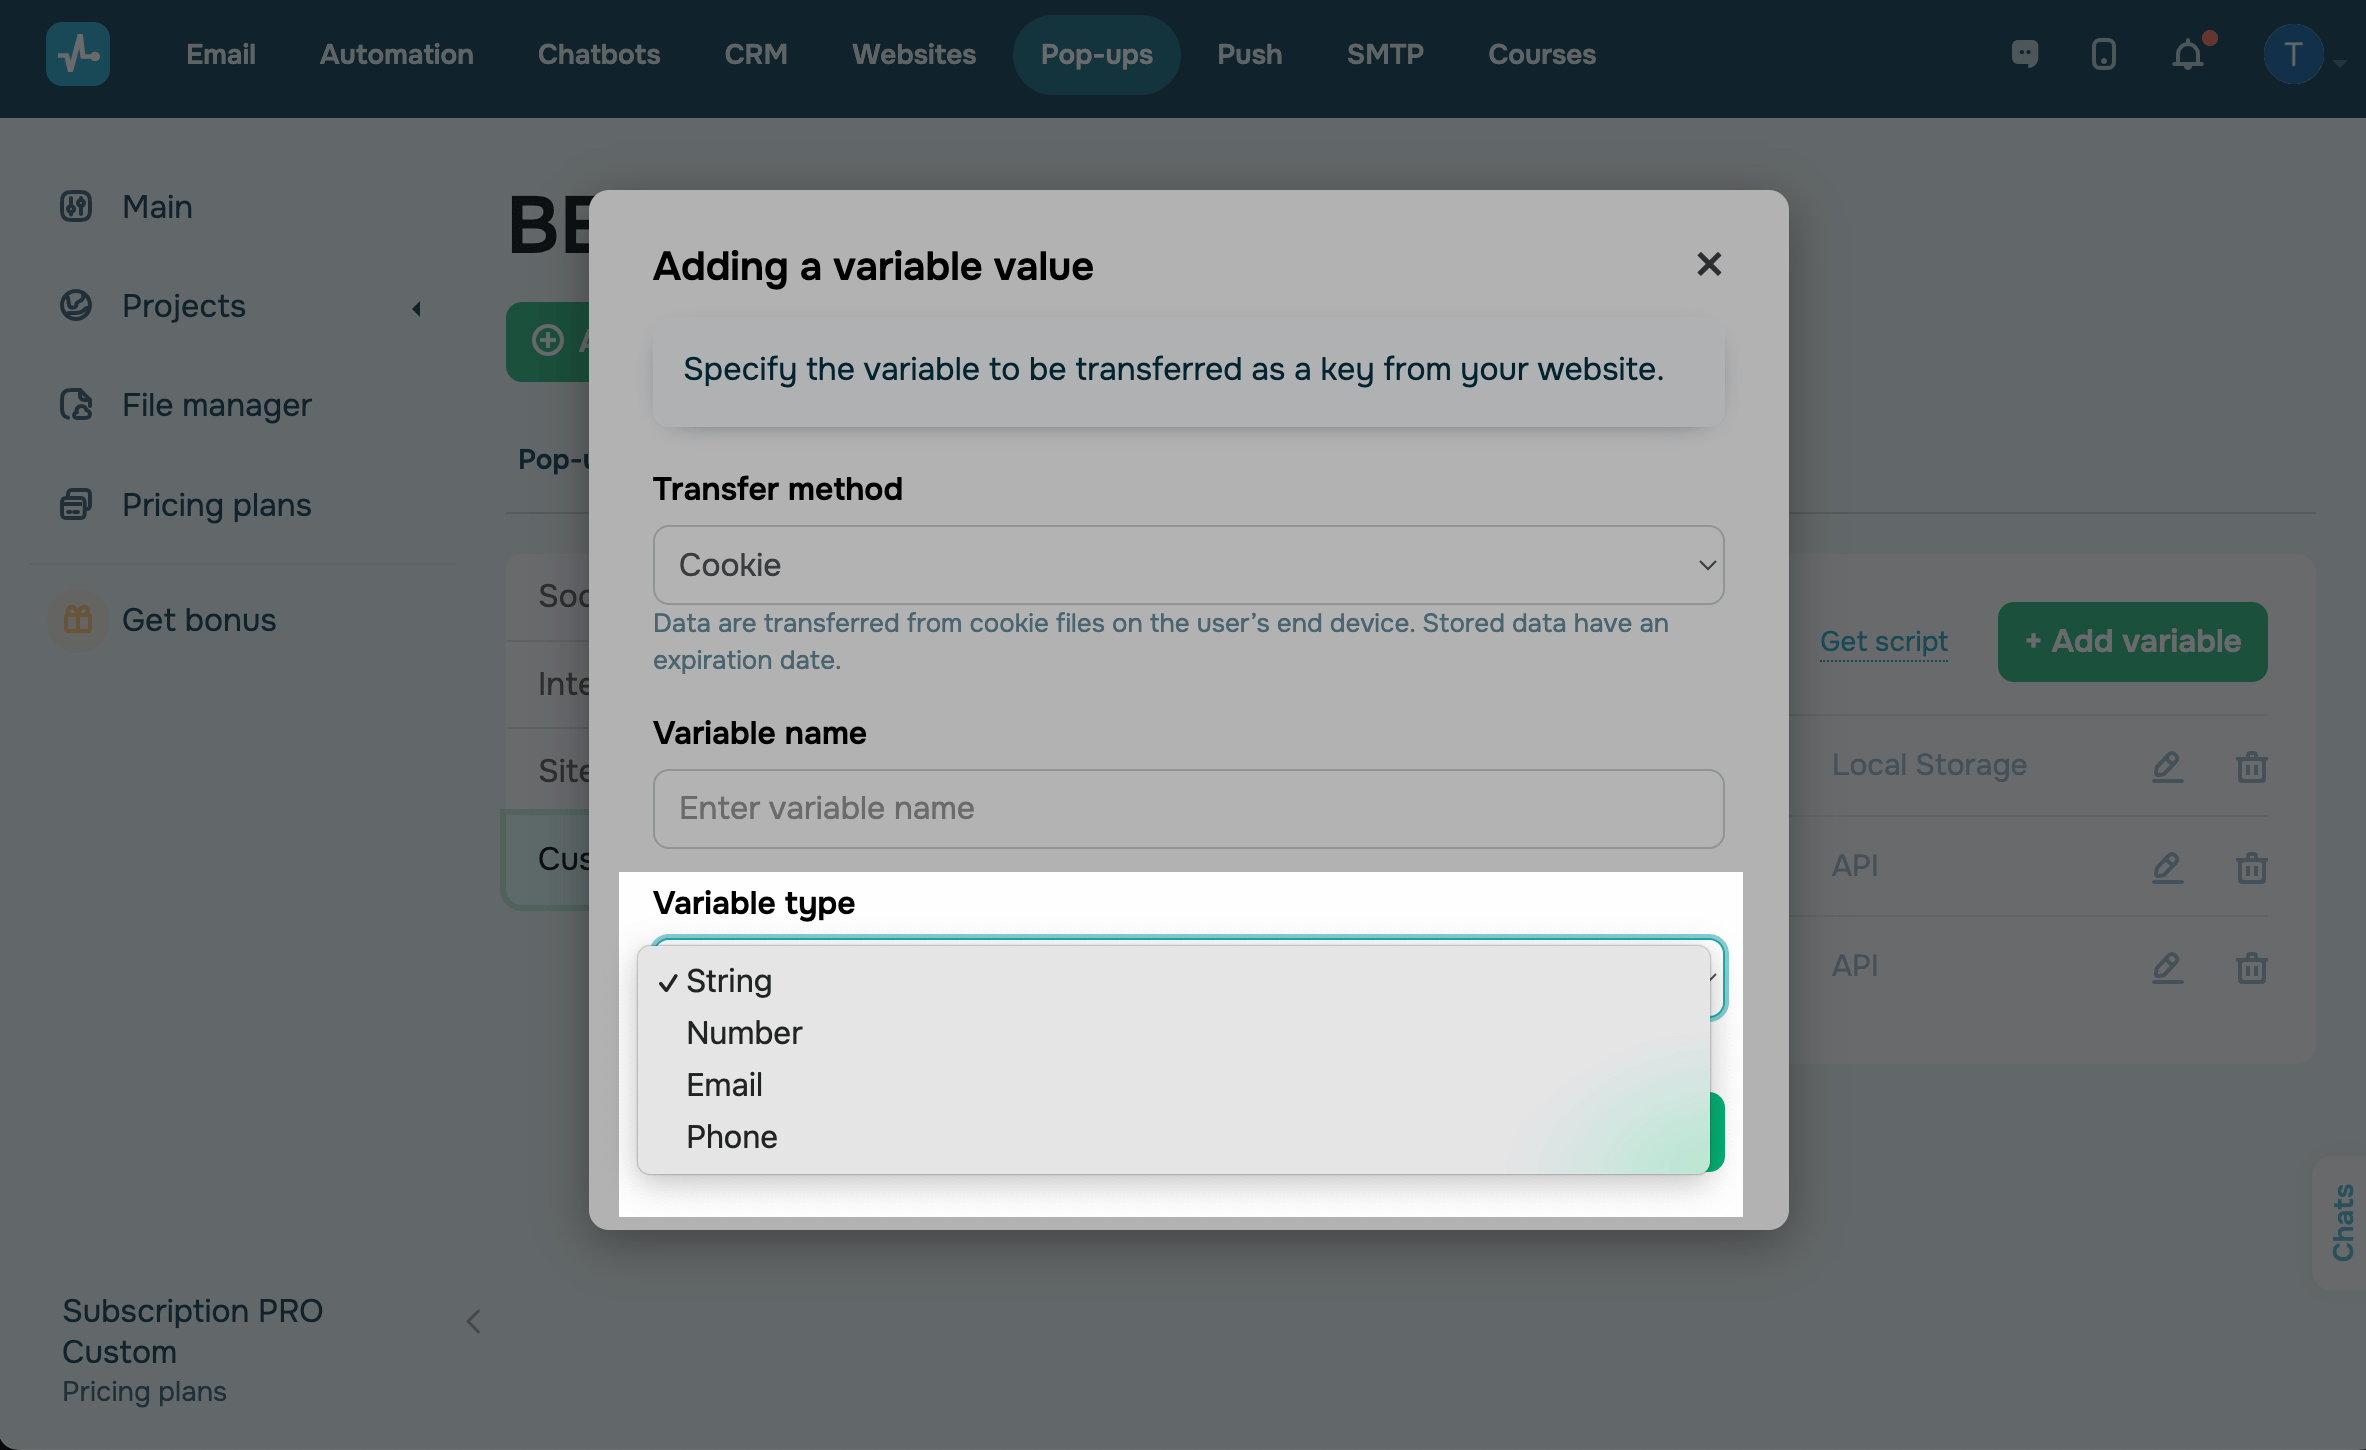
Select a data type that will be passed in a variable.
| String | Used to transfer up to 255 characters. |
| Number | Used to transfer numbers. |
Used to transfer email addresses as example@example.com. |
|
| Phone | Used to transfer phone numbers. We recommend using the international format with a country code. |
Click Add.
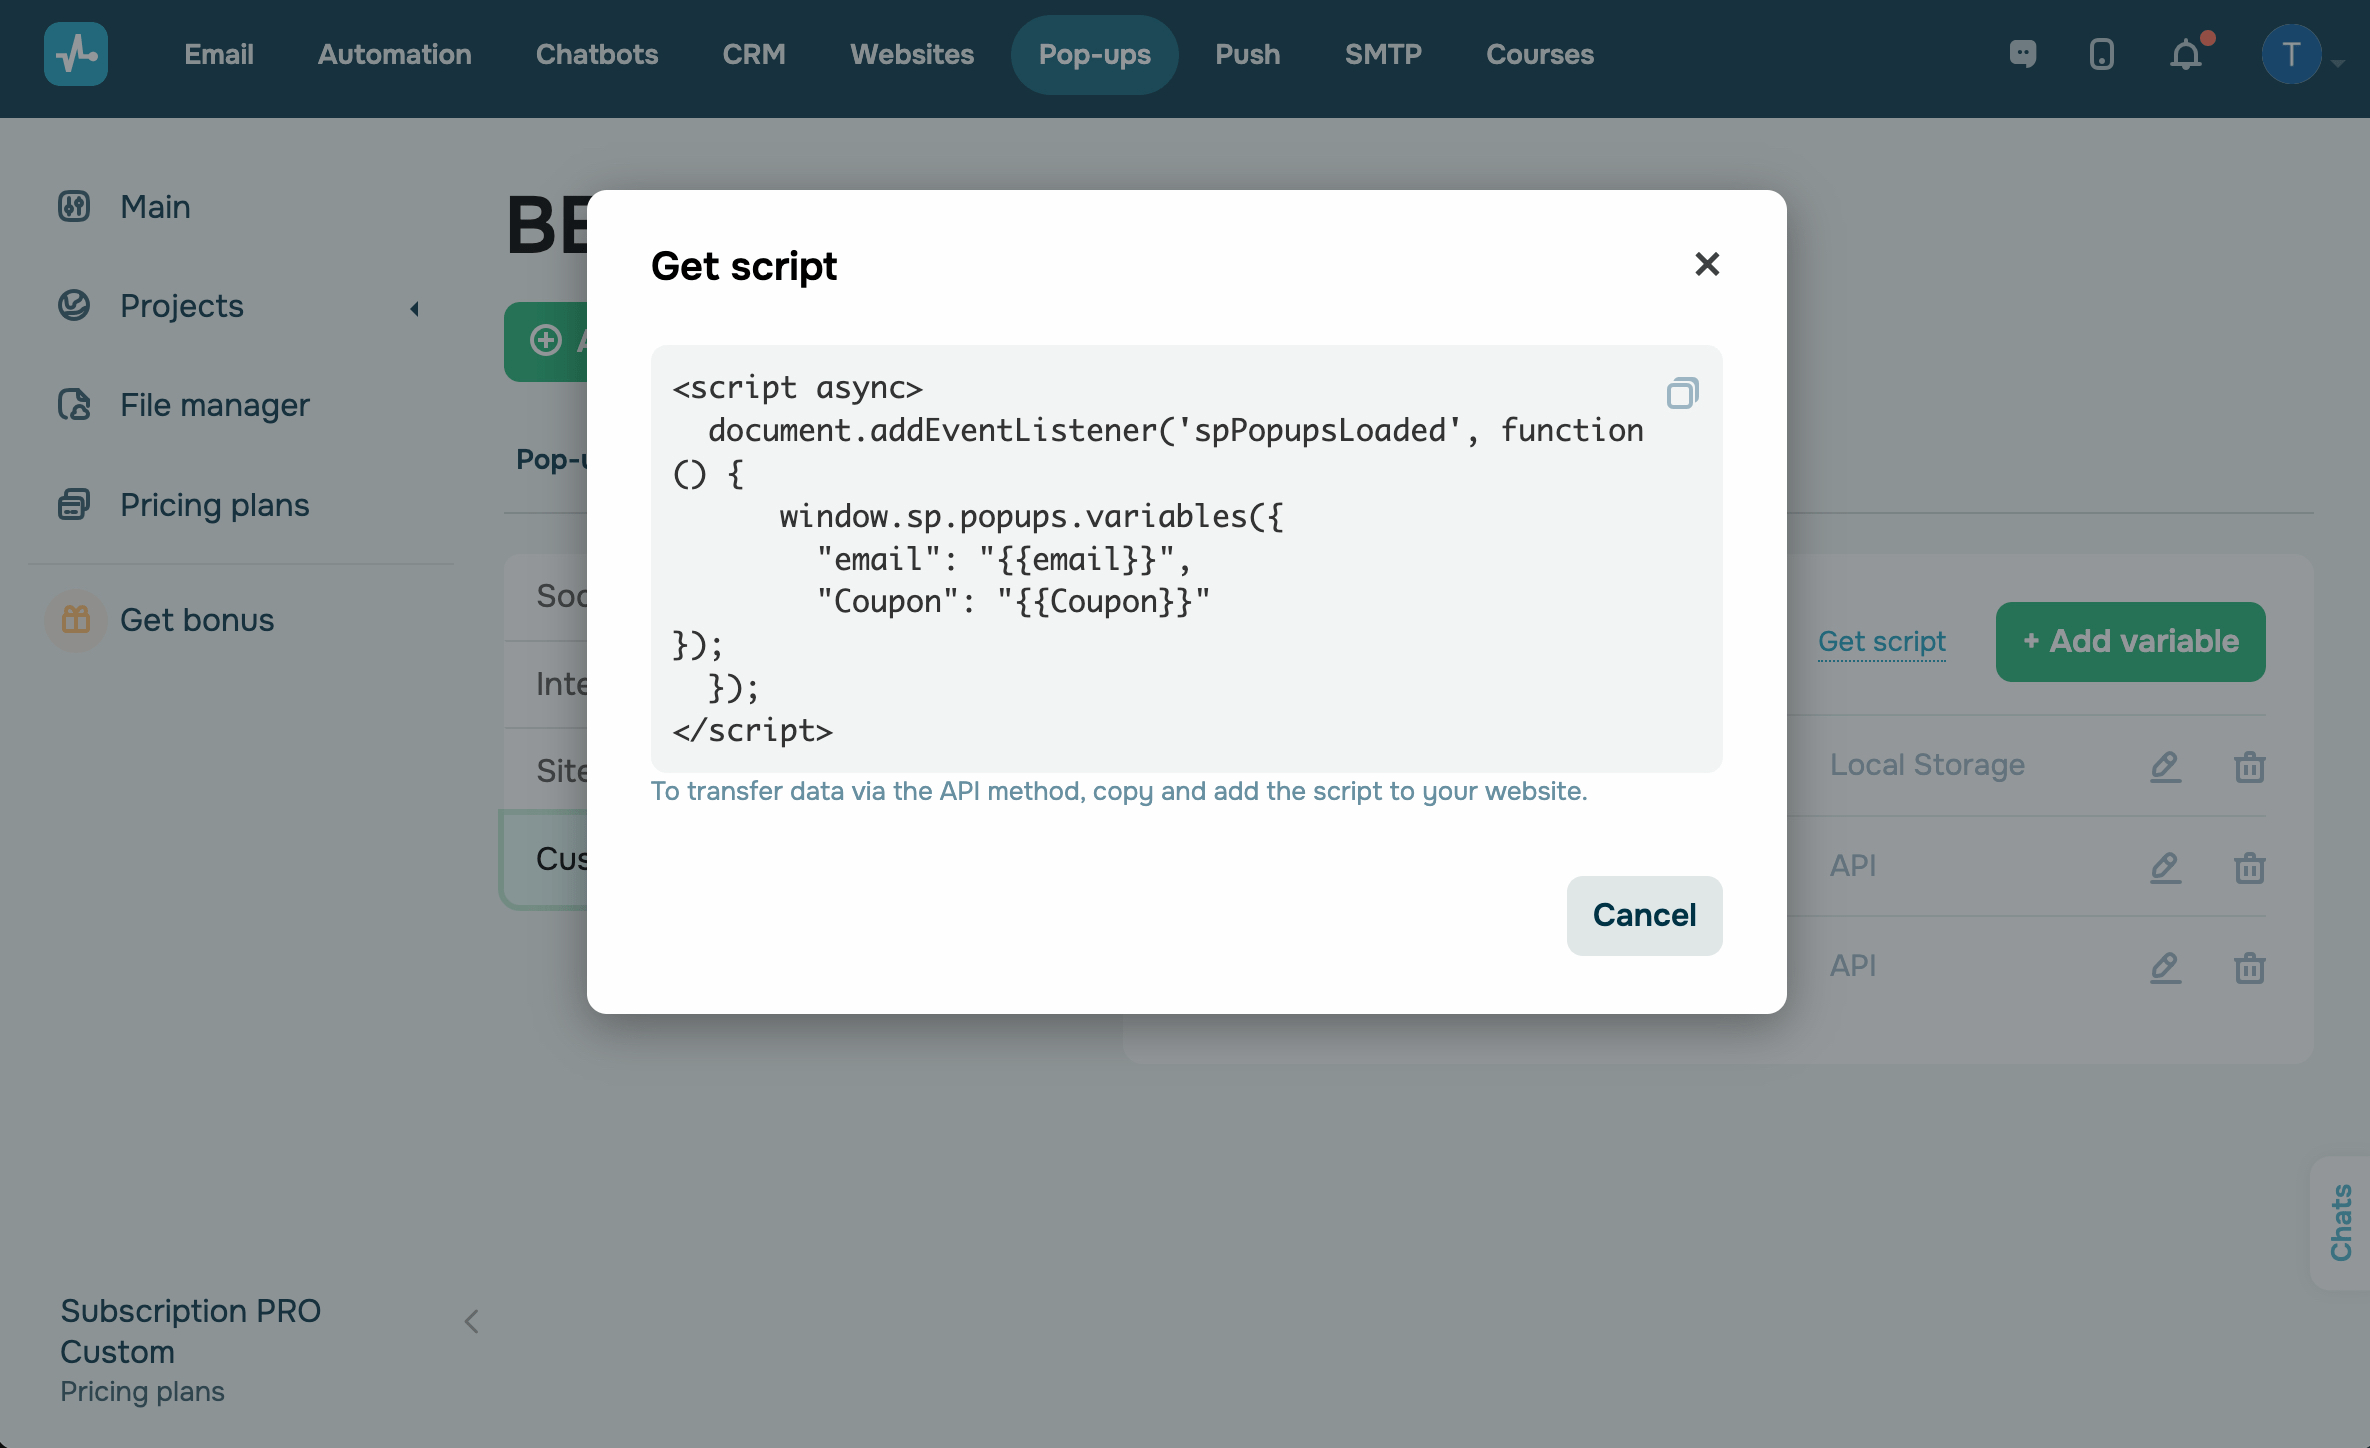
For the API transfer method, you also need to add a script to your website to transfer data. Go to Settings > Custom variables, click Get script, and copy it.
Keys are case-sensitive. To identify a variable correctly, check and transfer the variable name you created without editing it.
If you create a new variable, add it to the code you installed on your website, or copy the updated code in the interface.
Select a pop-up variable
Go to the pop-up builder, and select the Entry field element. In the element editing panel next to the field where you need to prefill variable values, click {}, and select a variable.
You can configure variable substitution only in the Entry field element. Your variable type must match the entry field type.
You can also hide fields if they are prefilled with variable values. For example, if users have already registered on your website, you don’t have to ask them for this information the second time.
By default, if your system or users have available values for a variable, your widget automatically inserts these values into the fields. Your users can view and edit them and submit the form afterward.
If you enable the "Hide this field if prefilled" option, your prefilled fields will be hidden from users, and their values will be transferred when a user submits your form.
Continue setting up your pop-up, and save it once you are done.
When a pop-up is displayed to users, its fields will be filled with values using the selected data transfer method. Visitors can use these values or add their own. Once they submit your form, their data will be transferred to the Contacts section and, if additional options were configured, to the email service and CRM.
Last Updated: 11.10.2024
or