How to Personalize Emails
Email personalization is a must for every brand. This implies using personal information about a recipient to increase email open rate, CTR, conversions, and sales. SendPulse offers simple and smart personalization options, both available on the free plan.
A bulk email sent to a large subscriber base is a thing of the past. Just imagine that you are the owner of a big department store. A teen and a middle-aged woman are your current visitors. They are definitely trying to find something but don't dare to ask you for help. So, now it's your time. Would you make them the same offers? Probably not!
The same thing applies to email marketing. Bringing value to every client is important. Here personalization and segmentation come into play. These instruments are the best friends of any marketer as they help be ahead of the game. They allow them to wisely use personal subscriber data such as gender, occupation, location, age. Moreover, online stores have an open space for practicing marketing tactics like sending emails based on order status, items bought, prices, pages visited, goods left in the shopping cart.
All you need to do is analyze your audience and get the necessary data while SendPulse takes care of the technical side of things.
Step 1: Set Up a Subscription Form to Collect Data
Choose a ready-made subscription form created by SendPulse designers or craft your own one that suits your brand style. Four types are available: embedded, popup, floating, fixed. Ask for any type of information you need by dragging the corresponding fields to your form. Create the same variables in the necessary mailing list. This way, you segment all your new customers right after subscription.

Step 2: Segment Your Mailing List
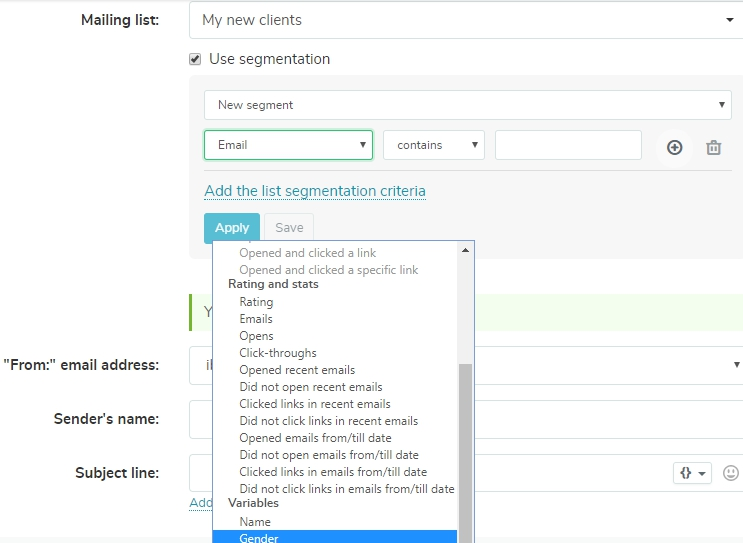
Now, you can use segmentation while creating an email campaign. Choose the necessary mailing list, tick “Use segmentation.” Select the variable that you specified in your subscription form and click “Apply.” So, you can send different email campaigns to men and women.
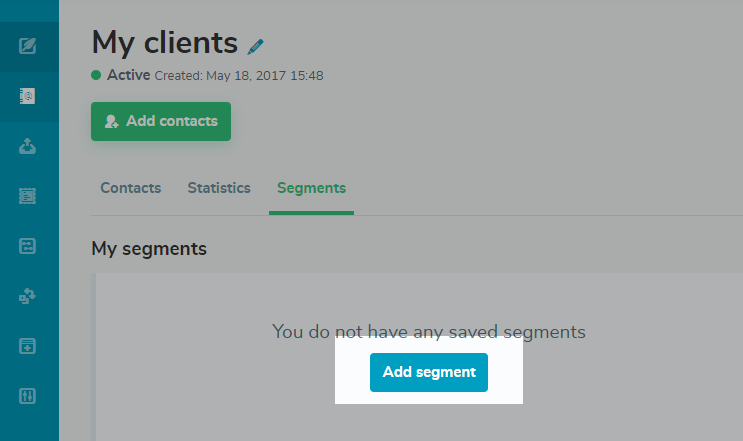
Alternatively, you can use SendPulse pre-defined segments based on subscriber behavior. Choose the necessary mailing list and click “Add segment”.
Here you have a big list of segmentation criteria. There are 3 required fields to set the criteria for sending targeted campaigns: for the first one, you should choose the value, for the second and the third — set conditions.
All the possible variables are grouped under the following sections: email, rating and stats, previous campaigns.
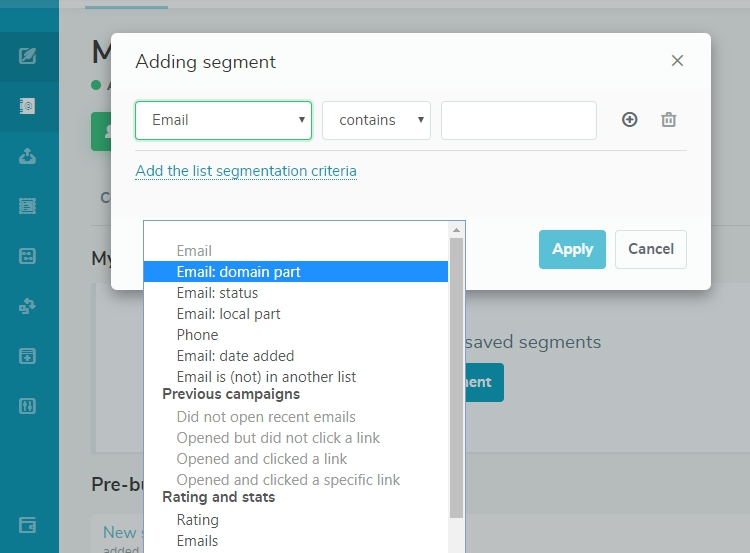
Let’s look at the example.
Say, you want to reward your loyal customers. Send them an email with a 20% discount on all the orders for those who subscribed more than a year ago. Choose “Email” and click “date added”. Set the necessary date, click “Apply”, and name the segment.
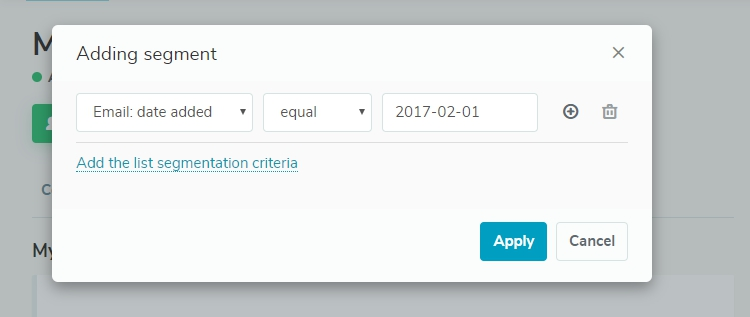
From here on, you can choose this segment when creating an email campaign.
Step 3: Use Simple and Smart Personalization
Using variables while creating a campaign allows sending different content in one email. It means that according to the condition some specific data will be substituted. This can be a good way to promote different goods on different terms to different subscribers on your mailing list.
Let’s have an example.
Say, there are new arrivals in stock. To encourage your clients to make a purchase, you may offer free shipping for subscribers from your country but you don’t have enough information about all the users. Here smart personalization proves to be useful.
To use it, click “Add Criteria.”

Choose the variable value and specify conditions by writing different text.
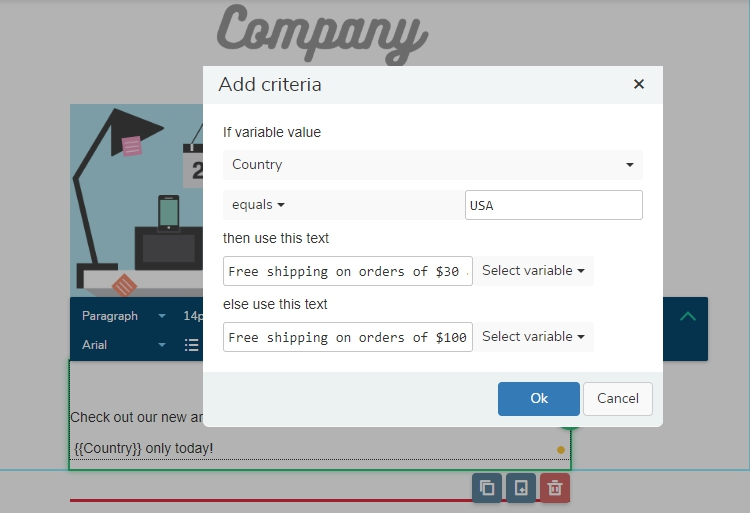
This way, even if you don’t have enough data, each subscriber will receive a relevant email.
Increase your email open rate and boost customer engagement with deep segmentation provided by SendPulse!
Last Updated: 22.02.2023
or