Create a pop-up flow scenario
You can link several pop-ups into one flow to show different messages to different website visitors according to the scenario you create.
In this article, we will talk about how to set up pop-up flows and scenarios.
How to create pop-up flows
The process of creating a flow requires you to link your pop-ups and launch them in a specific sequence.
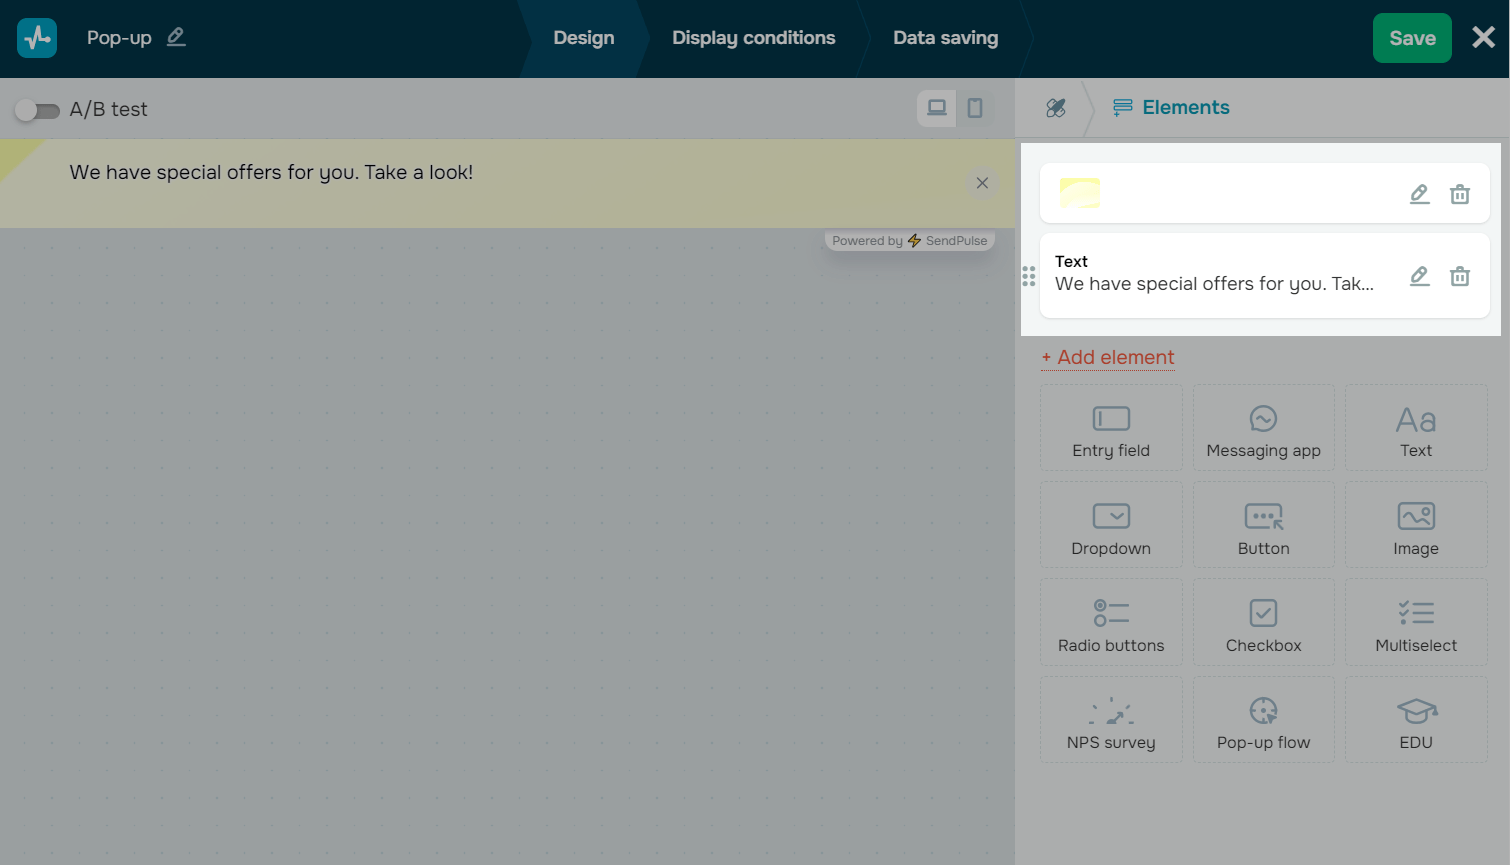
Create Pop-ups
We recommend that you develop your entire flow scenario structure before, and start creating your pop-ups and the links between them only after you do it.
Go to your website, click Create pop-up, choose a template, and add your content.
Read more: How to Create a Smart Pop-up.
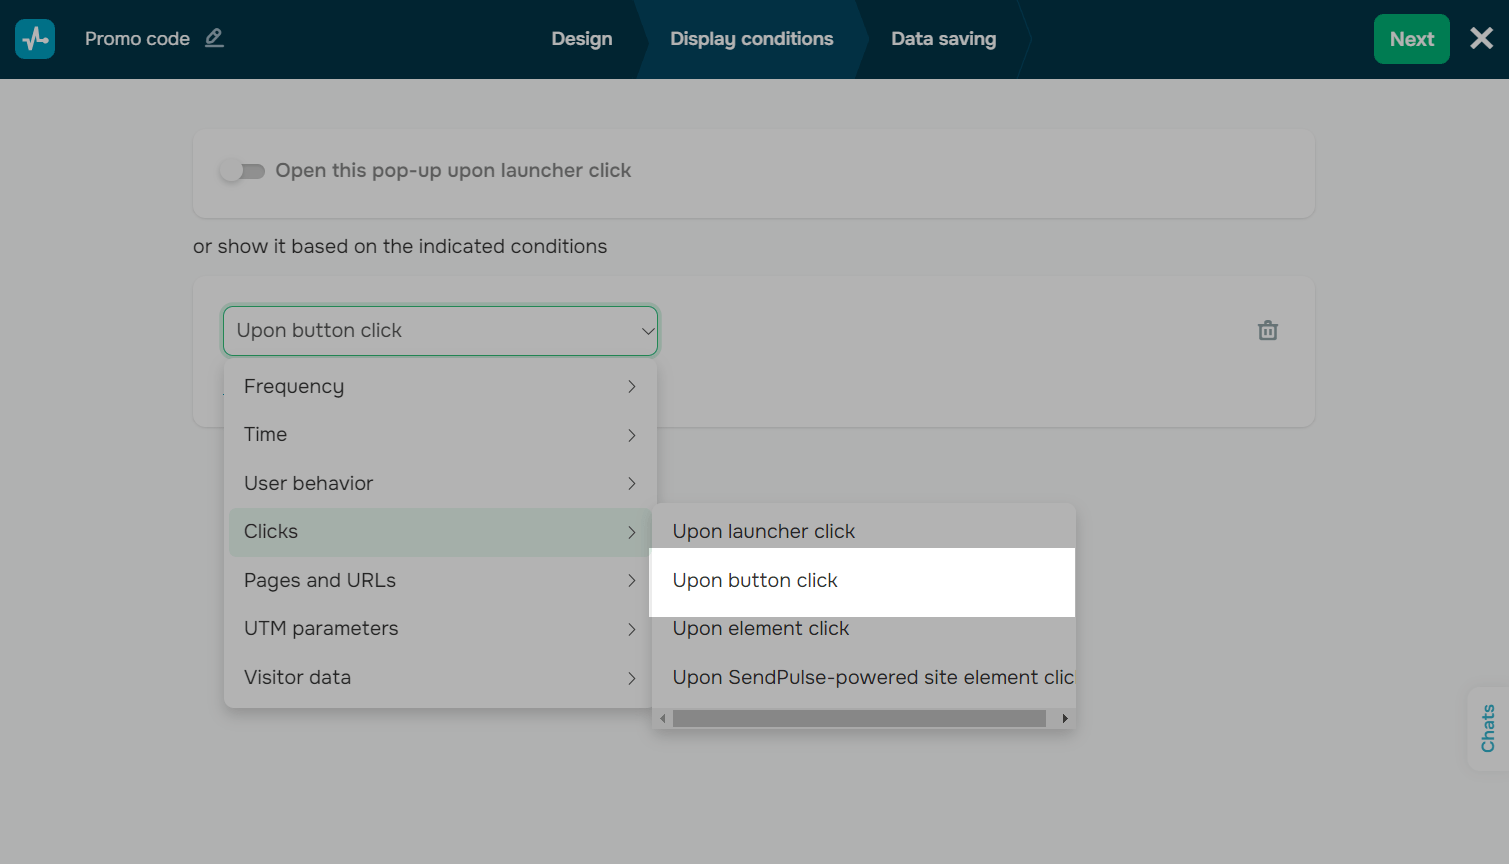
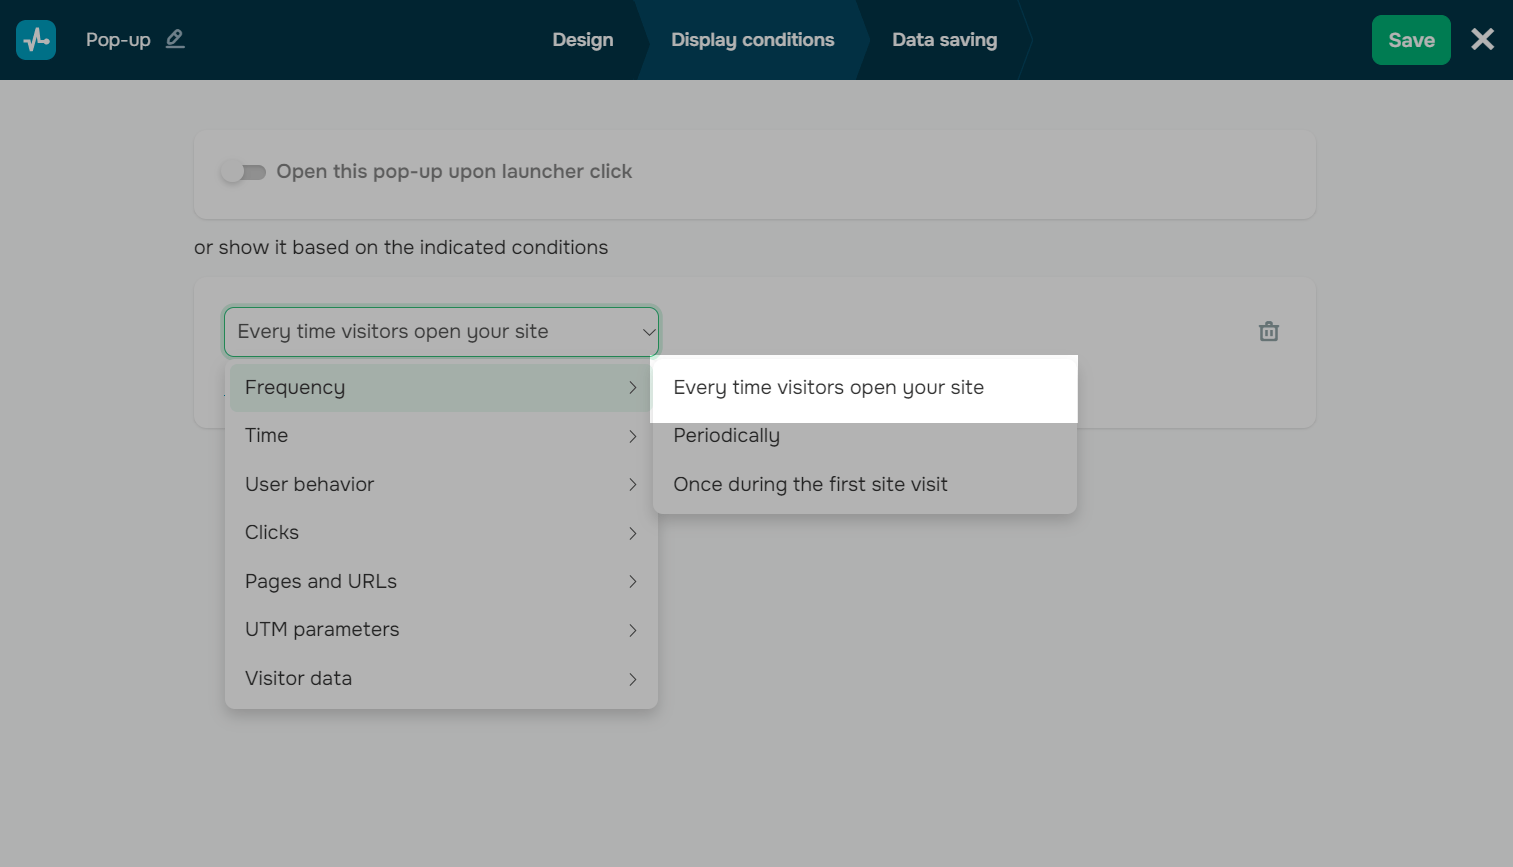
Select display conditions
To build flows, it is important to choose the right display conditions for each pop-up.
You can choose to display your pop-up only within your flow. To do this, go to the Display conditions tab, select the Clicks > Upon button click condition, and click Save.
You can select different conditions for each pop-up in your flow. For example, you can choose to always display your starting pop-up and show the rest of your pop-ups only within your flow.
Link your pop-ups in the settings
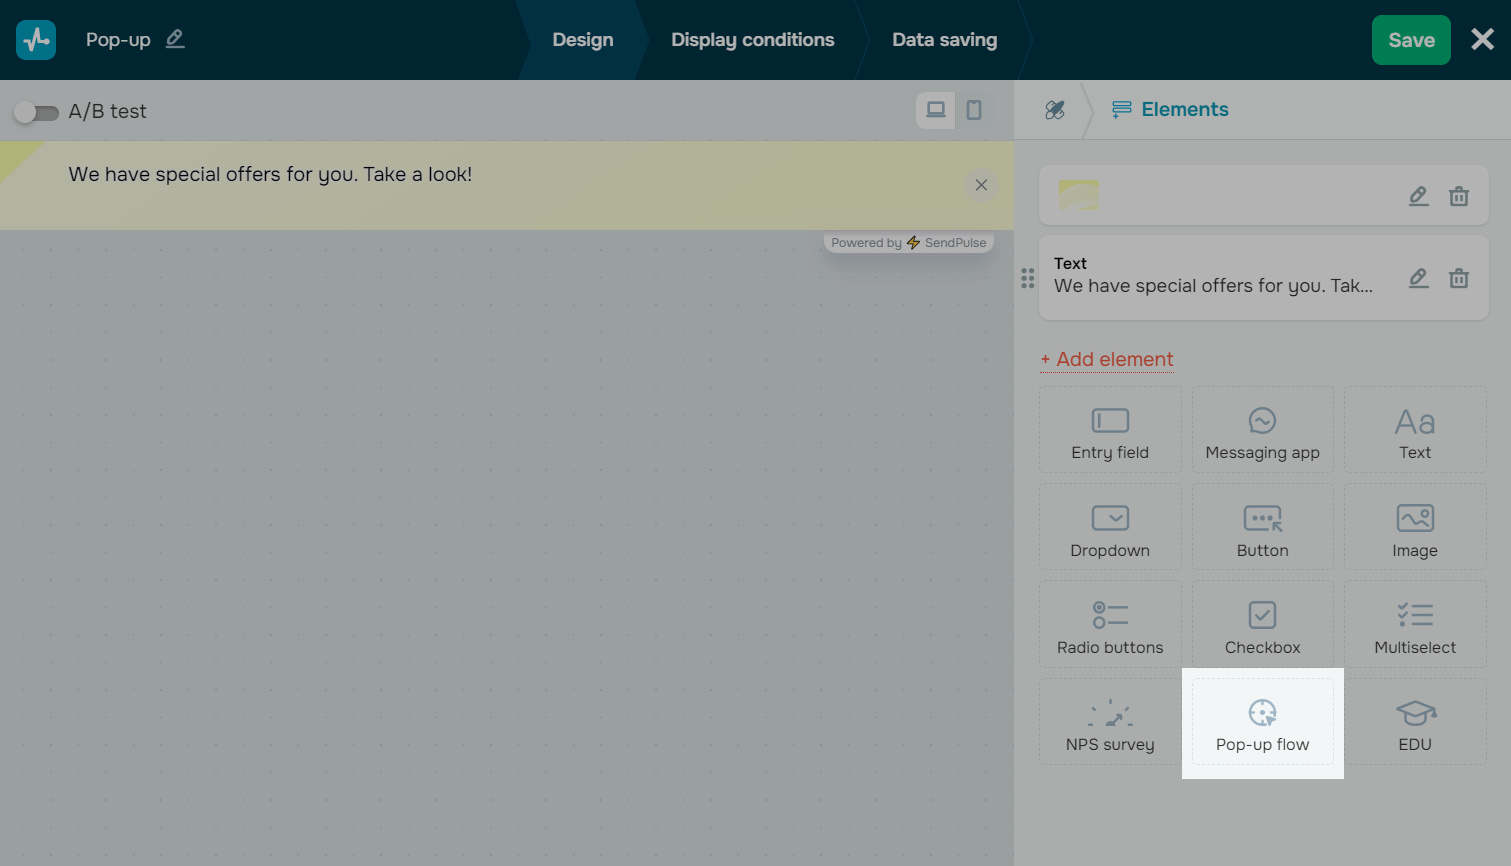
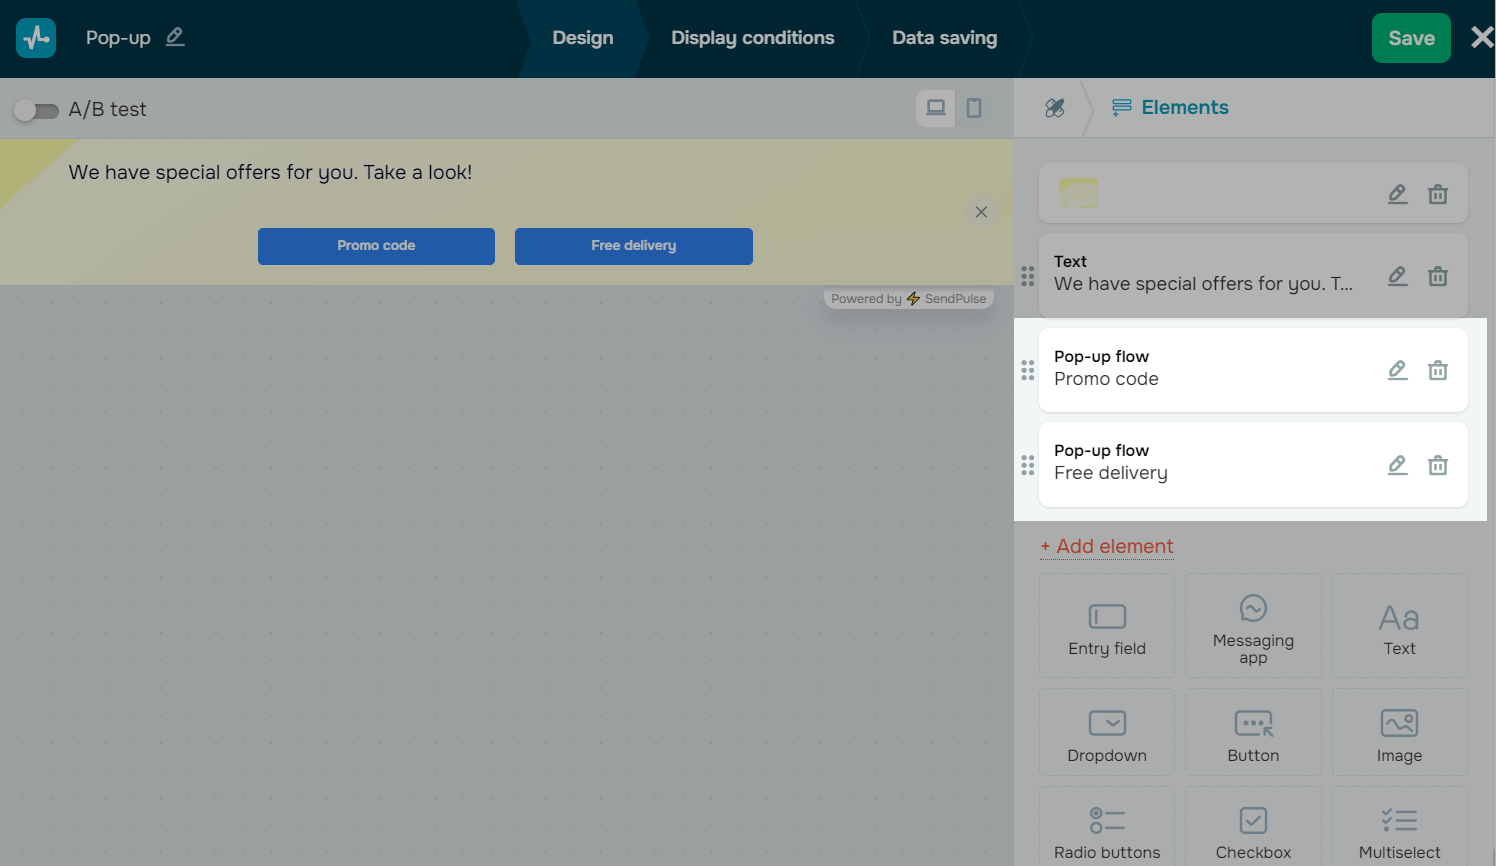
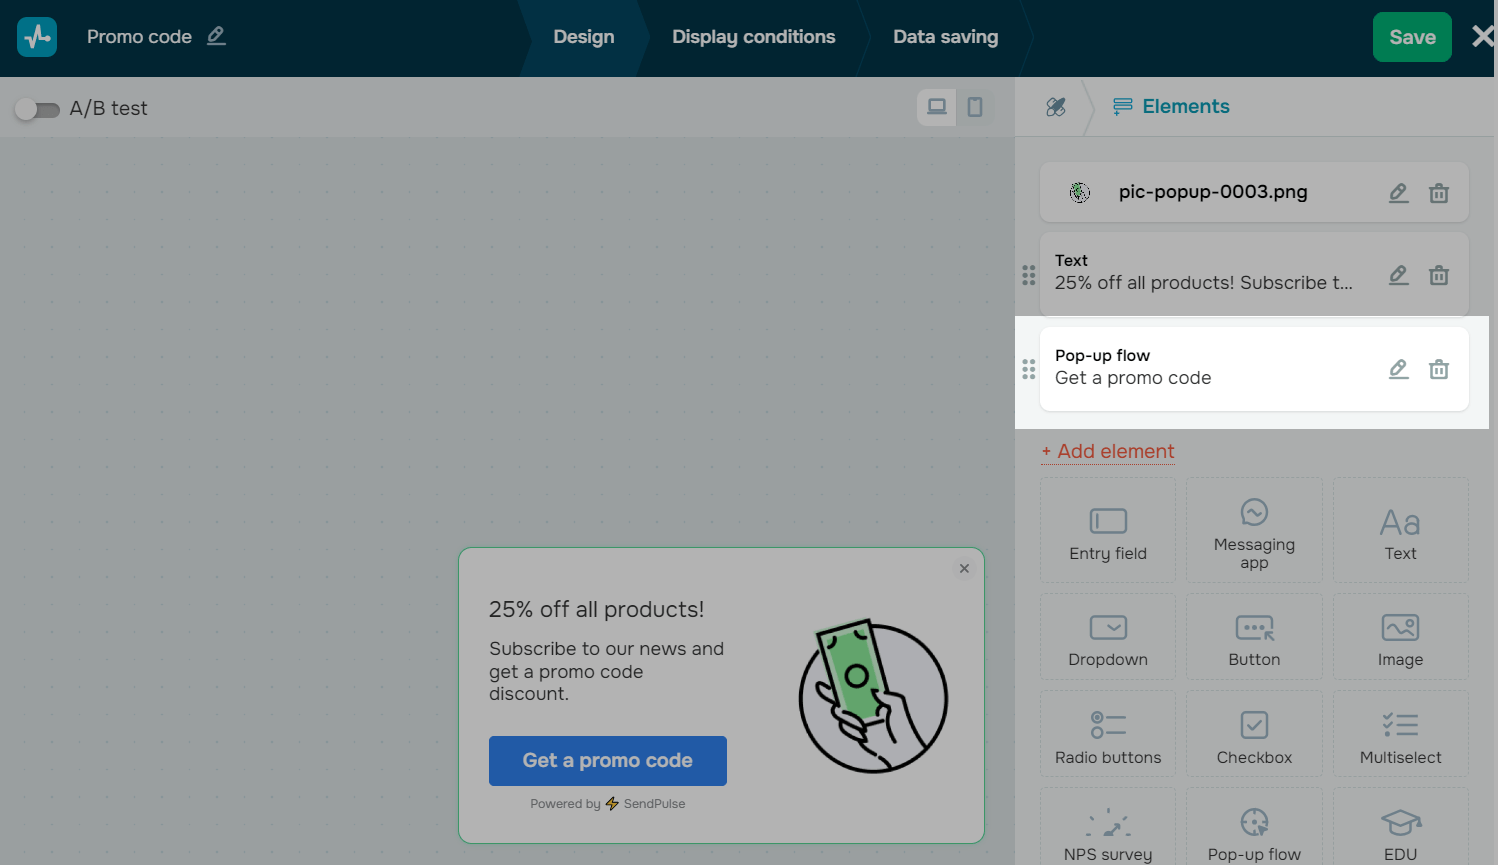
Go back to the pop-up builder, and add Pop-up flow element.
Try to always keep your flow scenario structure in mind. In the pop-up you are working with, choose the one that should go next.
In the Flow field, select the pop-up you want to launch when your button is clicked.
In the Button text field, type in your text. Select a button color below.
You can create up to five Pop-up flow elements that will trigger your pop-ups by branching your flow script.

Click Save.
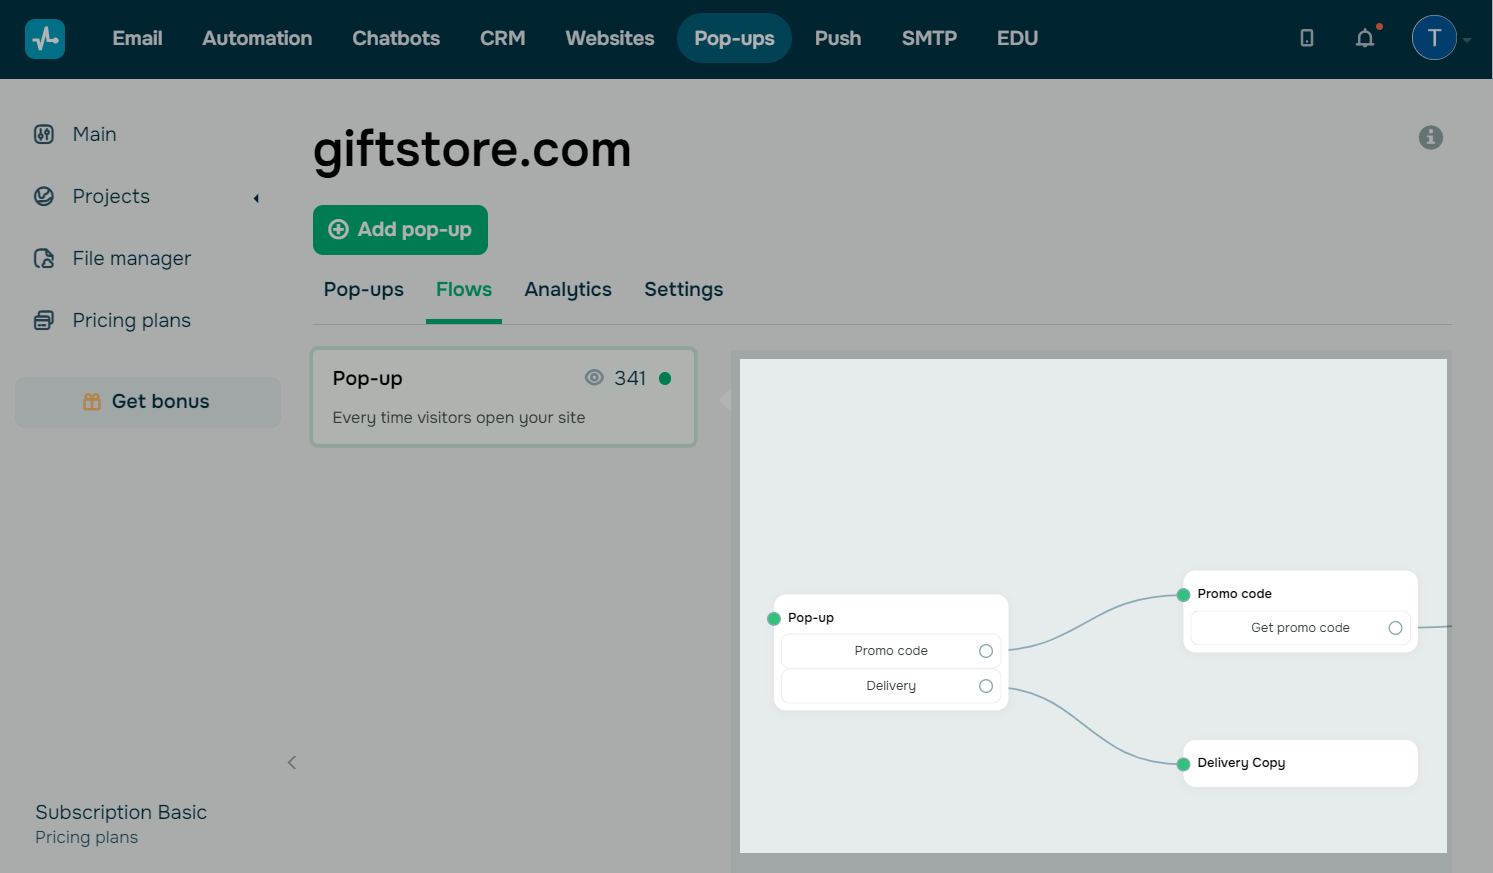
Flow viewing and editing
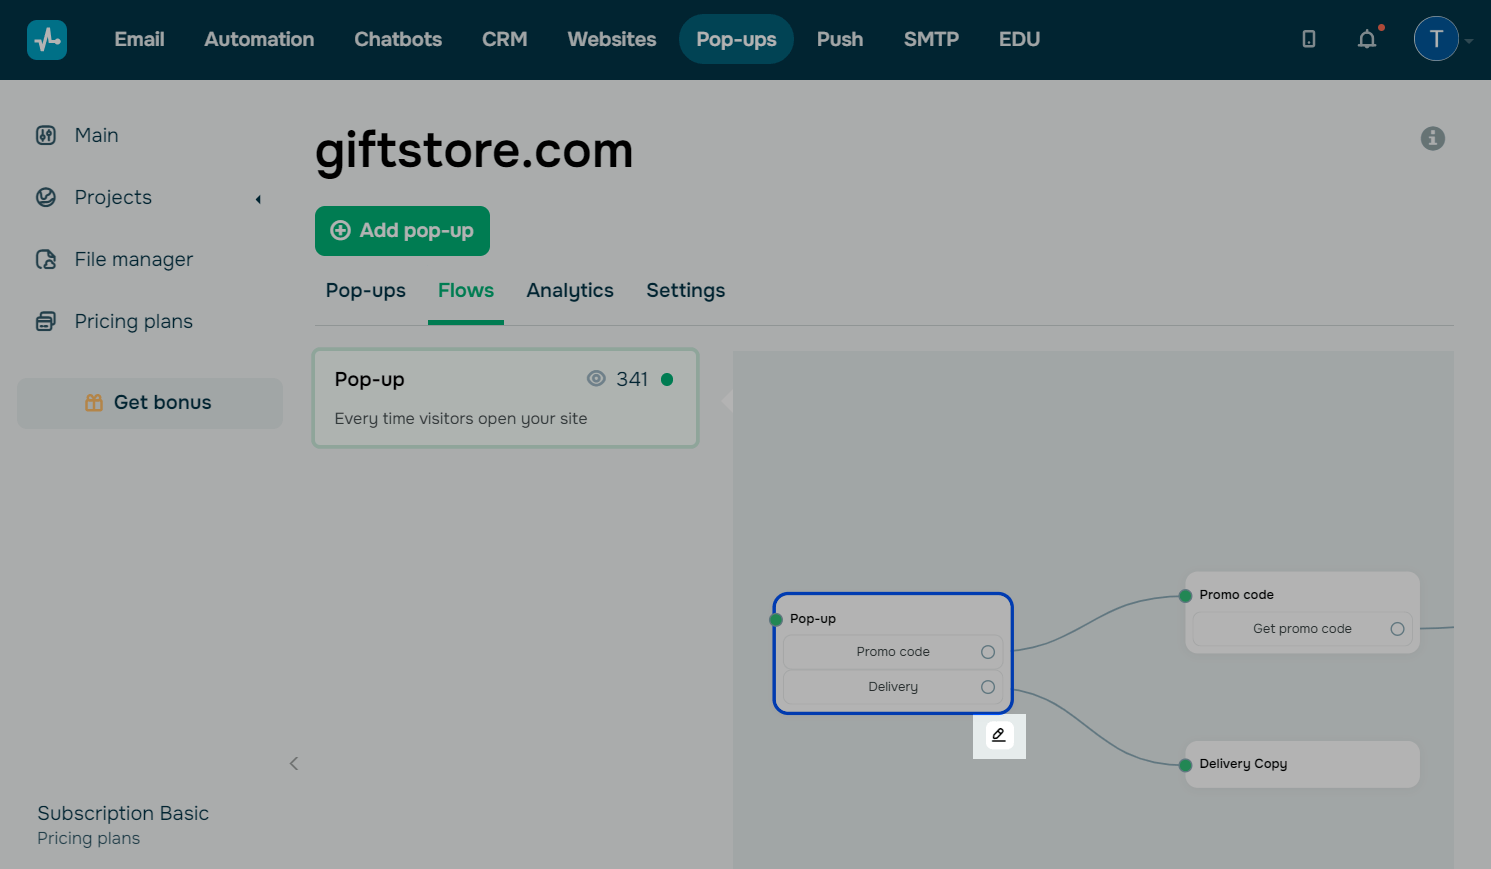
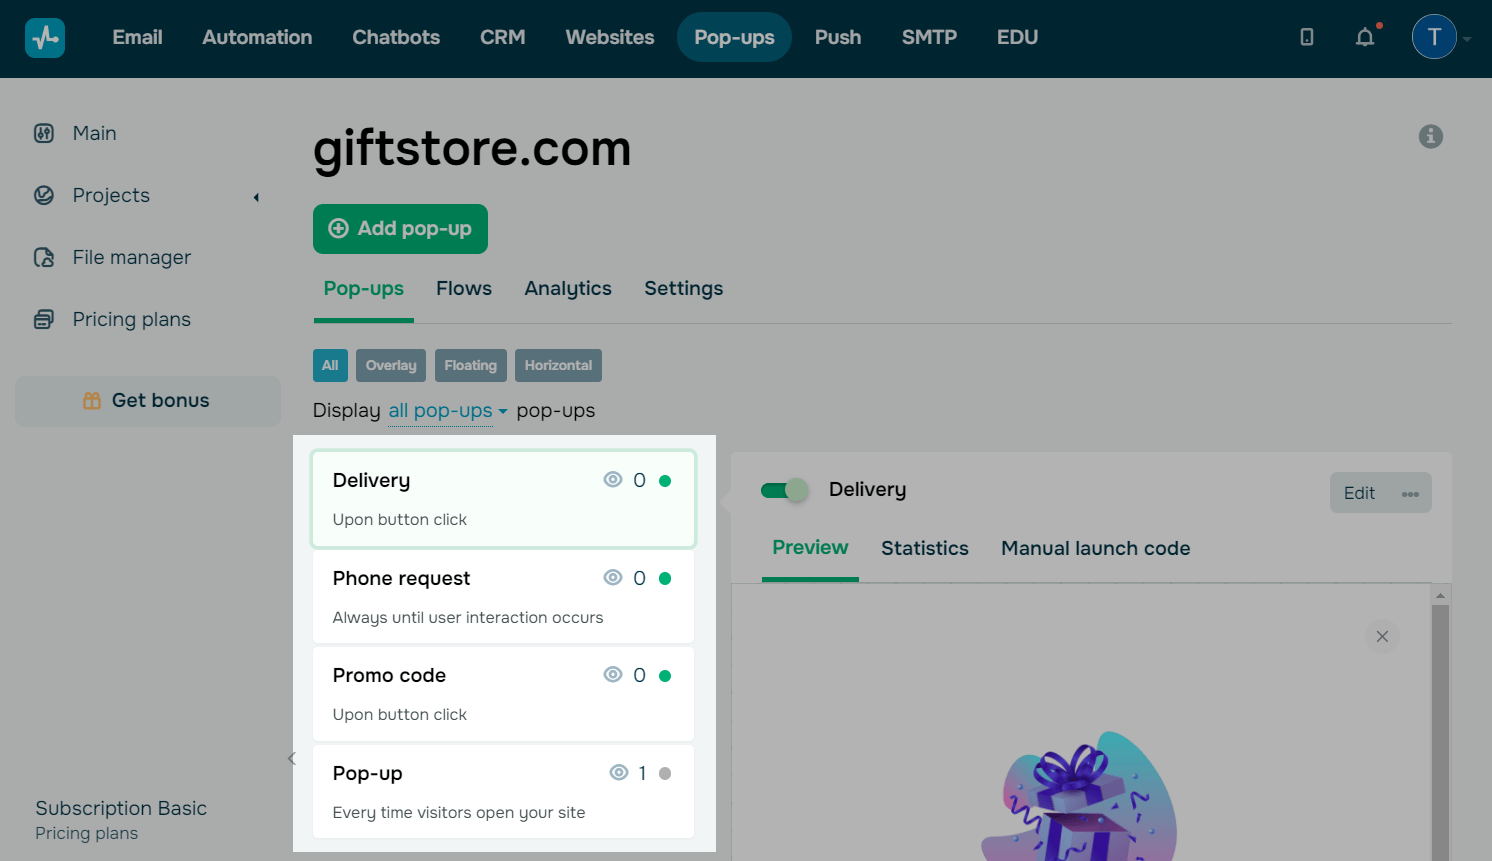
You can view your flow list and the structure of each scenario and edit your pop-ups in the Flows tab.
You can create and display flows using only published pop-ups.
You can view your flow structure and edit the settings of each pop-up.
To edit a pop-up in the builder, click it in the flow, and then click the pencil icon.
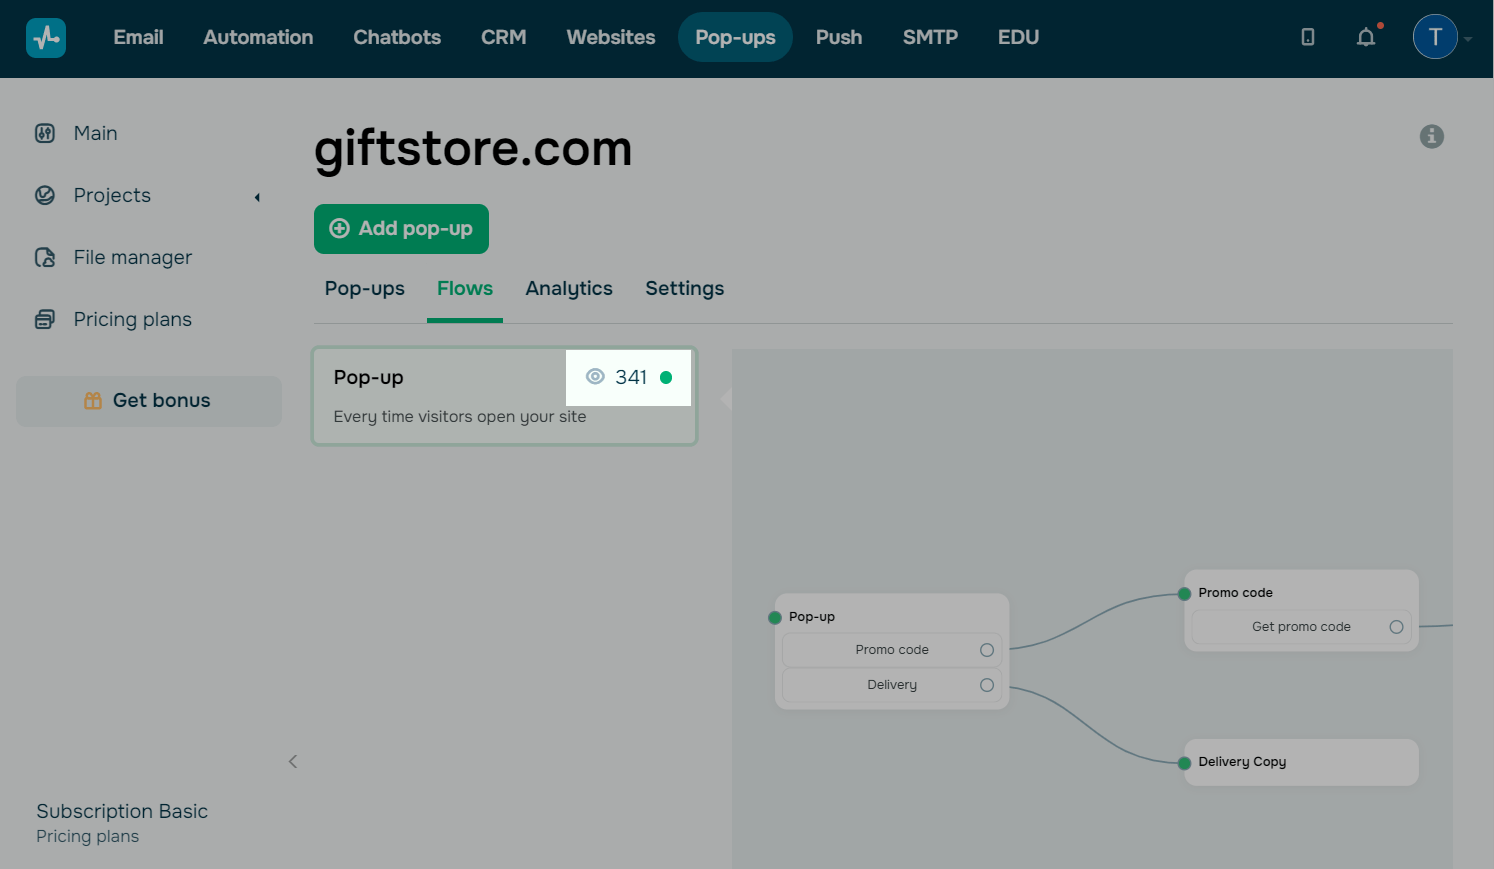
Next to your flow name, you will see your starting pop-up’s view statistics.
The flow name corresponds to your starting pop-up name.
An example with various website offers
Сompanies often run two or more promotions and offers at once. You can combine all of your offers into one consistent flow. For example, place one fixed horizontal pop-up with two buttons that display different offers, like free delivery and promo code in exchange for a phone number.
This way, you will inform your website visitors about all the possibilities and increase your conversion rate thanks to your lead magnet.
Let's talk about how to set it up.
Create a starting pop-up
Click Add pop-up, and choose one of the templates in the Horizontal section.
Add text and other pop-up content. During this stage, you only need to add text and an image. You will have to go back to the button settings when linking your pop-ups.
Once you save all the settings, go to the Display conditions tab, and select Frequency > Every time visitors open your site. Name the created pop-up — this name will be displayed only to you.
Try to choose simple and easy-to-understand names for the pop-ups you create — you will use them to establish links between your pop-ups.
Click Save.
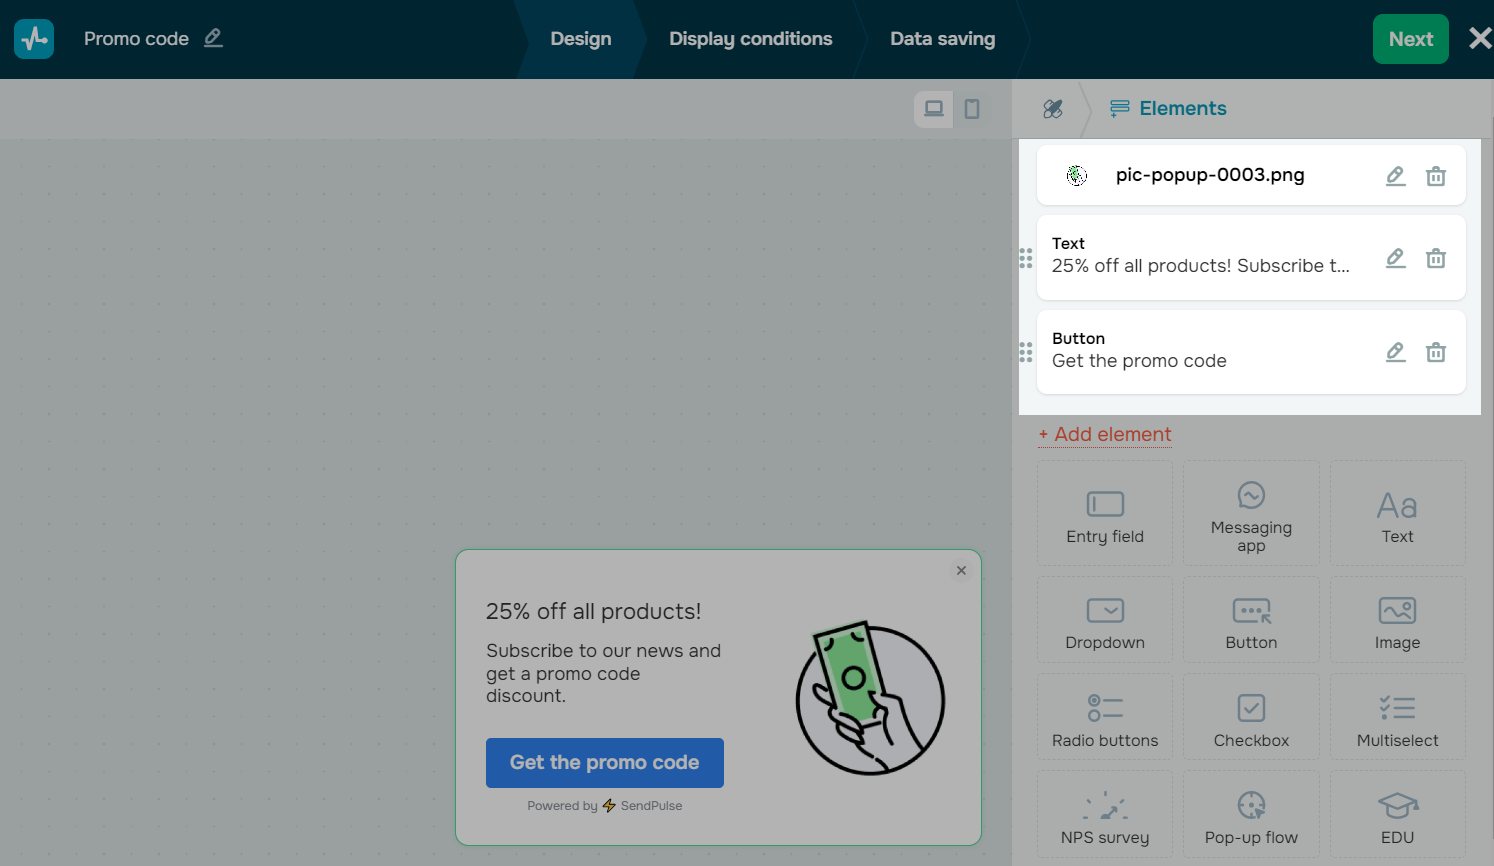
Add a promo code pop-up
Create your promo code pop-up that users can receive by sharing their phone numbers via your form. It will be linked to your next pop-up with a subscription form.
Go to the Display conditions tab, select Clicks > Upon button click, and click Save.
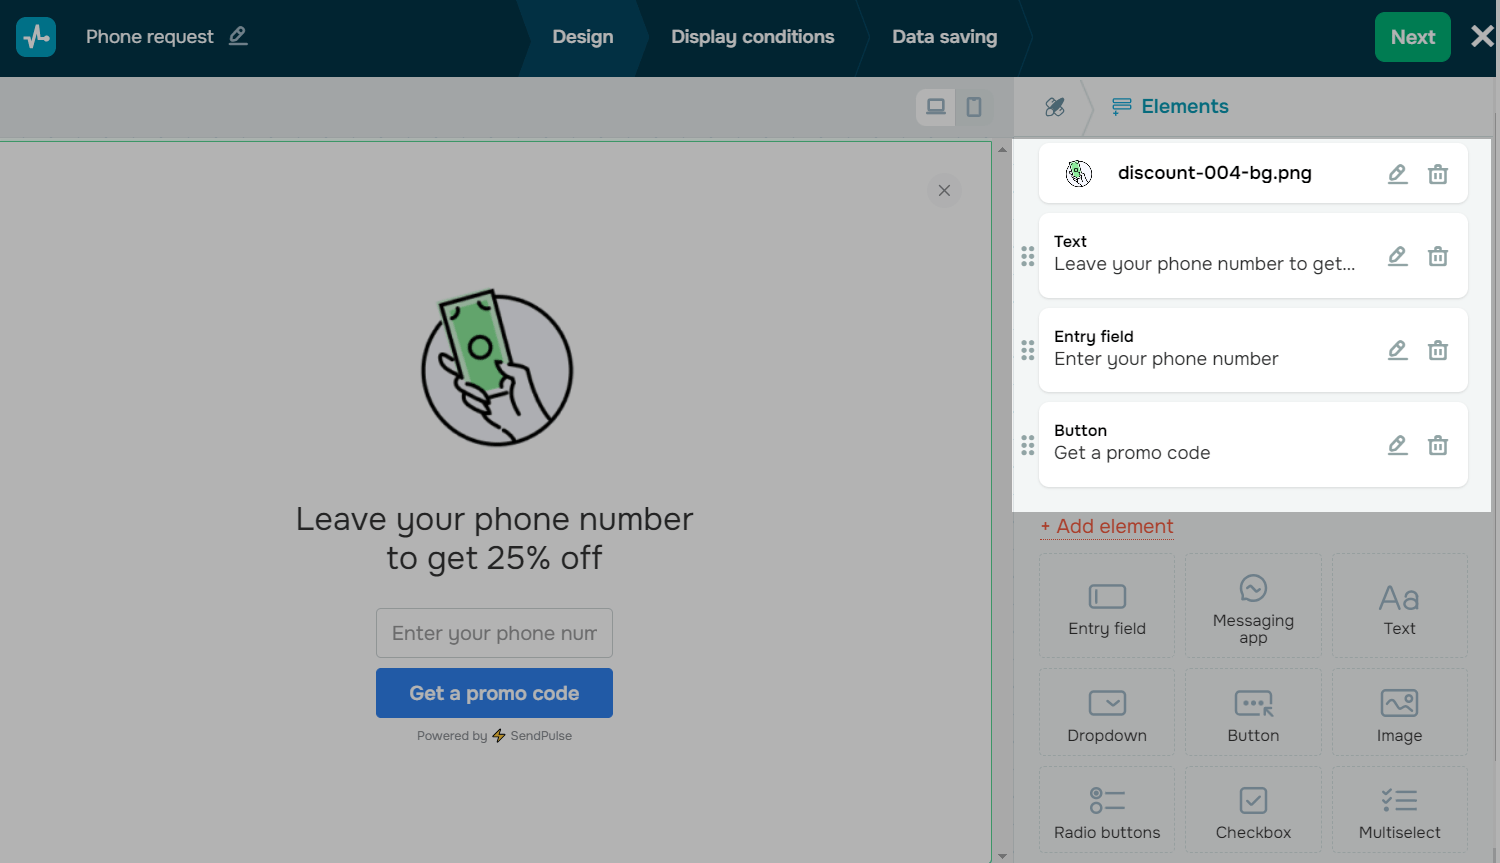
Add a subscription pop-up
Next, create a pop-up that will lead to your subscription form — this pop-up is for visitors who want to receive a discount and share their phone number. This will be the final pop-up of your promo code flow branch.
Add a pop-up of the Phone number request type, customize your button text, and select the mailing list where you want to save your received phone numbers to.
Go to the Display conditions tab, select Clicks > Upon button click, and click Save.
Go to the Data saving tab, and select the mailing list to which you want to save users’ phone numbers. You can also create CRM deals automatically. To do this, select a pipeline and its stage, and enter a deal name.
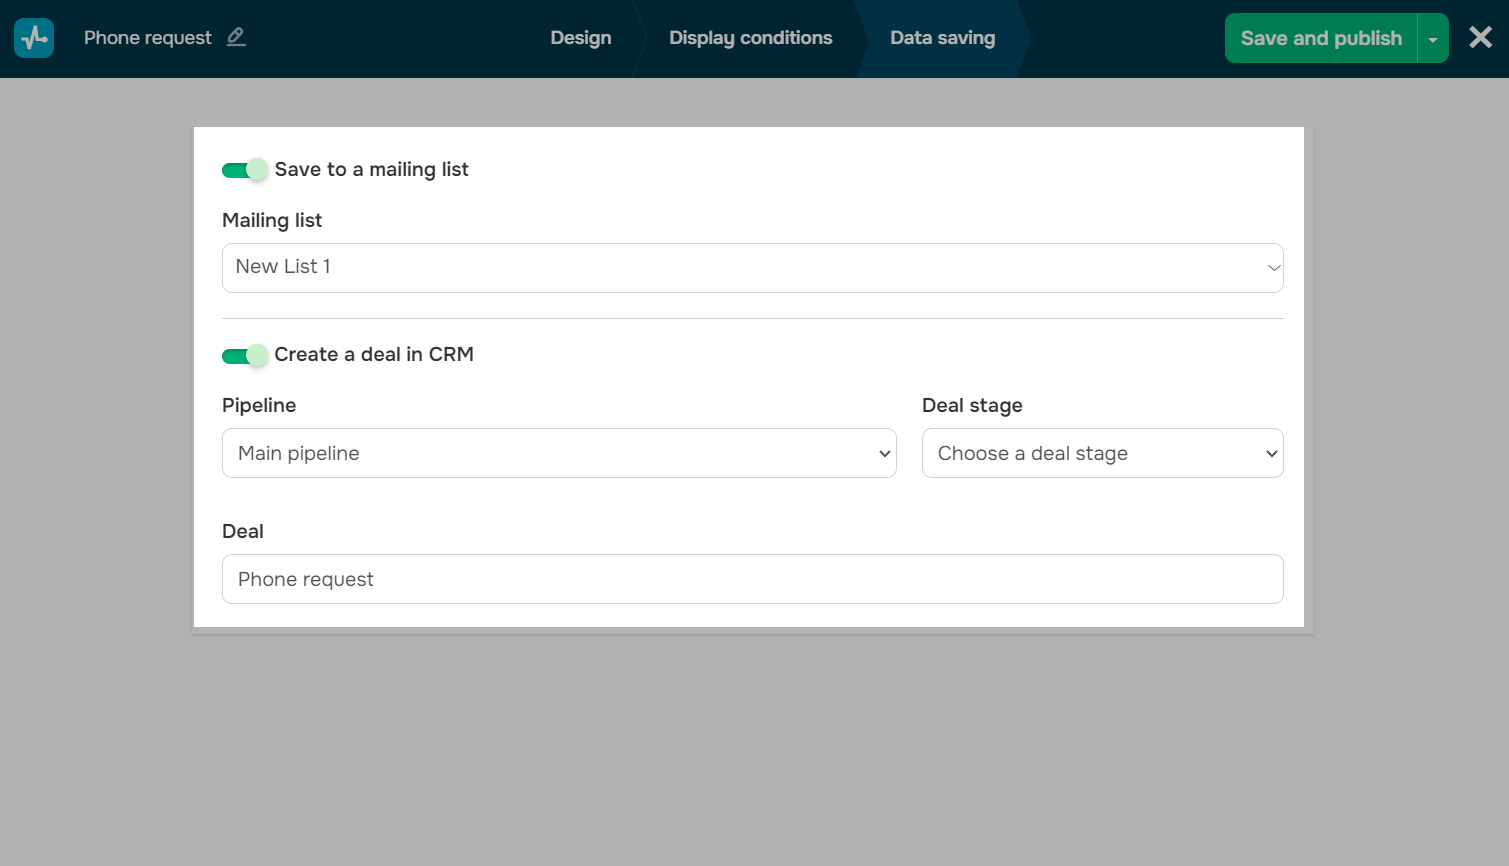
Click Save and publish.
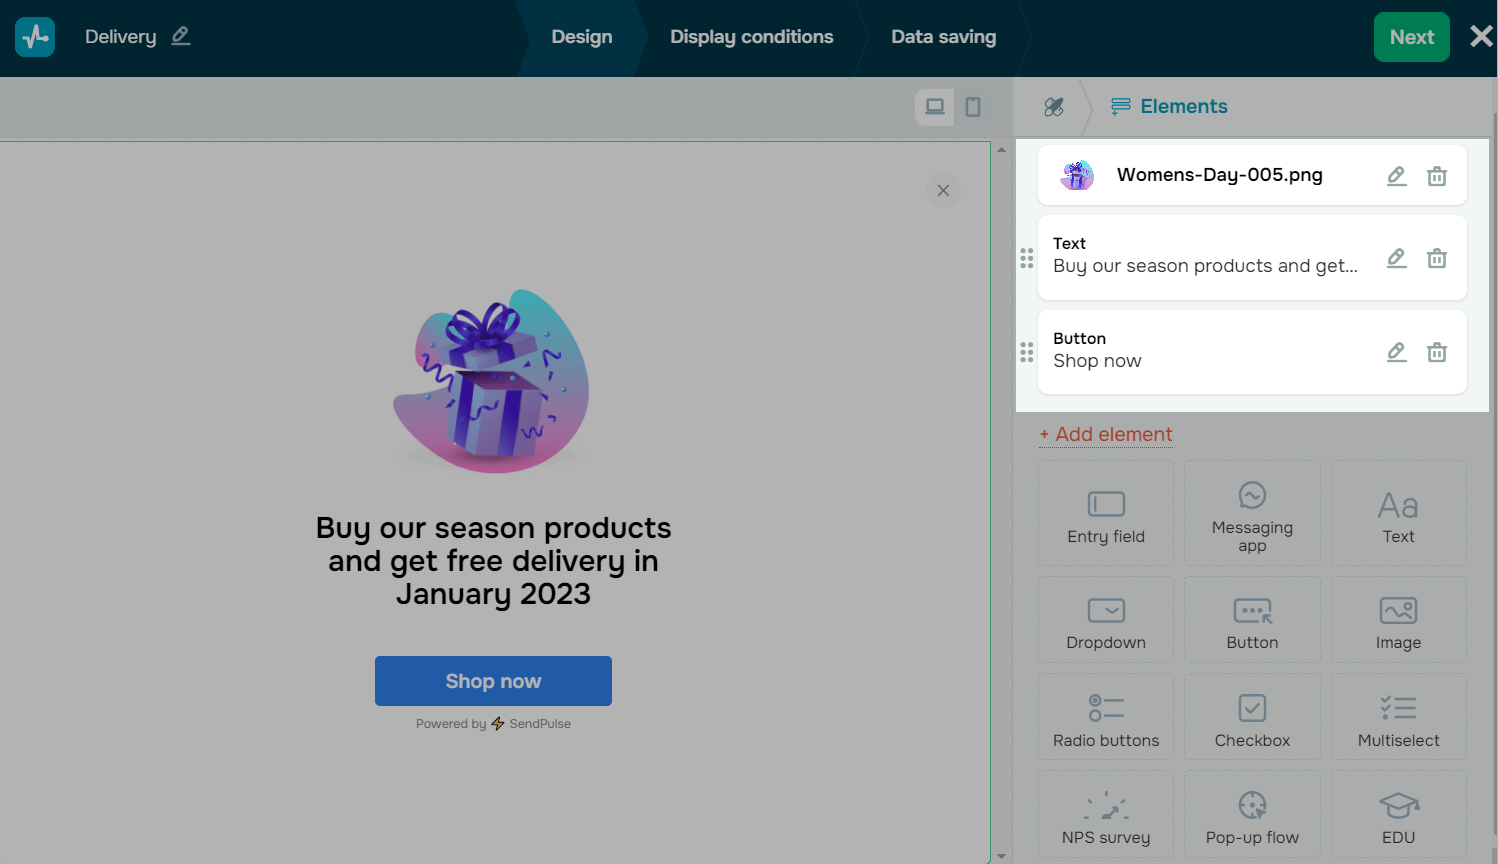
Add a promotion pop-up
Create a pop-up with a free shipping offer or any other offer.
Write out what users should do to get free shipping, and add a button that will lead to your website page with popular products.
Link your pop-ups into a flow
Now we have four pop-ups that need to be linked according to our scenario.
Make sure all of your pop-ups are published before linking them.
Go to your starting pop-up, and click Edit.
Customize the links between your pop-ups. To do this, add the Pop-up flow element. Select the pop-up you want to launch, enter a button name, and select a color.
Follow the same steps to launch your second pop-up.
Click Save.
You also need to link your promo code pop-up with the phone number request form. To do this, go to your promo code pop-up, add the Pop-up flow element. Select the pop-up you want to launch, enter a button name, and select a color.
Click Save.
To view your scenario structure, go to the Flows tab.
Last Updated: 06.05.2025
or