Conduct pop-up A/B testing
A/B pop-up testing allows you to compare two pop-up versions to find the most effective option for achieving your business goals, increasing website conversions, and improving user experience.
In this article, we will talk about how to conduct pop-up A/B testing and view your results.
How to Set Up an A/B Test
You can only conduct A/B testing within one website for an already existing pop-up. Create a pop-up first, and then set up an A/B test for it.
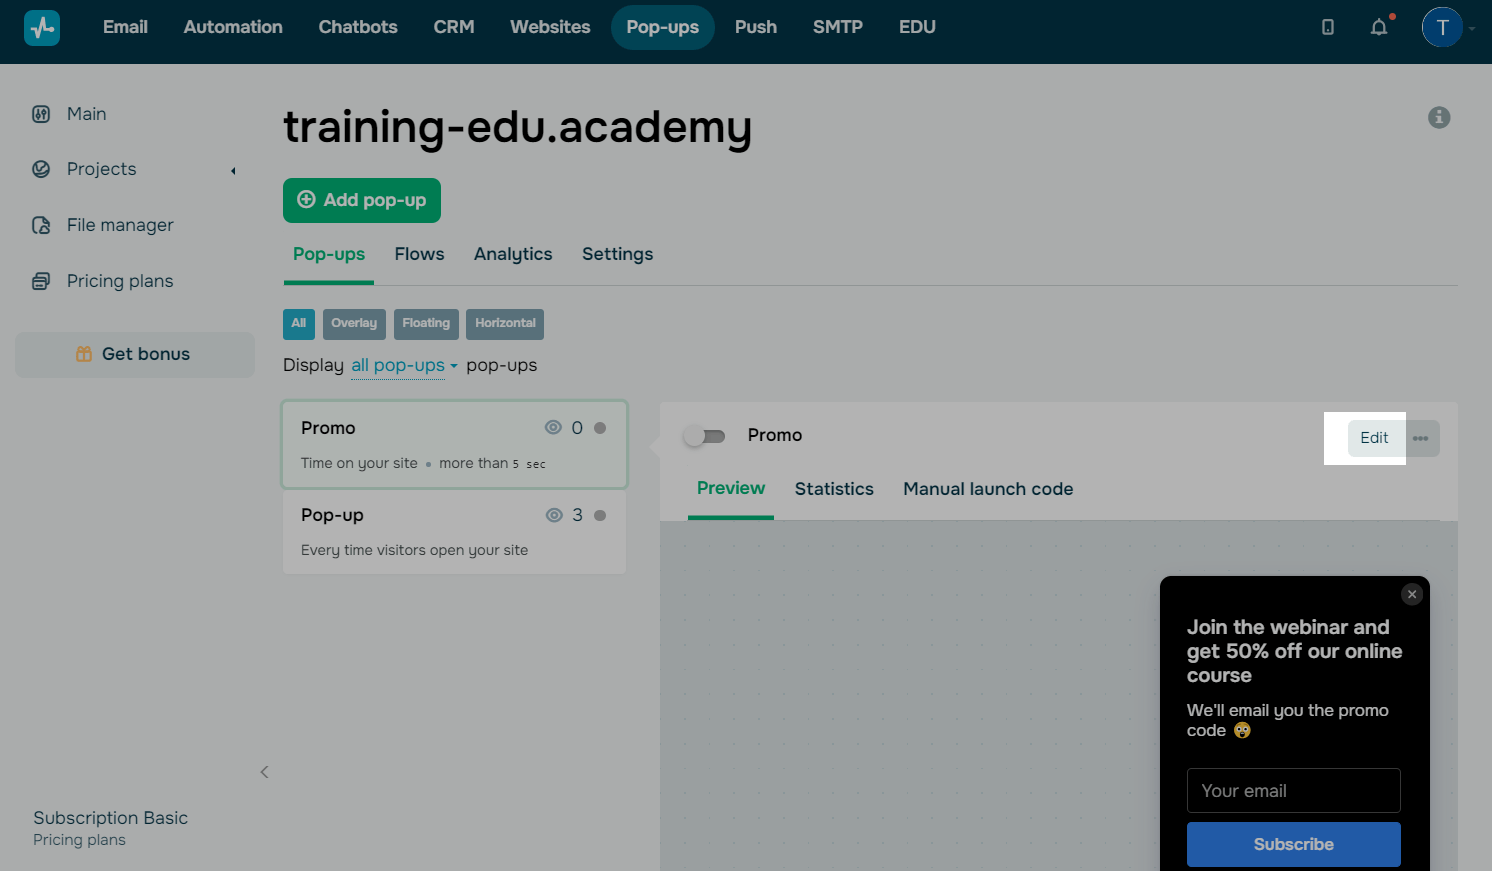
Choose a Pop-up
To start testing an already created pop-up, click Edit.
Enable the A/B Test Option
In the upper left corner of the pop-up builder, turn on the A/B test toggle.
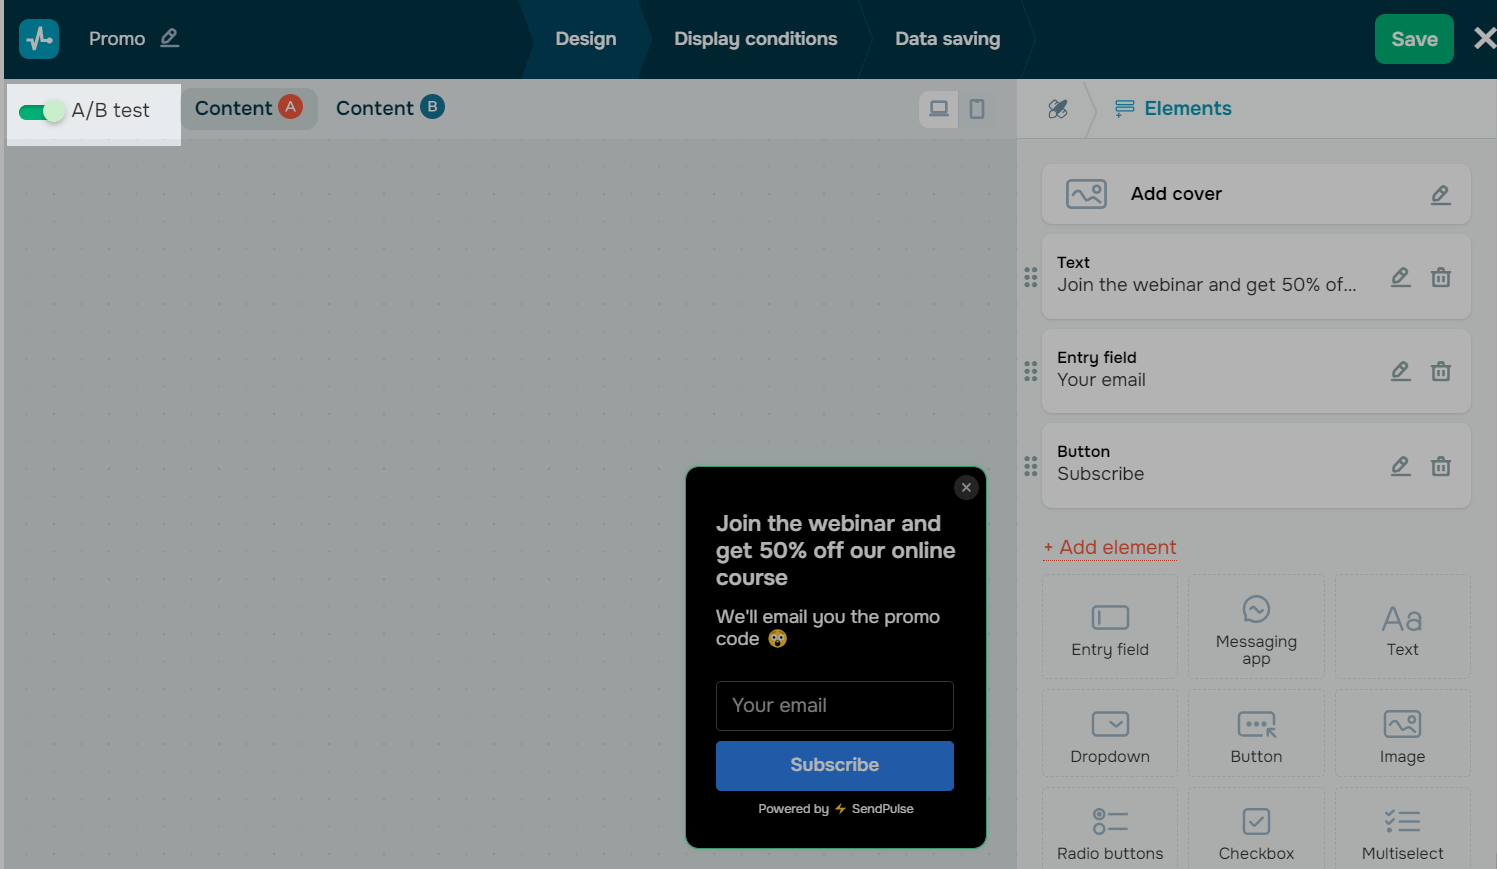
Add Test Contents
Once you enable A/B testing, you will see two additional tabs: Content A, and Content B.
| Content A | A tab with initial content settings selected before the A/B test option was enabled. |
| Content B | A tab with similar content settings where you can create the second version of your pop-up for the test. |
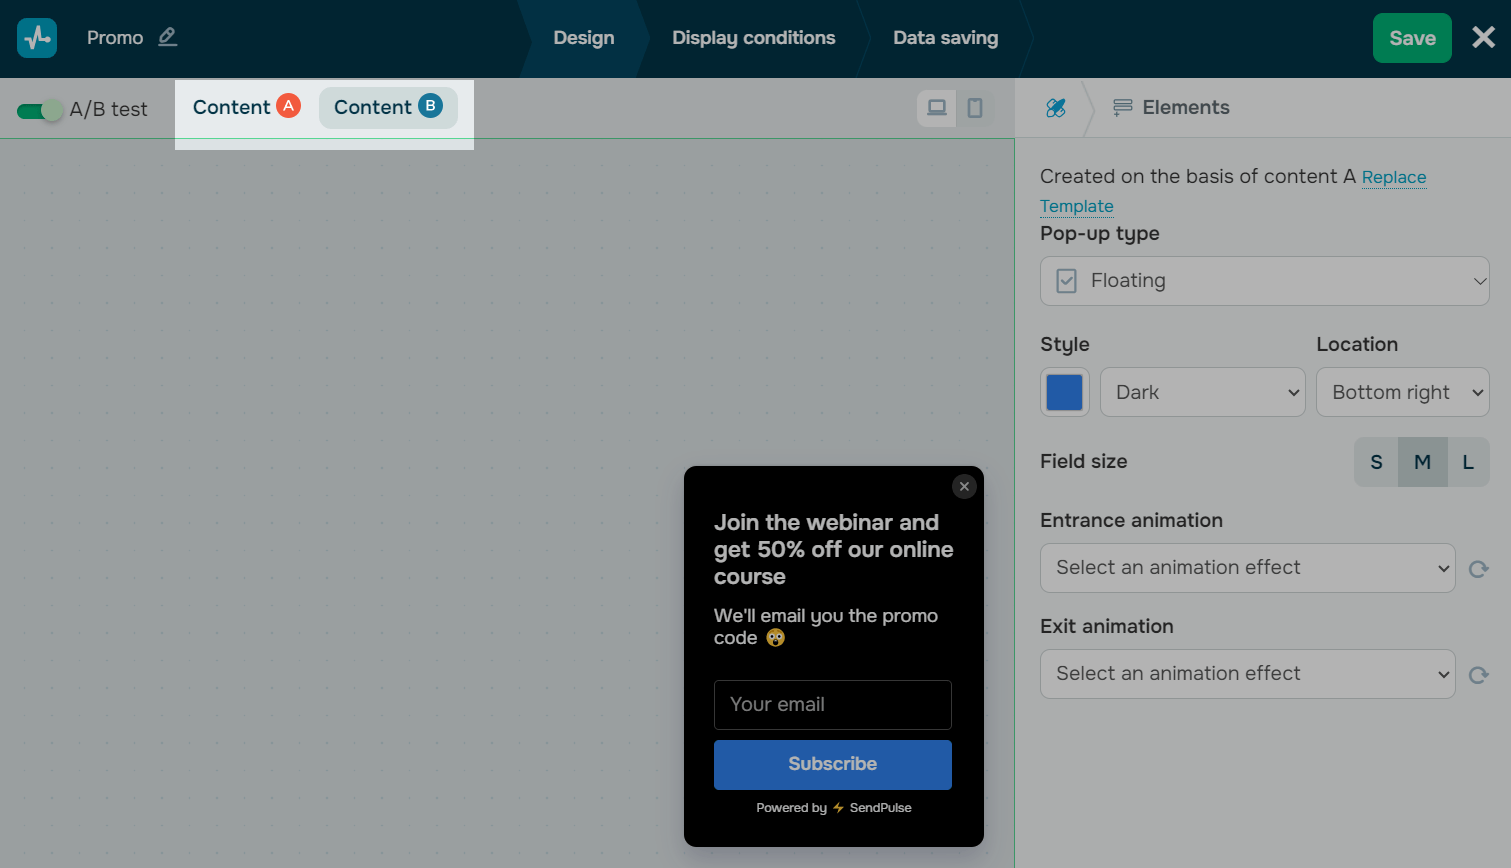
To choose a different pop-up design for the Content B version, go to the design tab on the right panel, and click Replace template.
You can only choose the templates that have already been used for this project’s pop-ups.
Read more: Customize Your Pop-up Appearance.
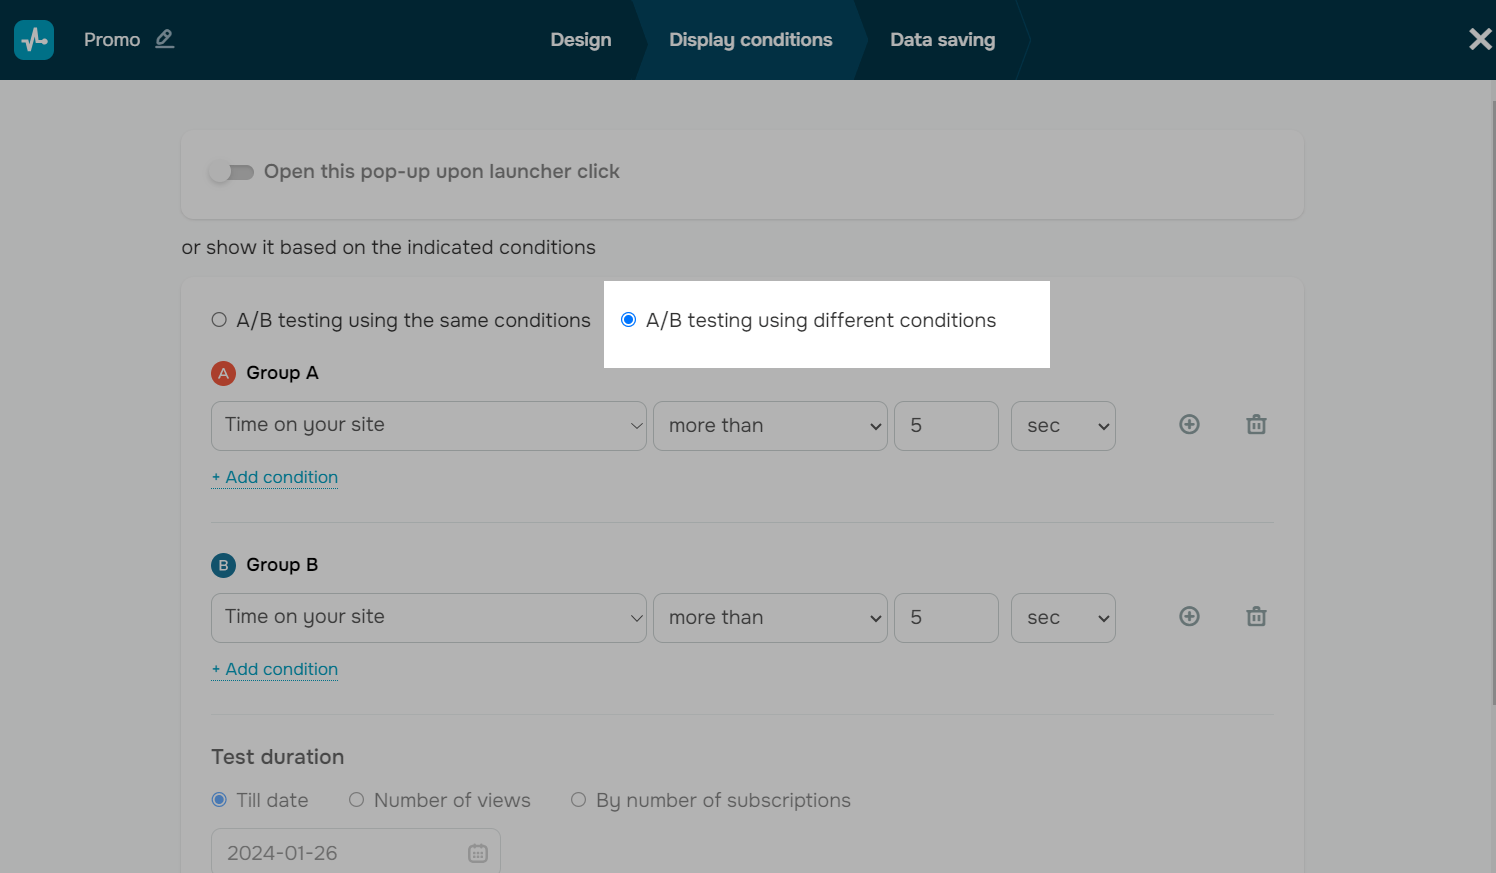
Select Display Conditions
You can set up display conditions for each pop-up version individually or for both.
Go to the Display conditions tab, and select a pop-up display condition from the drop-down list. To add several conditions, click +Add condition.
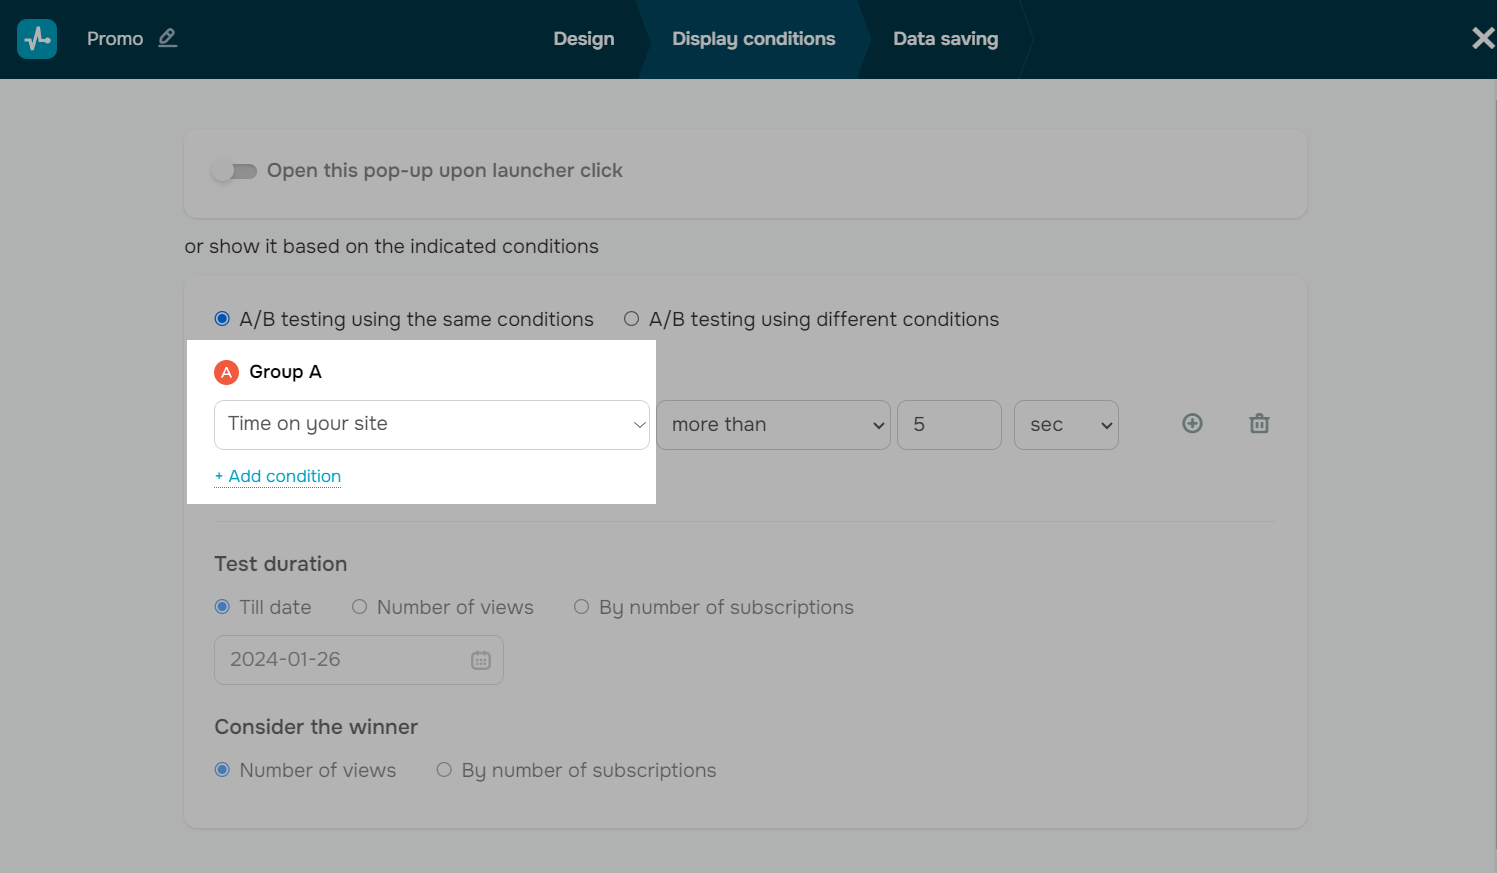
To choose different conditions for the two pop-up versions being tested, select the Use different conditions for AB-testing checkmark, and choose a condition for each.
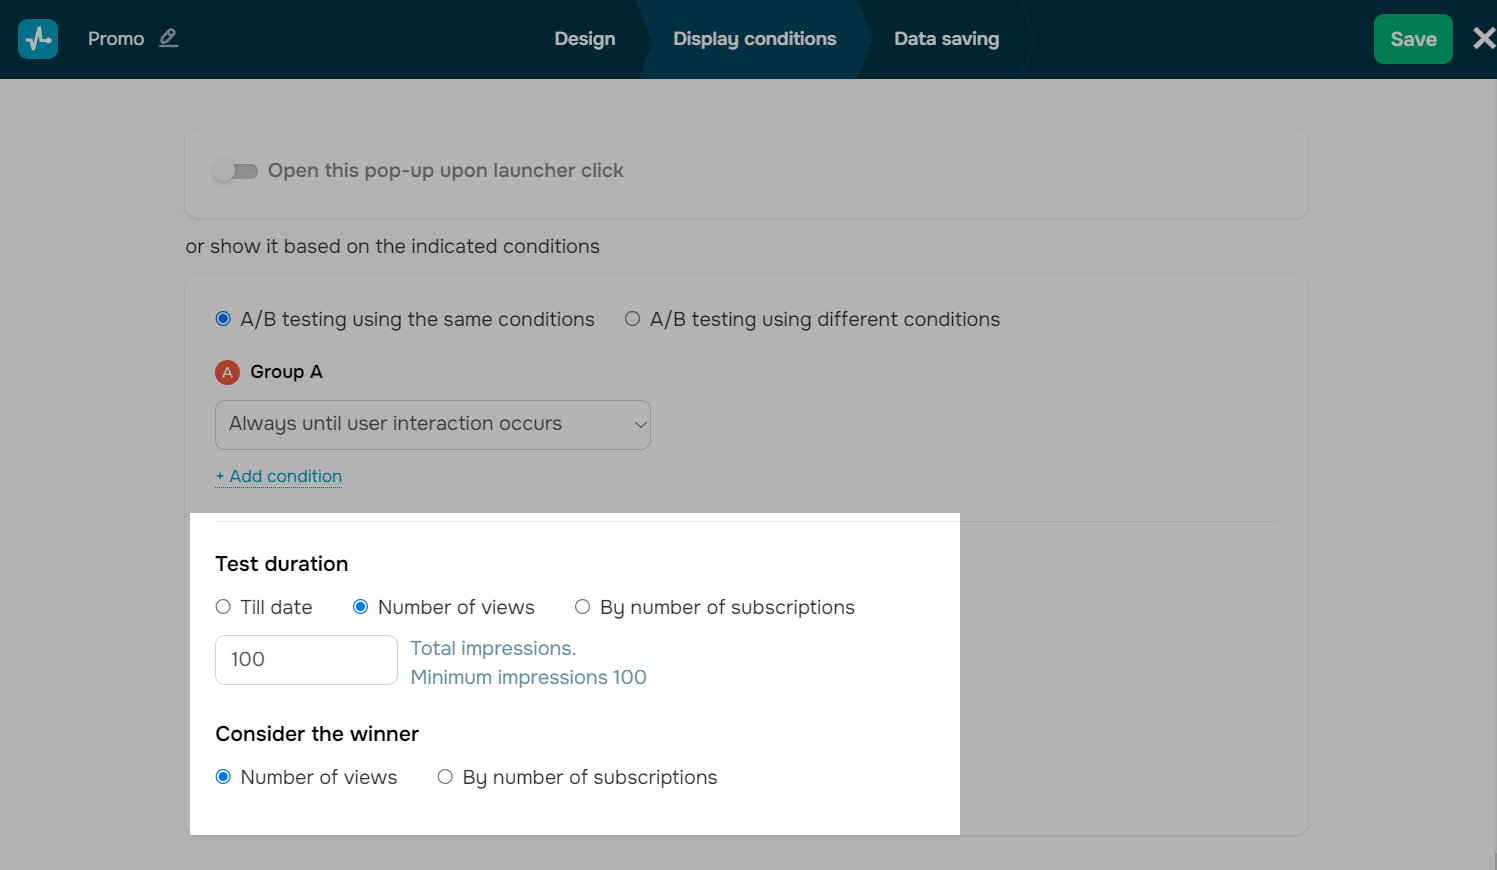
Select Test Duration Conditions
Choose when you want to finish testing. There are three conditions available:
| Until the date | This option will continue your A/B testing until a specific date selected in the settings |
| Number of views | This option will continue your A/B testing until you reach a specific total number of views in both pop-up versions. |
| By number of subscriptions | This option will continue your A/B testing until you reach a specific number of leads who provided their contact info using your form. |
For the By the number of views condition, you can also choose which pop-up to consider the winner: the one that collected more views or the one that collected more leads.
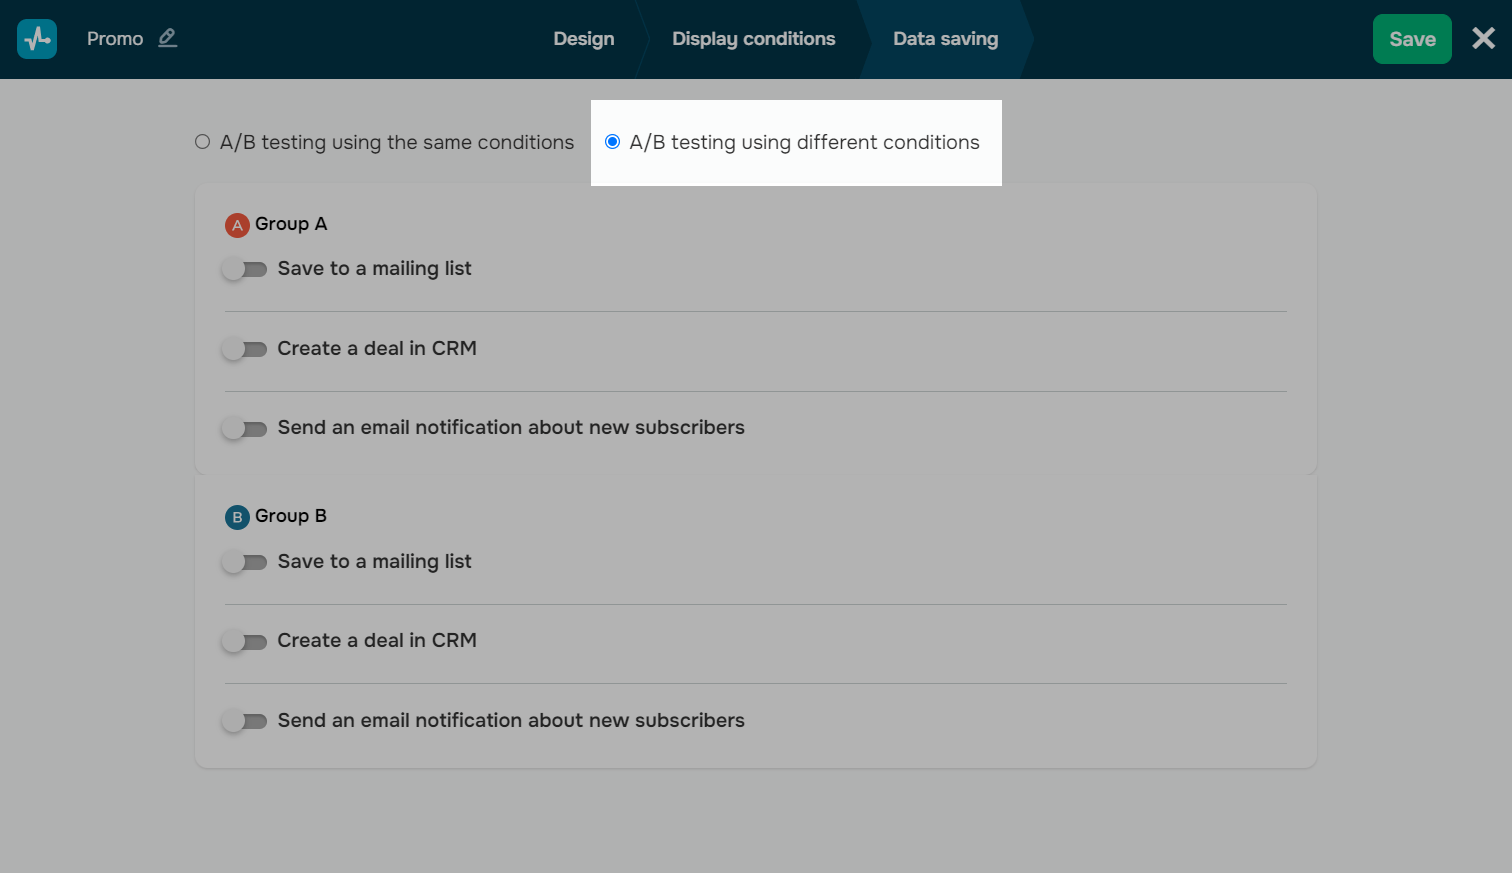
Configure data saving options
In the Data saving tab, you can choose where to store subscriber data.
Read more: Data saving.
You can configure data saving options for each version individually. To do this, select the A/B testing using different conditions option, and choose what you want to do with acquired data (save to a mailing list, create a deal in CRM, and send an email notification about new subscribers).
Once you finish with all the settings, click Save and publish. You will get one pop-up in the project, but users will be shown its two different versions in turns until the test duration condition is triggered.
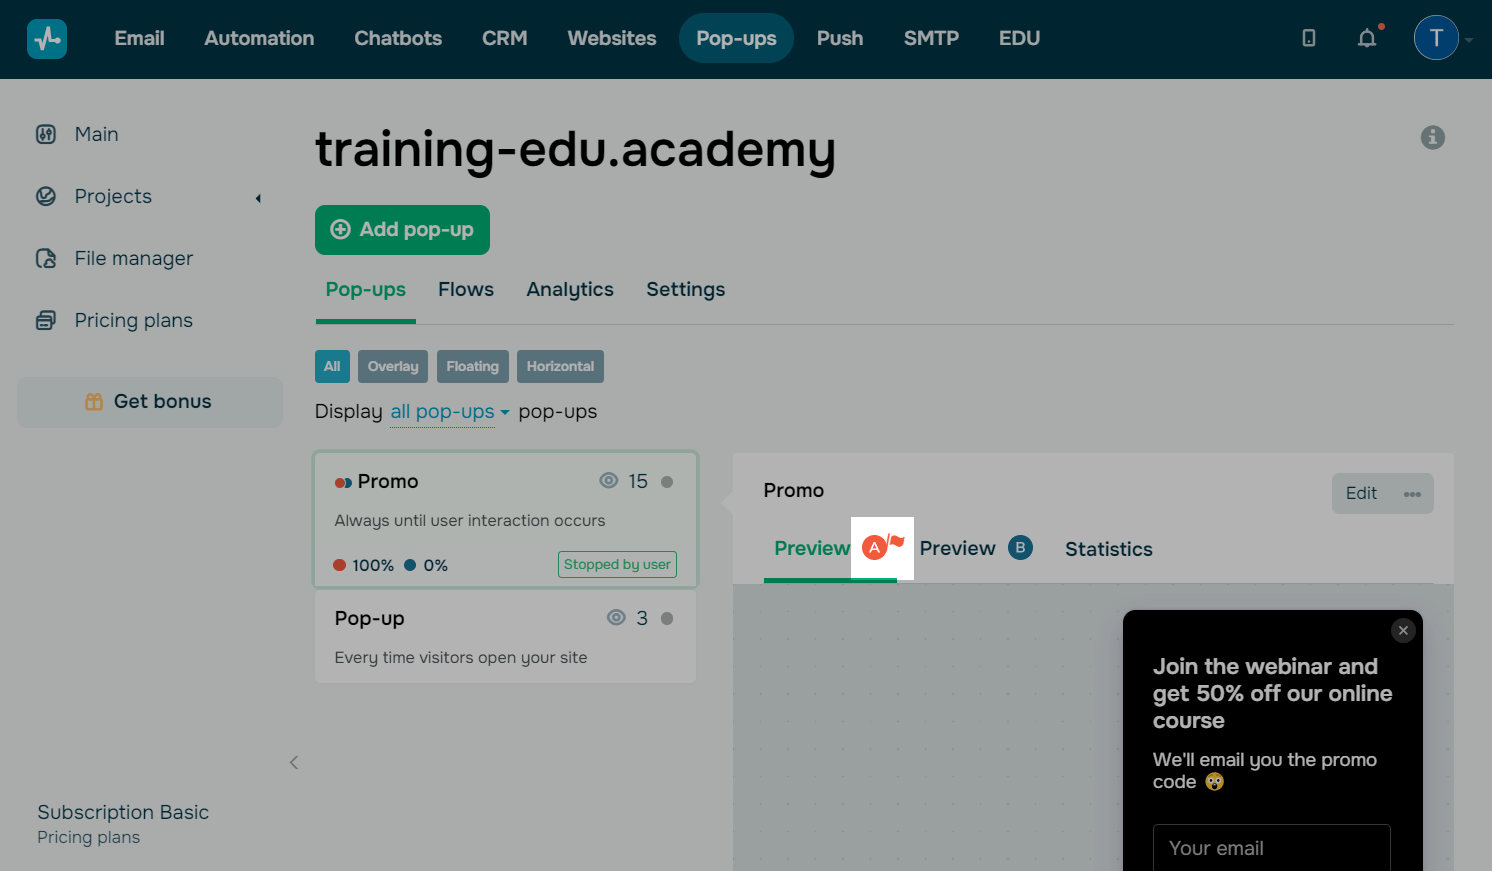
How to View the Results
Once you start your A/B test in the project, you will see a counter next to your pop-up name, where the total number of views will be displayed.
Below, you will also see a percentage indicator of how many leads and views are generated by your pop-up and testing status (active or stopped).
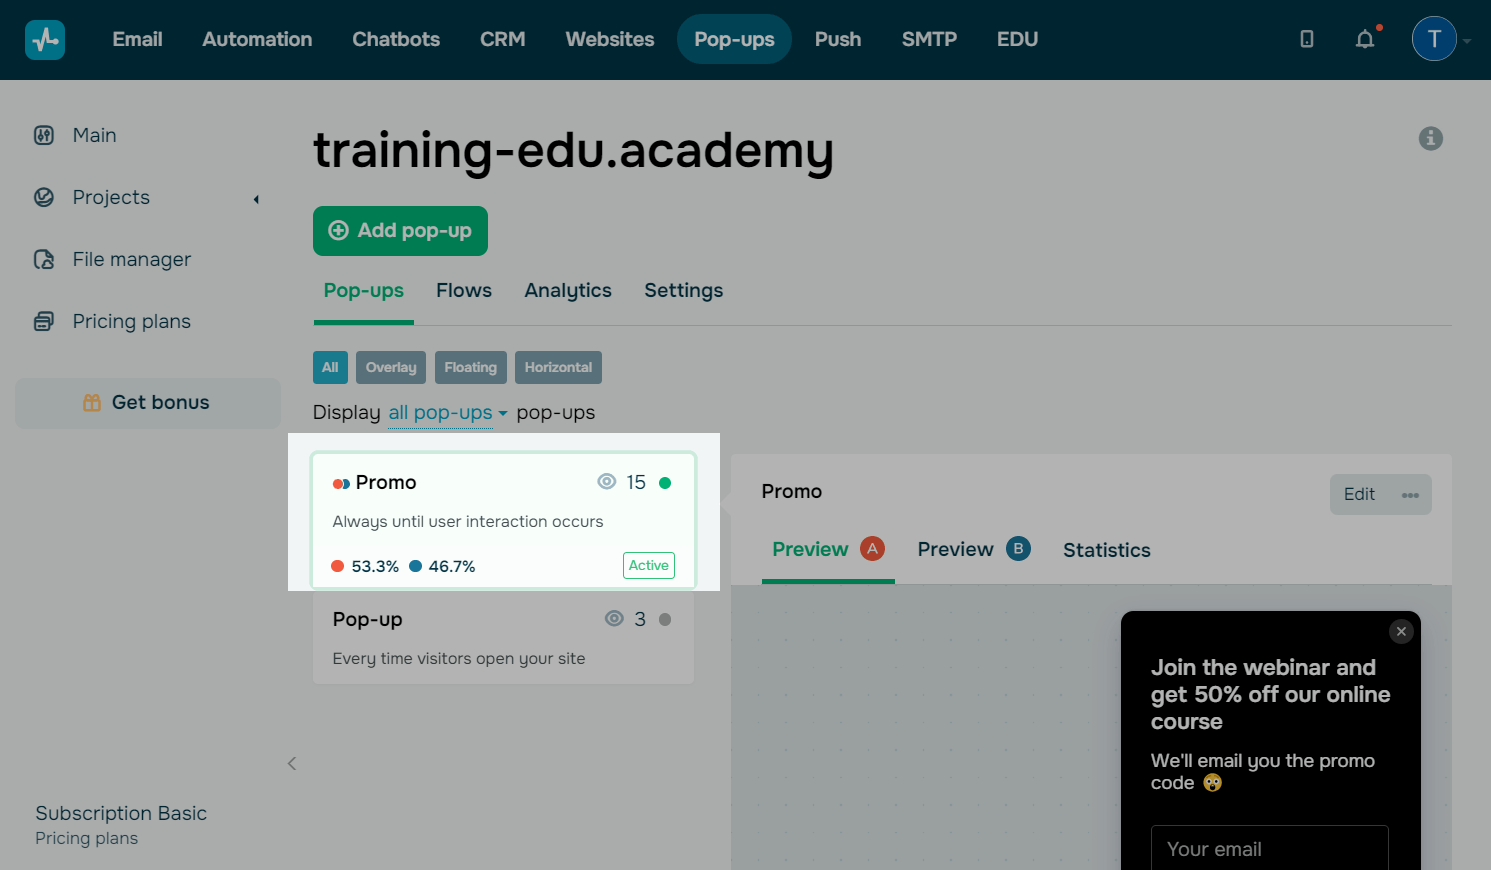
You can also view statistics and monitor your pop-up’s performance over various periods of time in the Statistics tab. You will see your pop-up’s total number of views, interactions, and leads, as well as the A and B versions’ performance metrics compared in percentages and graph with number of views.
Read more: How to View Your Pop-up Statistics.
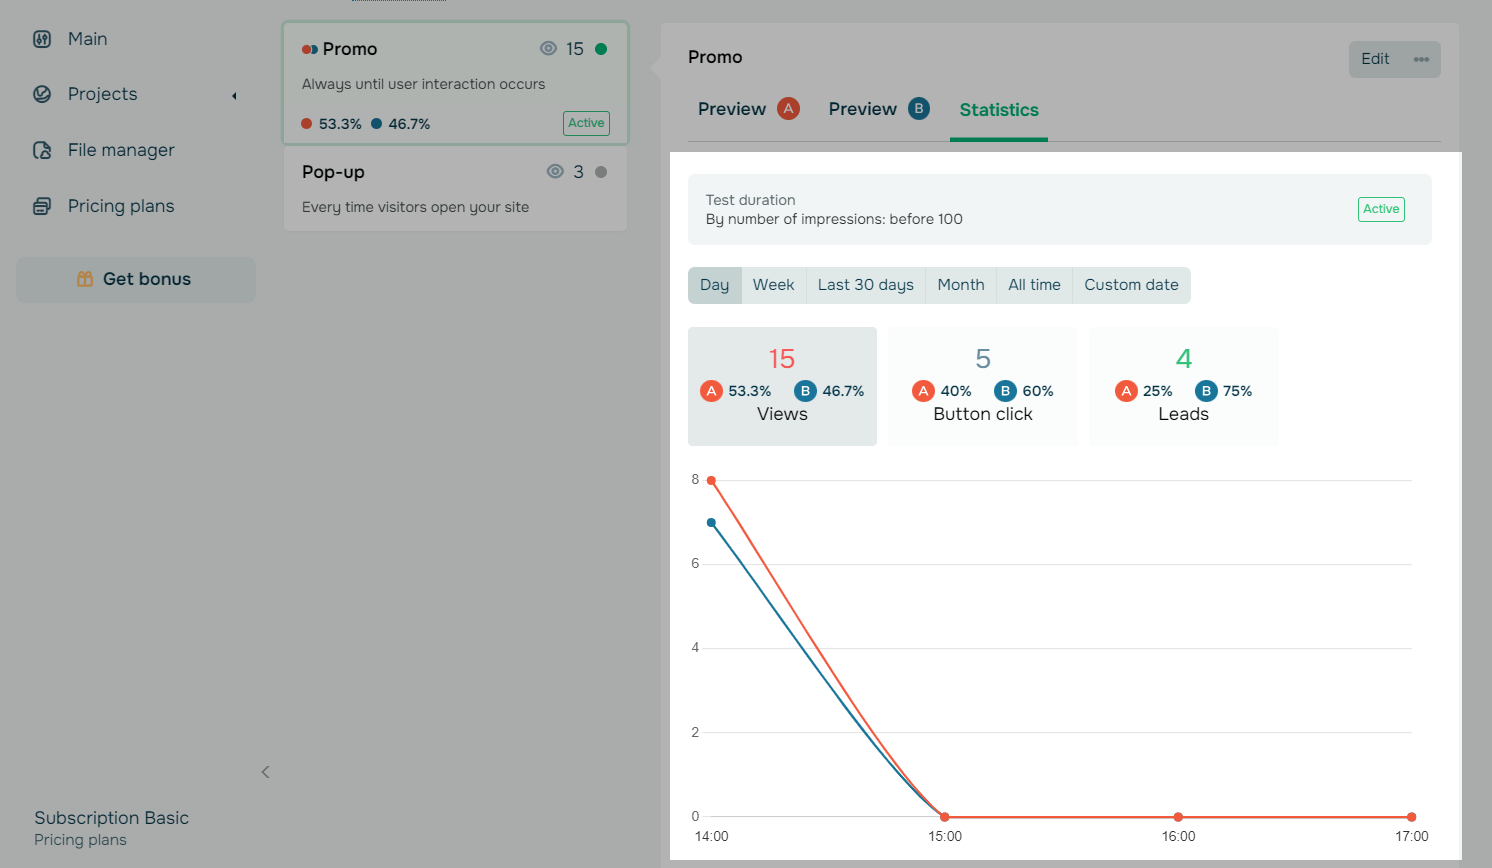
When the test duration condition is triggered, or you complete the test yourself, the winner will be selected from the two pop-up versions according to your selected criterion. It will be marked with the flag icon, meaning that this pop-up’s content and display conditions are more effective.
How to Stop an A/B Test
You can stop a test even before the selected condition is triggered. To do this, click the three dots icon > Stop testing.

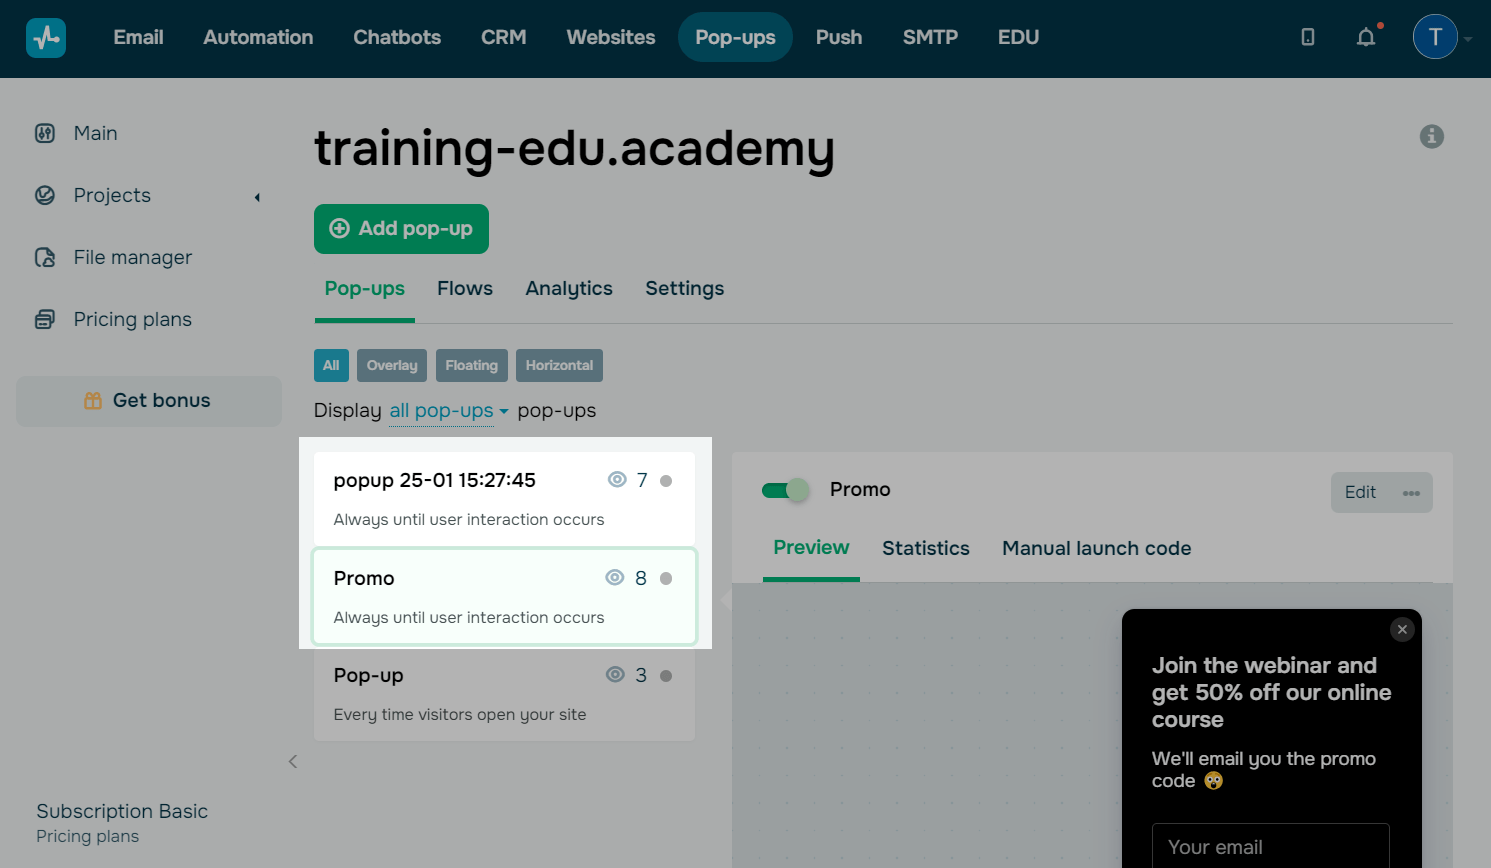
Next, you can delete your test. To do this, click the three dots icon > Delete.

Once you remove your test, you will get two separate pop-ups in your project. Then, you can set up A/B testing for each pop-up separately if you want to identify the most effective one.
Last Updated: 06.05.2025
or