Create a custom subscription confirmation email
A subscription confirmation email is the beginning of your communication with a customer and an important step in creating a positive first impression. This email is sent once a new email address is added to your mailing list via API or a subscription form.
You can use SendPulse’s default confirmation email or create your own based on your corporate identity and tone of voice.
In this article, we will talk about how to create a custom confirmation email using SendPulse.
Why do you need a confirmation email
Sending a confirmation email and using double opt-in allows you to:
- know if users are actually interested in receiving emails from you;
- keep your mailing list clean by filtering out unwanted email addresses;
- build a good sender reputation (invalid email addresses and unwanted contacts in your mailing list can negatively affect your sender reputation and lead to email bounces and rejections);
- comply with GDPR requirements, which are mandatory when collecting and processing personal data, including email addresses, in the EU.
Before you start, we recommend familiarizing yourself with the best email confirmation practices and examples.
Developing a template using subscription tools
Use this method to send a confirmation email via the Add Emails to a Mailing List (double-opt-in) method and a simple subscription form.
Create a new email template
Go to Service Settings > Subscription tools. Click Confirmation emails.
Click Add confirmation email.

Fill in the fields
Specify your template name to be able to quickly find it in the list and confirmation email subject line.
Select a sender email address and email language for the SendPulse moderators to check your template.
Use your business email address as a sender email address.
A business email address is a corporate email address that contains a unique domain name. Using a business email address allows you to avoid email delivery issues and improve your sender reputation. If you already have a website and a registered domain, you can use them to create a corporate email address.
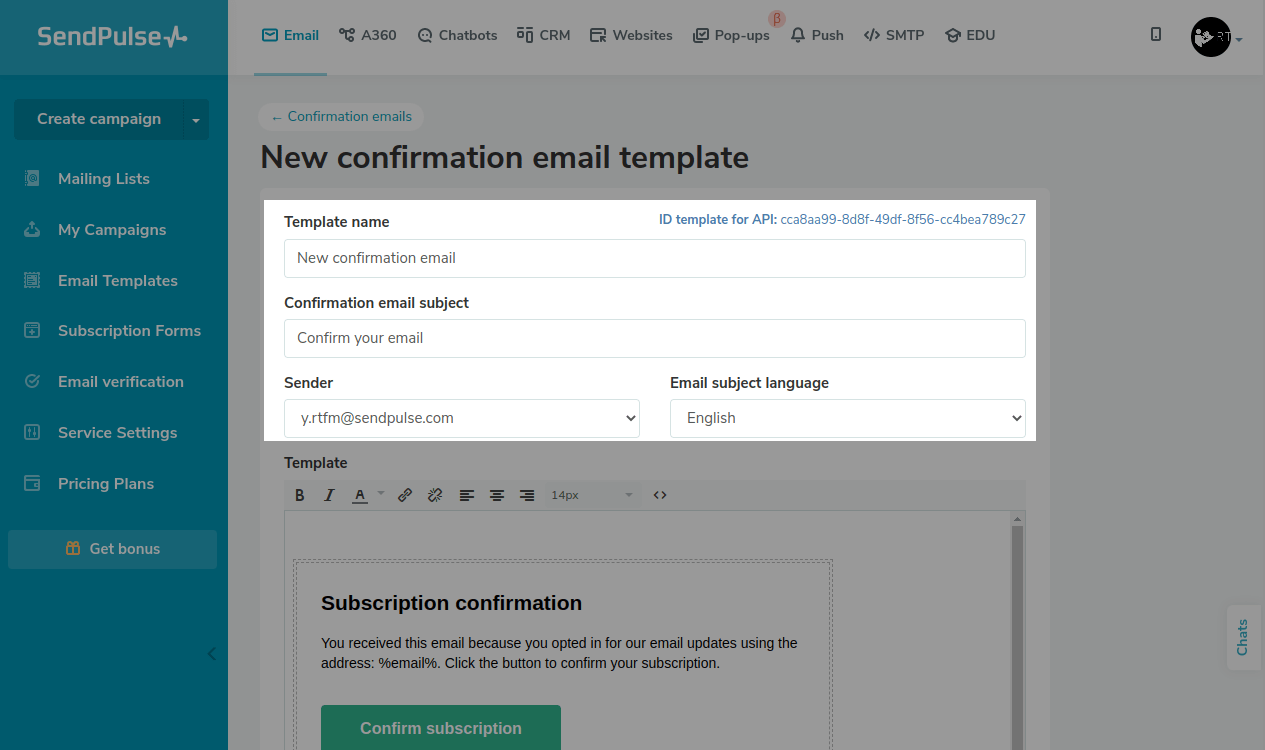
If you are using the SendPulse API to collect email addresses, copy your template ID — it will be available once your saved email passes SendPulse’s moderation.
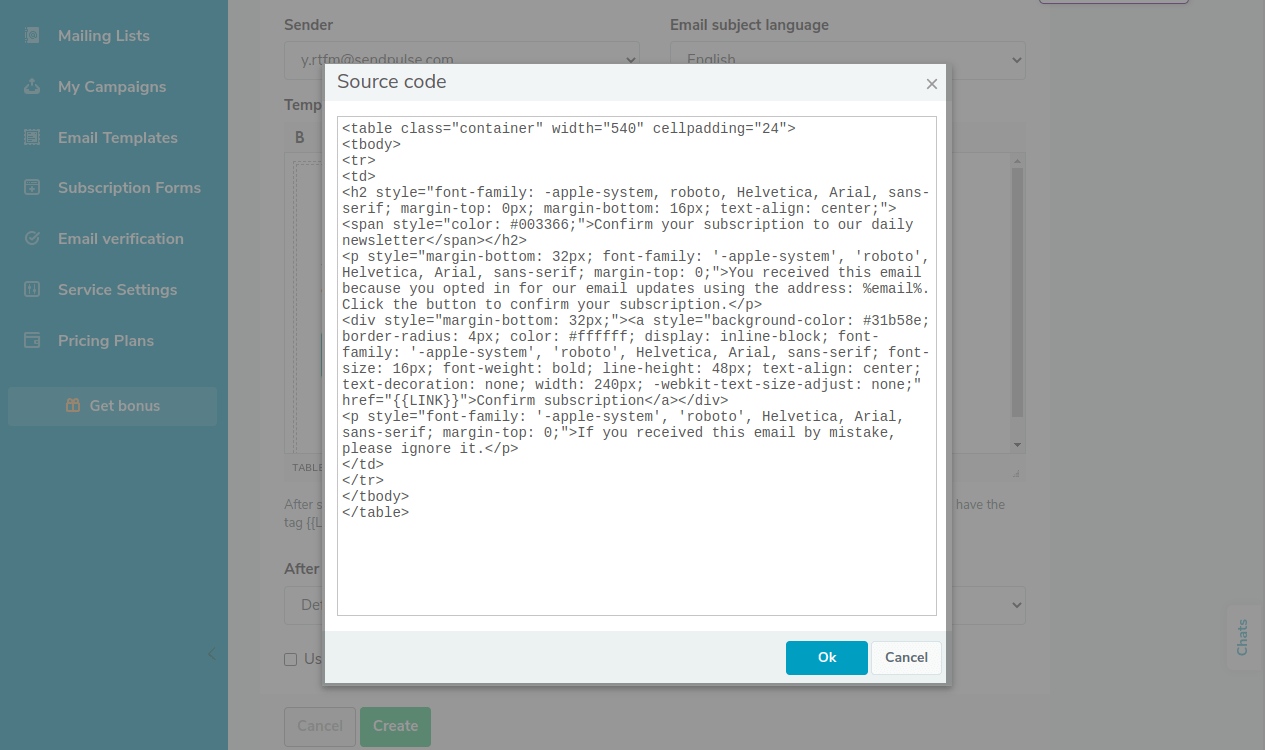
Add email content
You can use one of the SendPulse templates or create an original confirmation email.
The visual editor offers all the essential text tools (fonts, color, hyperlinks, alignment, and font size in pixels).
You can also click the < > icon to open the HTML code editor, customize your text display using inline styles, and add images.
To personalize your email, you can add variables created in your mailing list and linked to your subscription form fields, such as %email%, %name%, and more.
When editing your email, make sure to use the {{LINK}} tag — the system will replace it with a subscription confirmation link.
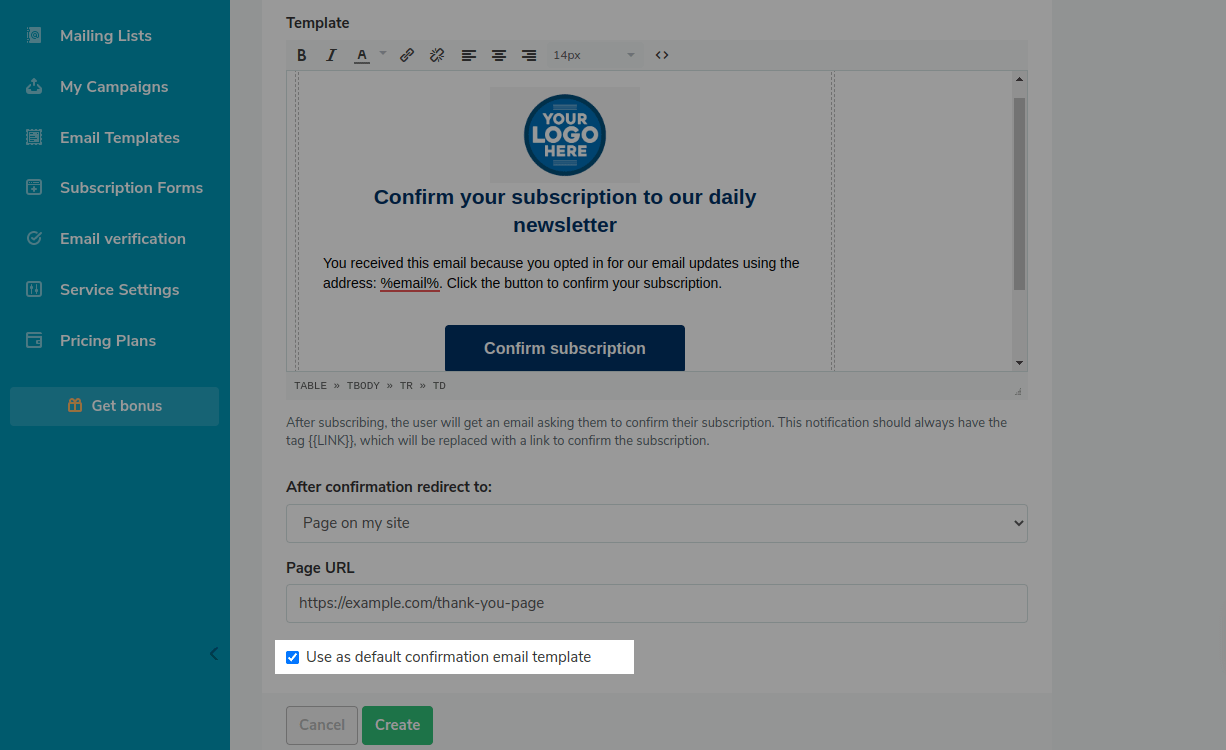
Finish setup
Select where to redirect users once they confirm their subscriptions (the default thank-you page or your website page).
If you selected your website page, enter its URL.
Select the Use as default confirmation email template checkbox if you want to set your new template as default, and click Create.
SendPulse moderates your confirmation email template every time you edit it. Users continue receiving a default confirmation email until your template gets approved.
With this in mind, try to make all the necessary changes to your template before saving it to speed up the process.
Developing a template using the form builder
Use this method to send a subscription confirmation email via a form created with the drag-and-drop form builder.
In the form builder, go to Form Options > Opt-In Settings, and turn on the Enable double opt-in toggle.
Follow the steps described in the Developing a Template Using Subscription Tools section of this article — they are similar. Specify your sender's email address and subject line, and edit the content using the visual editor or code editor.
In the Confirmation page tab, you can change your user redirection settings and add a custom thank-you page.
Last Updated: 05.12.2023
or