Set up an SPF record
An SPF record defines the list of servers that can send emails on behalf of this domain, and how to process emails that were sent from other servers. By setting up an SPF record, you can reduce the risk of sending spam on behalf of your domain and improve inbox deliverability.
In this article, we'll talk about how you can generate a record for your domain to send emails from SendPulse’s servers and add it to your domain's DNS settings registrar site.
If you have already set up DKIM and SPF records to authenticate your domain in the email service, you don’t need to set up a DKIM record in the SMTP service.
All services share the same record settings, so you only need to add them to your host provider once. You can skip the first two sections of this article and go to the Check an Entry Status section.
Copy an SPF record
If you have already generated records in the SMTP service, it means that you already have a DKIM record, so go to Copy existing domain record.
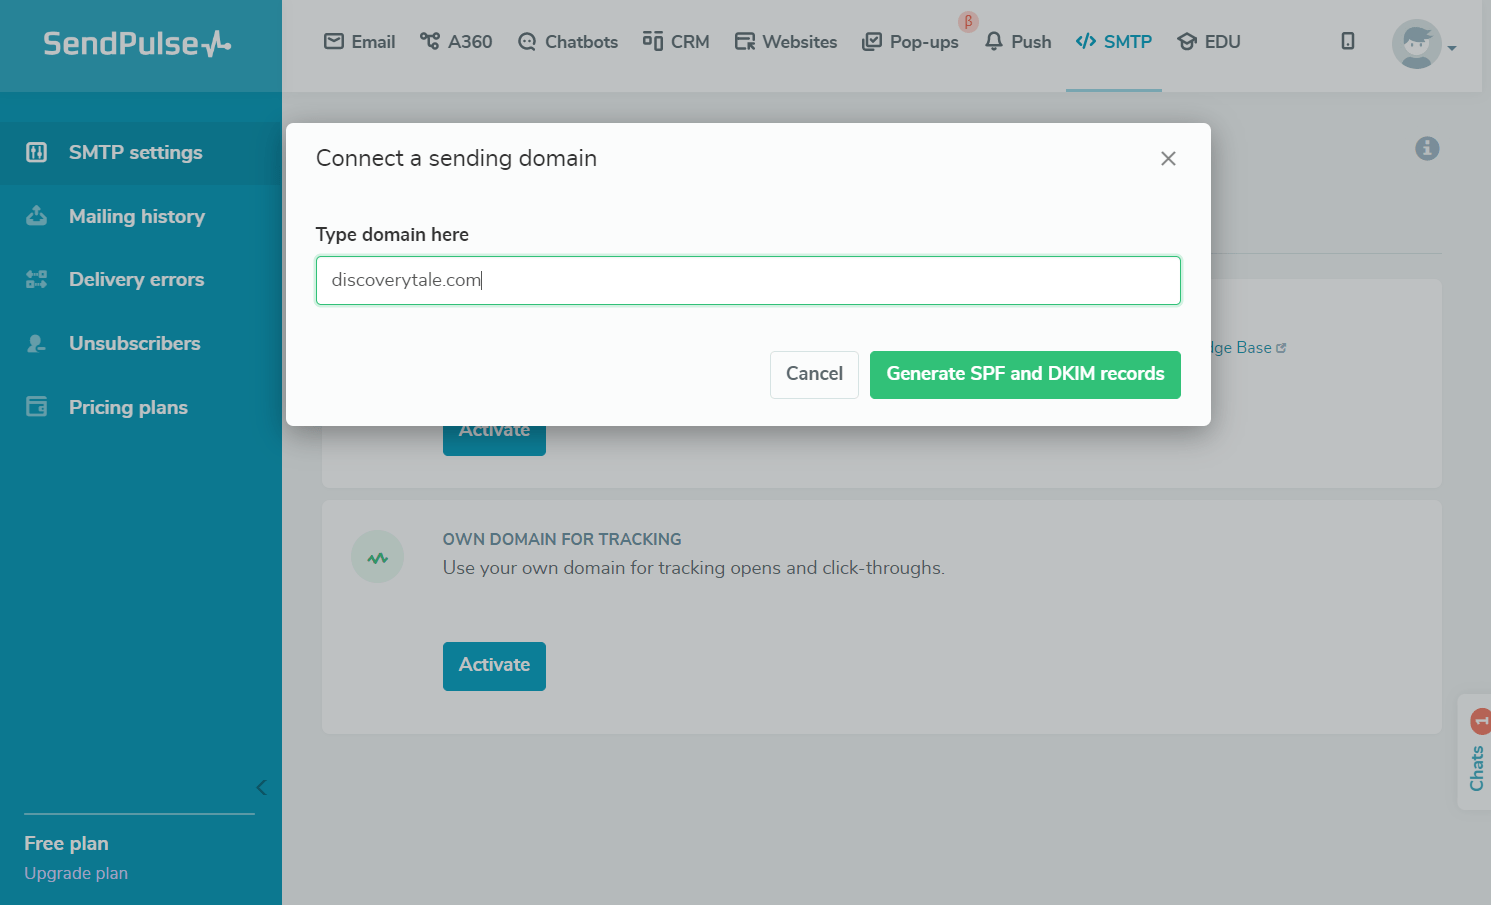
Adding a new domain
In the SMTP section, go to the SMTP Settings > Domain settings tab. In the Sending domain section, click Activate.
Enter the domain name, and click Get SPF and DKIM Records.
The domain name must be in the example.com format without the http protocol or the www prefix.
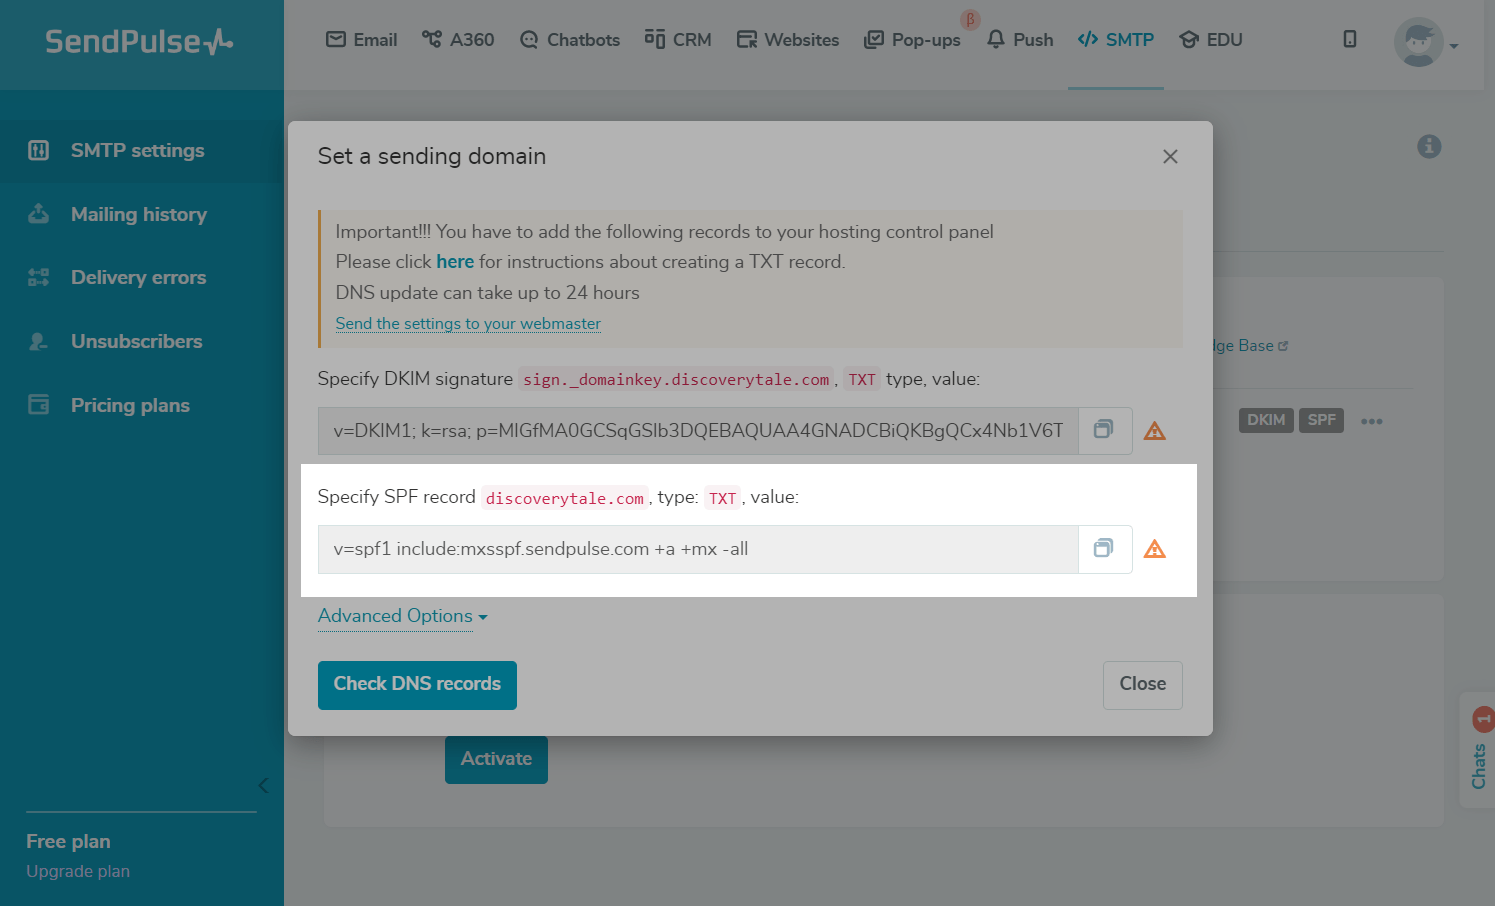
The service will generate the data you’ll need to add your SPF and DKIM DNS records. Copy the name and value for the entry.
Copying an existing domain record
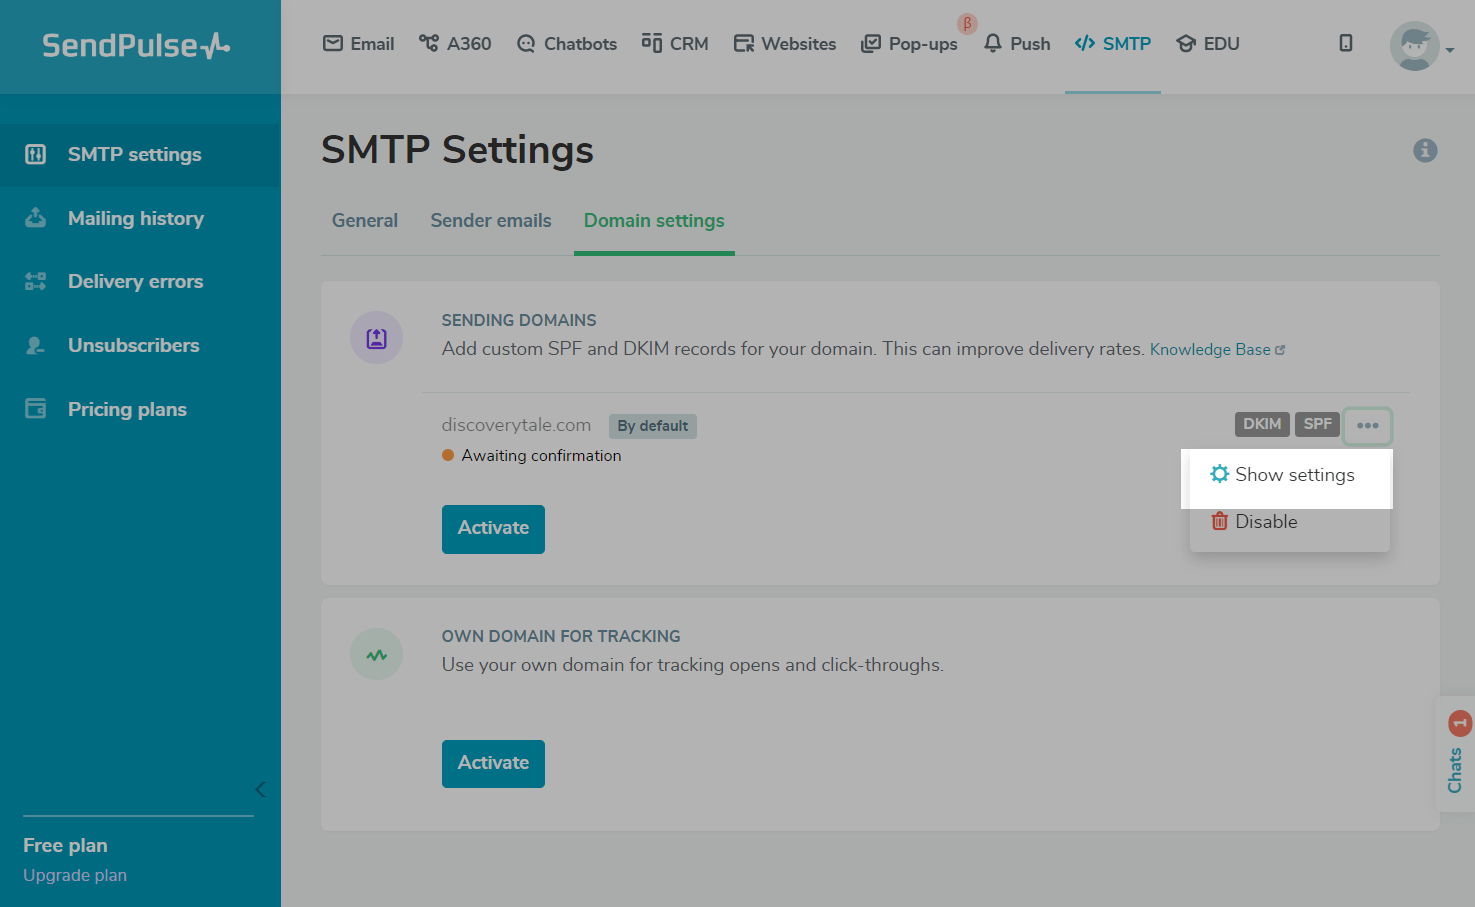
In the SMTP section, go to SMTP Settings > Domain settings. In the Sending domain section, click the three dots icon next to the desired domain, and select Show settings.
Copy your SPF record’s name and value.
You will need to create a TXT record on your DNS settings provider’s site using the @ or yourdomain.com name and the following value: v=spf1 include:mxsspf.sendpulse.com +a +mx ~all. If you already have an SPF entry, then you need to add the include:mxsspf.sendpulse.com value to your existing one.
Which name you need to enter — @ or domain name, depends on your host provider rules.
Add an entry to the DNS provider website
You can check where your domain's DNS settings are located using the MxToolbox tool. Follow the link, and enter your domain. Select SOA Lookup or DNS check from the drop-down list, and click the button.
If your registrar does not provide default DNS servers, you can activate this service separately, for example, using cPanel.
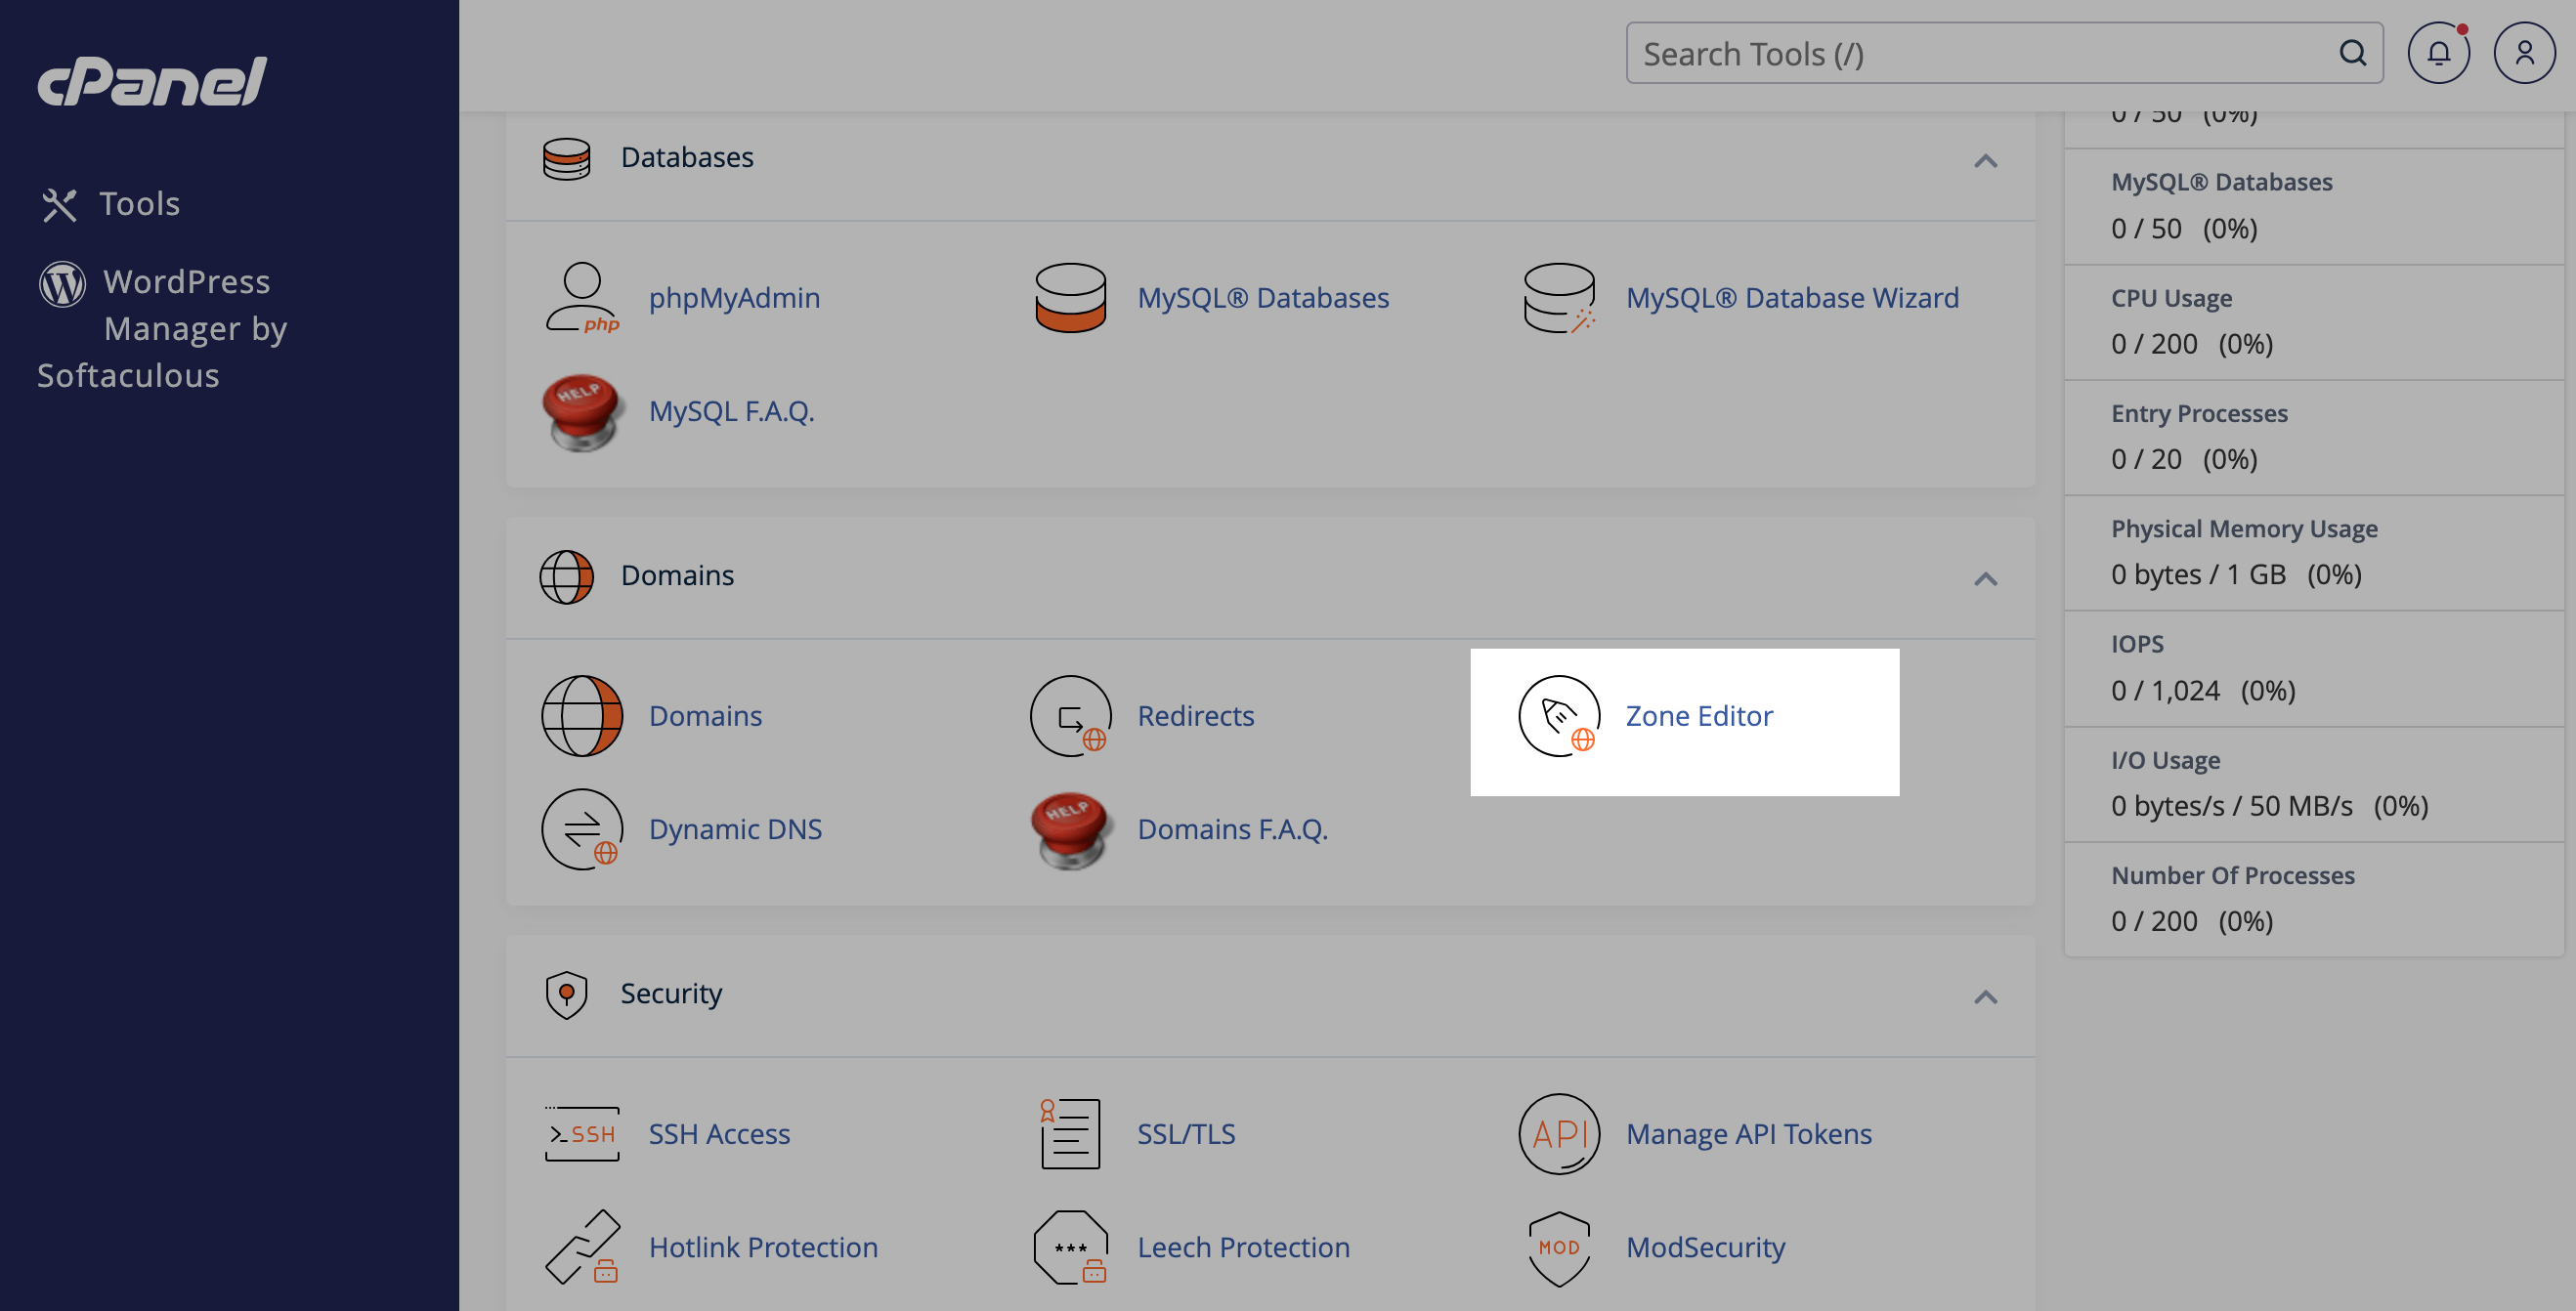
In our example, we will use cPanel to add an A record to our site's DNS registrar.
Learn more about how to set up TXT records in cPanel’s documentation.
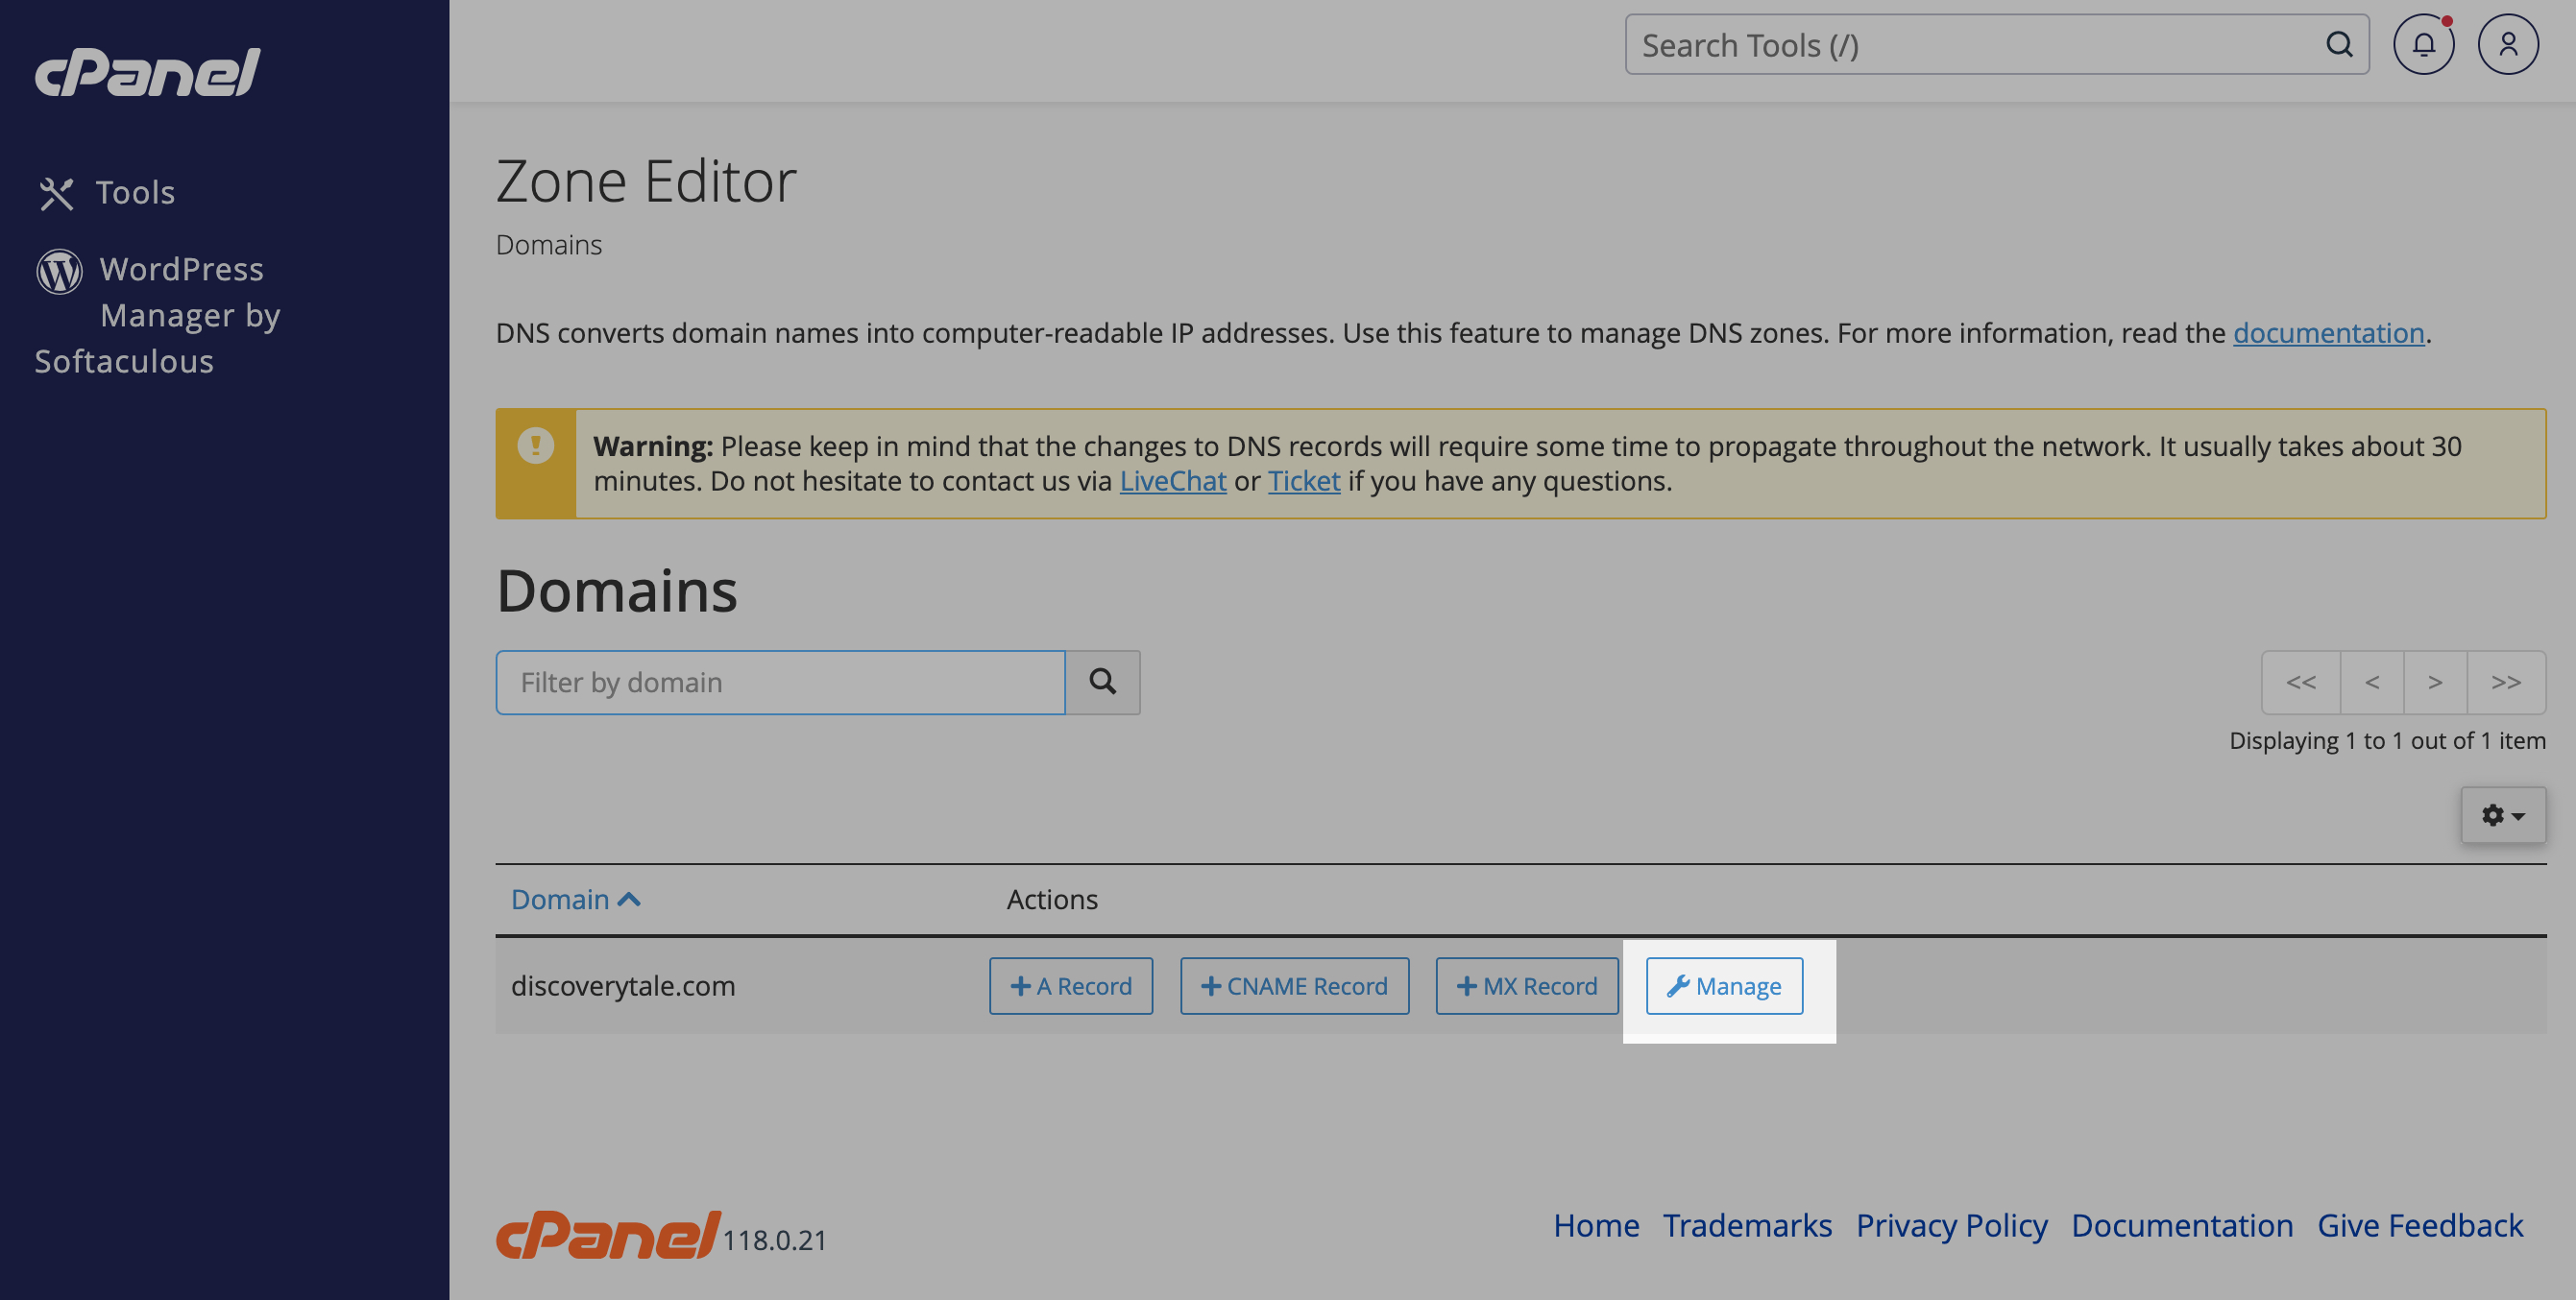
In the domain control panel, select Zone Editor.
Next to your domain, click Manage.
Click +Add Record.
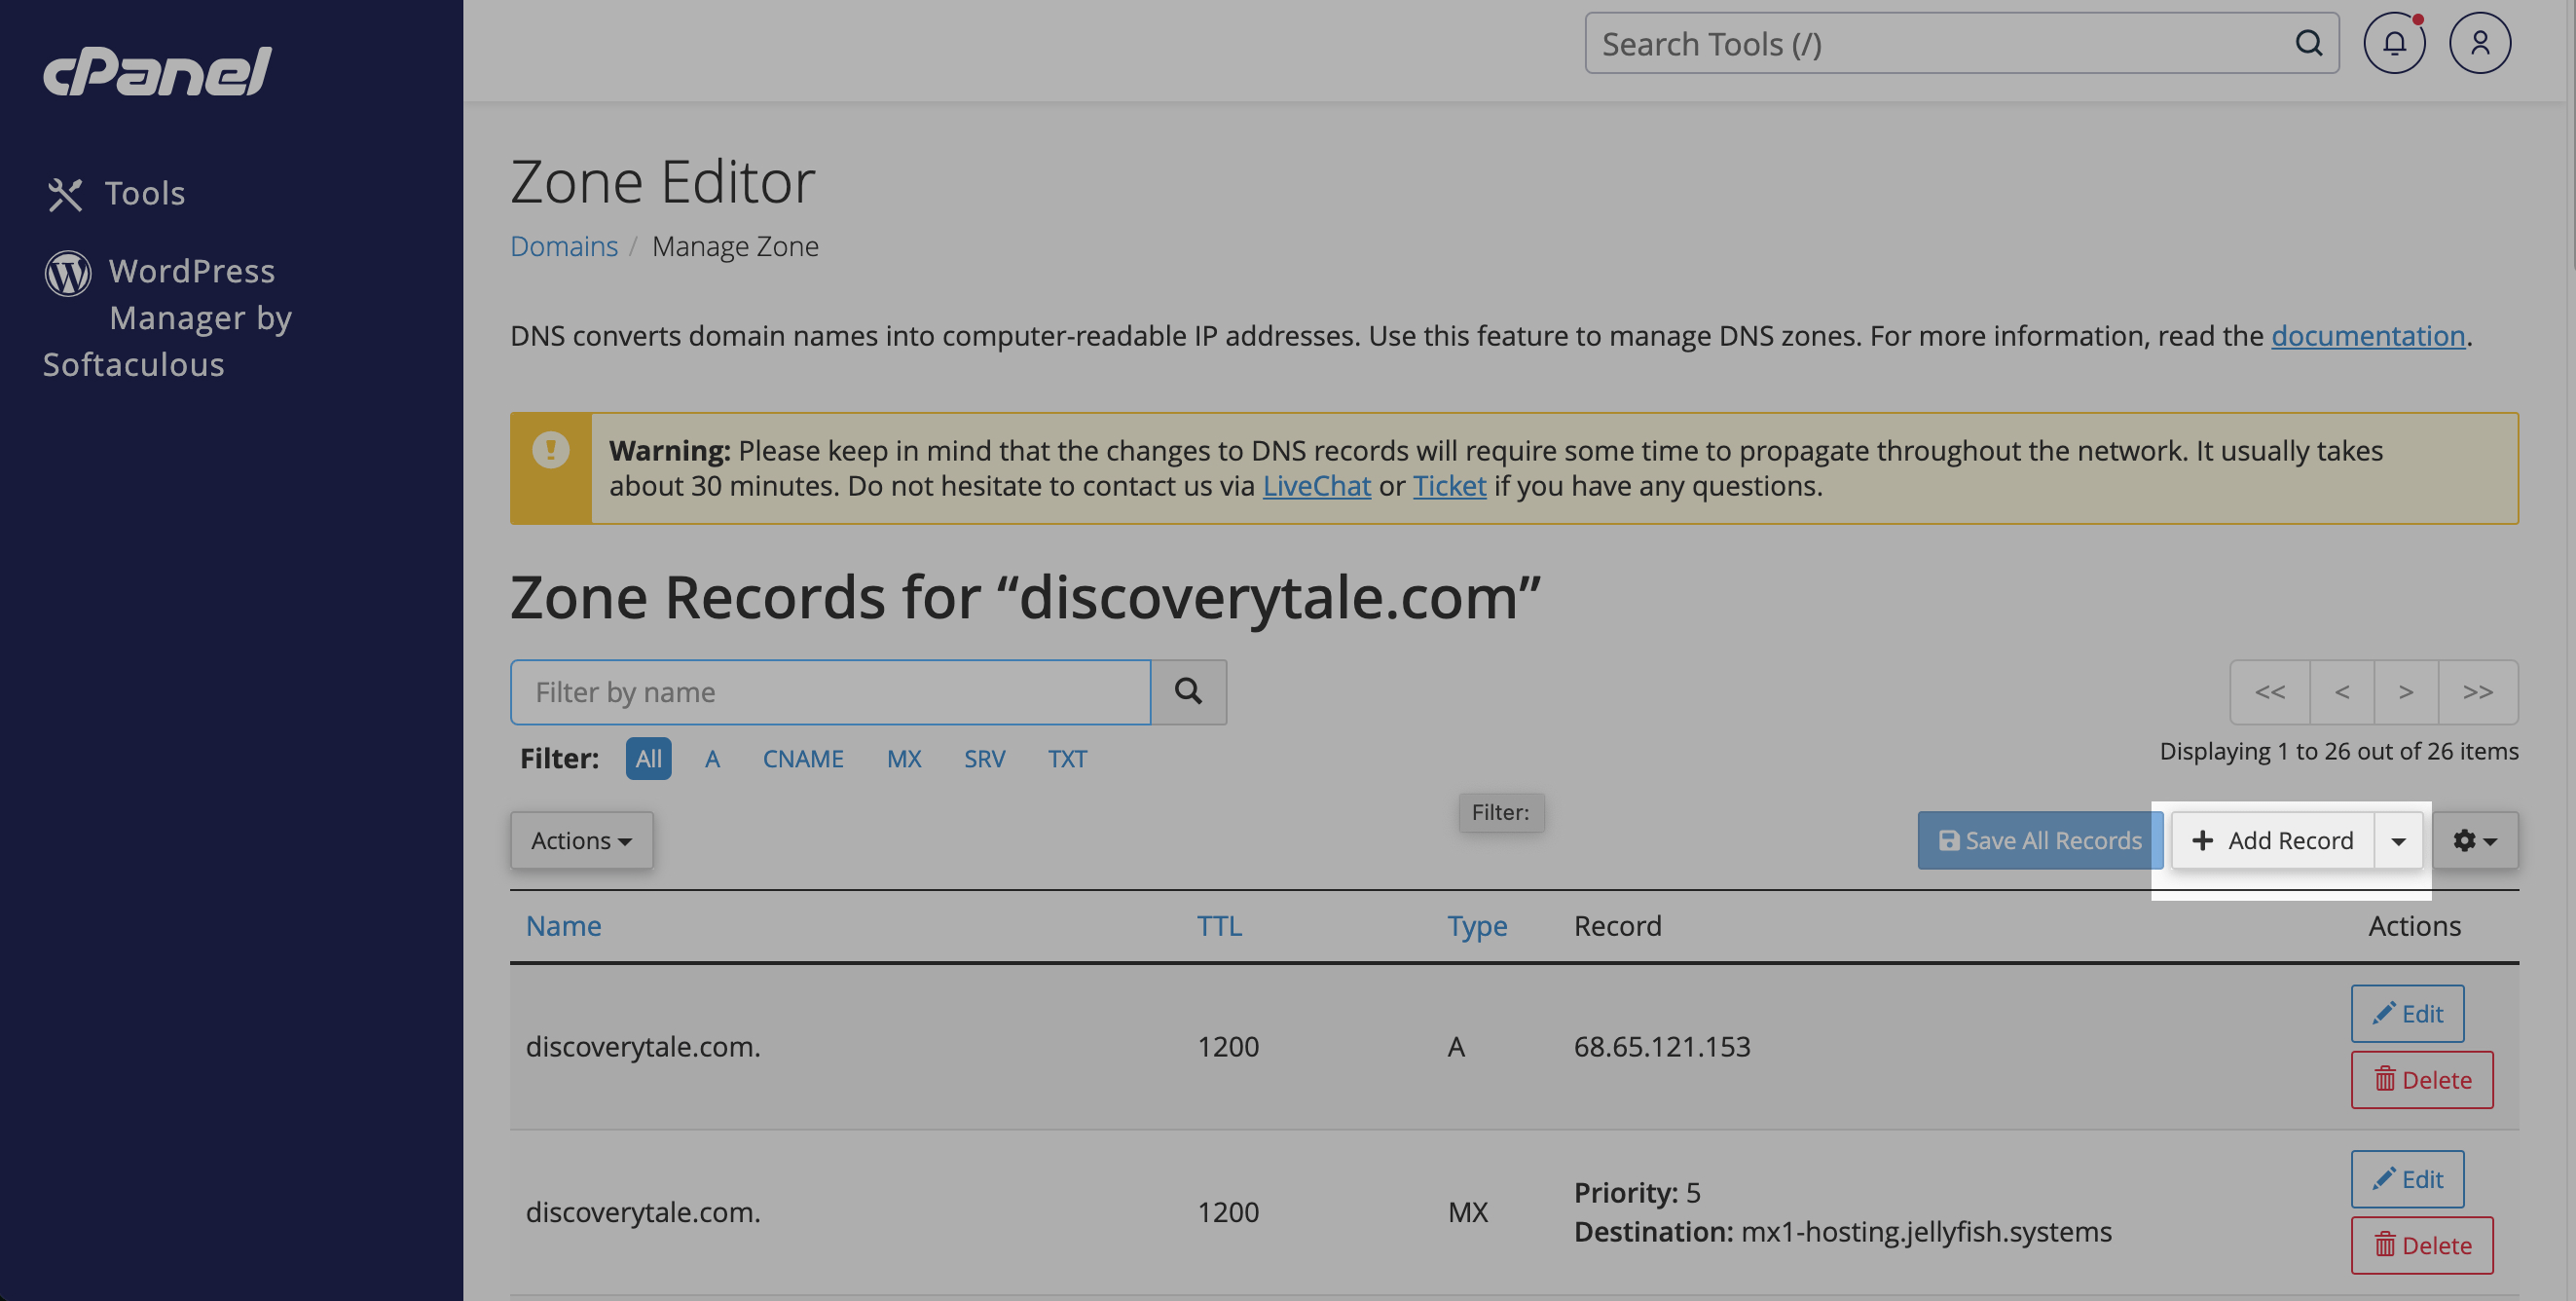
Paste the values in the corresponding fields:
In the Name field, paste the @ record name, and your hosting can add the domain name. For example, for cPanel, it will be yourdomain.com
In the Type field, select the TXT record type.
In the Record field, paste the record value.
If you are sending emails using multiple third-party servers, you need to add the service value to the same entry, and it will look like this:v=spf1 include:mxsspf.sendpulse.com ip4:XXX.XXX.XXX.XXX include:serverdomain.com +a +mx ~all.
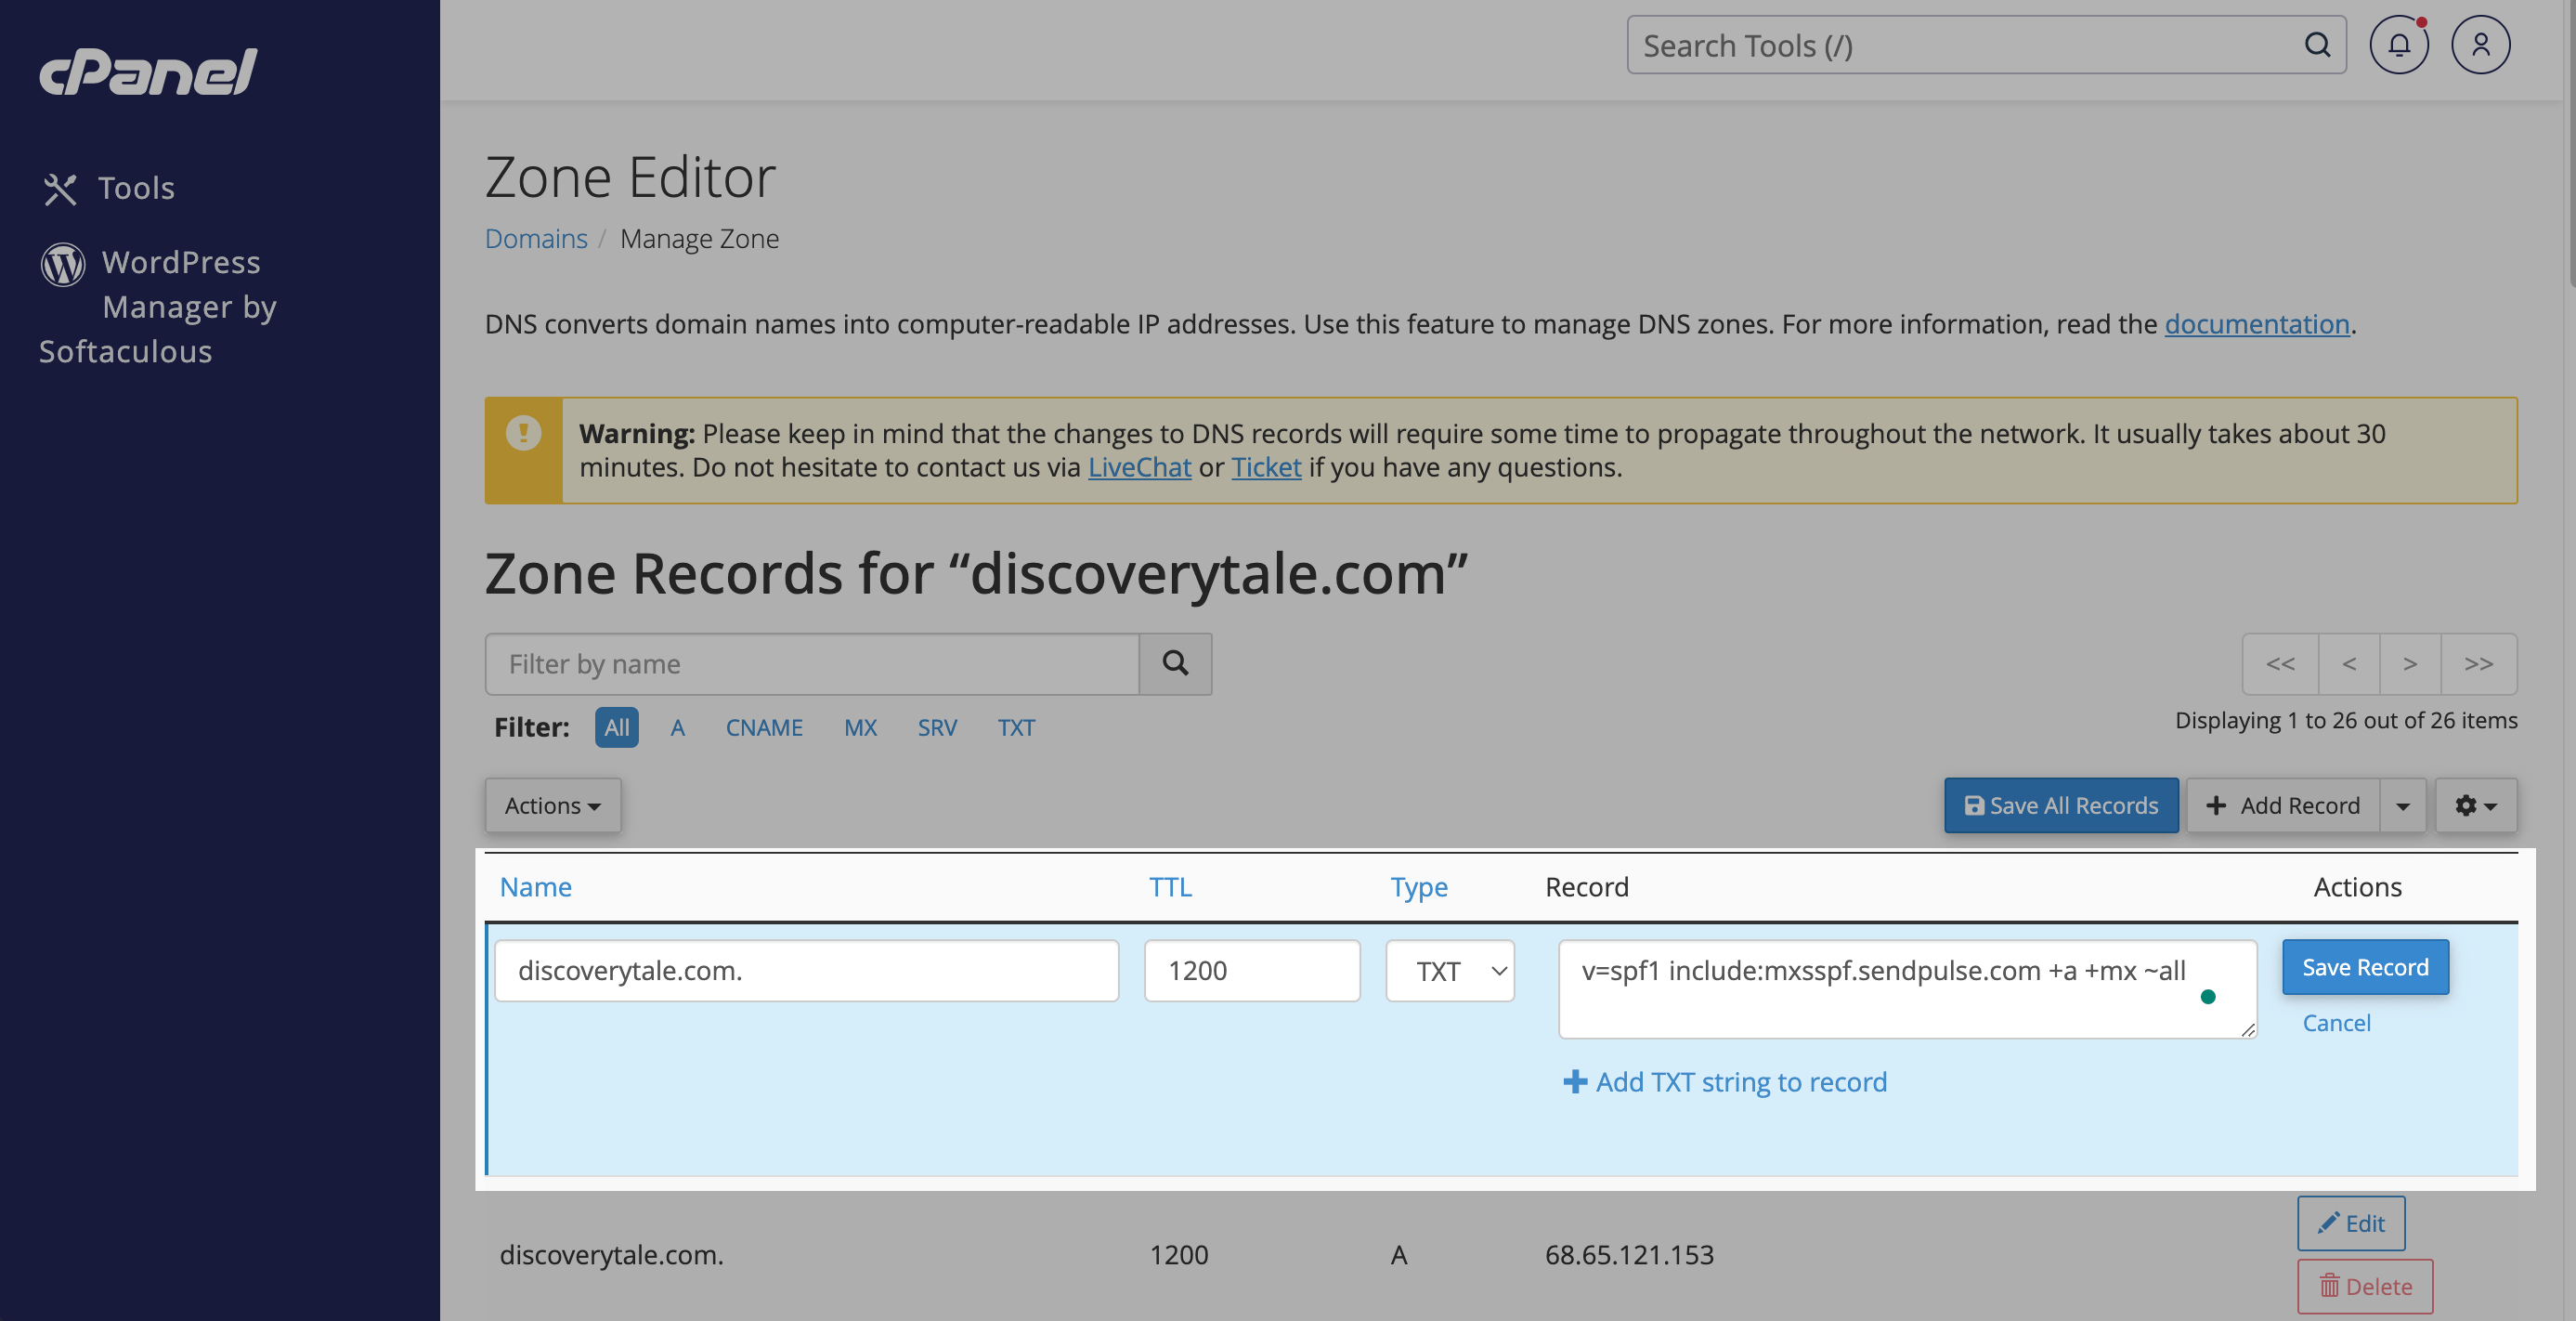
Click Save Record.
Once you add the entry, you need to wait for the activation, which may take up to 24 hours, depending on the work of the hosting.
Check the entry status
You can check the status of your added entry using MxToolbox or Google Admin Toolbox. Follow the link, and paste your full domain name. For MxToolbox, select SPF Lookup in the drop-down list. For Google Admin Toolbox, select the TXT entry.
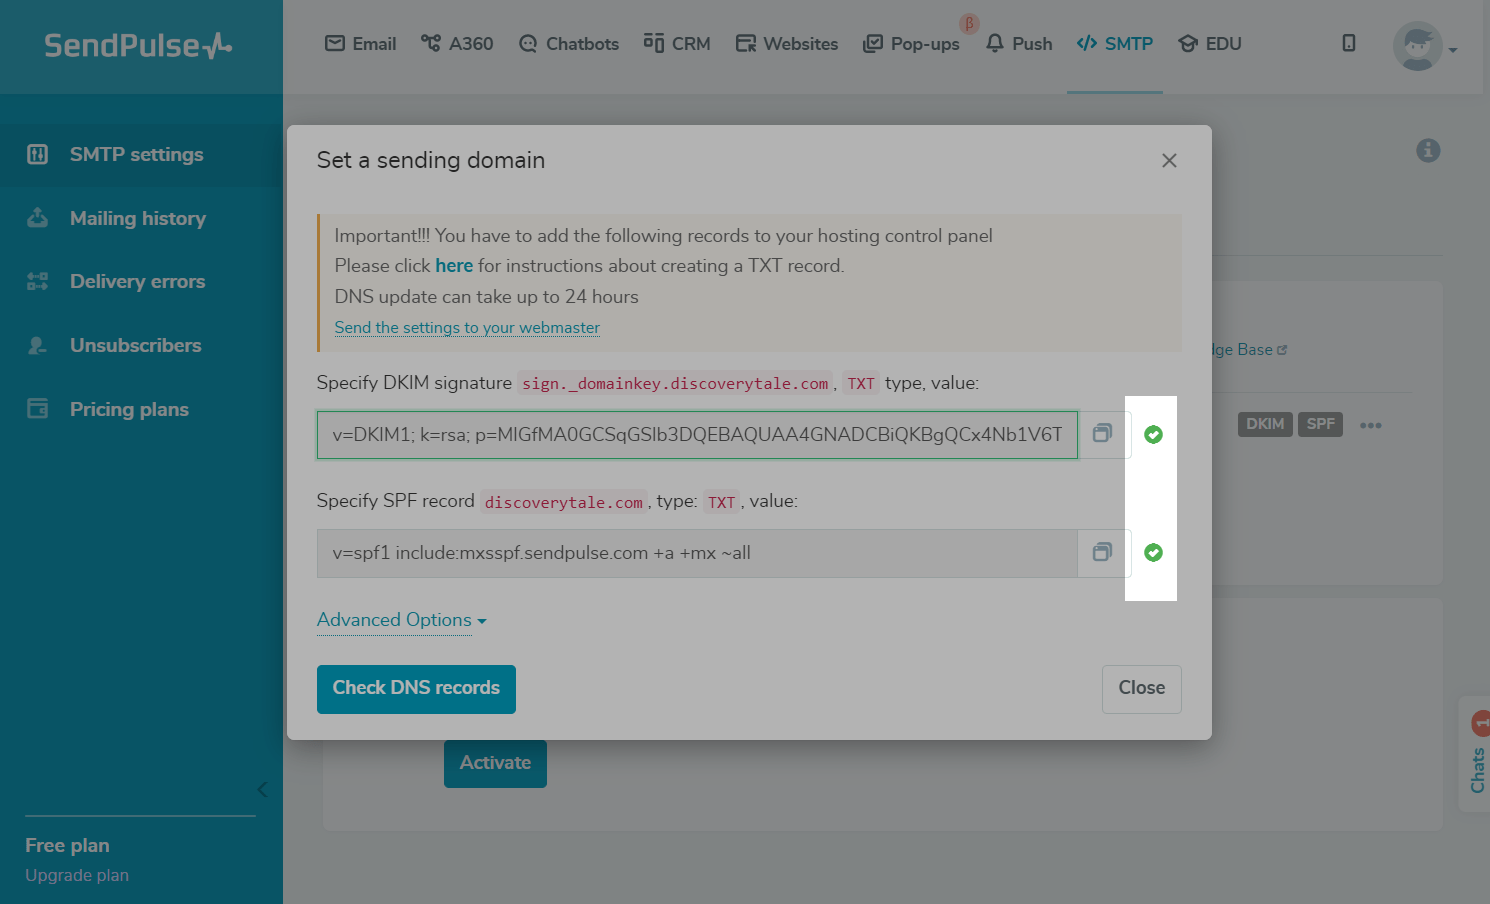
You can also check the entry status directly in your SMTP account. Go to the SMTP section > Service Settings > Domain settings tab. In the
Click Check DNS records.
If you have configured everything correctly and the DNS settings have been updated, next to each record, you will see an icon with a green checkmark, and the connection status will change from Awaiting confirmation to Connected.
Read also:
How to add a TXT record to Namecheap
How to add a TXT record to Godaddy
Last Updated: 07.10.2024
or