Connect LiqPay as a payment system
You can add a payment button to your chatbots and landing pages and accept online payments from users using your LiqPay account. To integrate LiqPay with SendPulse, you'll need to create and activate a LiqPay account, copy your public and private keys, and get them authorized by SendPulse.
Create a LiqPay account
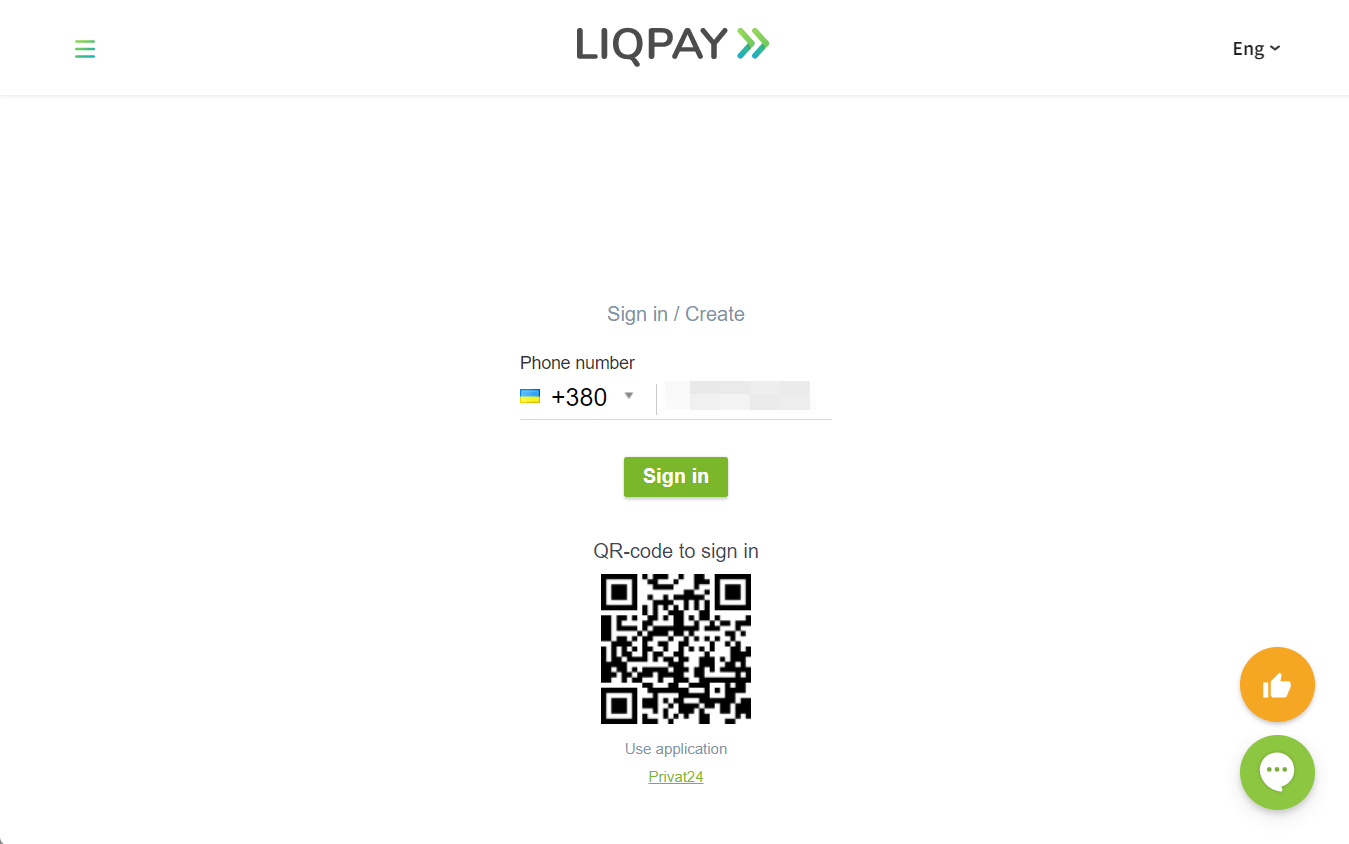
Log in to your account, or create a new one on the LiqPay website. To do this, enter your phone number, and confirm the sign in via SMS or scan the QR code to do this in the Privat24 app.
After confirmation, enter your company’s name and email address. Click Create a shop.
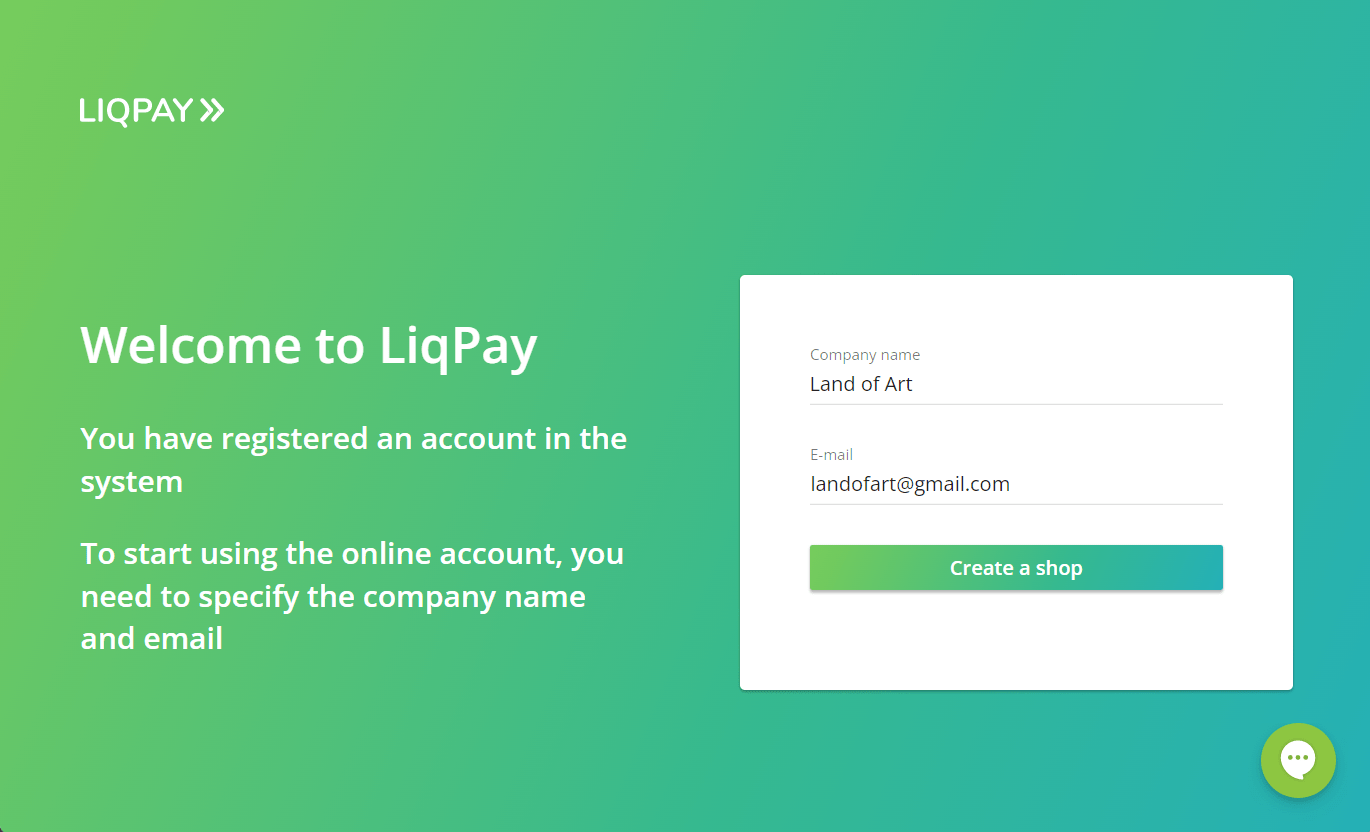
After creating an account, you will receive a registration confirmation email.
Please note that only test sandbox keys will be available to you right after registration. It is not possible to debit or credit an account at this time. To get your production keys and make payments, you need to activate your company.
Activate your company
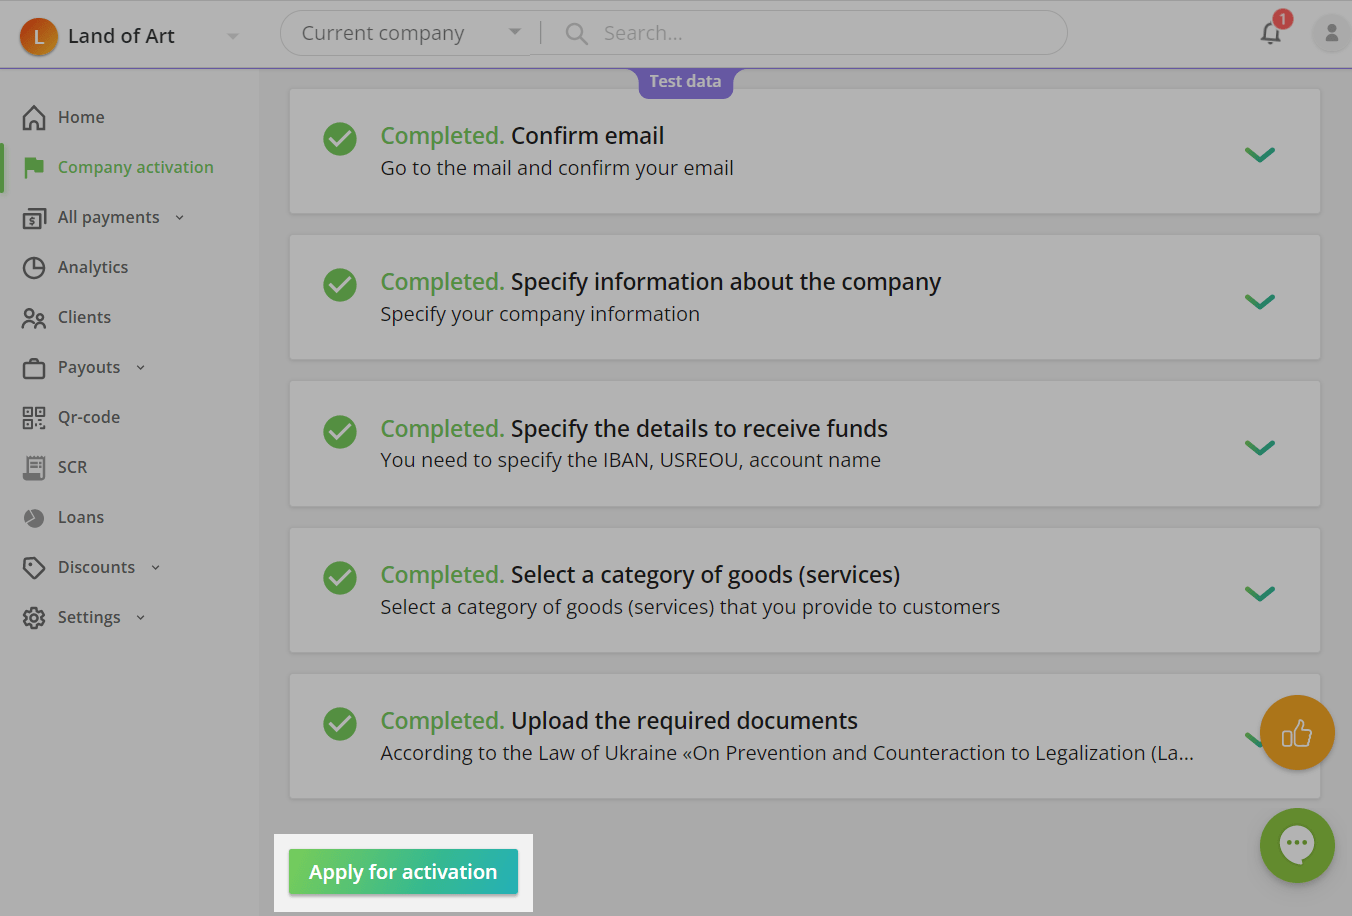
Next, you need to provide more information about your company: some bank details to receive funds, select a category of goods and services, and upload the required documents.
To do this, go to the Company Activation tab in your LiqPay account, enter the required info, and click Apply for activation.
The activation process takes from 30 minutes to 24 hours. When your application status changes, you will receive a notification in Privat24 and LiqPay.
Copy your LiqPay keys
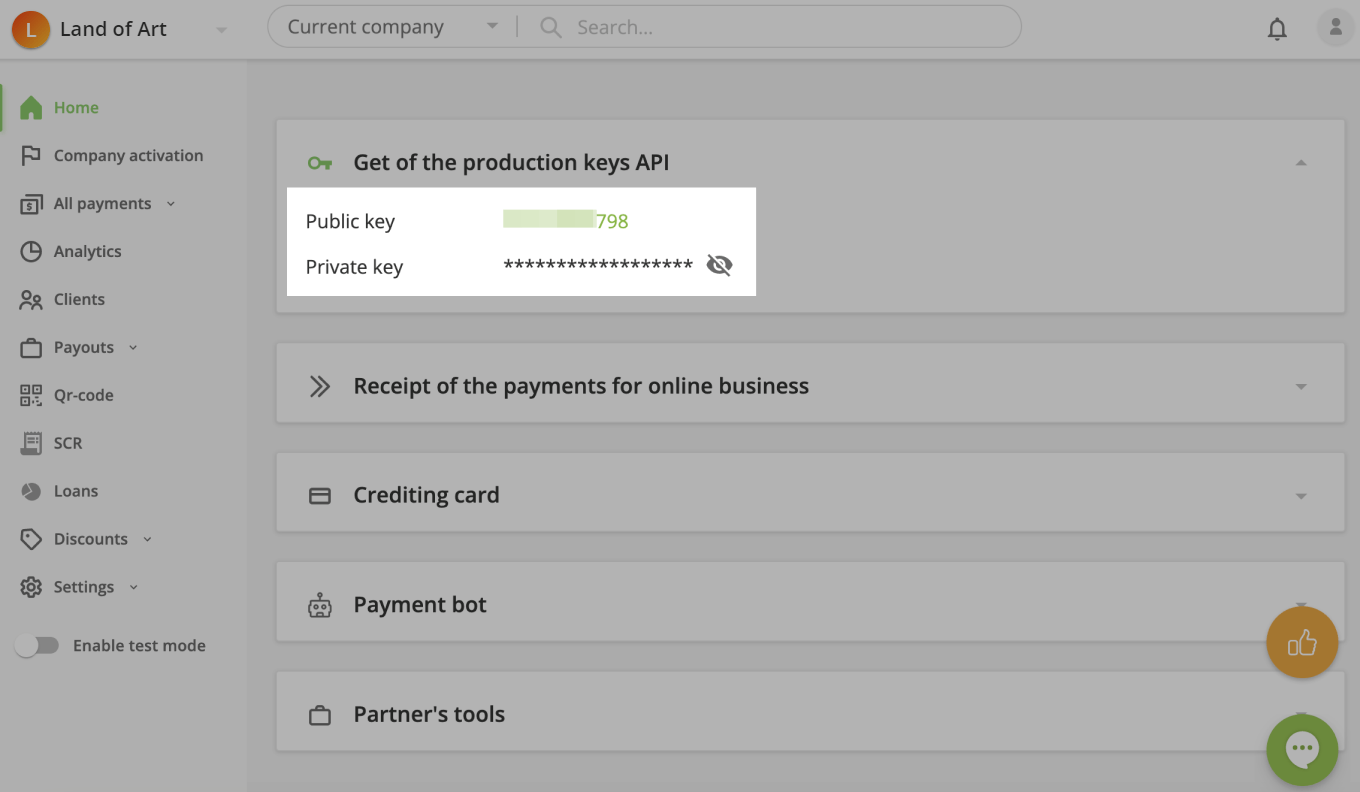
After activating your company, go to the main page. Copy the public and private key values.
Connect LiqPay to SendPulse
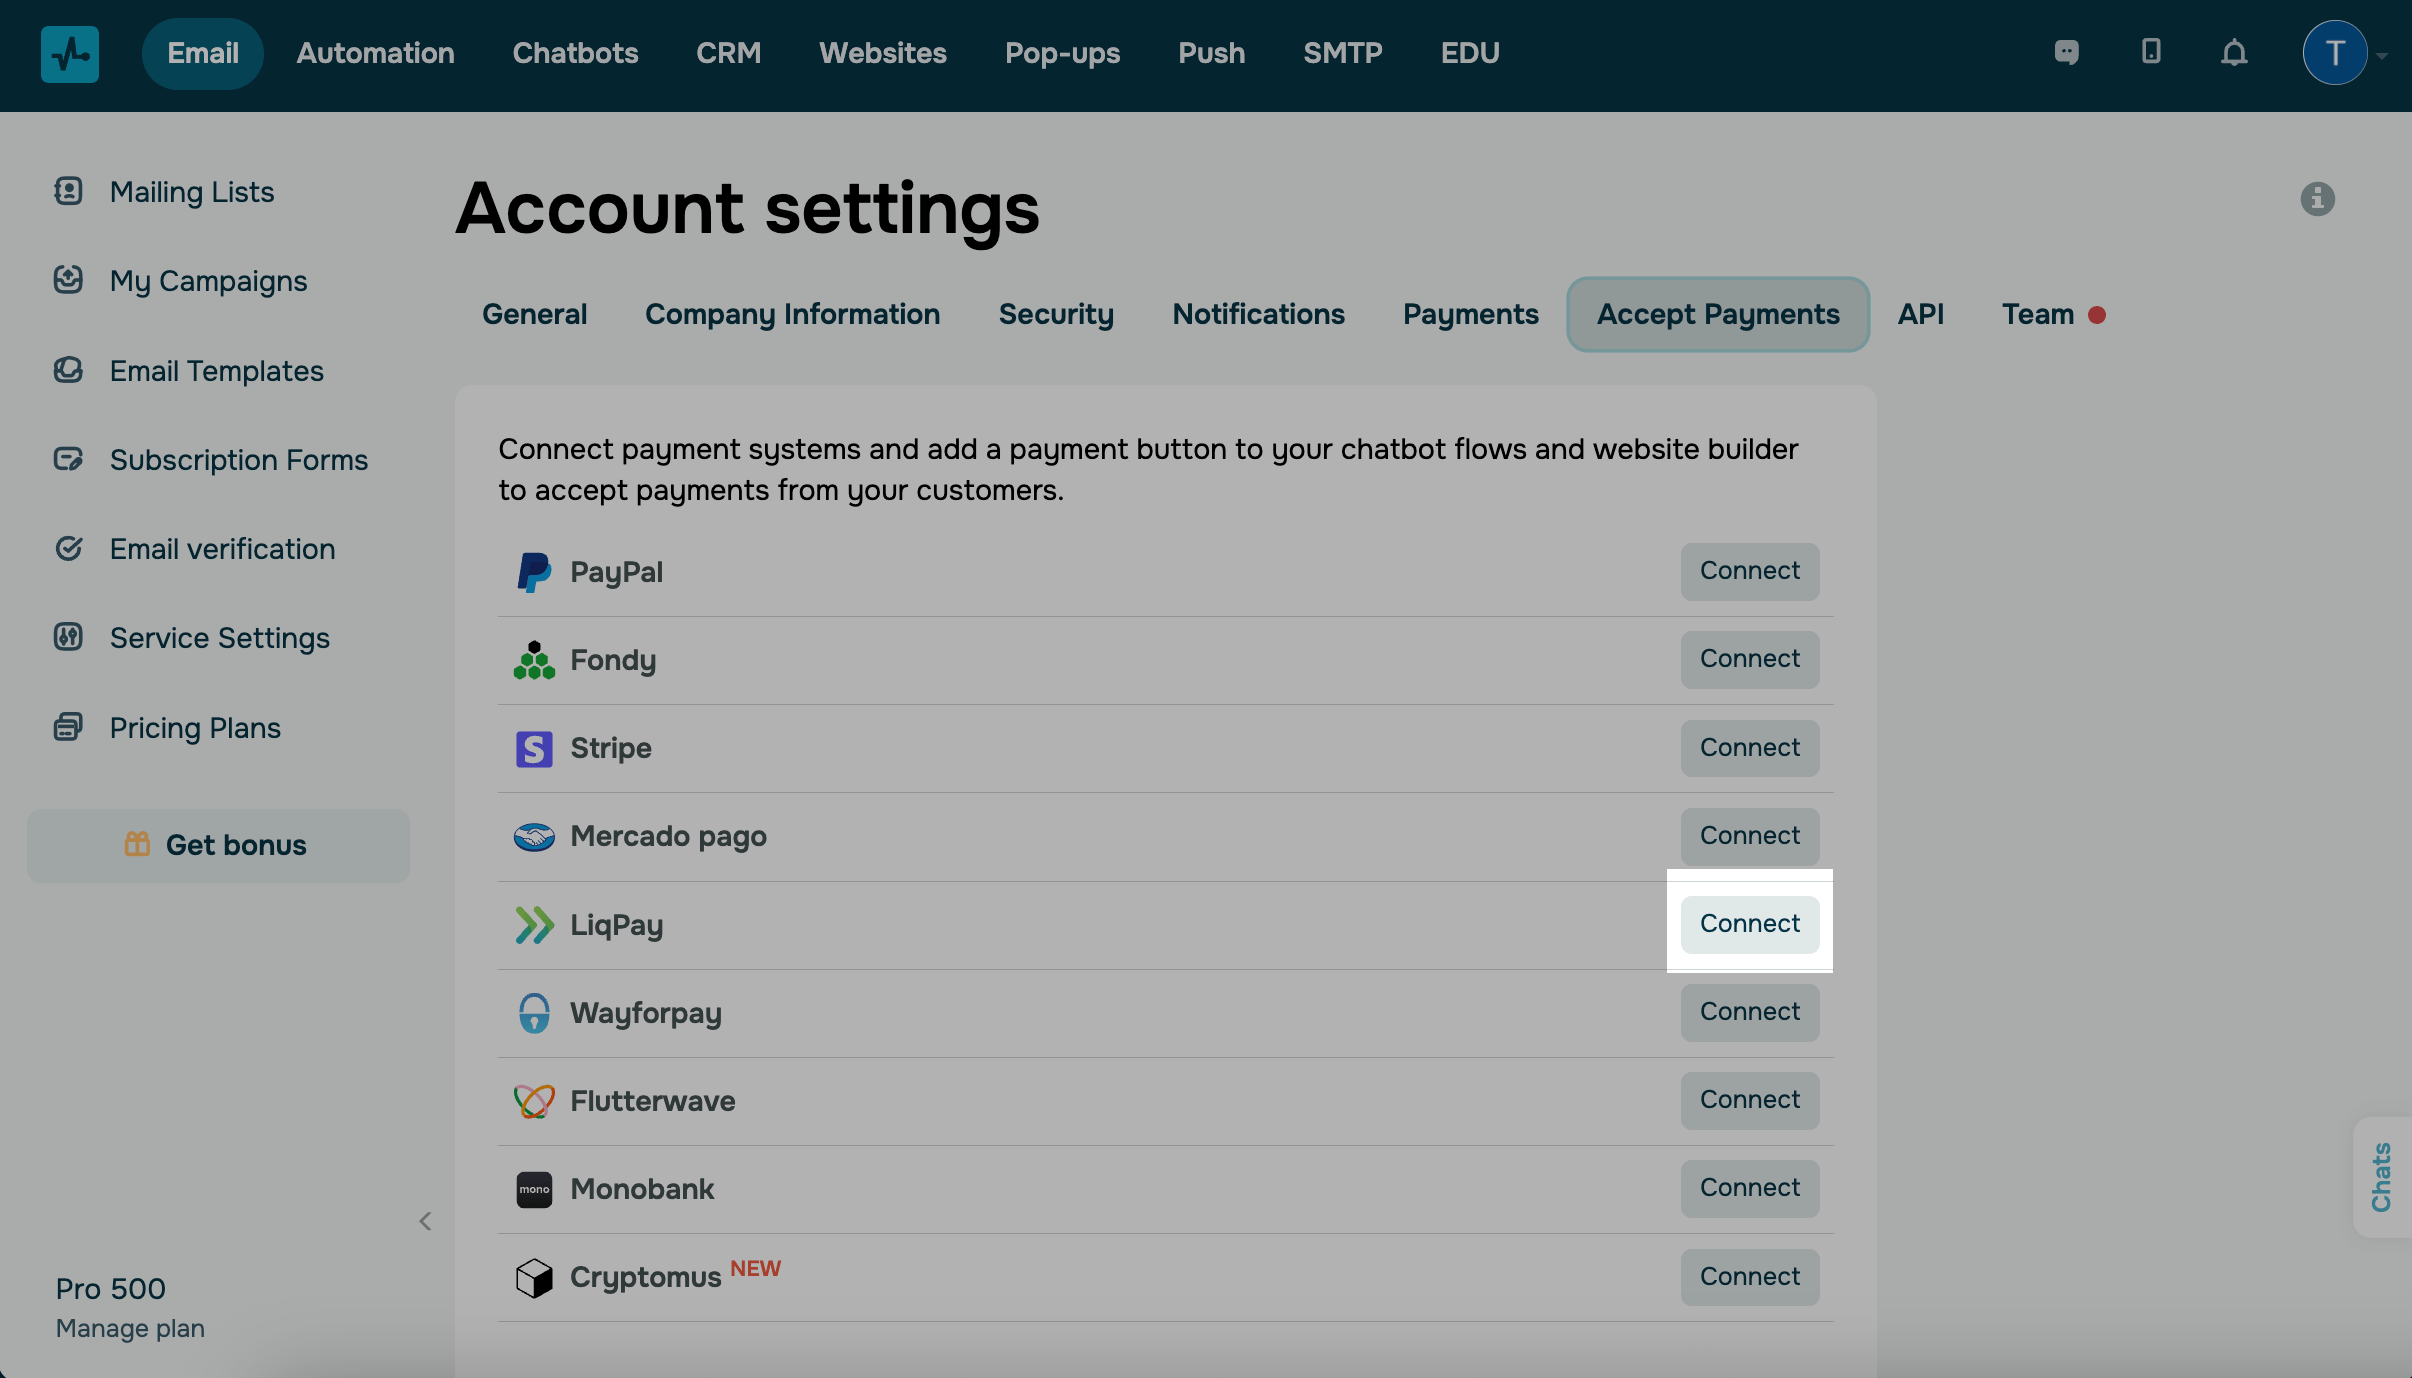
Log in to your SendPulse account, and go to the Account Settings > Accept payments tab.
Next to LiqPay, click Connect.
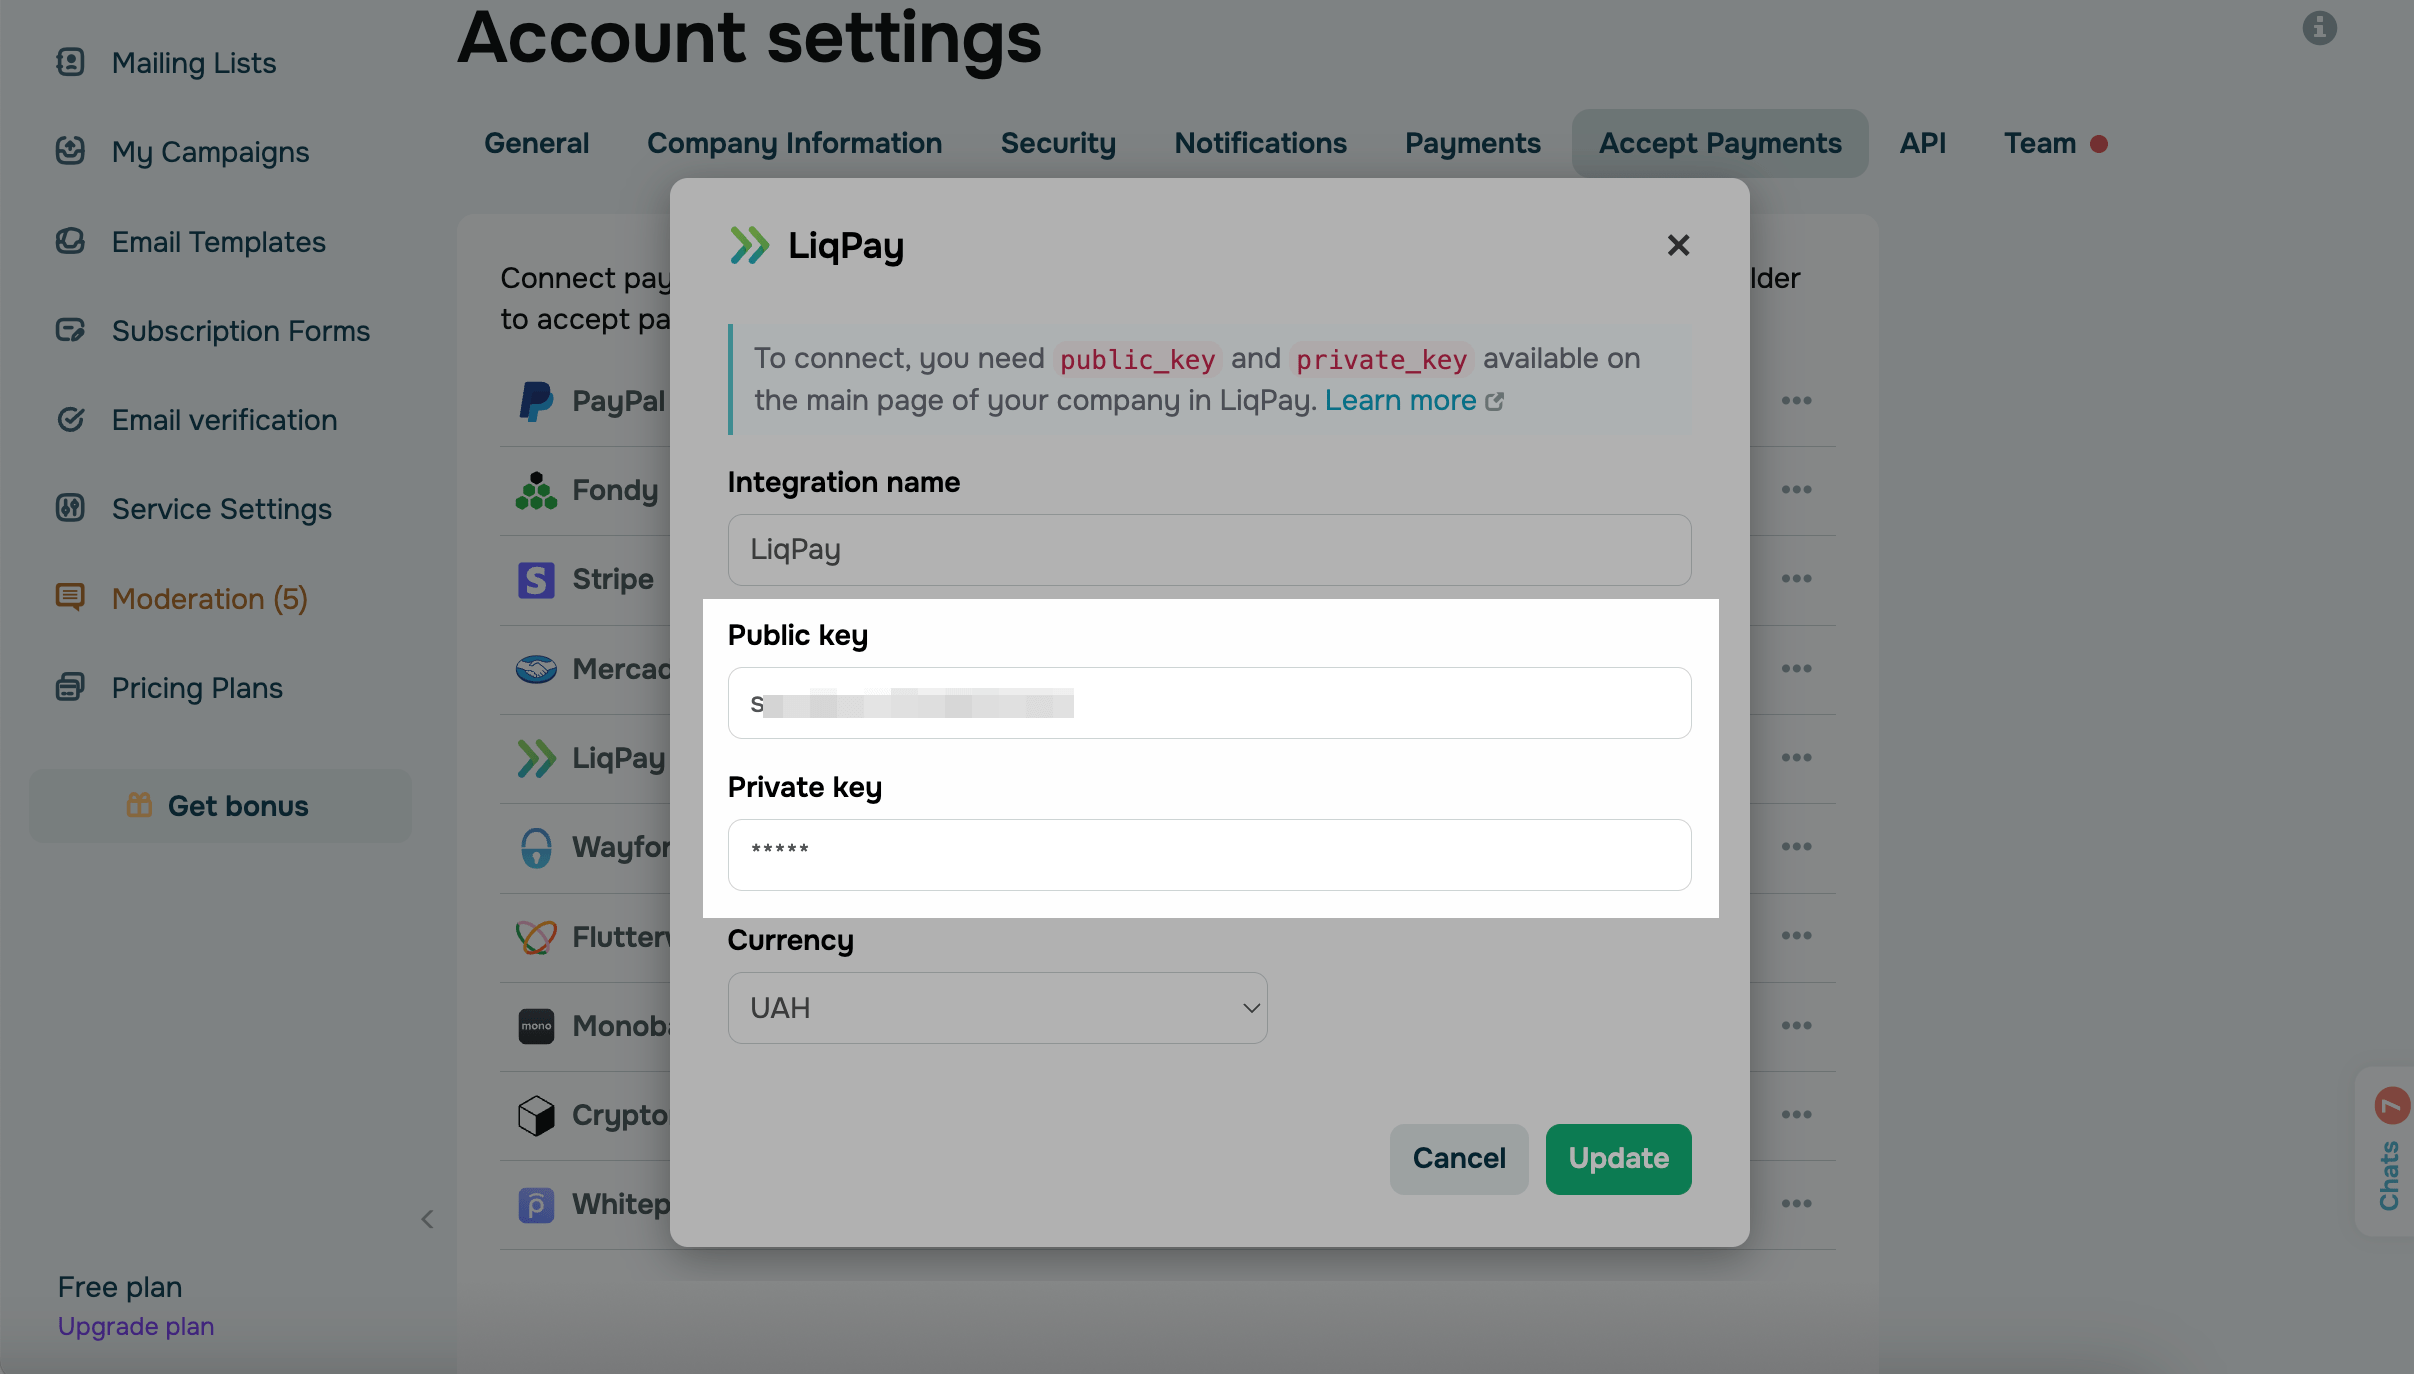
Enter keys values in the respective field.
Select the currency you accept.
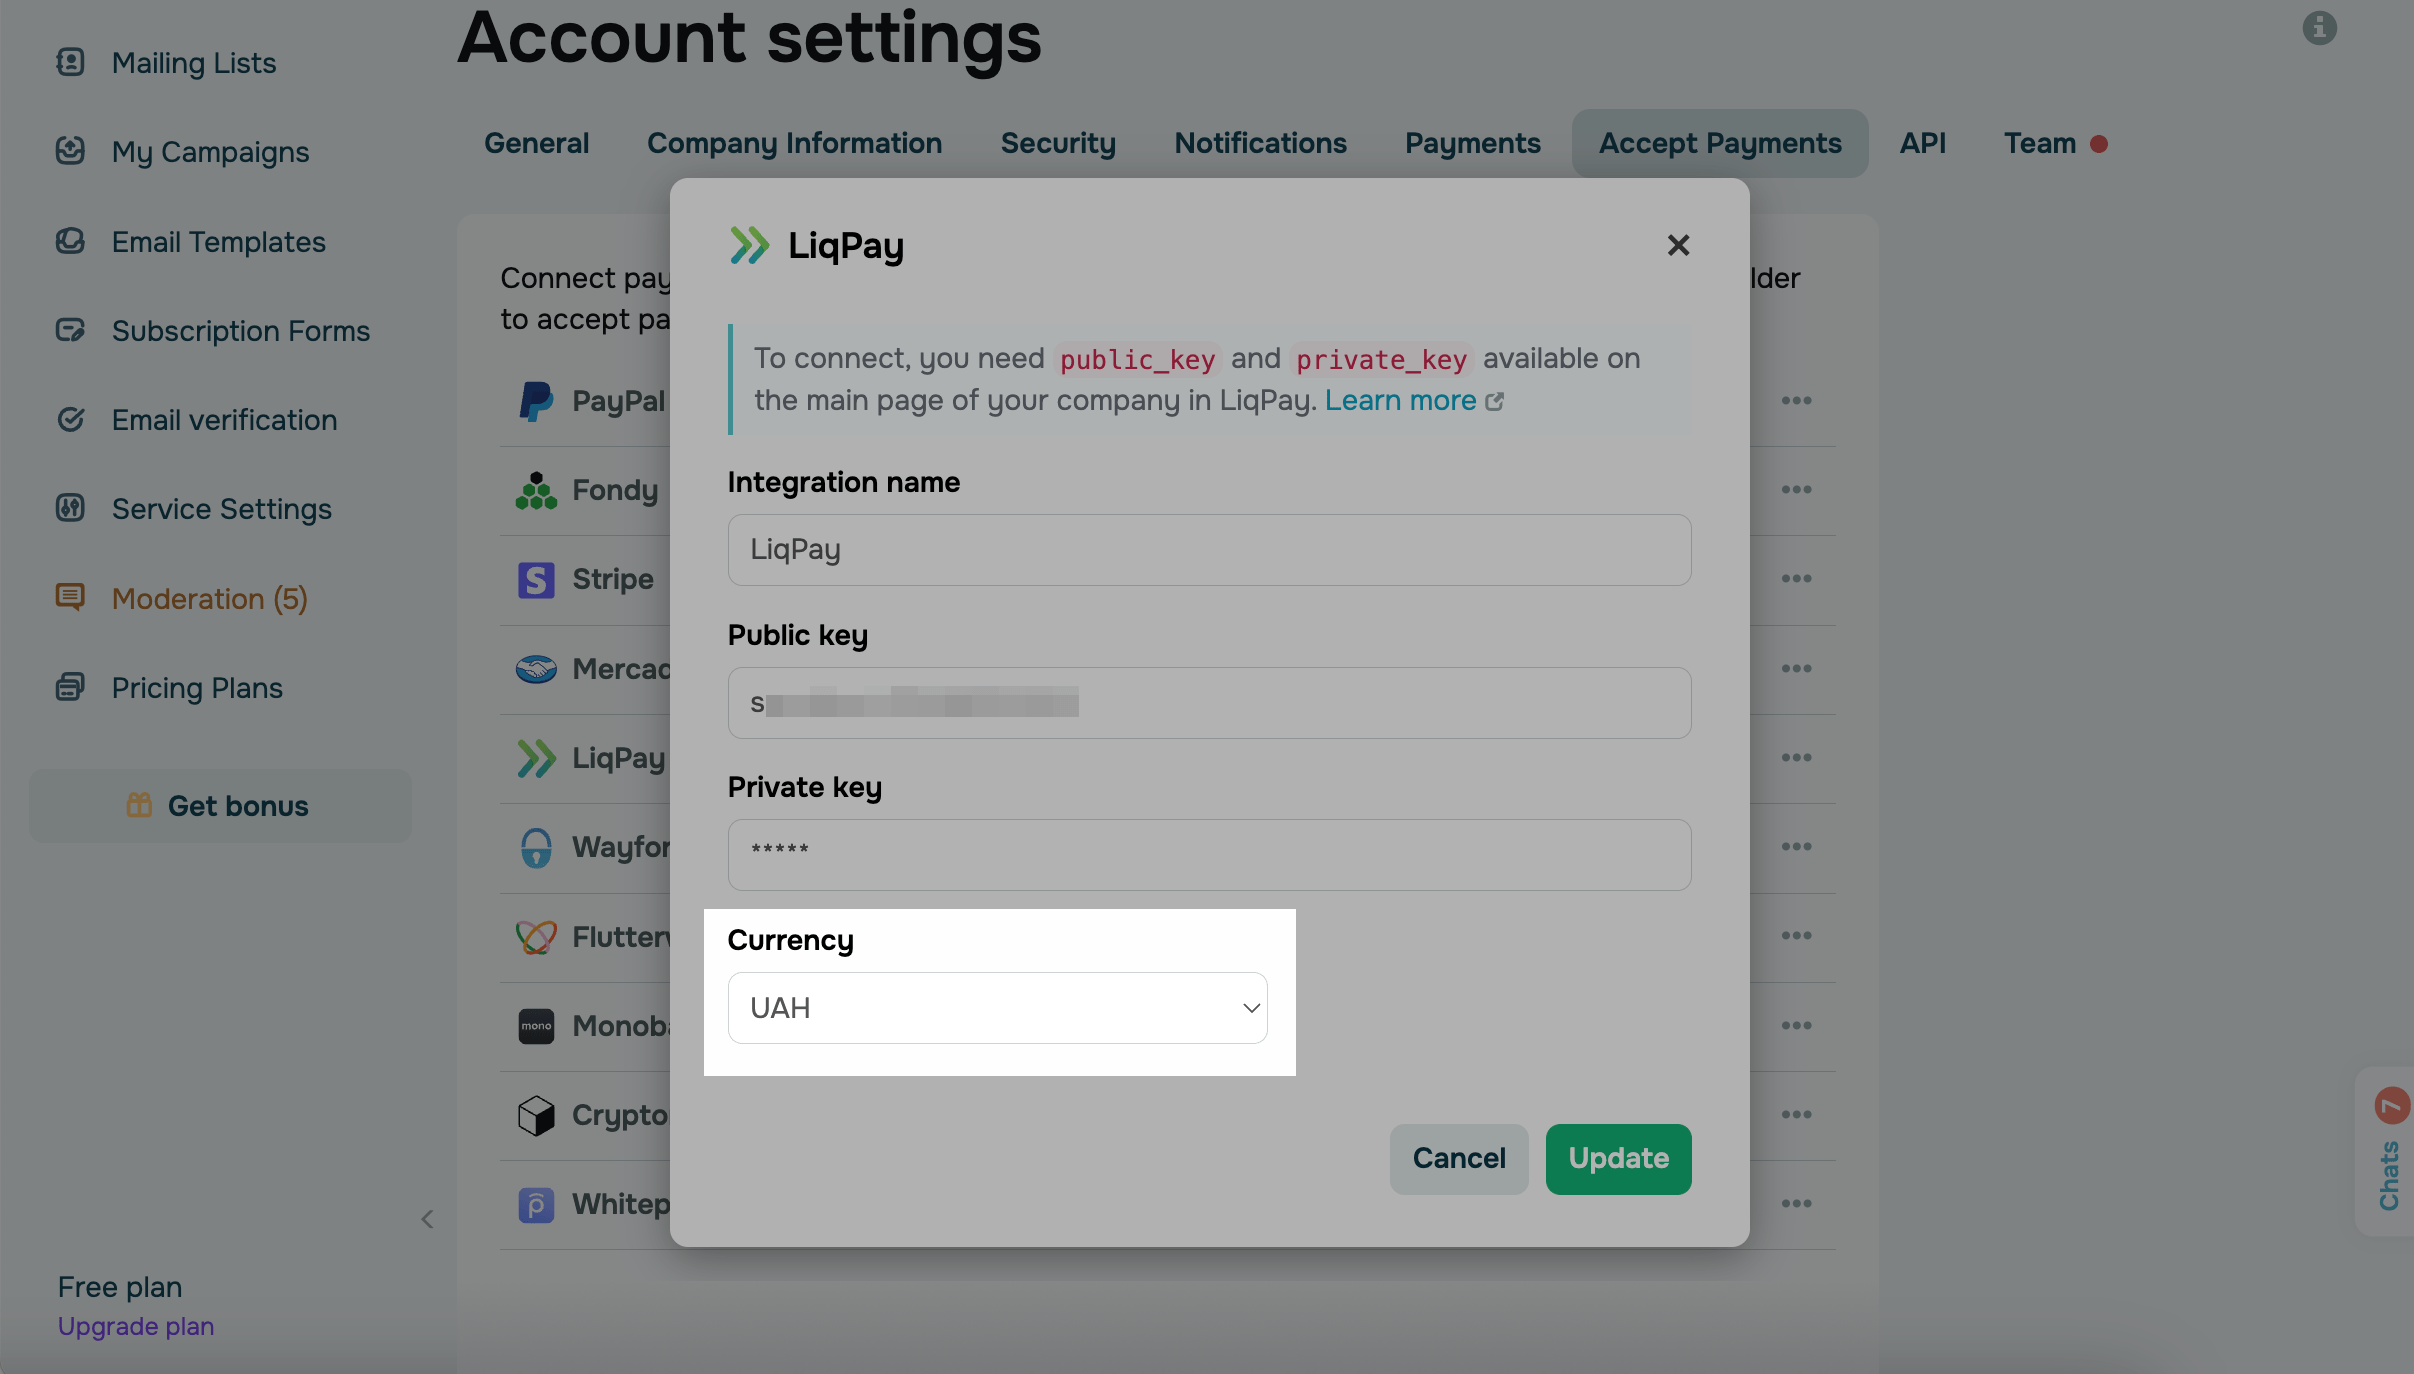
Click Save.
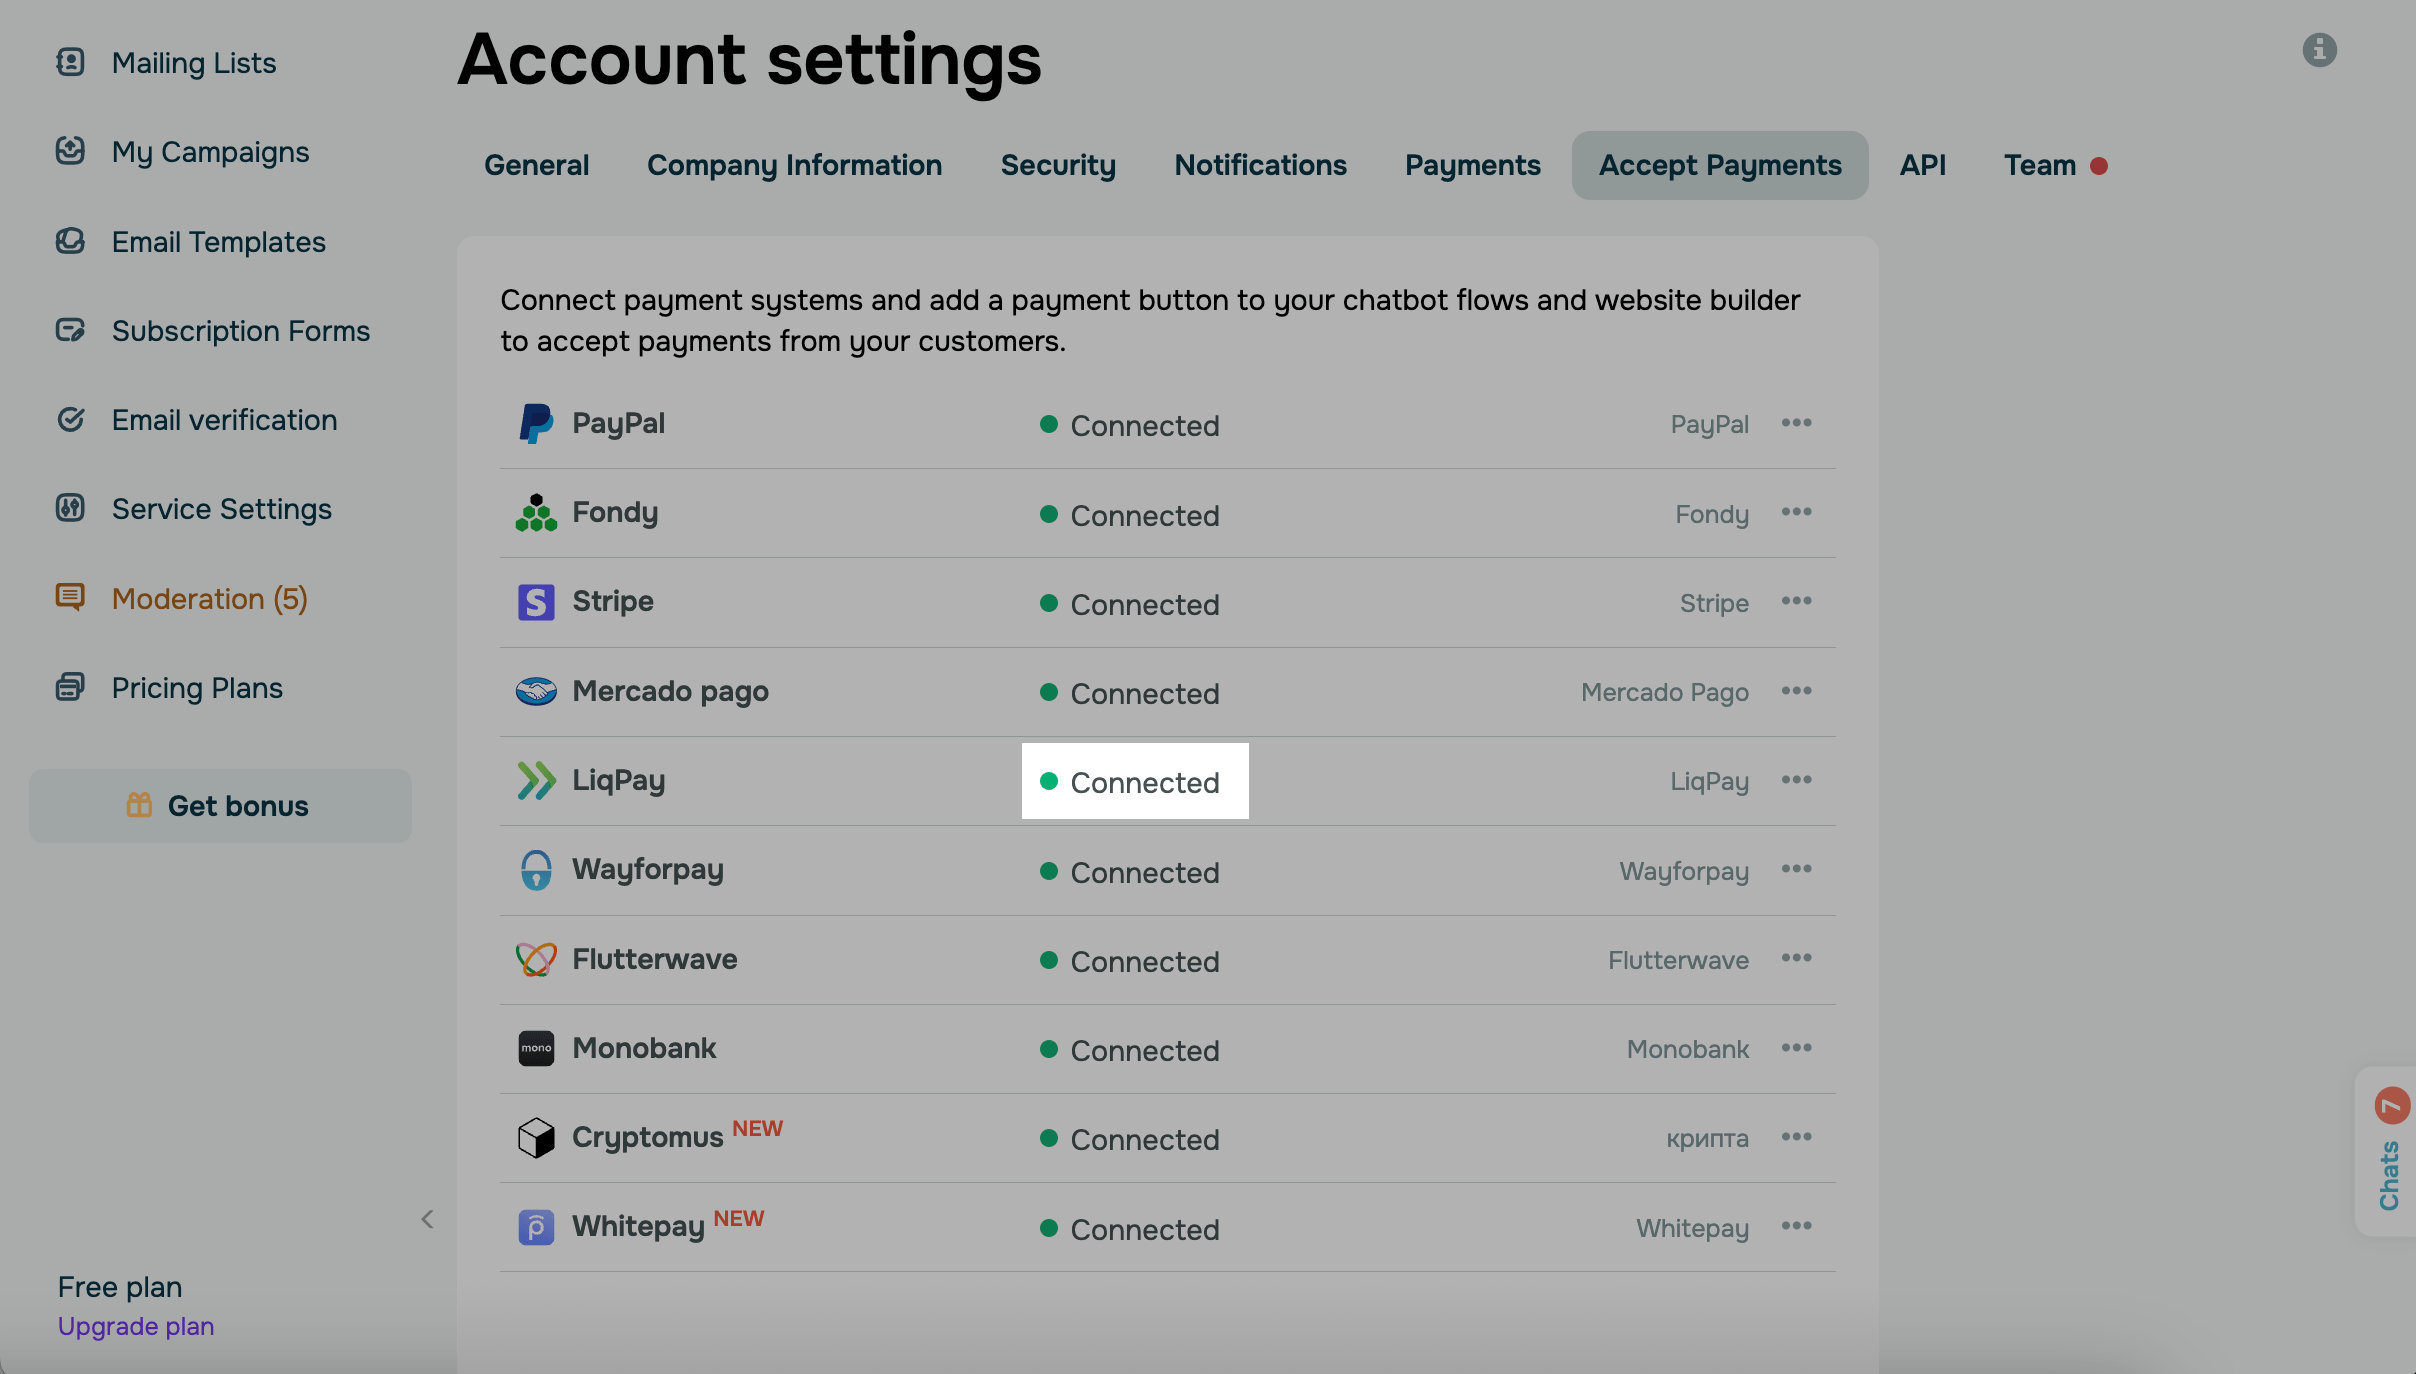
If the values are correct, you will receive a notification and your connection status will change to Connected.
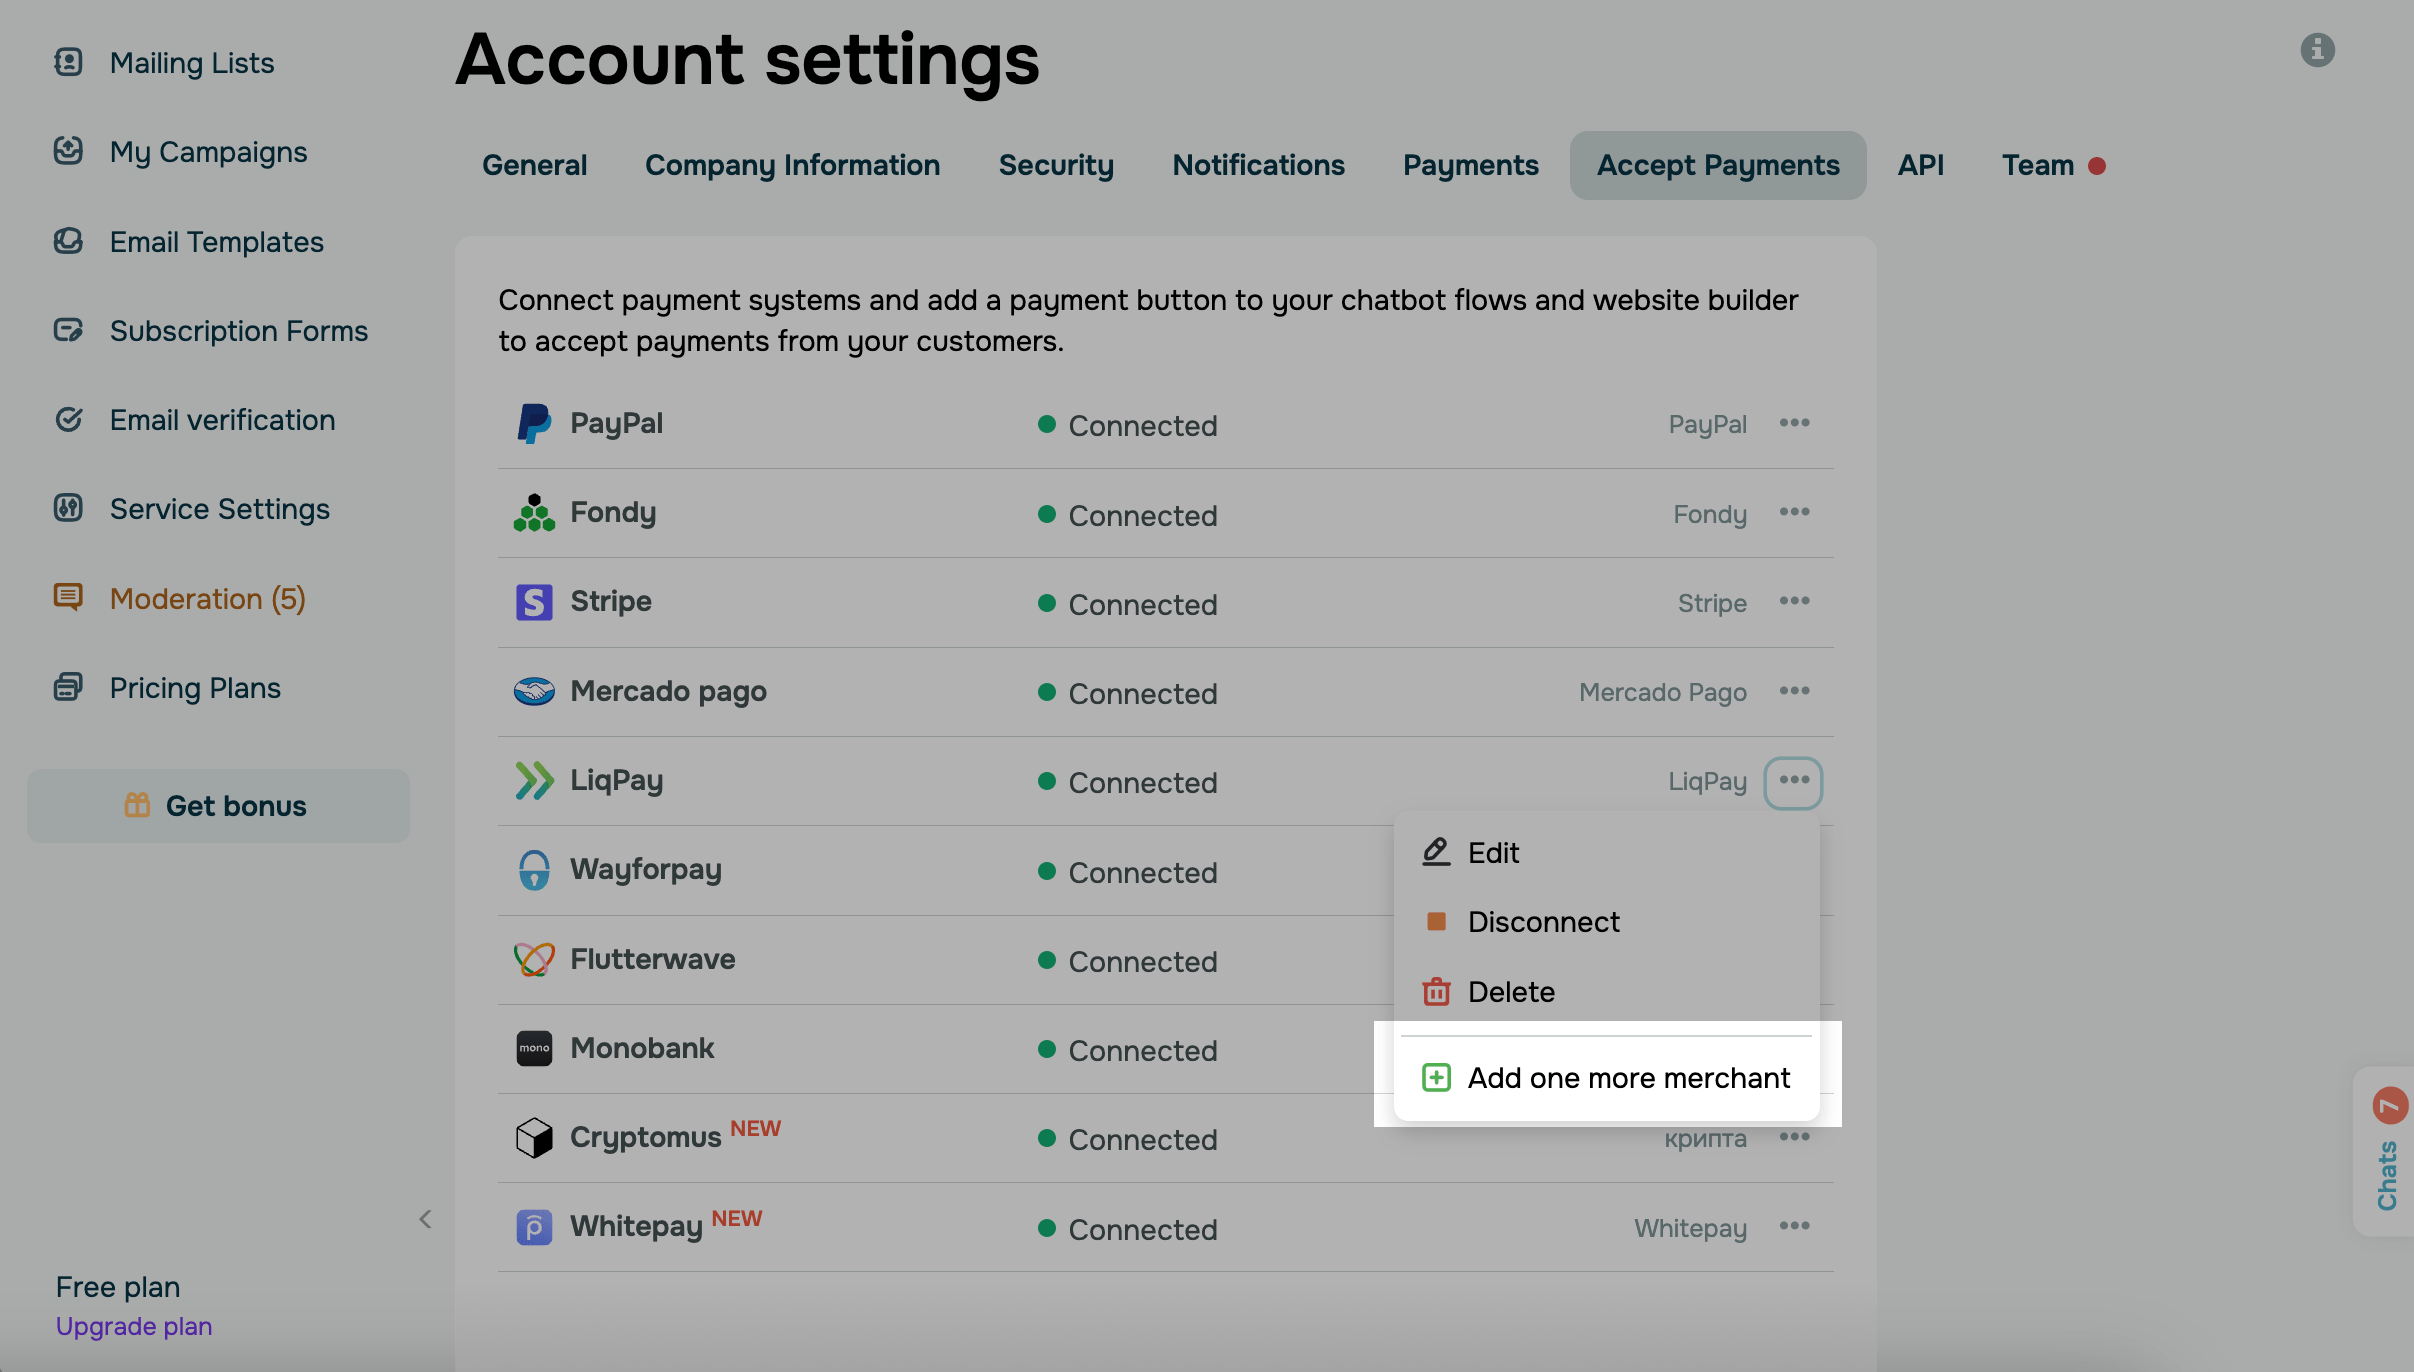
To connect addition merchant of the same payment system, click the three dots icon next to a payment system, and select Add one more merchant. Follow the same procedure you used when adding a merchant.
Enter a name for your additional merchant so that you can identify it. This name will only be displayed in your account — customers will not see it.
You can now select this payment option when adding buttons in SendPulse tools.
You can view the payment history in the same tab. Mark the list of successful transactions or payment errors in order to quickly respond to them.
Last Updated: 21.05.2024
or