Automate CRM deal management
With SendPulse, you can create an automation for creating a deal or changing a deal stage in CRM, for example, from New to In Progress.
Process customer data using various elements, and inform your customers about changes in the deal stage through different communication channels — email, SMS, web push, Viber, Instagram, Telegram, Facebook, or WhatsApp.
In this article, we'll show you how to add and configure each element and start an automation.
Read also: How to automate CRM task management.
Create an automation
With Automation, you can create your own scenarios or use and customize ready-made templates.
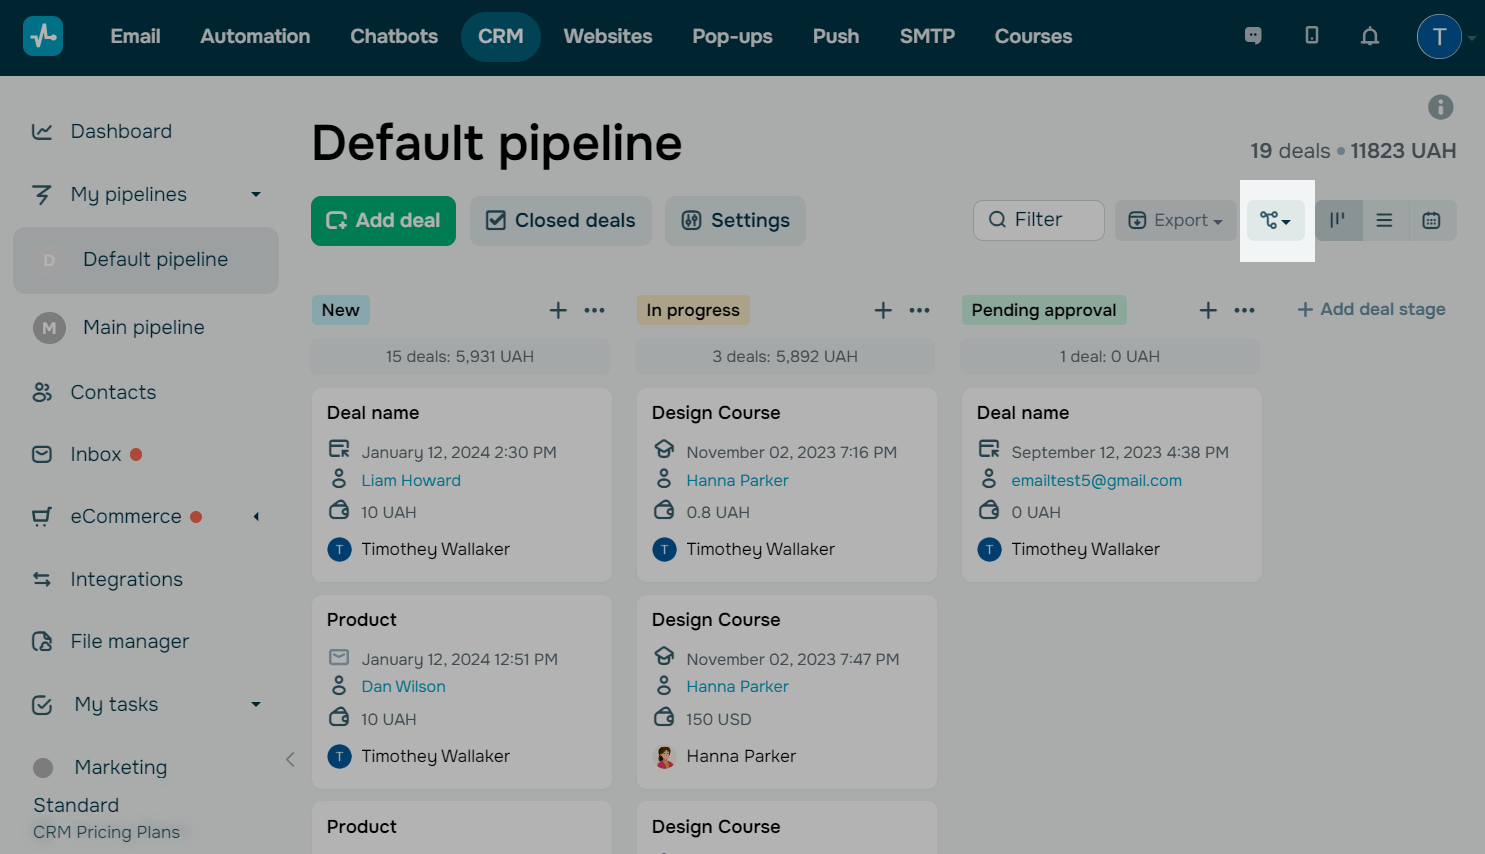
In the CRM section
Go to the CRM section. In your pipeline, click the flow icon.
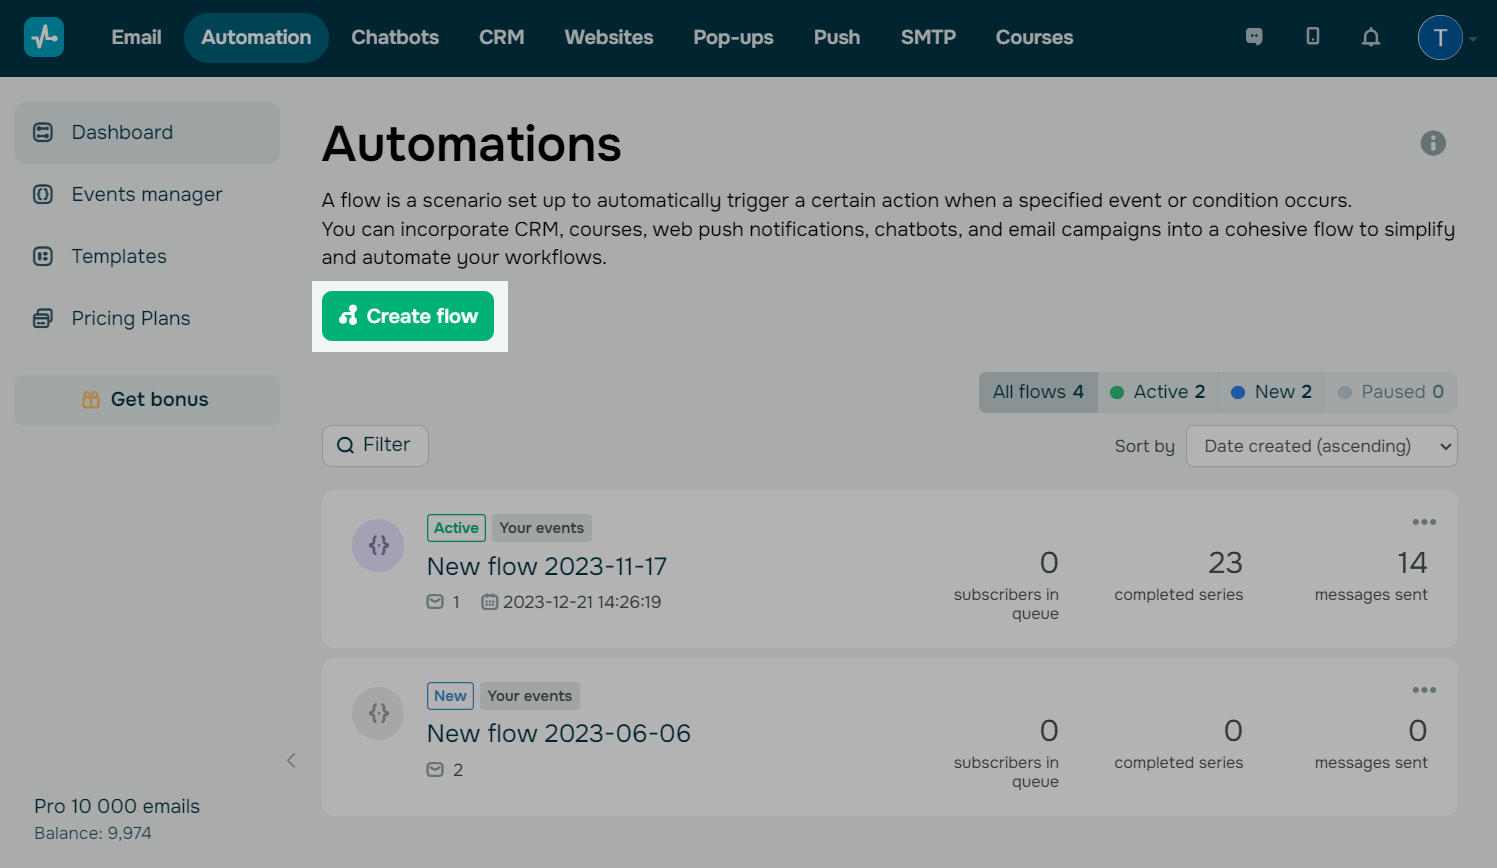
In the Automation section
Go to the Automation section and click Create flow.
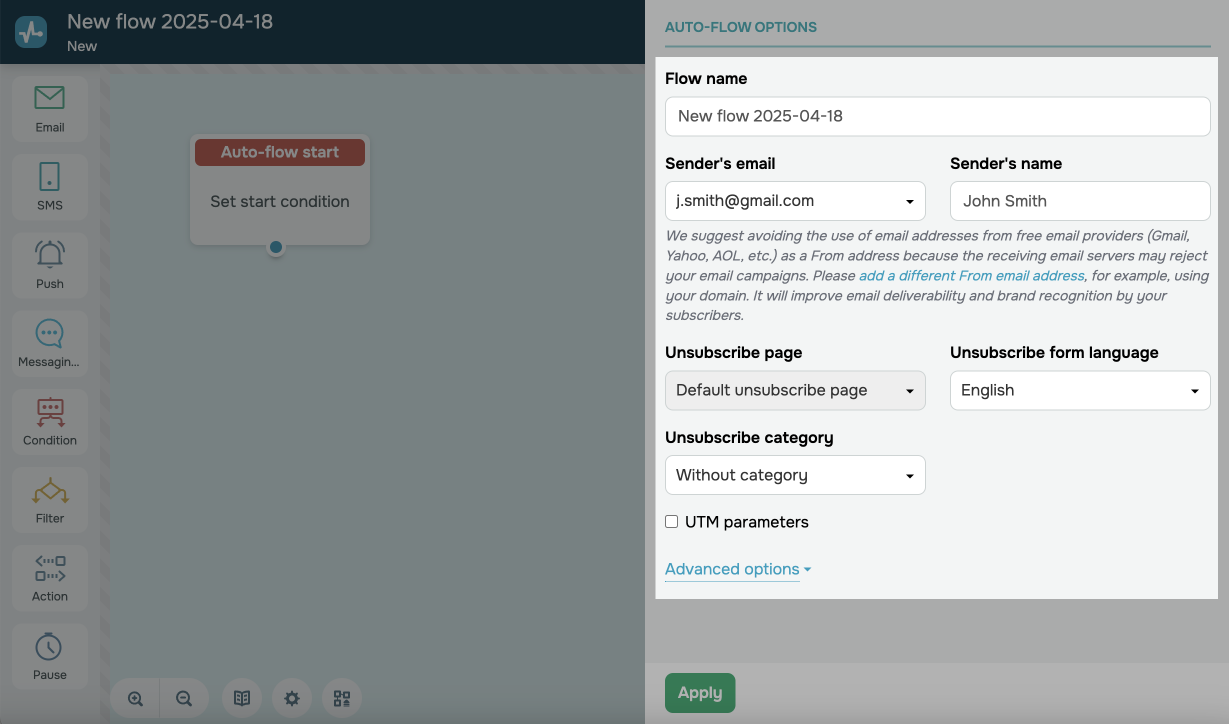
Configure automation settings
Enter your automation name, specify the sender, connect Google analytics, and select the unsubscribe page and unsubscribe form's language.
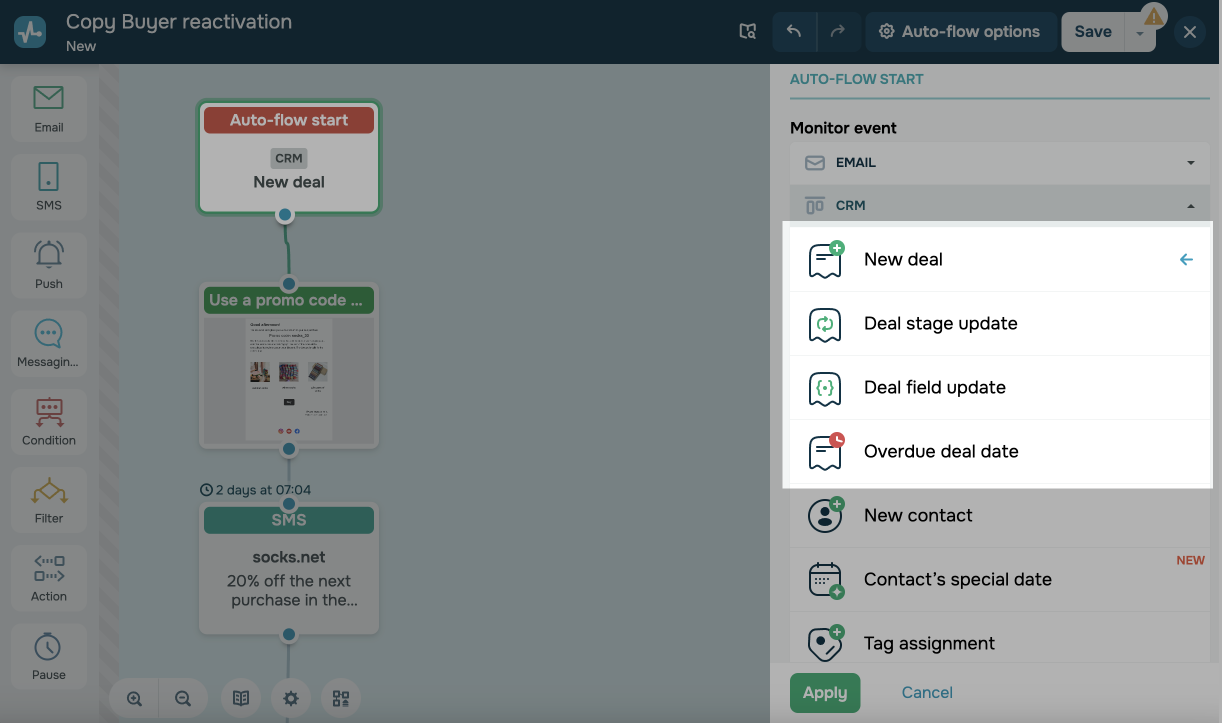
Set the series start
You can choose a start condition and send a message at a specific stage of working with a client.
| New deal | Triggers a flow to create a deal in the CRM system when, for example, a customer pays for a course or places an order through another SendPulse tool.
See also: How to create a deal and Sources of automatically added deals and contacts. |
| Deal stage update | Triggers a flow to change a deal status in the CRM system when, for example, a customer makes a payment or a team member processes an order.
See also: How to change a deal stage and Action element in Automation 360. |
| Deal field update | Triggers a flow when a deal field value changes in the CRM system. For example, if a deal price changes, you can notify your customer.
See also: How to create a deal. |
| Overdue deal date | Triggers a flow when a deal's due date arrives. Use this to drive conversions or send a deal reminder.
See also: How to edit a deal. |
You can also select an event from another SendPulse tool as a trigger and manage your deal data in the CRM system when the event occurs.
Read more: Automation launch triggers: CRM.
Select the pipeline in which you want to track your deal stage change, current deal stage, and source of adding the deal.
You can check if you want to stop the series by event and select an event.
As soon as the service tracks an event with the subscriber's email address, the flow will stop for this contact.
You can also count a series stop as a conversion.
Click Apply.
Configure your flow
The left sidebar in the flow builder includes all the elements you can add to customize your scenario.
Map out your flow, then add, arrange, and link its elements. To give you an idea, you can send a promo code for a client's special date or once their deal status changes to Completed.
All elements are optional. You need to add at least one element that sends a message to make your automation work.
Read also: How to work with the A360 builder.
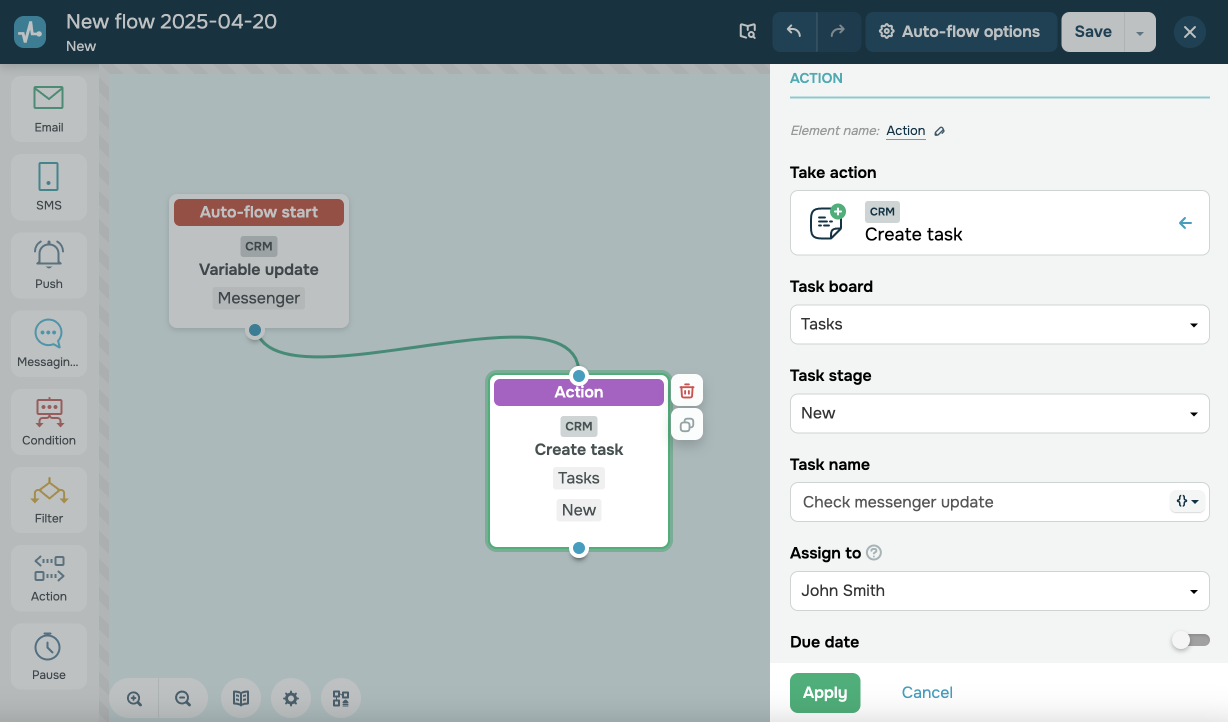
Add the Action element
Use the Action element to manage student data in courses.
Add an Action, go to the CRM tab in the right panel, and select an action from the list. To give you an idea, you can add a CRM contact card when a customer clicks a link in your campaign or makes a purchase.
If you select the Action element, you can use the following CRM data management options:
| Create deal | Adds a deal to the specified funnel. |
| Change deal stage | Changes the deal status to the one you specified. |
| Replace variable for contact | Updates the field value in the deal.
If the trigger for the flow automation start was a deals event, the list will also include deal variables with the |
You can pass variable values to update CRM fields. To do this, click Set field mapping.
Your automated flow must use the Create deal or Change deal stage trigger to pass deal data.
Deal variable values with the _deal suffix in your automated flow will sync with CRM deal fields, while variable values without this suffix will sync with contact fields.
To pass a variable value to an existing CRM deal field, type in the exact field name, including its letter case. If the field name or data type differs, the system will create a new field instead of passing the variable value.
Read more: Action element: CRM.
Add flow and contact management elements
You can also add elements that help manage automation, such as sending messages with a delay or based on conditions like the day of the week or deal stage.
| Pause | Add a pause to set a time when your customers will not receive messages. |
| Condition | Set a condition that will track customers’ status updates. Once the condition is met, they will move further along your flow.
For example, you can set a condition to change the deal status to |
| Filter | Set up a contact filter to branch your flow and send relevant messages to a specific group of customers.
For example, you can choose a phone number filter and assign team members based on your customer’s location. You can personalize your flow using a deal or contact data filter. Let's say your CRM system has a "city" field in both deal and contact cards. To use the deal field value, add the You can also set a phone number filter and assign a team member based on your customer’s location. |
| Goal | Set your goals. Once they are achieved, you will be able to send specific messages or stop your flow. For example, after receiving a product payment, you can confirm the order in a messaging app. |
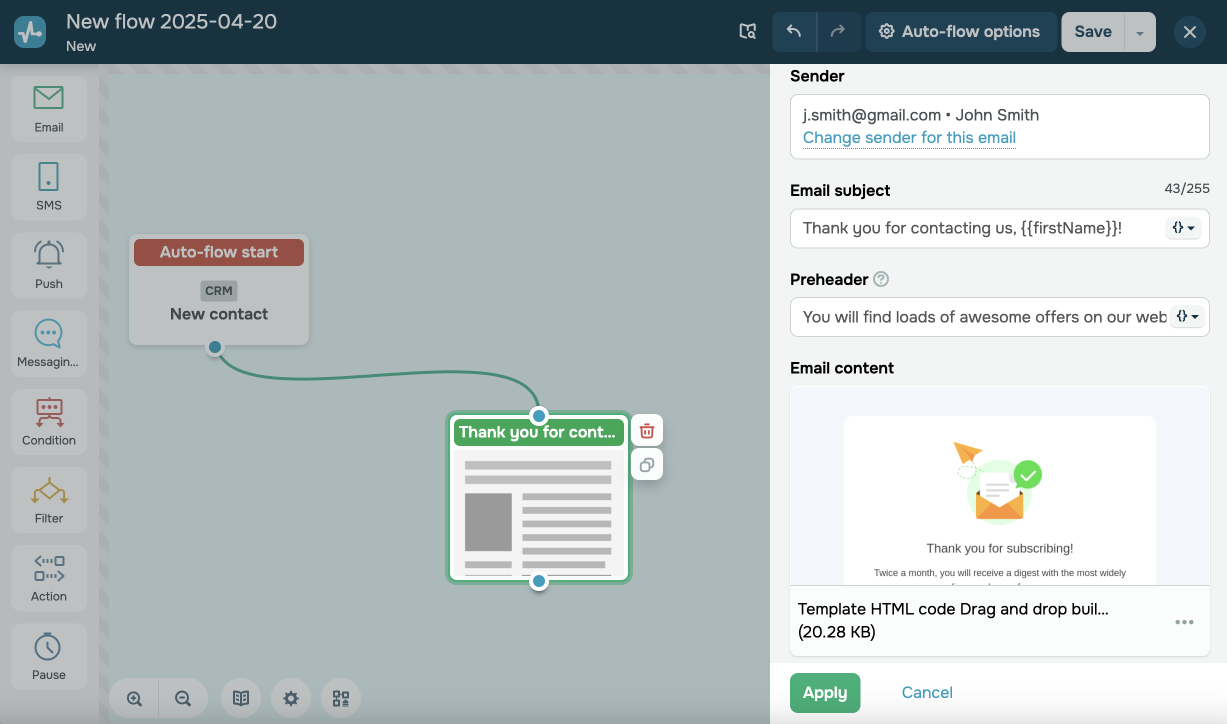
Add a sending element
You can send messages through various communication channels.
| Send emails with important information to customers, such as new product announcements. | |
| SMS | Inform about course events using text messages sent to customers' phone numbers, such as sale start reminders. |
| Viber | Send Viber messages to keep in touch with your customers, for example, to keep in touch with your audience. |
| Push | Communicate with customers using web push notifications, such as reminders about upcoming promotions. |
| Messenger | Add a chatbot to send messages via Instagram, WhatsApp, Facebook Messenger, or Telegram. |
You can also use CRM deal and contact data to personalize messages and include order information.
To add a variable value from a deal field, add the _deal suffix to the field name. To add a value from a contact field, enter its name exactly as it appears in its contact settings, including the letter case.
Let's say your CRM system has a "city" field in both deal and contact cards. To use the deal field value, add the {{city_deal}} variable to your message, and to use the contact field value, add the {{city}} variable.
Your flow will be sent to your primary contact one time. If you have saved more than one phone number and email address in a contact card, the system will send your flow to your selected primary contacts. By default, the email address and phone number you added first are recognized as your primary contact.
You can also use the {{email}} and {{phone}} variables within the same flow element, for example, to add an email address to your SMS message text.
Save and launch
Once you finish with the settings, click Save and run in the upper right corner.
The user will receive your message as soon as the conditions of the series start are met.
Deal automation examples
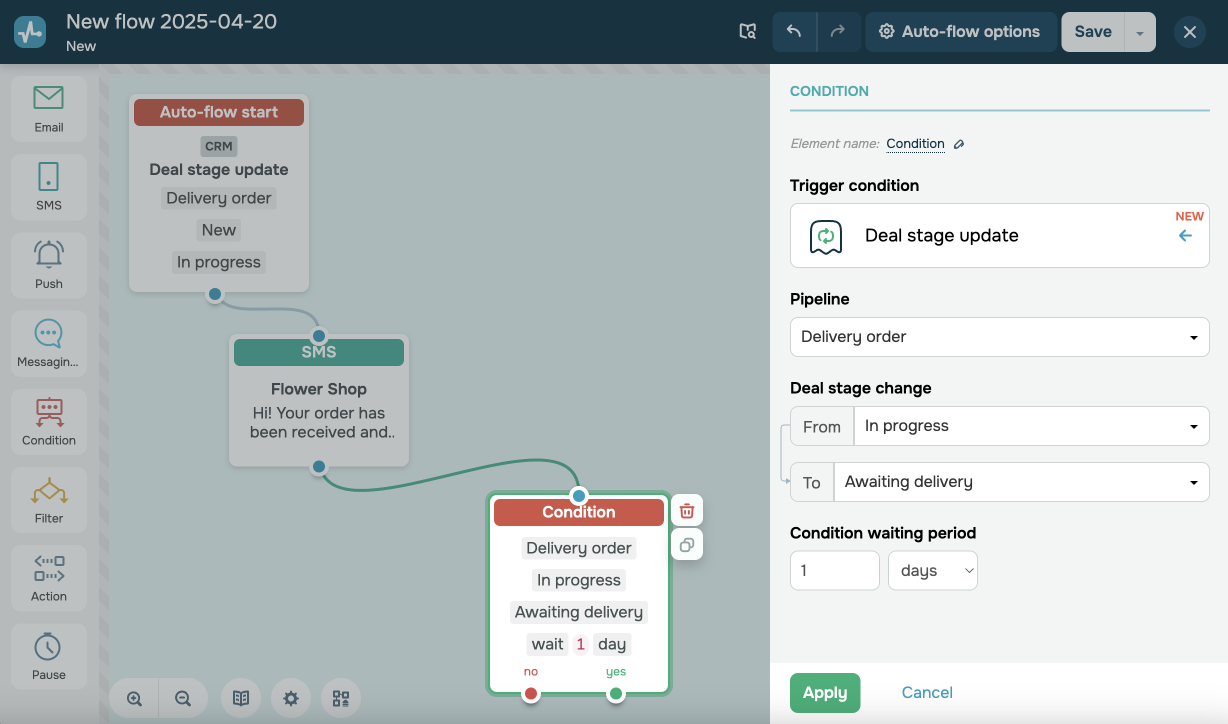
Deal status update
Automatically send a personalized message to confirm that you've started processing your customer's request. Let them know they can expect a follow-up call from your team member once their deal stage moves from New to In Progress.
To do this, set the Deal stage update trigger, and select its source stage (for example, "New") and target stage (for example, "In Progress").
Next, add the Email, SMS, or Messenger element to send your notification. You can also use the Filter element with a variable or tag to send it through your client’s preferred communication channel.
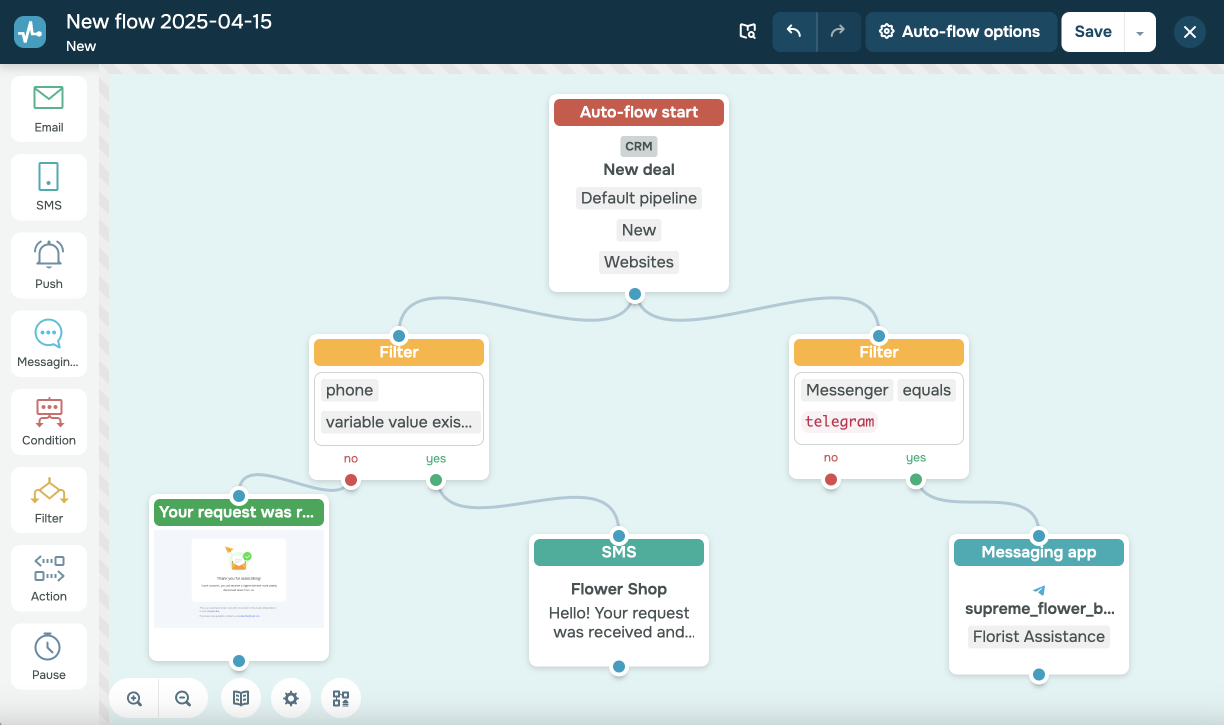
Automated request confirmation
When a new request appears in the CRM system (for example, when a client submits a form on your website), you can automatically send a confirmation message and let them know when they can expect a follow-up call or email.
To do this, select the Create deal trigger. Use the Filter element with a variable or tag to determine your client’s preferred communication channel. Then, add the Email, SMS, or Messenger element to send your message.
You can also add the no filter branch to use an alternative communication channel.
Special date message
Send messages with holiday wishes or birthday greetings. You can also arrange promo codes for these occasions beforehand to drive conversions or sales.
To do this, select the Special date trigger and choose the variable where this date is stored. Decide when to send your message. To give you an idea, you can deliver it 5 days before the date so that your client has time to use the promo code.
Then, add the Email, SMS, or Messenger element.
Optionally, insert the link to your promo code page, and create a deal using the Action element if your client clicks it.
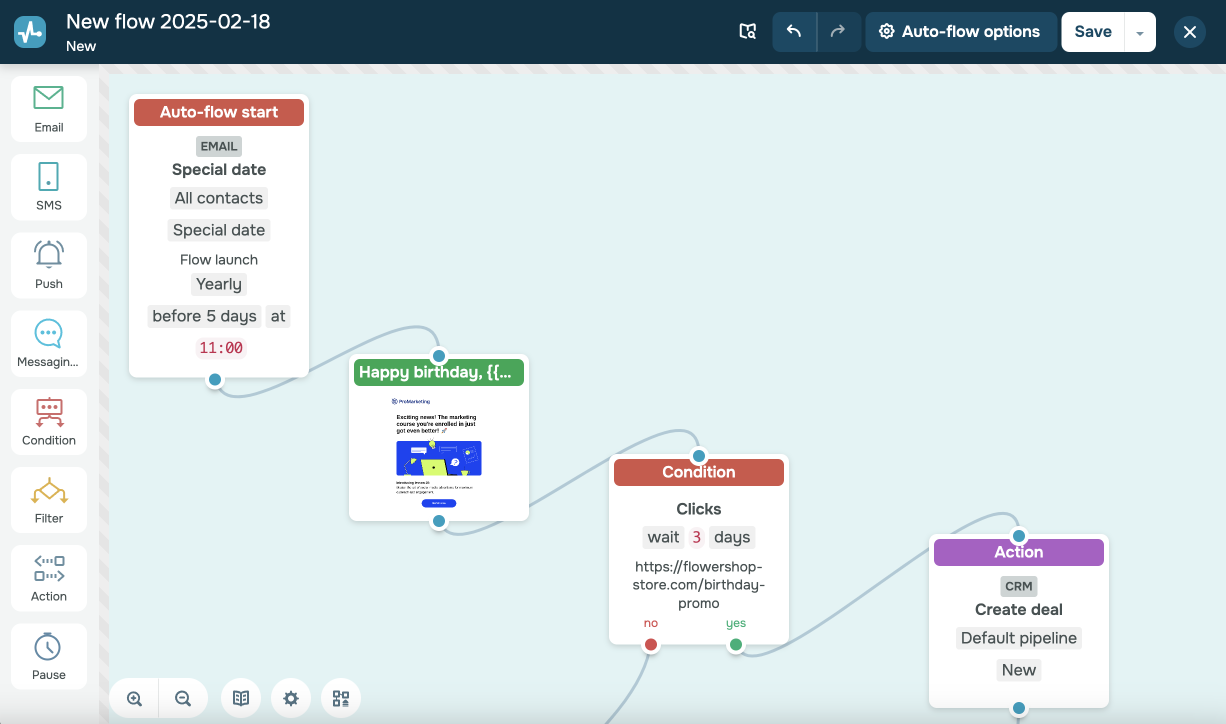
You can also add the no branch to your Condition element to send a promo code reminder later on.
Last Updated: 16.05.2024
or