Create a multilingual website
Supporting multiple languages on your website helps you reach a wider audience, enhance user experience, and boost website performance across different regions. This approach is especially valuable for businesses expanding into or already operating in global markets.
Let’s talk about how you can make your SendPulse-powered website multilingual.
Setup methods
You can make your website multilingual either by copying and translating pages within a single website or creating dedicated websites with unique domains for every language.
| Page copies within a single website |
All language versions remain within the same website, and its URL changes based on the language selected in the menu. For example:
To use this method, create a copy of your page, translate it, and add a language switcher menu. |
| Dedicated website for every language |
Every language version has its own website. For example:
Or:
To use this method, create a copy of your website, add a subdomain, translate your website copy, and add a language switcher menu if needed. |
Choose a setup method
Page copies within a single website
We recommend creating a language switcher menu before you add page copies, even if you don't have all their links yet. Once your pages are ready, you’ll only need to update the menu instead of creating it from scratch.
Copy your page
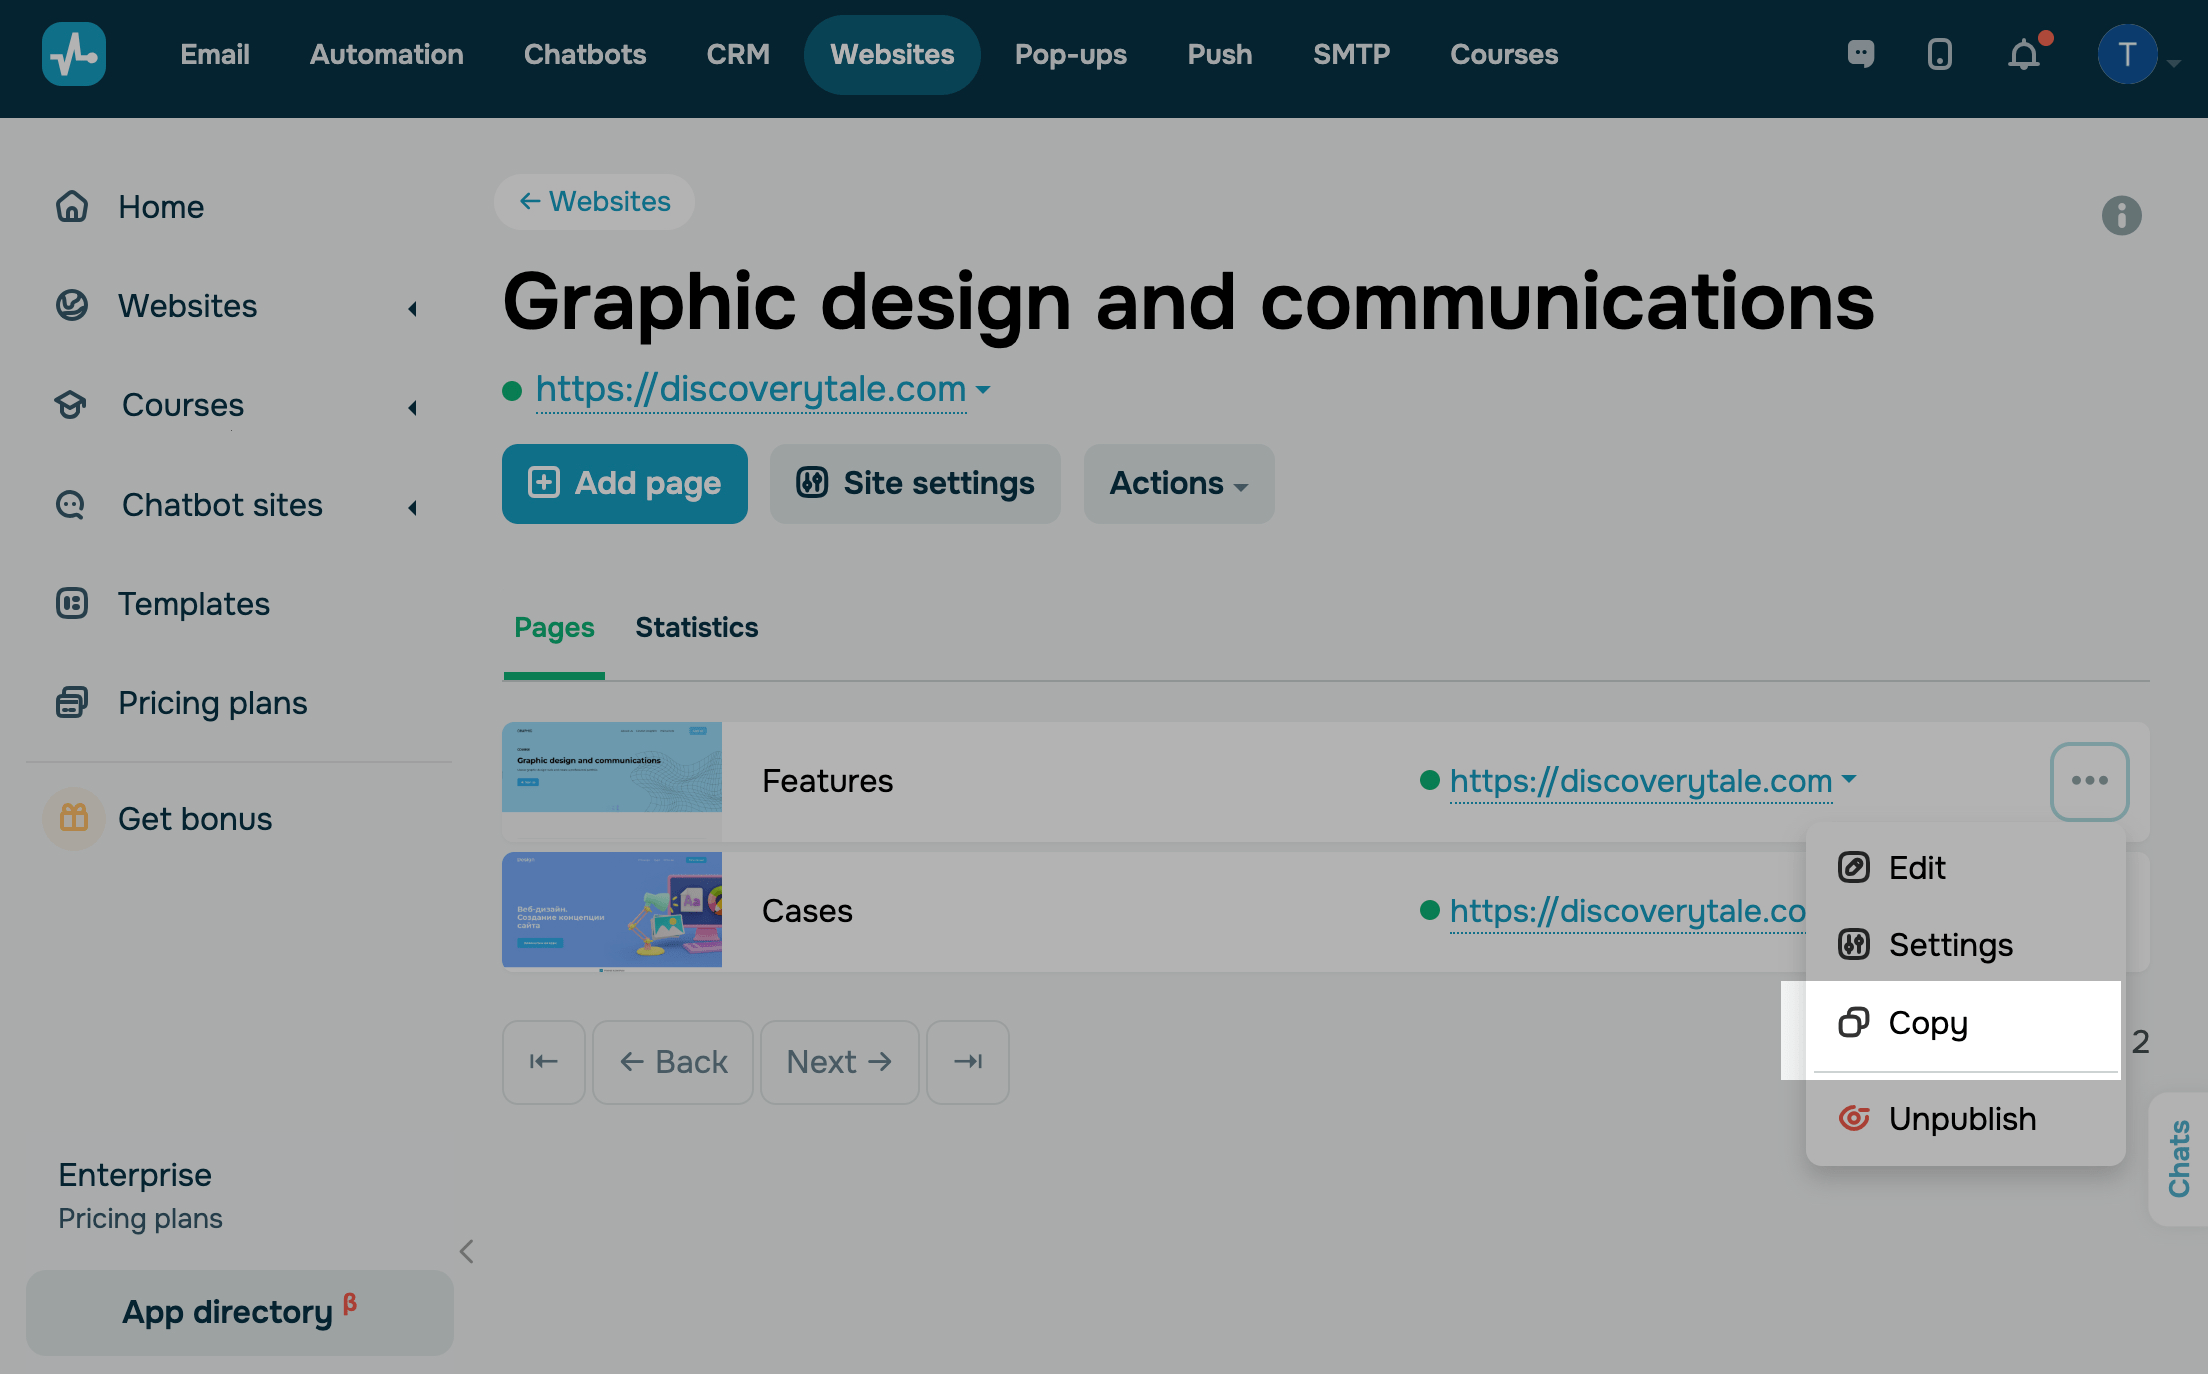
Go to your website and click the three dots next to the page you want to translate. Select Copy from the menu.
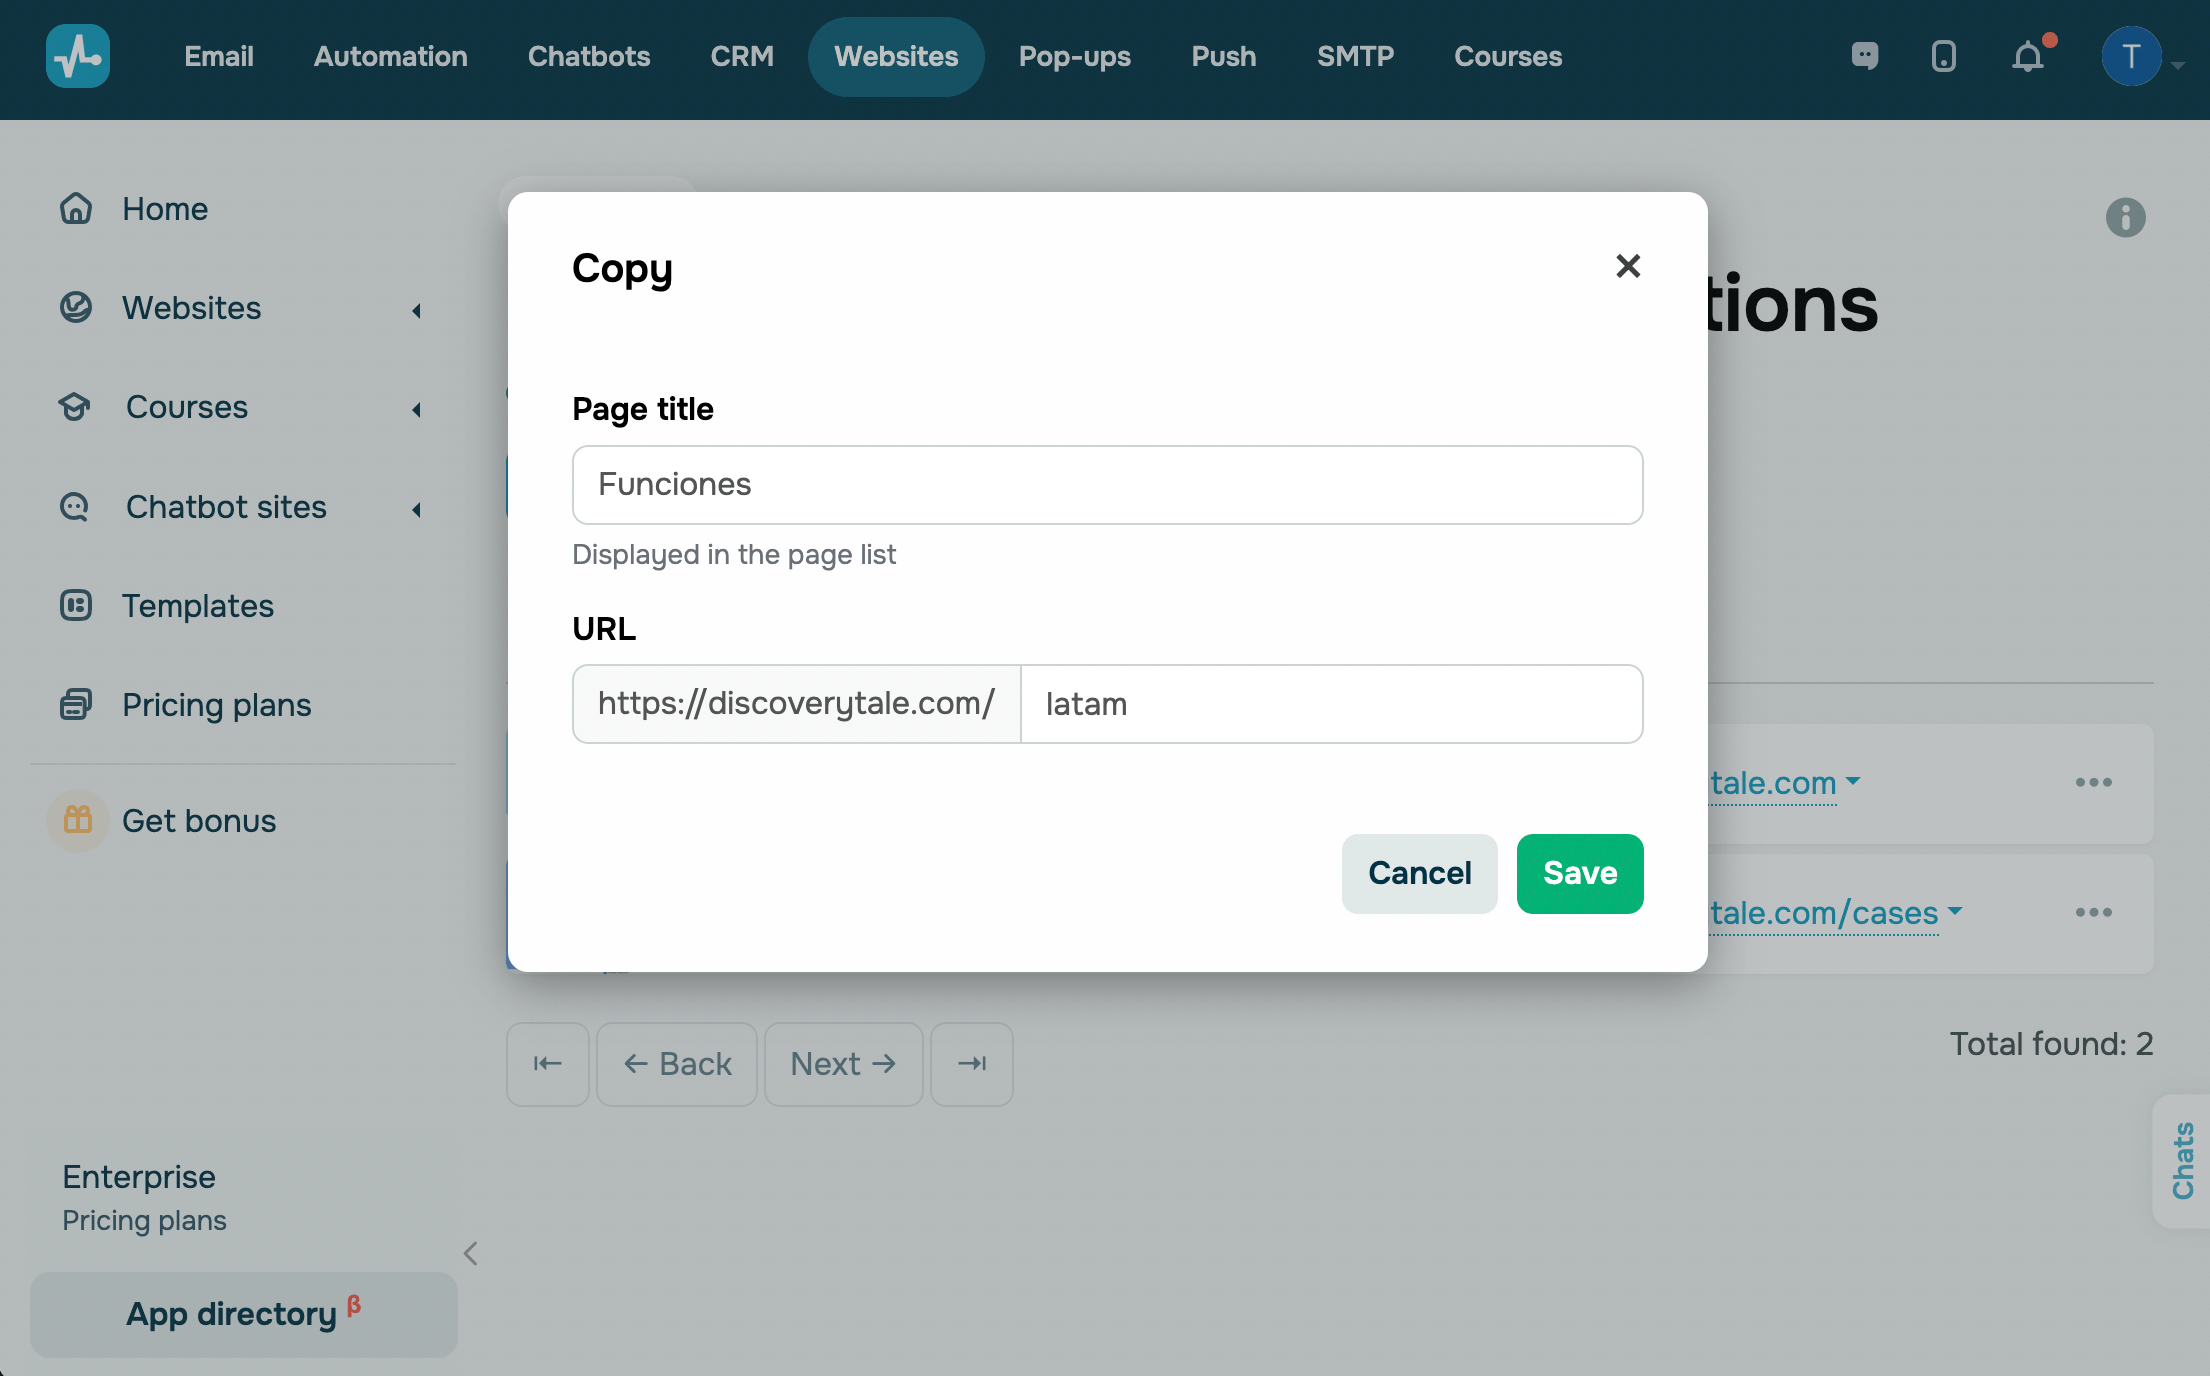
In the modal window, type in a page name and its URL.
For example, if your original website link is discoverytale.com, add a subdirectory for the new language version, such as discoverytale.com/latam.
You can add a translated page name in your target language. This way, users will see it in their language while you keep its original name in your source language.
Set a page language
Using the page language setting, you can select the language of notifications and other technical texts.
Click the three dots next to your page and select Settings. In the Language field, select a language.
Translate your page
To edit your page copy, click the three dots next to it and select Edit.
Review all text elements and translate them into your target language.
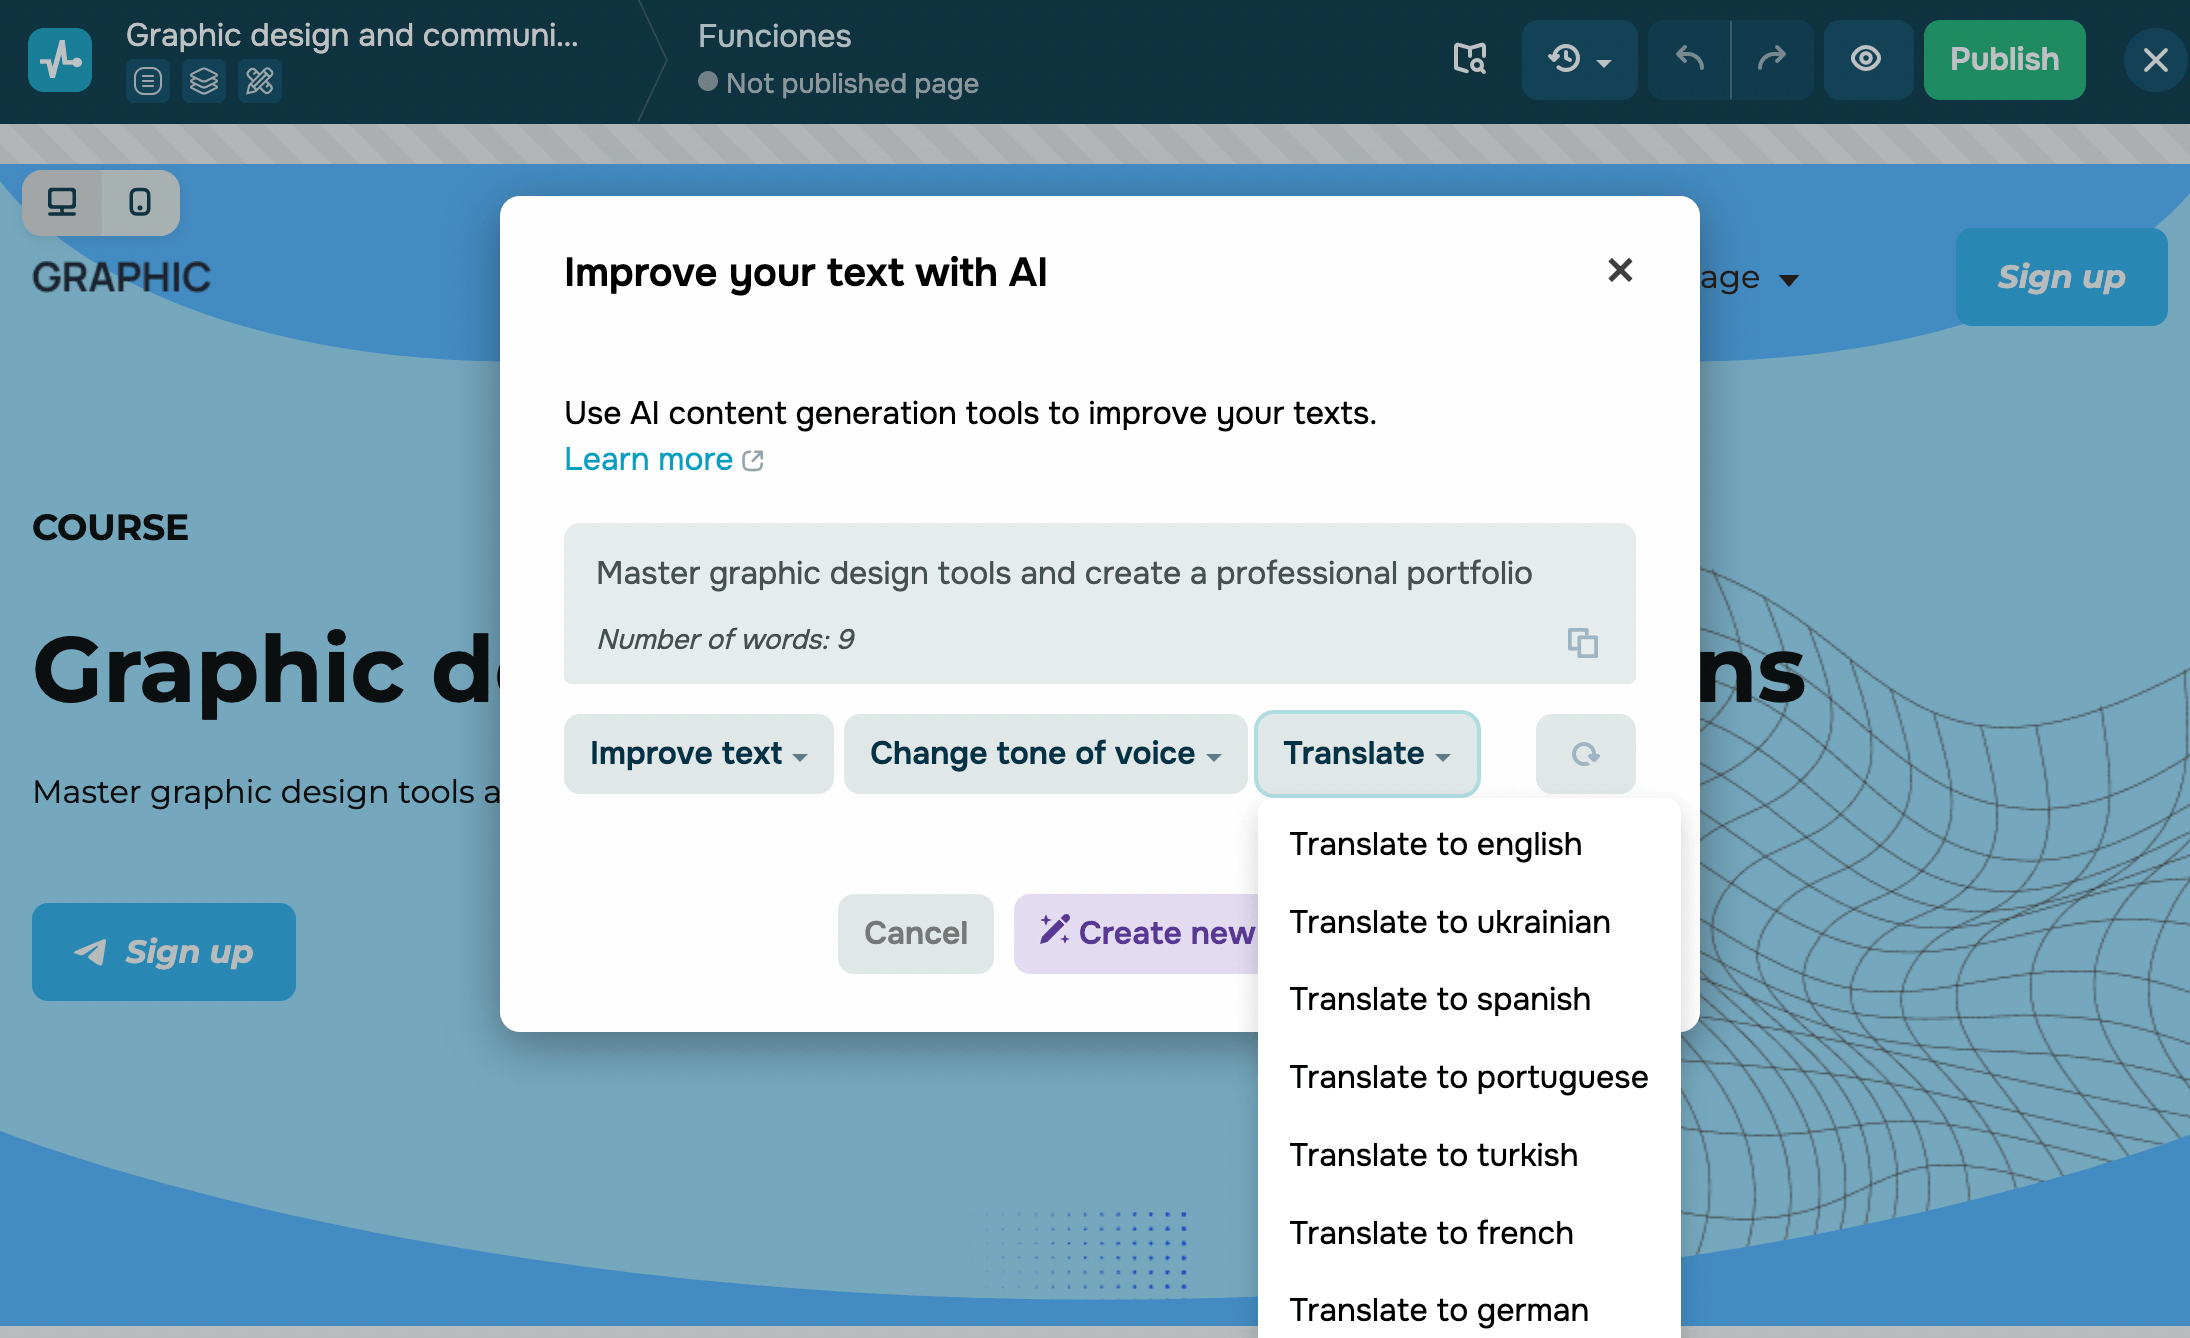
In the Text element, you can use built-in AI features for translation. Open a text element, select Use AI, click Translate, and select a target language. Once the translation is generated, click Apply text to insert it into the text element.
We recommend reviewing and adapting all automated translations manually to ensure natural readability and cultural relevance.
Add your translated page to the language switcher menu
Open the Menu element and add a new item named Language in your target language. Leave the menu type blank.
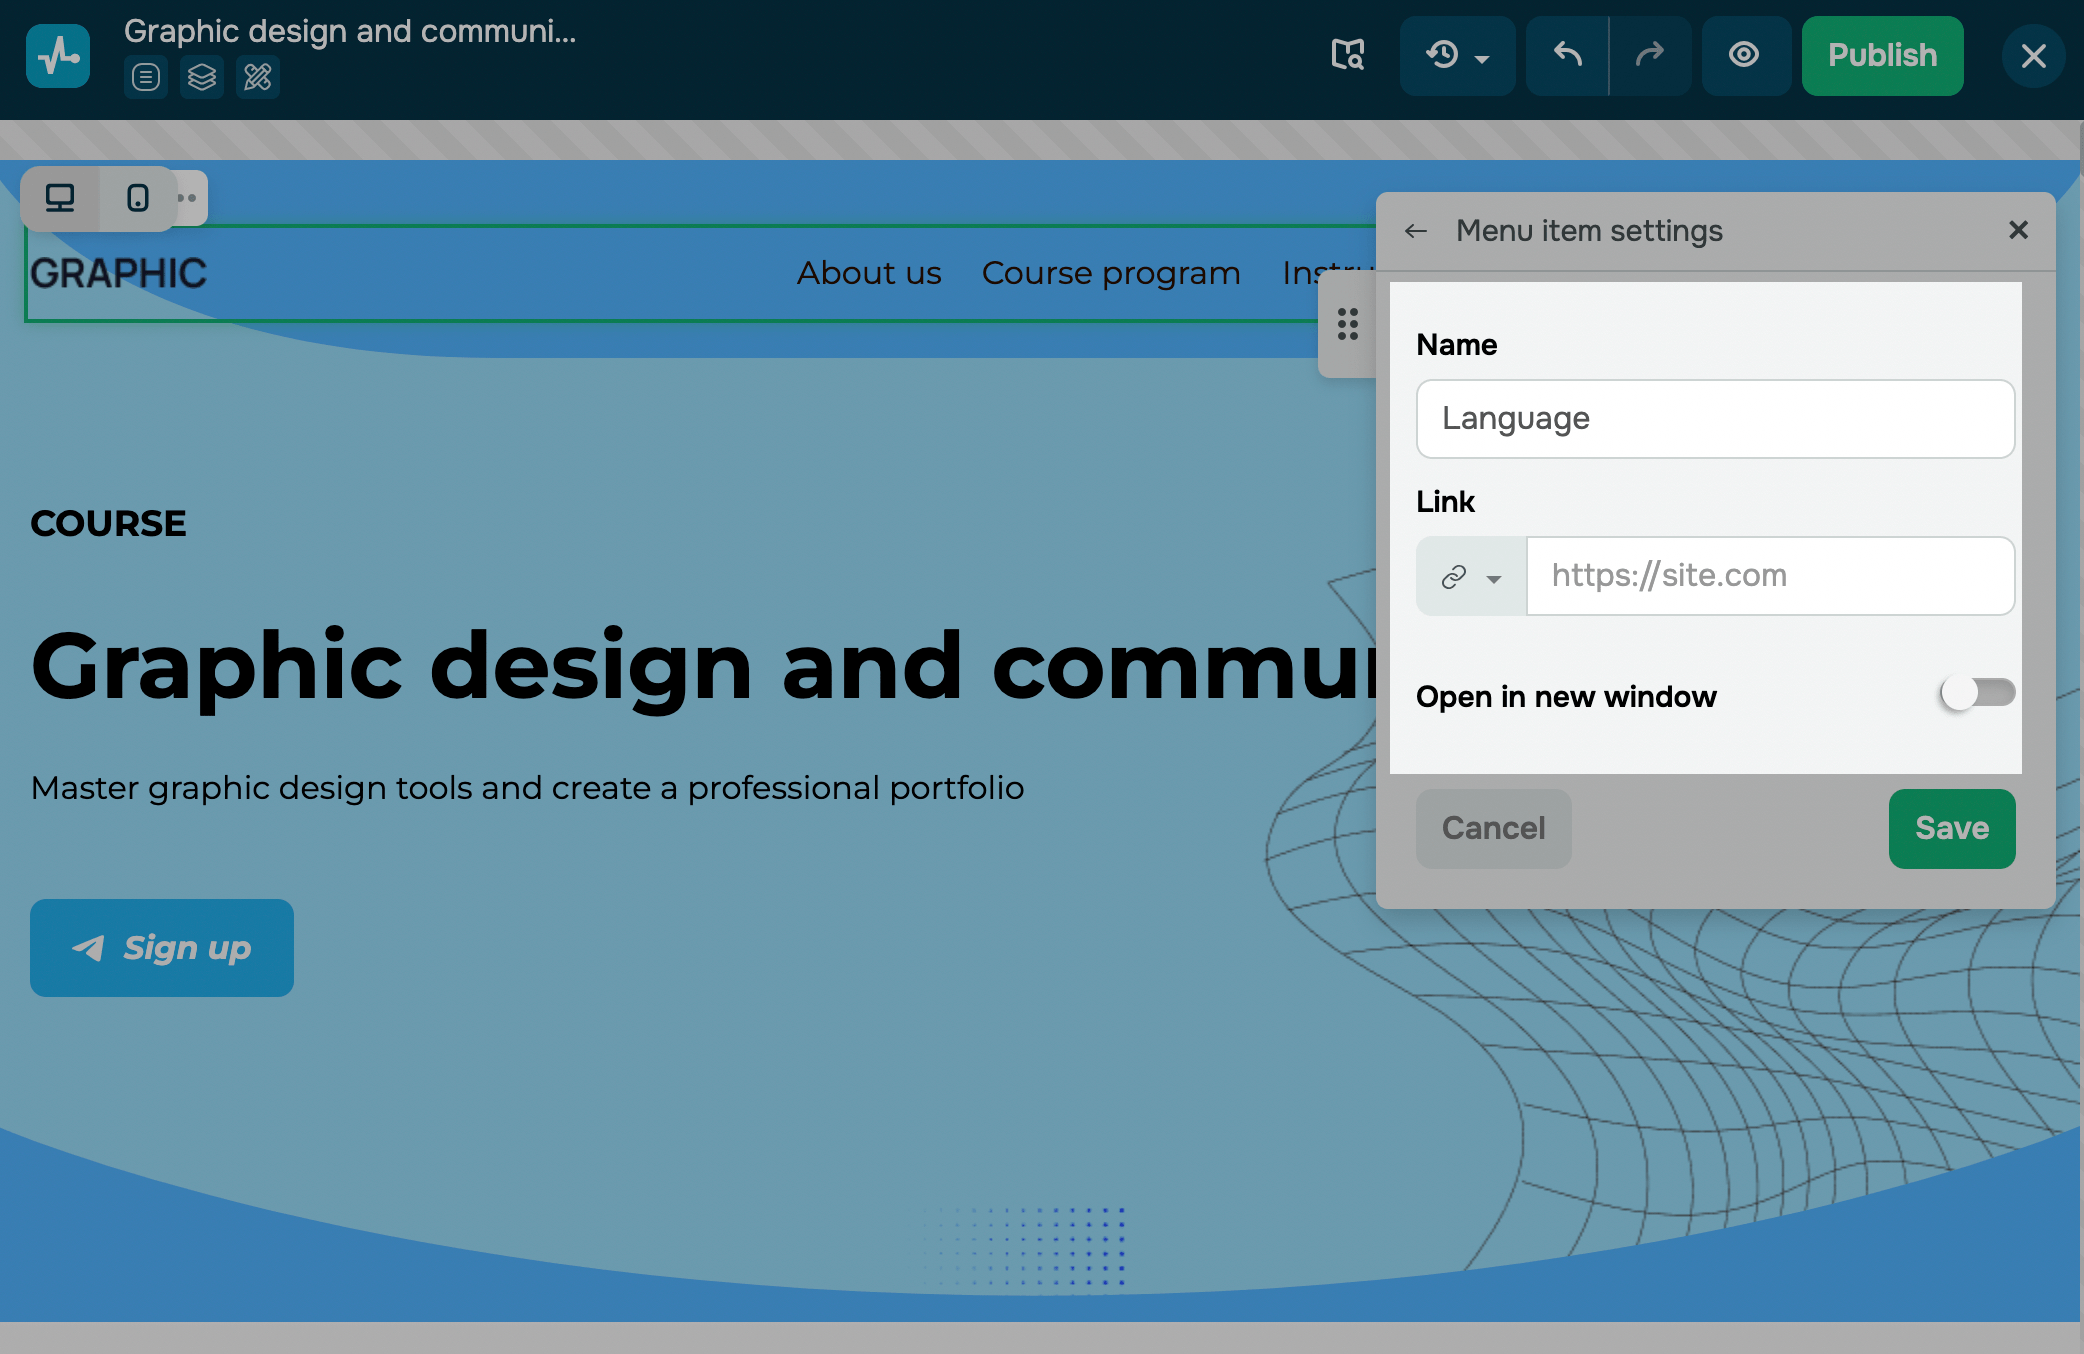
Click the three dots next to your new item and select Add submenu item.
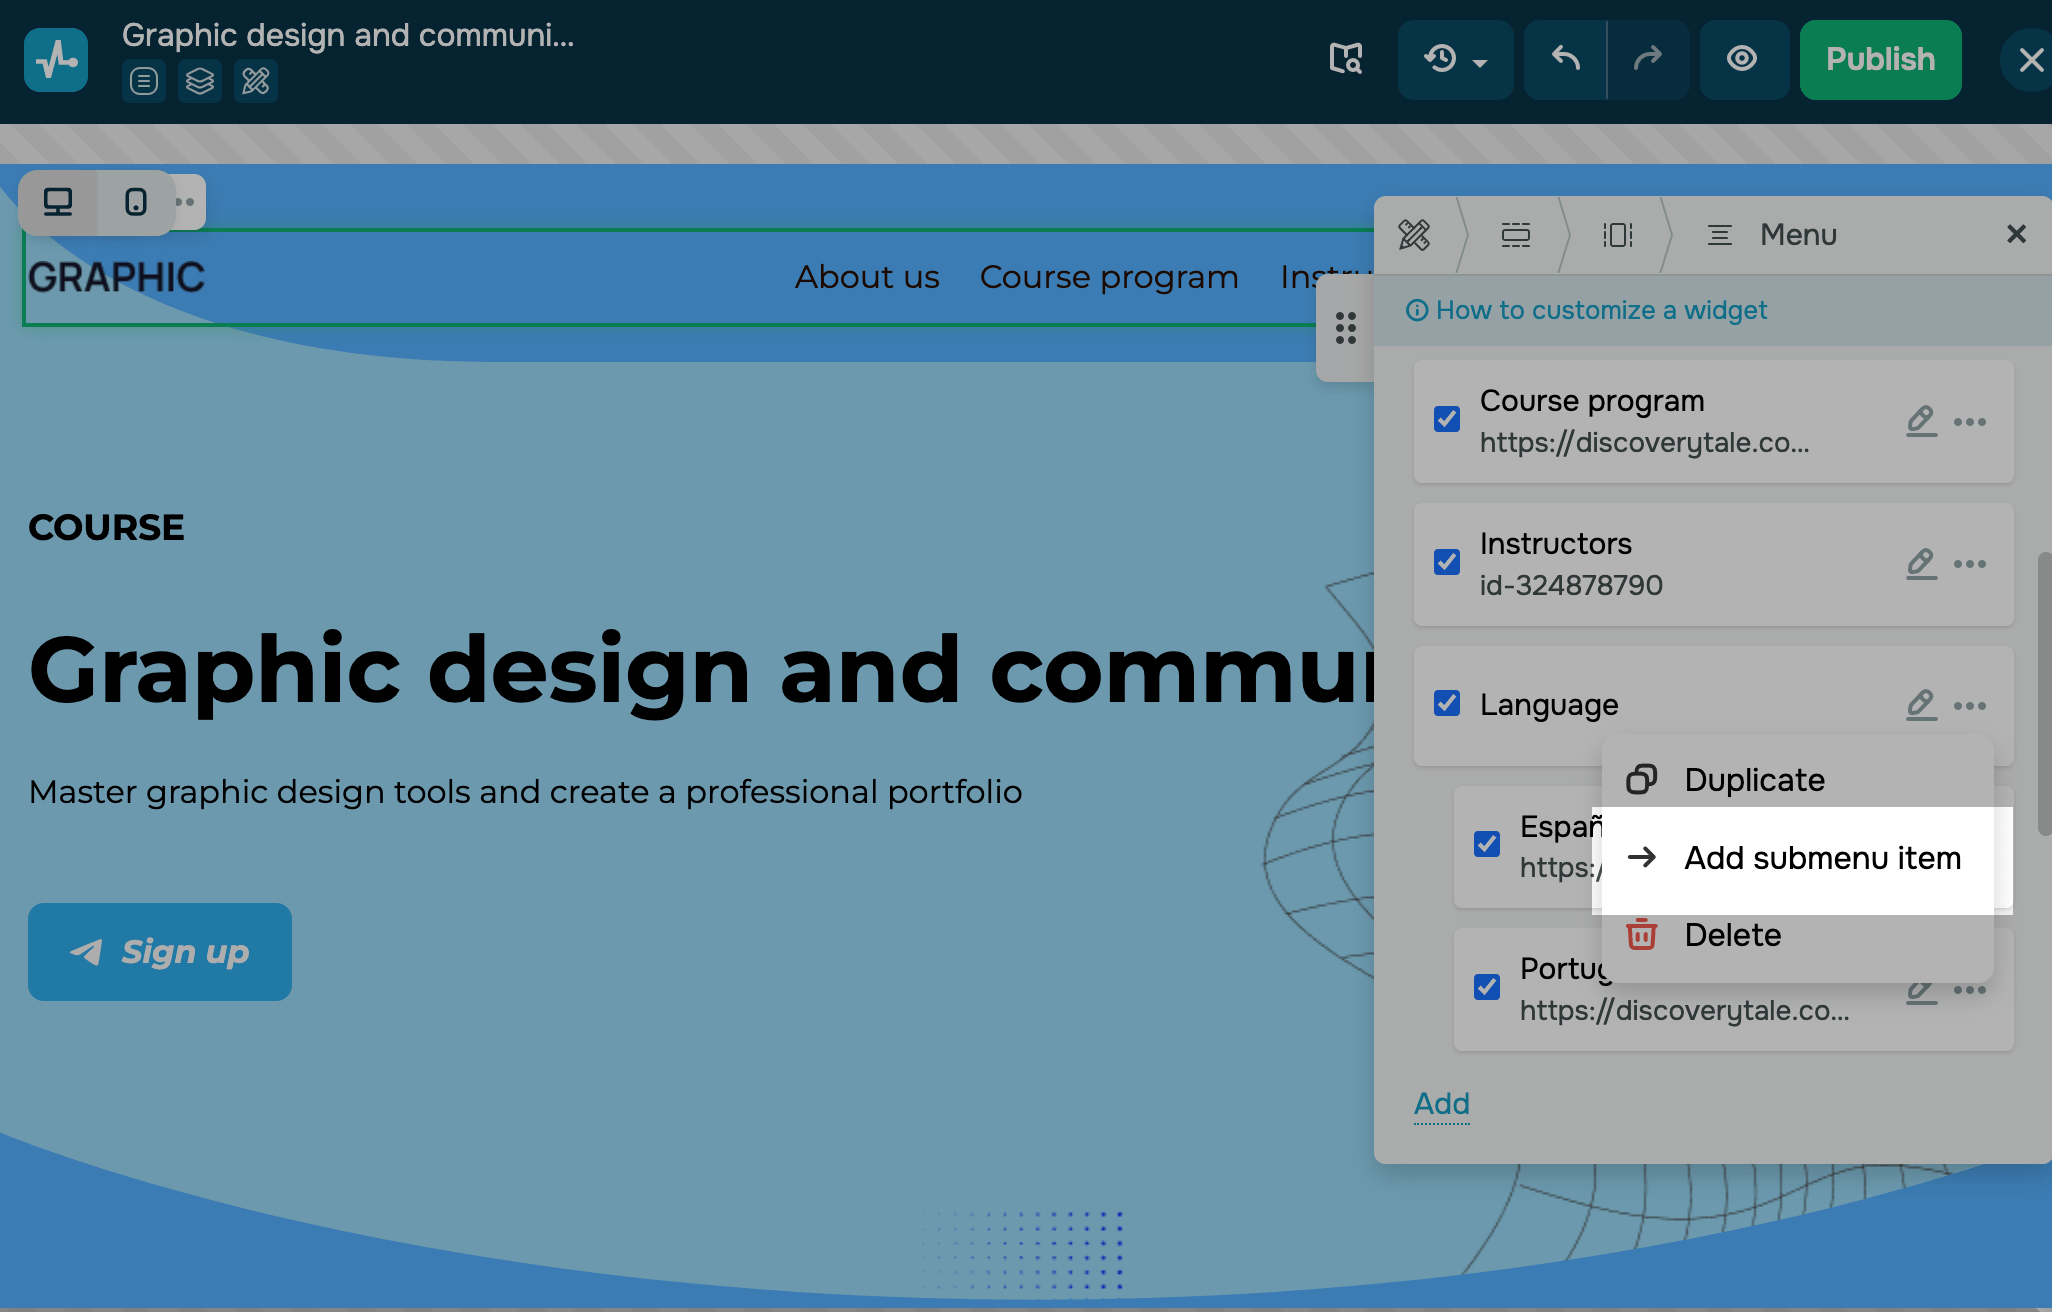
In the submenu item, type in a language name (for example, English). Select the Link menu type and paste the link to your translated page.

If you have multiple translations, add a submenu item for each.
For example, if your website is available in Spanish, Portuguese, and English, link the English page to the Spanish and Portuguese versions, the Spanish page to the English and Portuguese versions, and the Portuguese page to the English and Spanish versions.
We recommend using sitewide or saved blocks to simplify menu management.
Dedicated website for every language
Copy your website
Preview your website and review the pages. If you need to make adjustments, do so before copying your website.
Click Actions and select Copy.
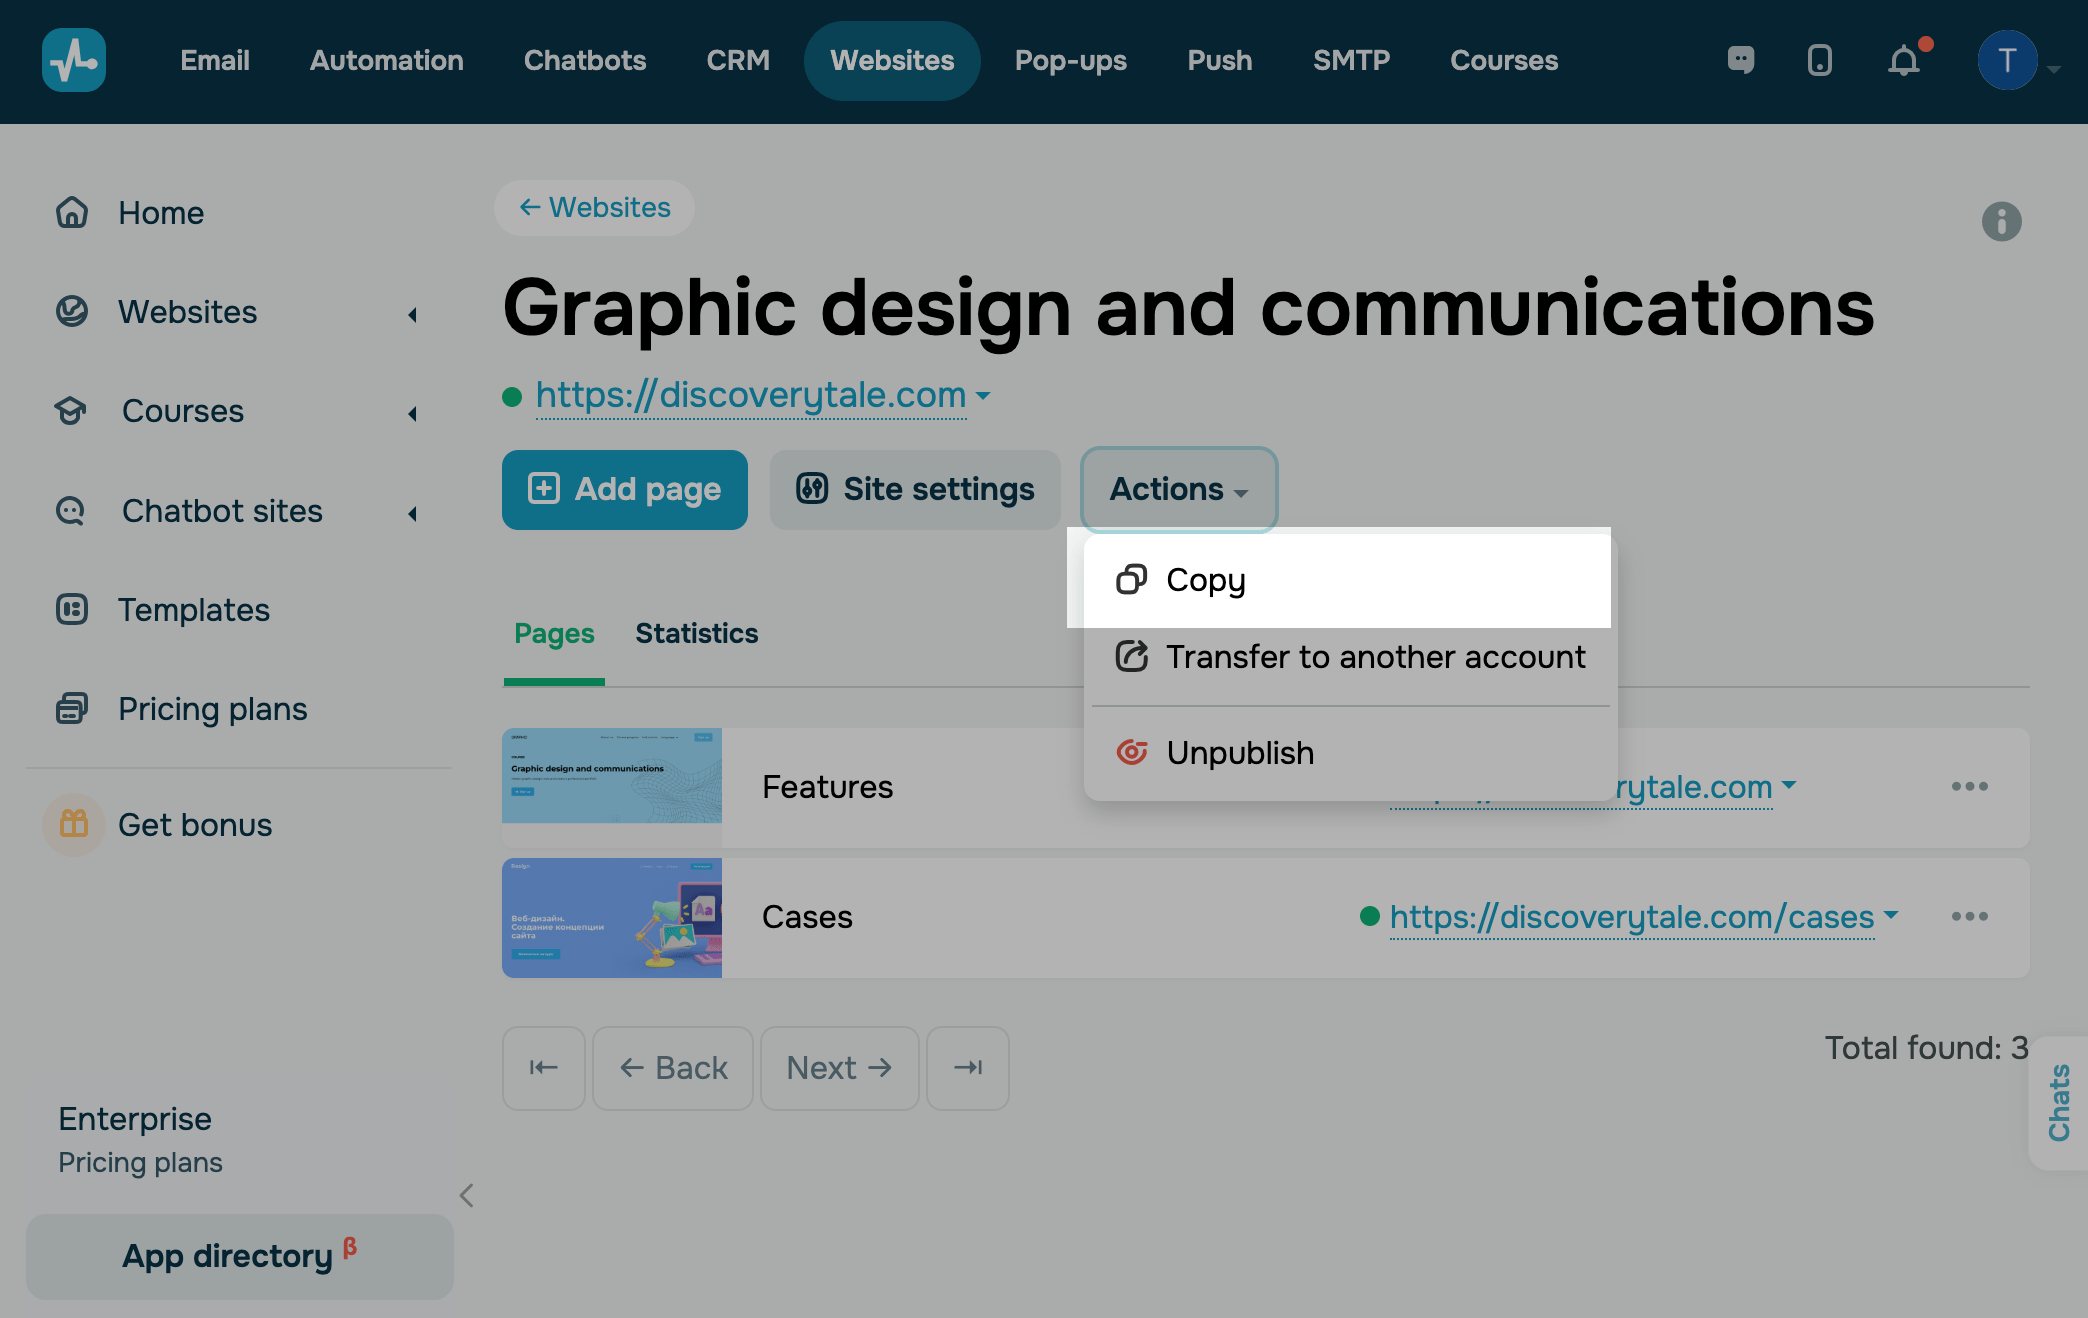
In the modal window, type in a website name and its main domain. All pages will be copied with the same URL structure as the original website but under the new domain.
For example, if your original website link is https://discoverytale.com, add a subdomain for the new language version. During setup, you can select a standard domain and assign a custom subdomain in your website settings later on.
Set a website language
Using the website language setting, you can set a language of notifications and similar messages.
Go to Site settings and select a language in the Language field. This setting will apply to all website pages.
Translate website pages
Open the list of website pages, click the three dots next to every page, and select Edit to go to the builder. Translate all text elements, update links using the same method as before, and adjust page names in their settings.
Read more: Translate your page.
Add translated pages to the language switcher menu
Link newly created website pages to their source website pages using the same approach as in the first method.
Learn more: Add your translated page to the language switcher menu.
In every website page, add a new item named Language in your target language, and do not select a menu type. Then, click the three dots next to your new item, and select Add submenu item.
In the submenu item, type in a language name in the Name field (for example, English). Select the Link menu item type and paste the link to your translated page.
If you have multiple translations, add a submenu item for each.
Check your page
Once you have configured the settings, go to your website page and test the language switcher menu. Verify the following:
- Pages and menu items appear correctly in every language.
- Your language switcher operates smoothly.
- All content appears correctly based on the language you select.
- Links to language versions are configured properly.
If everything looks in order, your website is ready for an international audience.
Last Updated: 14.03.2025
or