The Course login widget in the website builder
With the SendPulse website builder, you can use the Course login widget to add buttons for enrolling in a course or logging in to a student account on the course registration page in your own design.
For example, you can create a multi-page site about your school or an expert, link several courses to it, and present them in the style you need.
Existing students can enroll in a new course directly through the embedded registration form. For a logged-in student, the Email field is filled in automatically, so they only confirm their enrollment to start learning.
Please note that you can add this widget only to a site with a linked course. To do this, go to the course site, create a new page with a linked course, and add the widget to it.
In this article, we'll walk through how to add and configure the Course login widget.
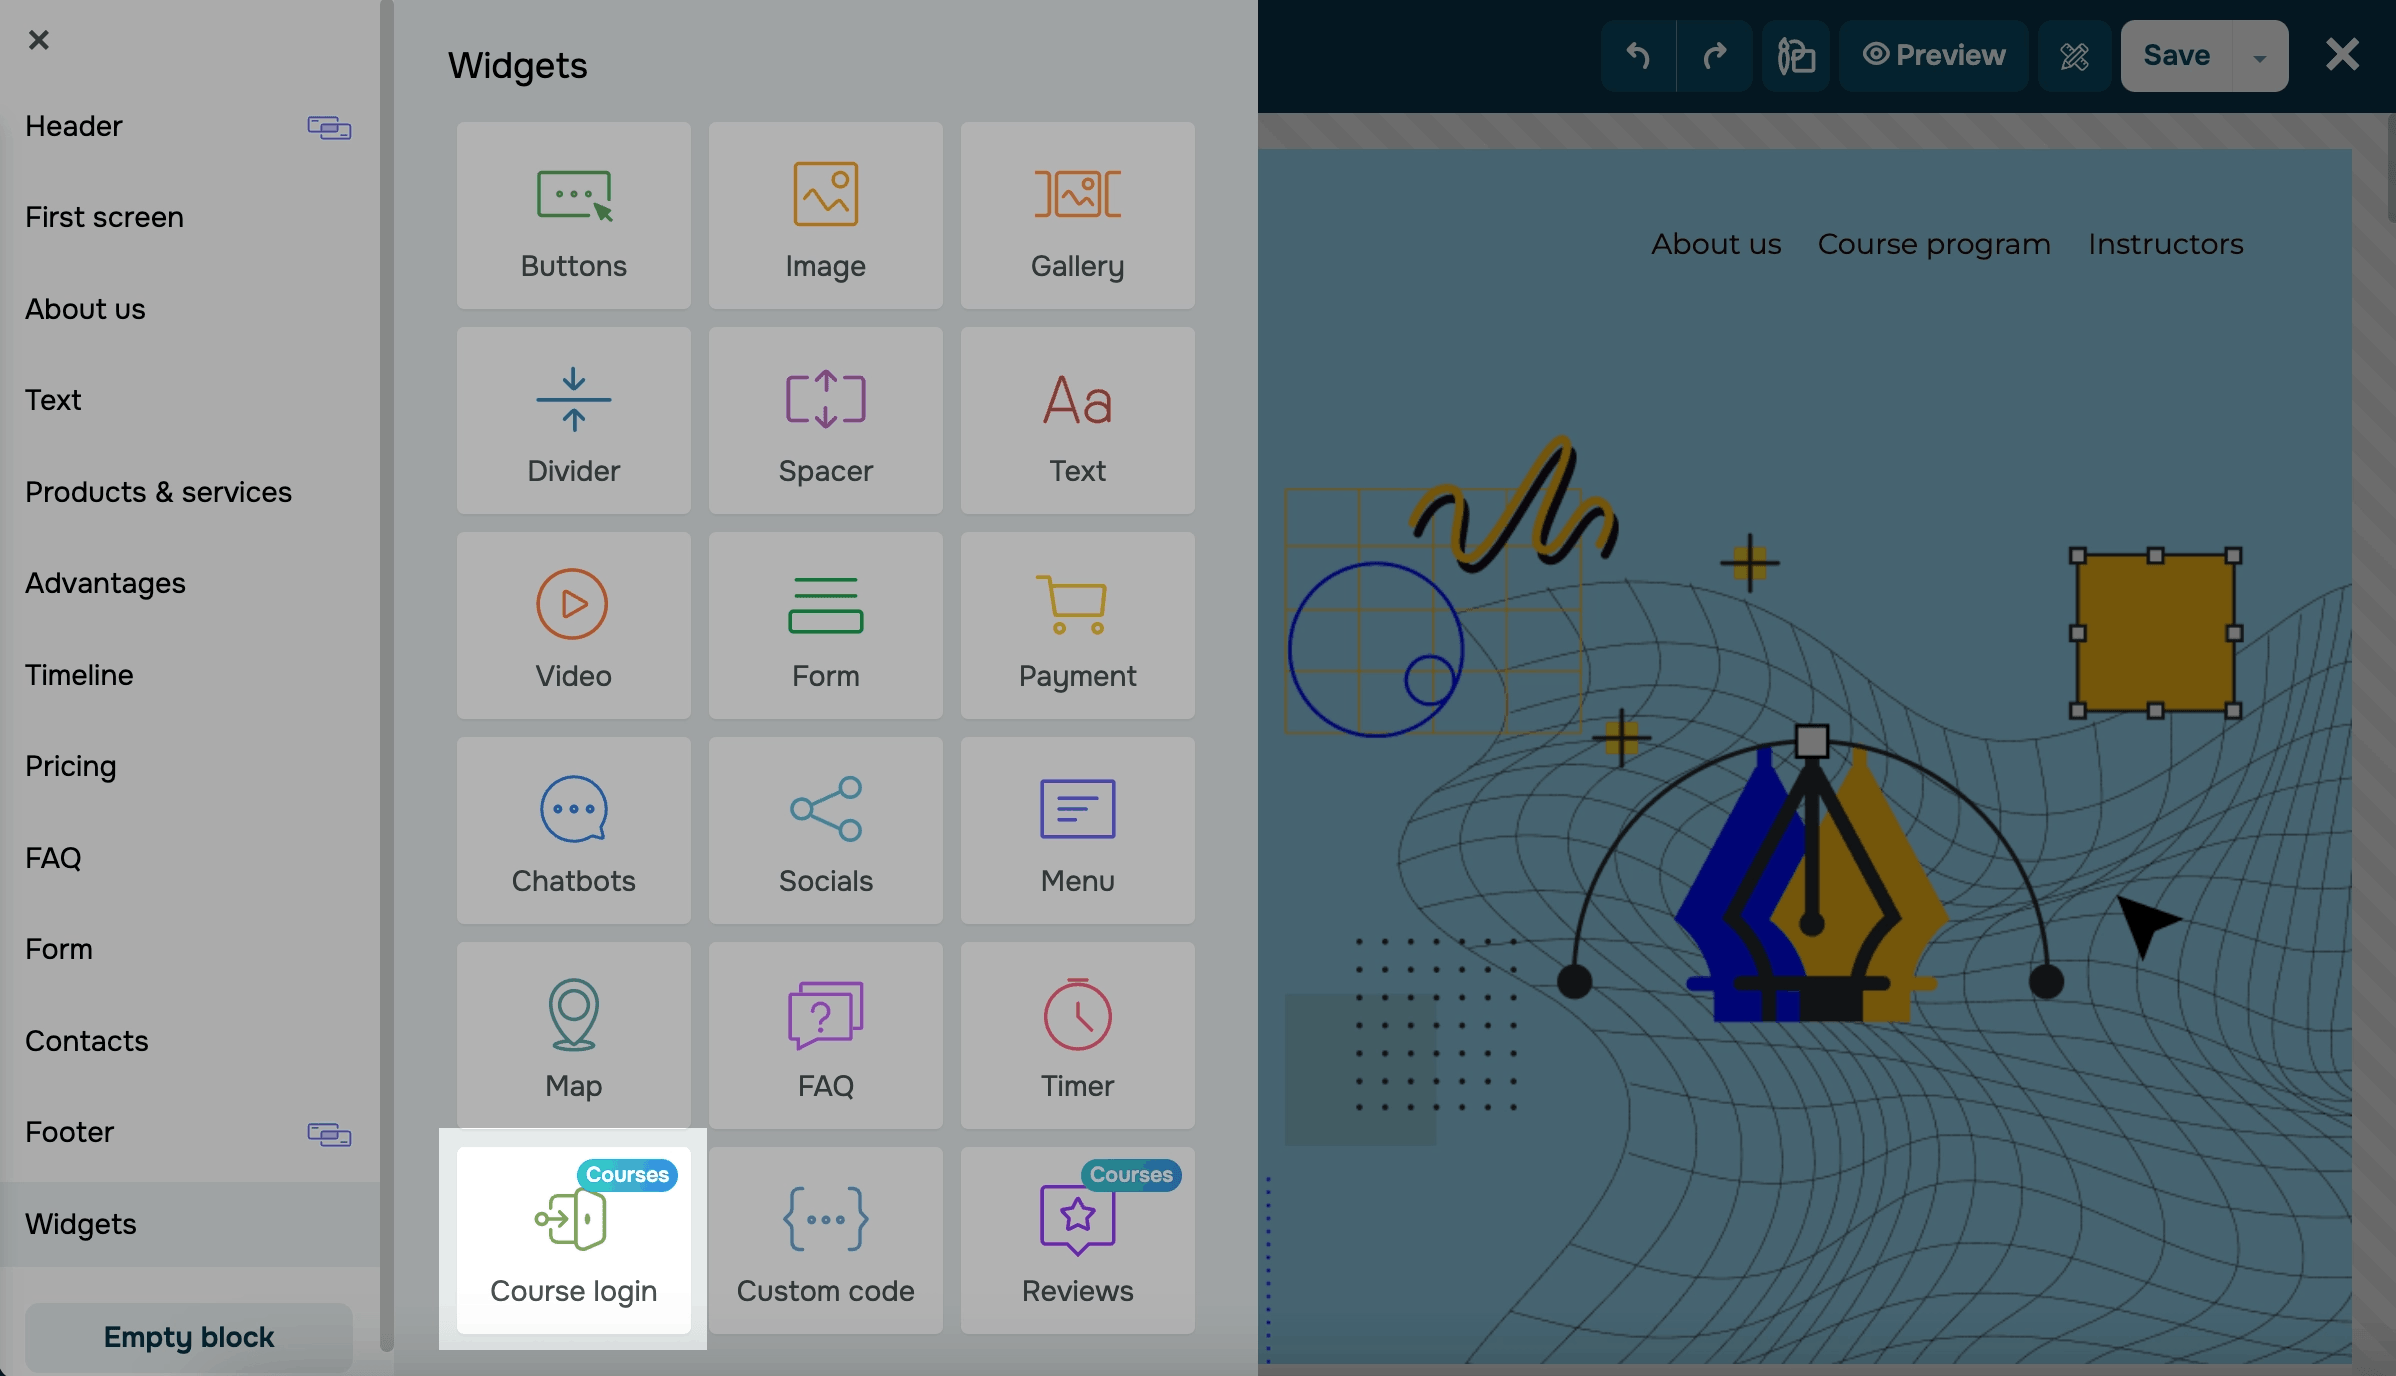
Add the element
Add the Course login widget to your template.
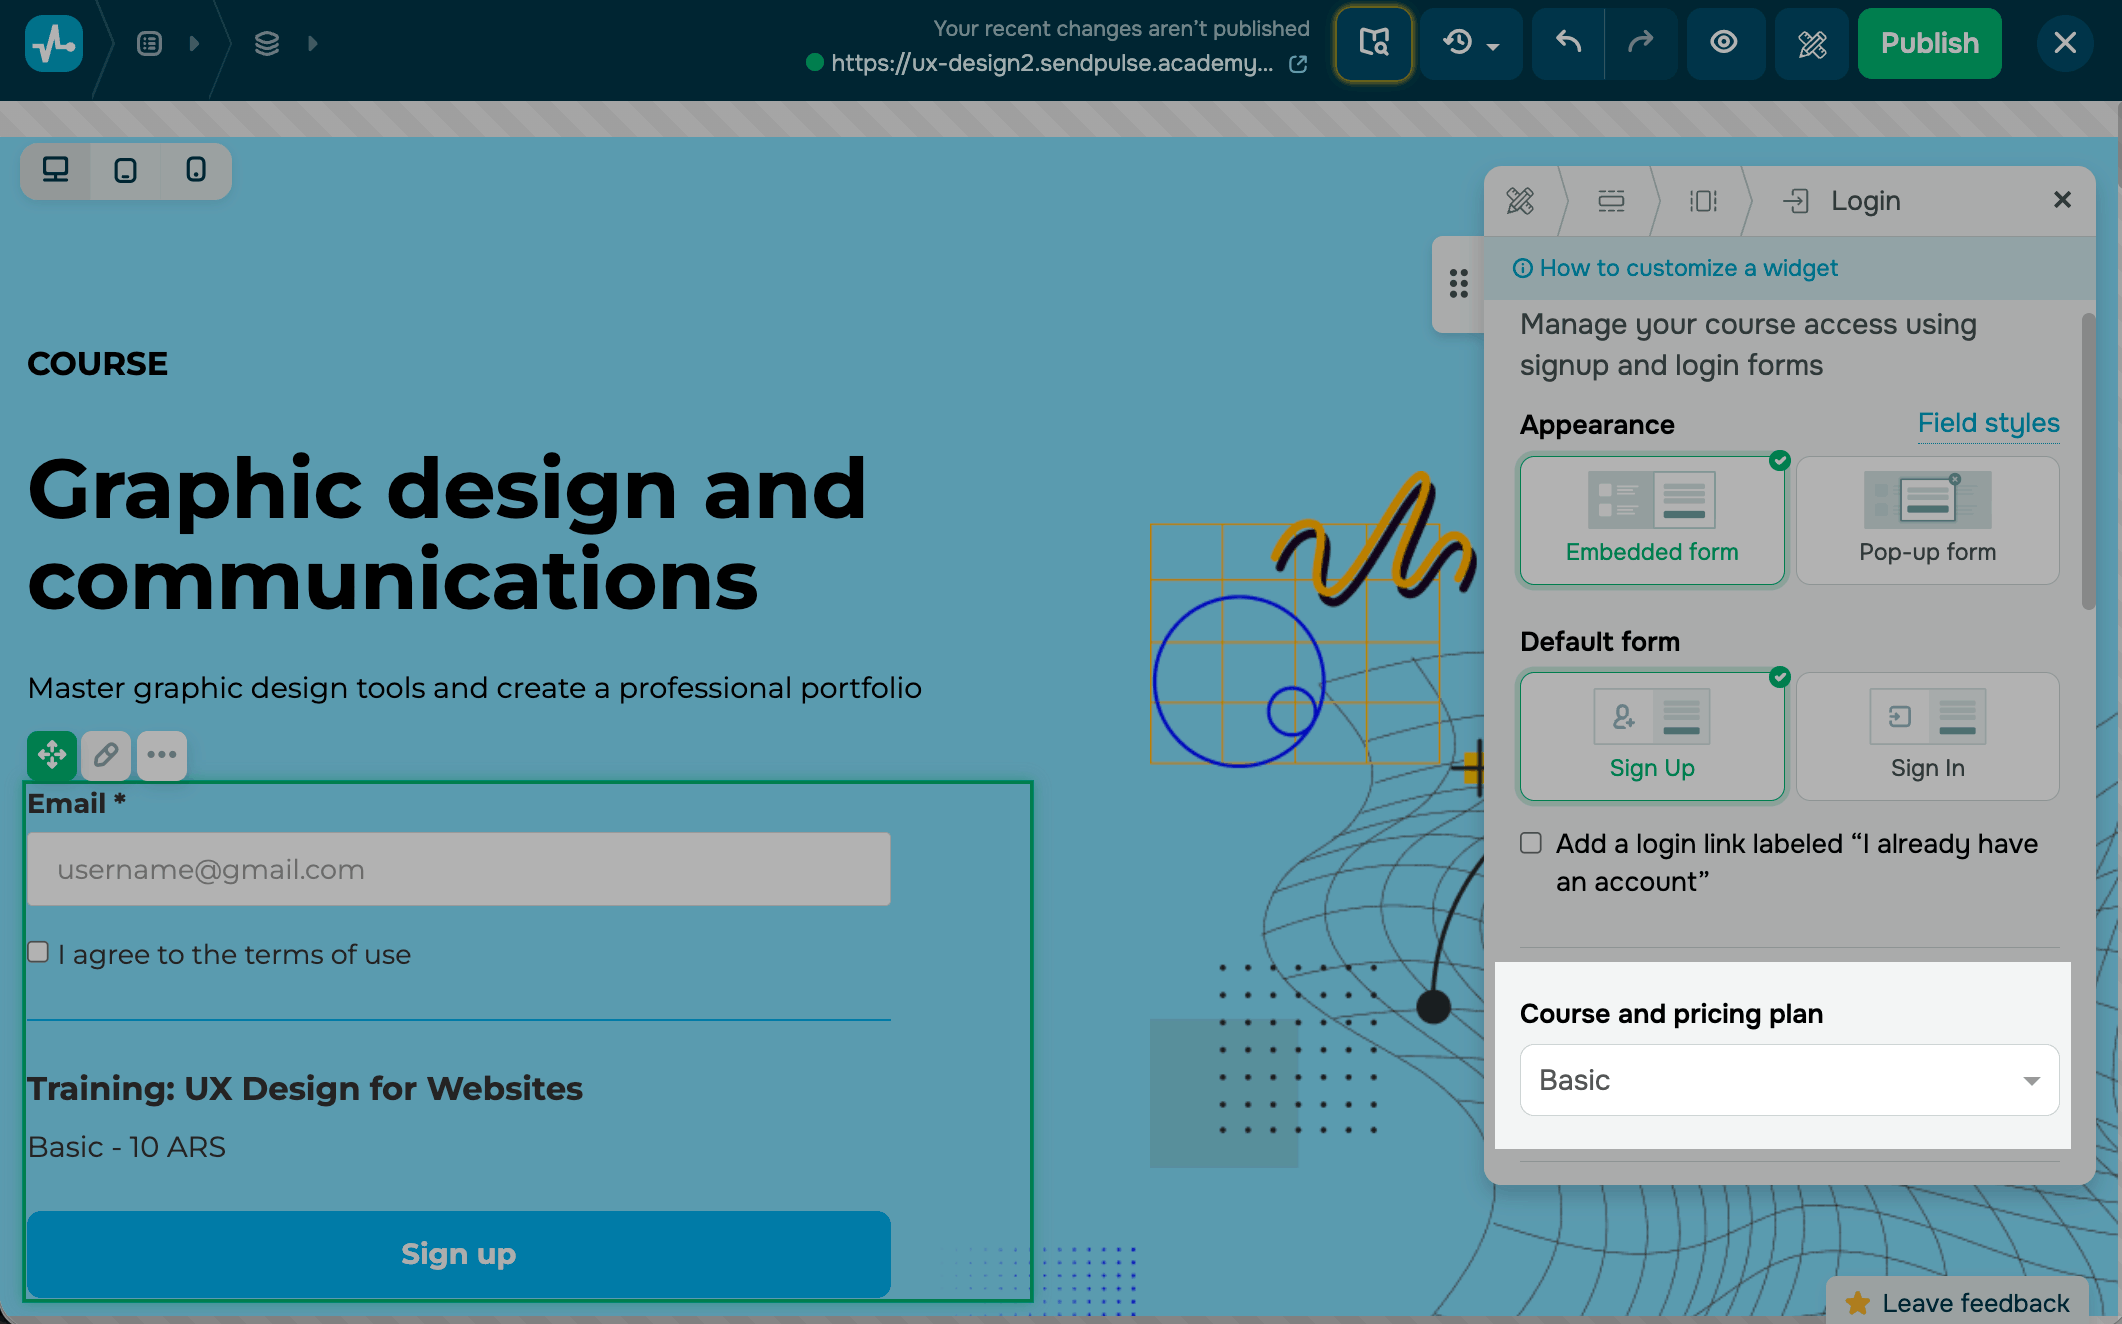
Choose an appearance
In the Appearance section, choose how to show the widget on your page. Available form options depend on your selection.
| Embedded form | Shows the form expanded on the page, with all input fields visible.
In the Default form setting, select which form should appear by default: Sign In or Sign Up. |
| Pop-up form | Shows buttons that trigger the form in a pop-up window when a user clicks them.
In the Button display setting, select which buttons should appear: Sign In or Sign Up, or both. |
To show a login link to students who already have an account, select the Add a login link labeled "I already have an account" checkbox.
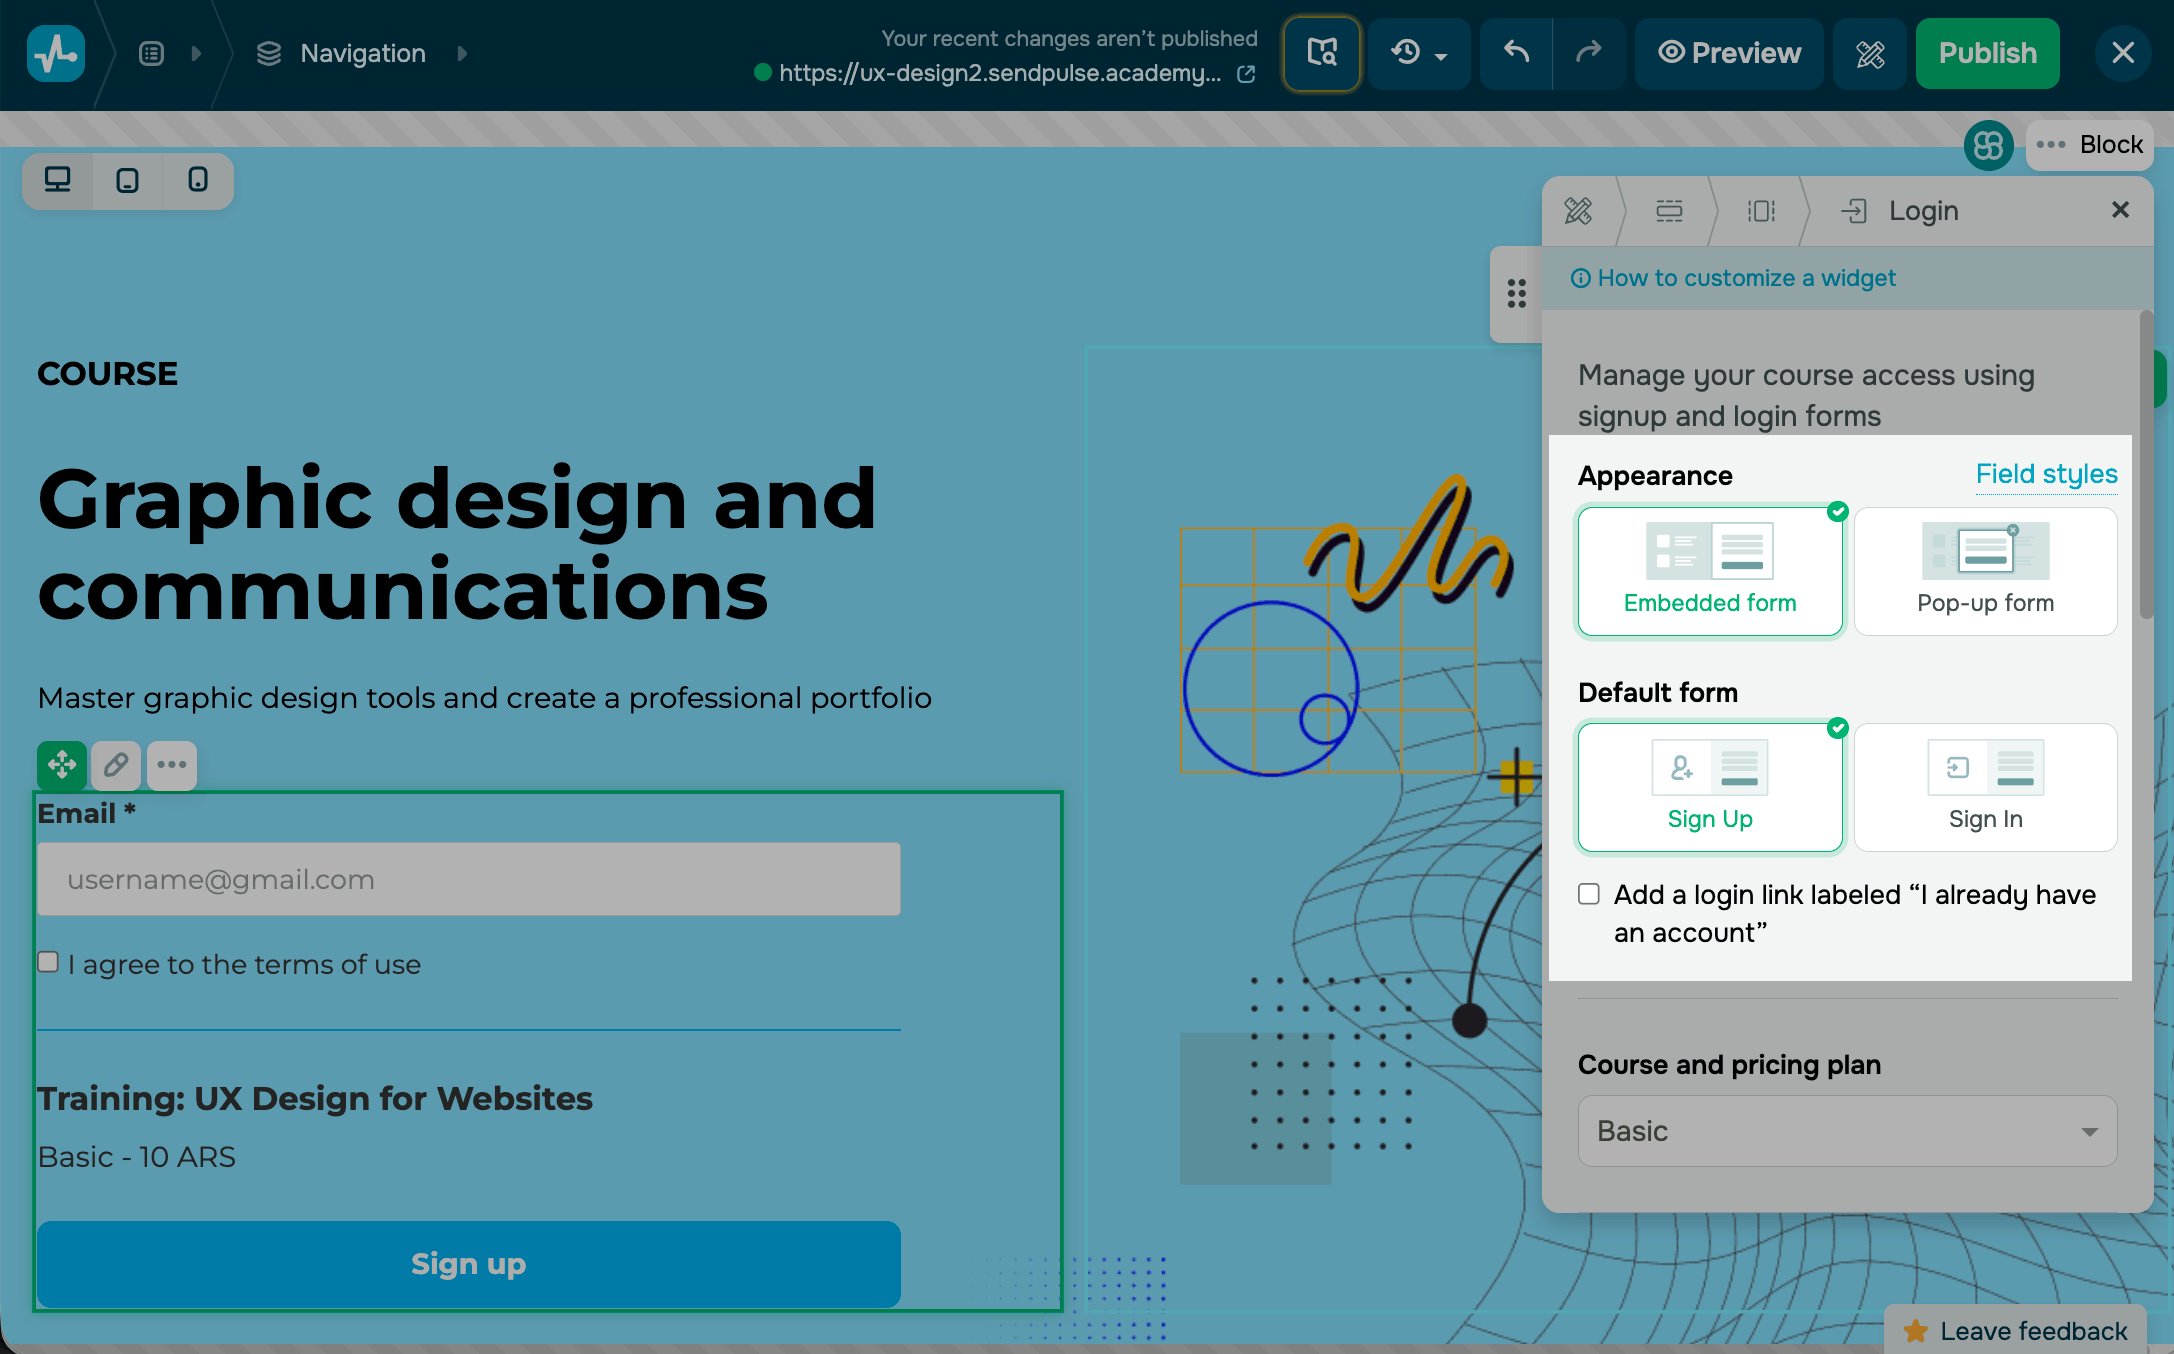
Select a course and pricing plan
If your course is paid, in the Course and pricing plan section, select the course and pricing plan to link to the widget. You can find a plan by its course name.
Сustomize the form field
To open the form settings, in the Form fields section, select your widget form (Sign In, Sign Up).
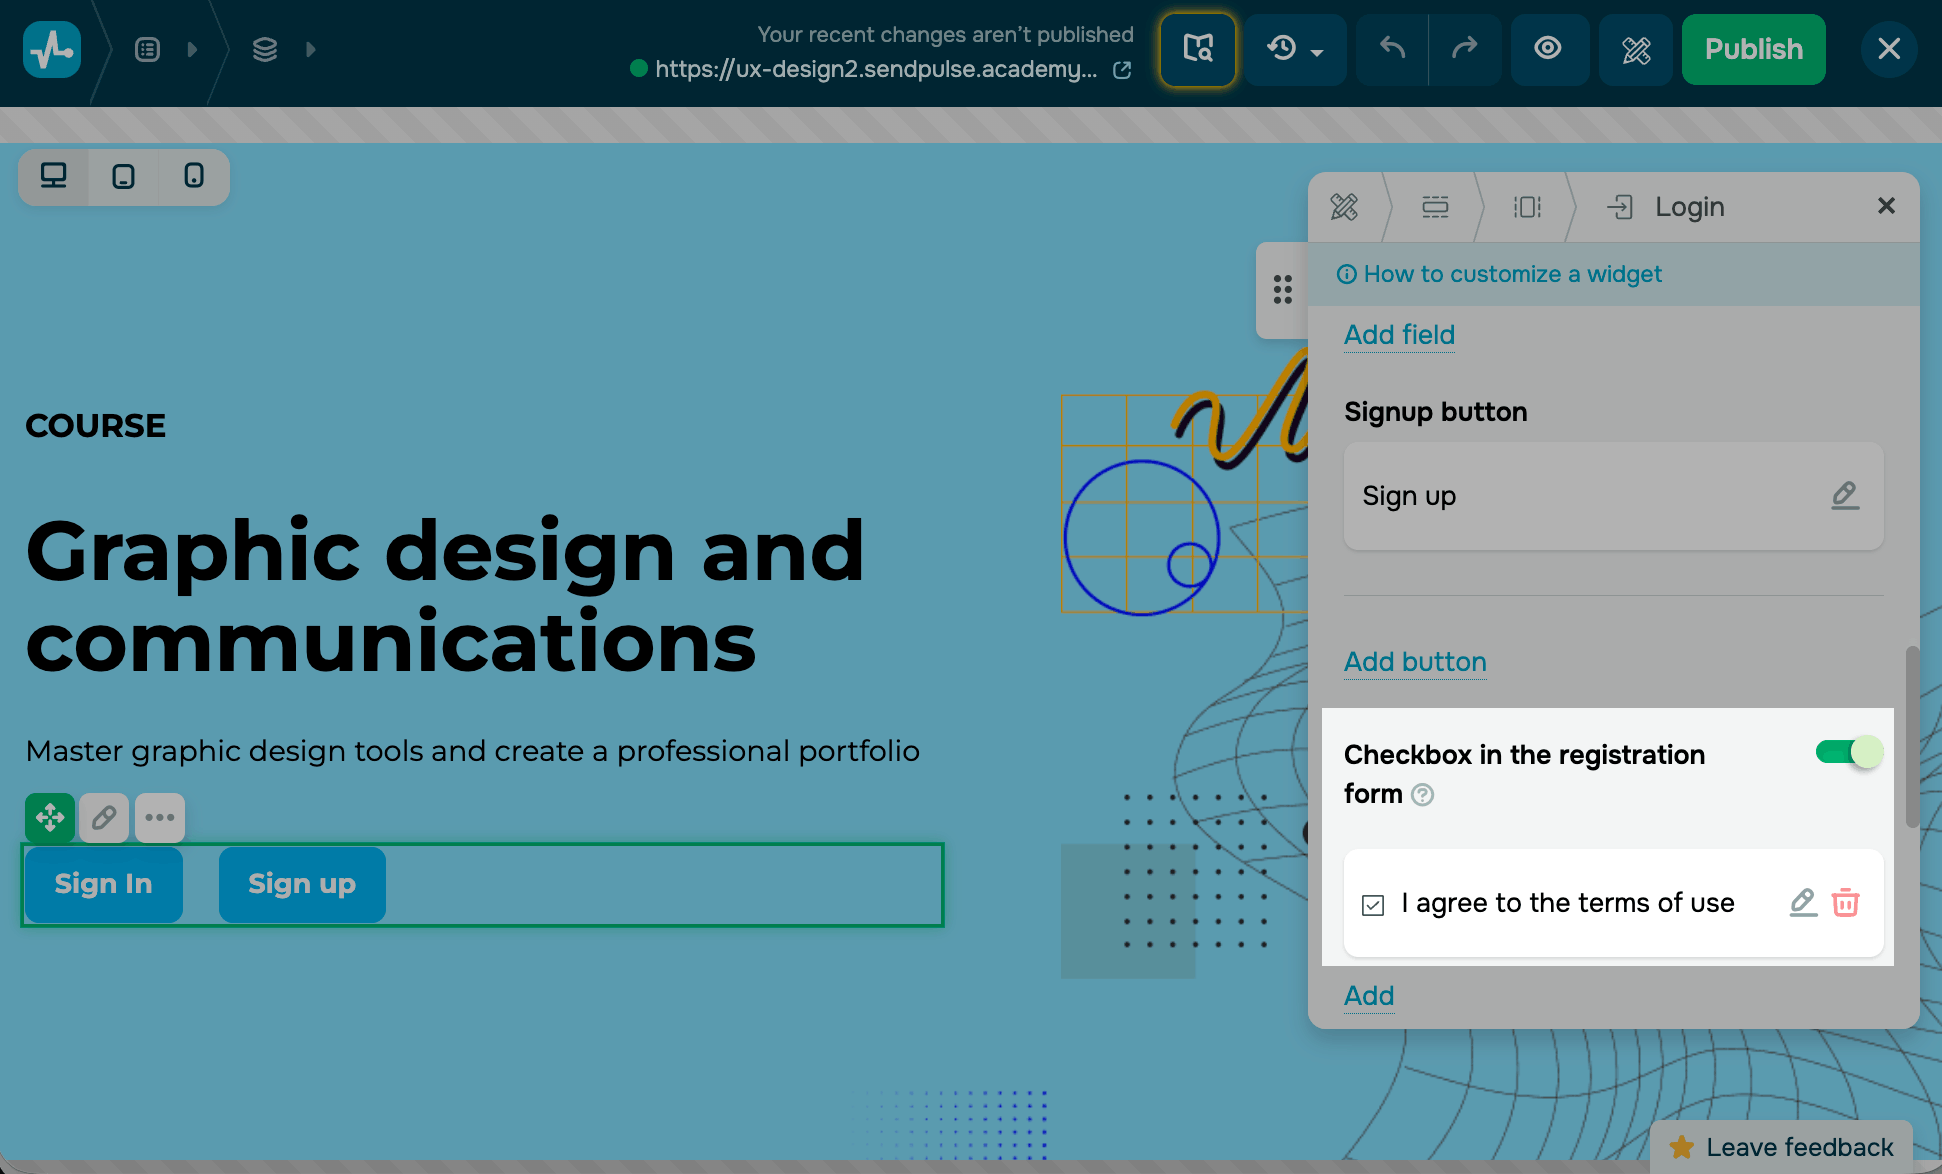
Sign up
This button leads to your course registration page. You can add fields to your registration form and customize your registration button.
Once a user fills out your registration form, they will receive a confirmation email with their login data. They will be able to log in to their account and start learning after following the link specified in your email.
Read more: How to allow students to enroll by themselves.
You can configure your existing fields or add your own. To edit an existing field, click the pencil icon next to it. In the next window, select a field type and enter its name.
In every form field, select a CRM contact field to which you want to save variables. The system will also create deals for your new students.
To make a field required, turn on the toggle.
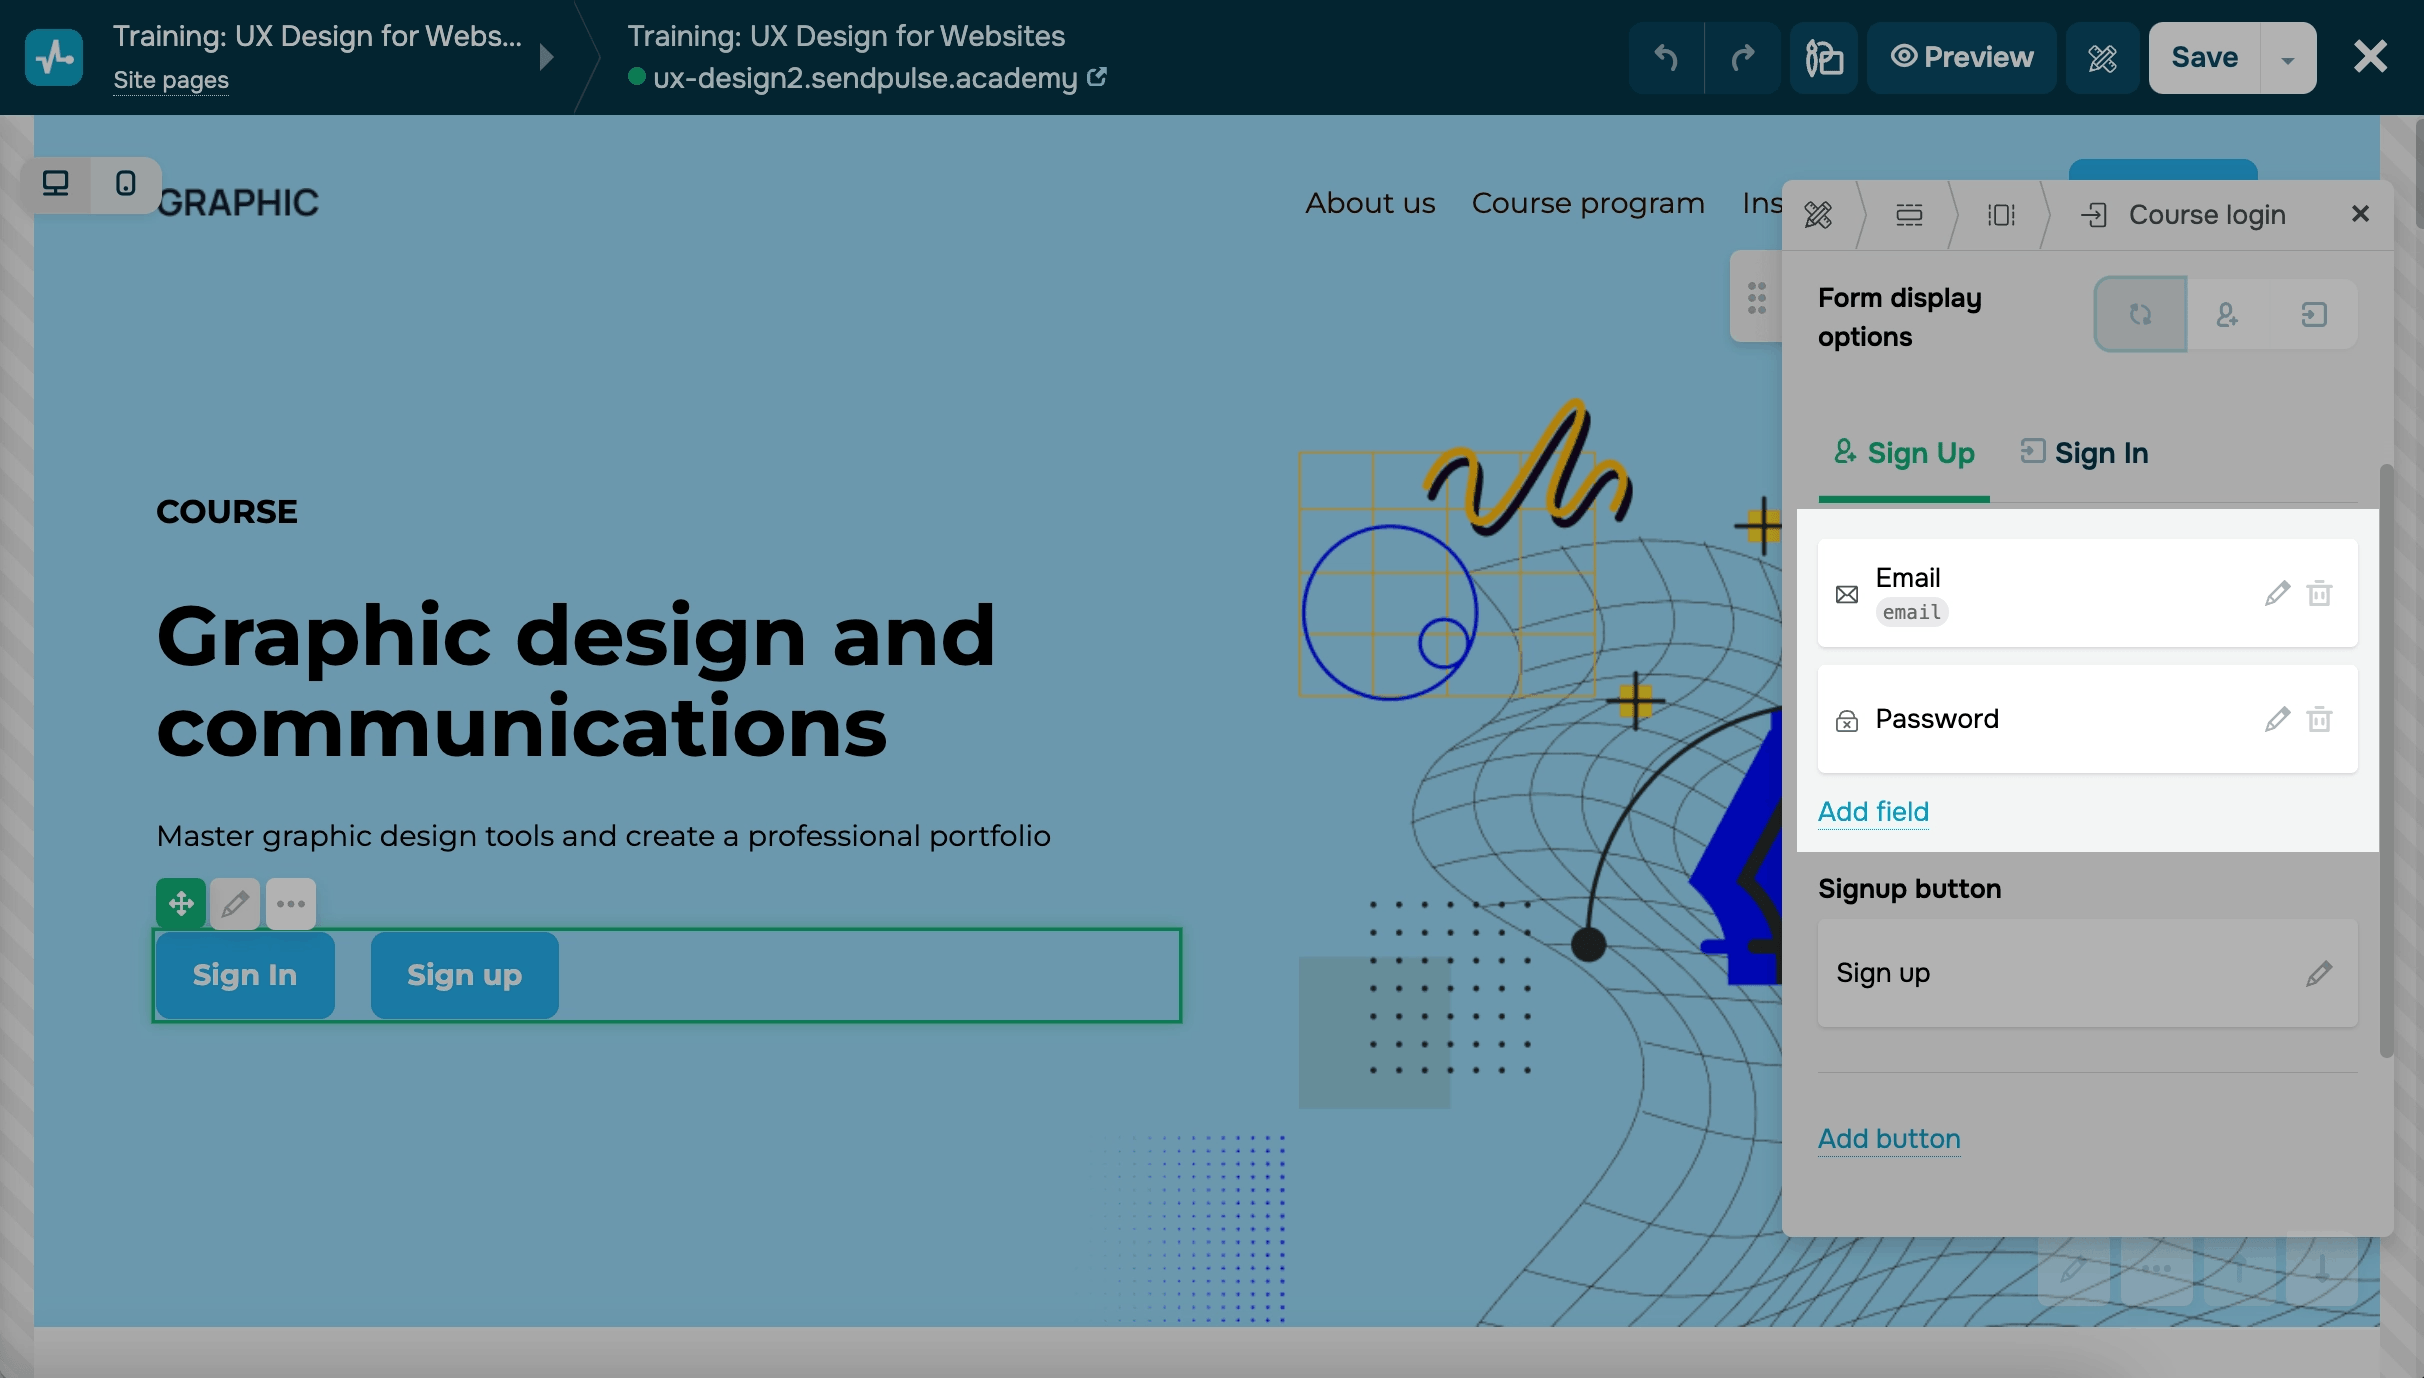
To edit the button that leads to your course registration page in the Sign up button field, click the pencil icon. You can show different button labels depending on whether a student was previously enrolled in any course of the same instructor on that domain or not.
In the next window, select a text for each scenario:
| Course sign in text | This text version is displayed if the student did not log in to their account. |
| Course sign up text | This text version is displayed if the student logged in but did not enroll in the course. |
| Go-to-course text | This text version is displayed if the student logged in and enrolled in the course. |
You can also add an additional button in the section to add extra information. Click Add button. Click on the pencil to go to button settings.
Sign in
This button leads to your student account login page. Students can log in to their accounts if they registered for a course with the same instructor on this domain.
You can customize your standard fields (Email and Password) by editing their names and placeholders. To do this, click the pencil icon next to each field.
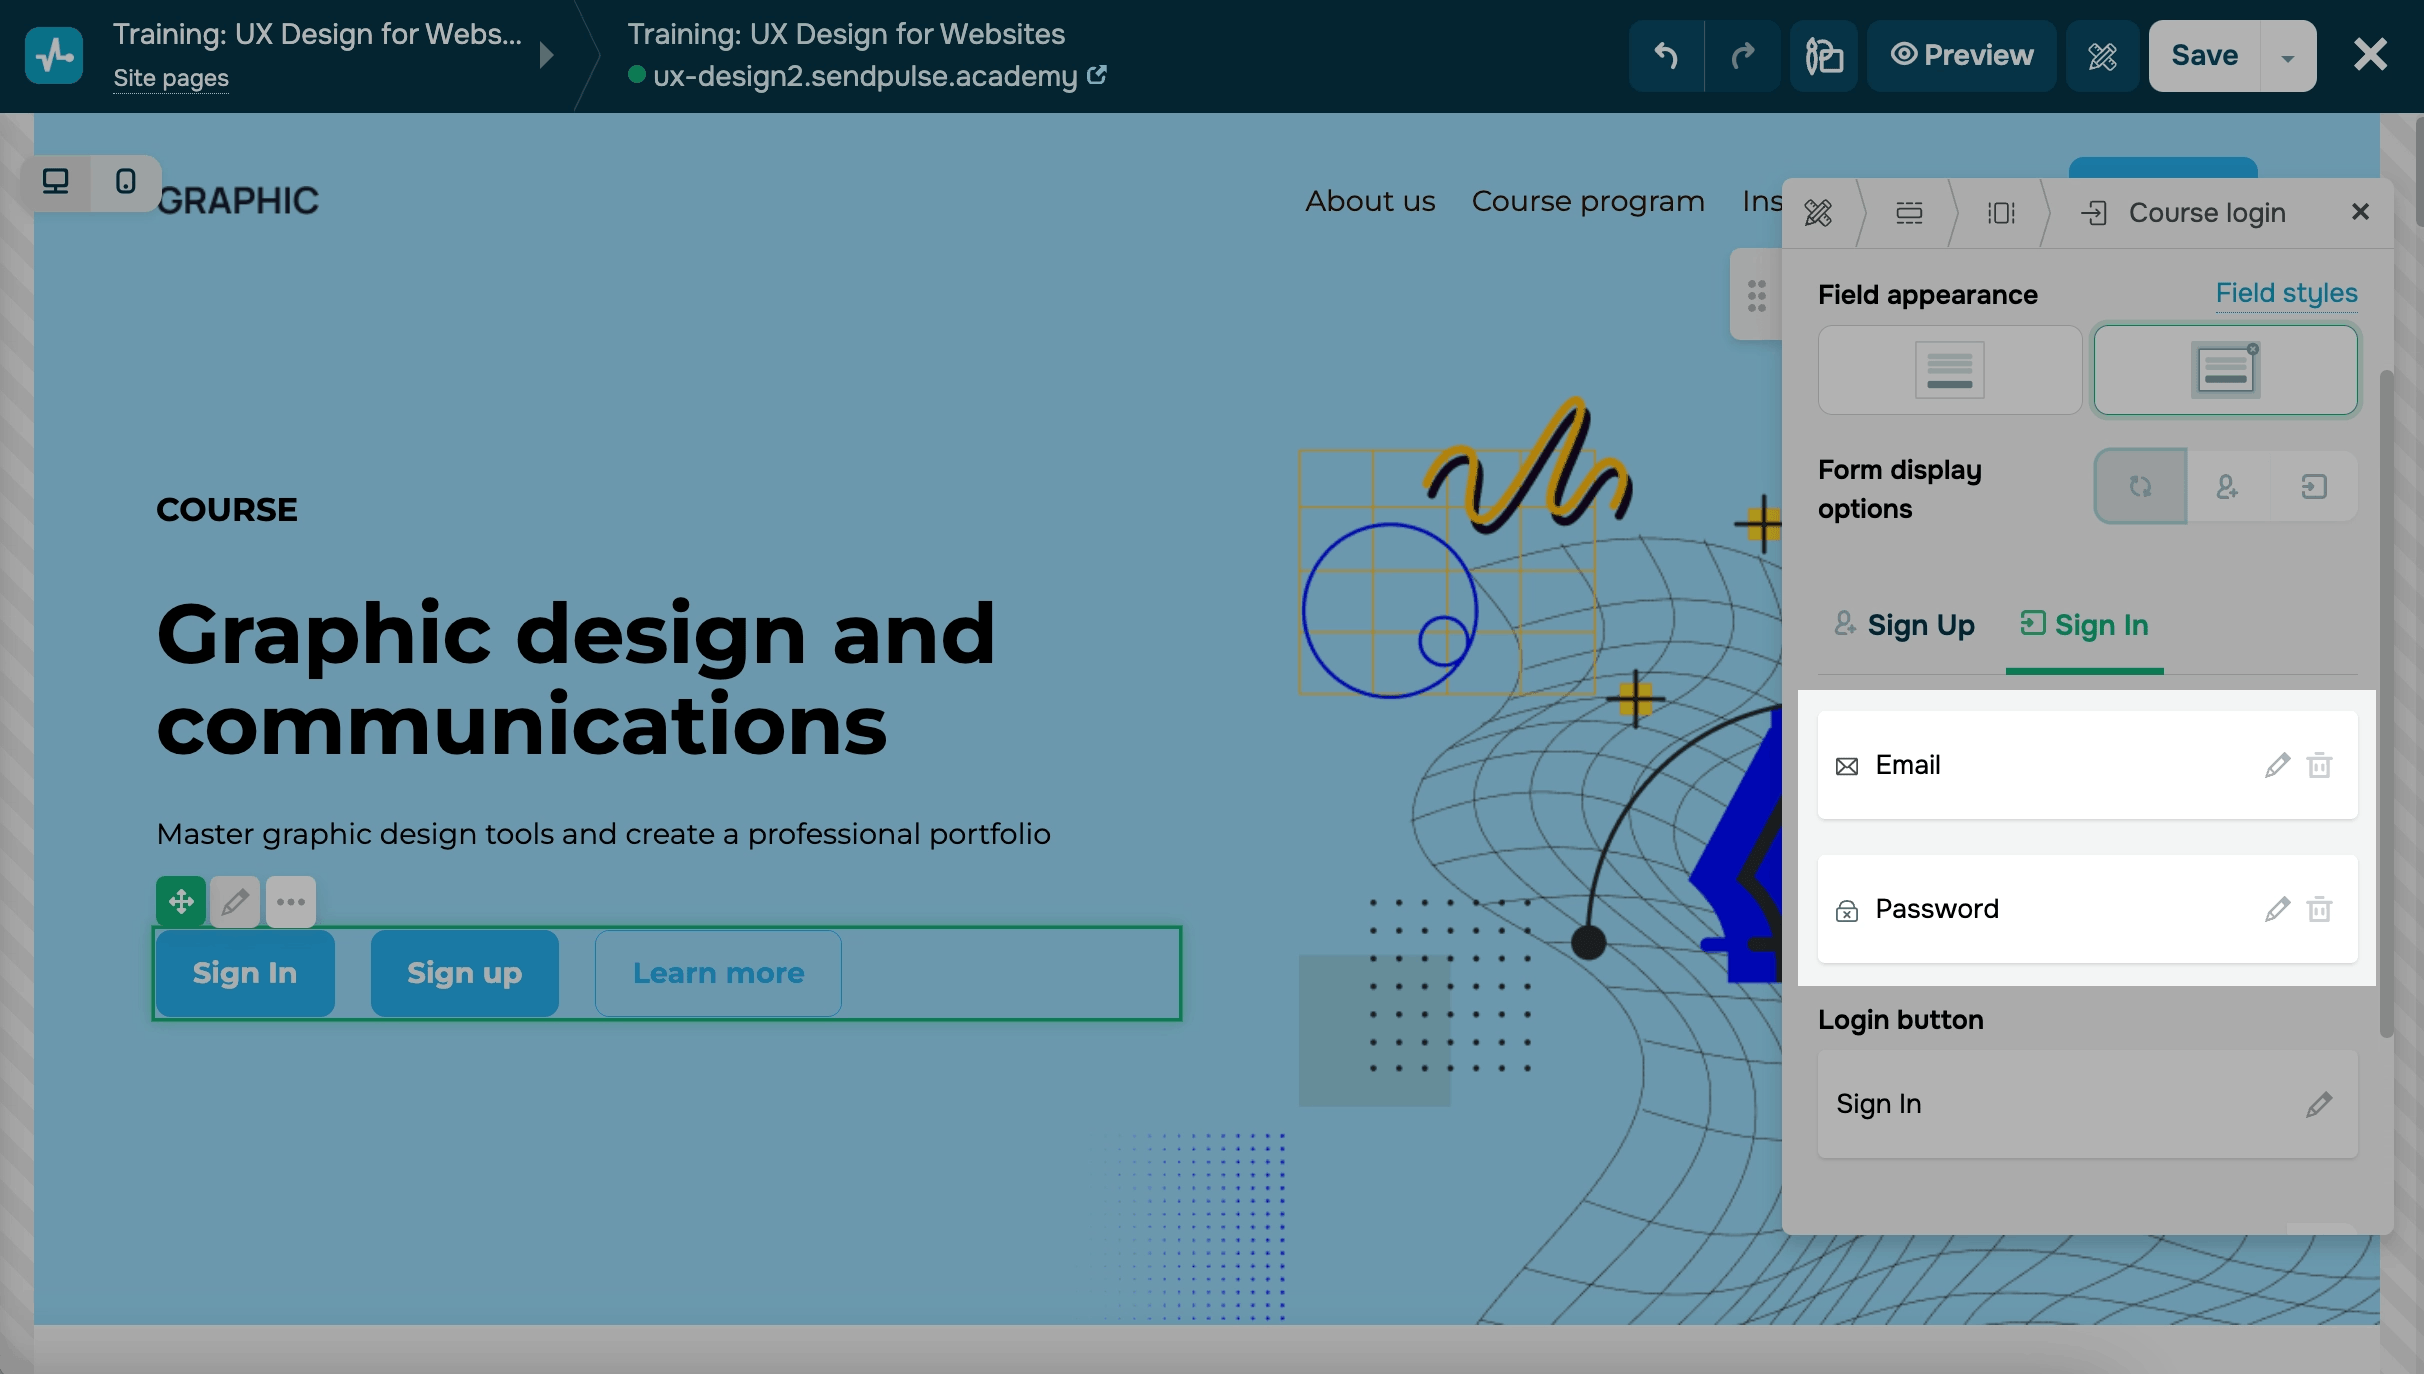
To edit your button text, click the pencil icon in the Login button section.
Add a consent checkbox to the registration form
To ask students to accept your terms before they sign up, turn on the Checkbox in the registration form toggle.
By default, the registration form will then show an I agree to the terms of use checkbox. To edit it and add a link, click the pencil button. To add a new checkbox, click Add.
Customize the widget style
To change the field style in the embedded form, click Field styles.
You can customize the form using the following options:
| Modal window background | Adjusts the form's background color. Select a color. |
| Rounding | Adjusts the form rounding. Specify a value in pixels. |
| Inner padding | Adjusts the form's inner padding. Specify a value in pixels. |
| Form texts color | Adjusts the form's text color. Select a color. |
| Field appearance | Adjusts the form's field shapes. Select a rounded or rectangular shape. |
| Input field text color | Adjusts the form's input text color. Select a color. |
| Background color | Adjusts the form's text background color. Select a color. |
| Border color | Adjusts the form's border color. Select a color. |
| Field size | Adjusts the form's field sizes. Available sizes: small (S), medium (M), and large (L). |
| Form link color | Adjusts the form's link color. Select a color. |
You can also set the column content location — left, center, or right — in the Alignment field.
Configure analytics
You can transfer goals from your form to Google Analytics and Facebook Pixel events. Click Analytics settings.
If you haven't activated analytics yet, follow the How to set it up link.
To complete your data transfer, add the Facebook pixel and Google Analytics code to your website settings.
Read more: Connect Google Analytics to Your Site and Connect Facebook Pixel to Your Site.
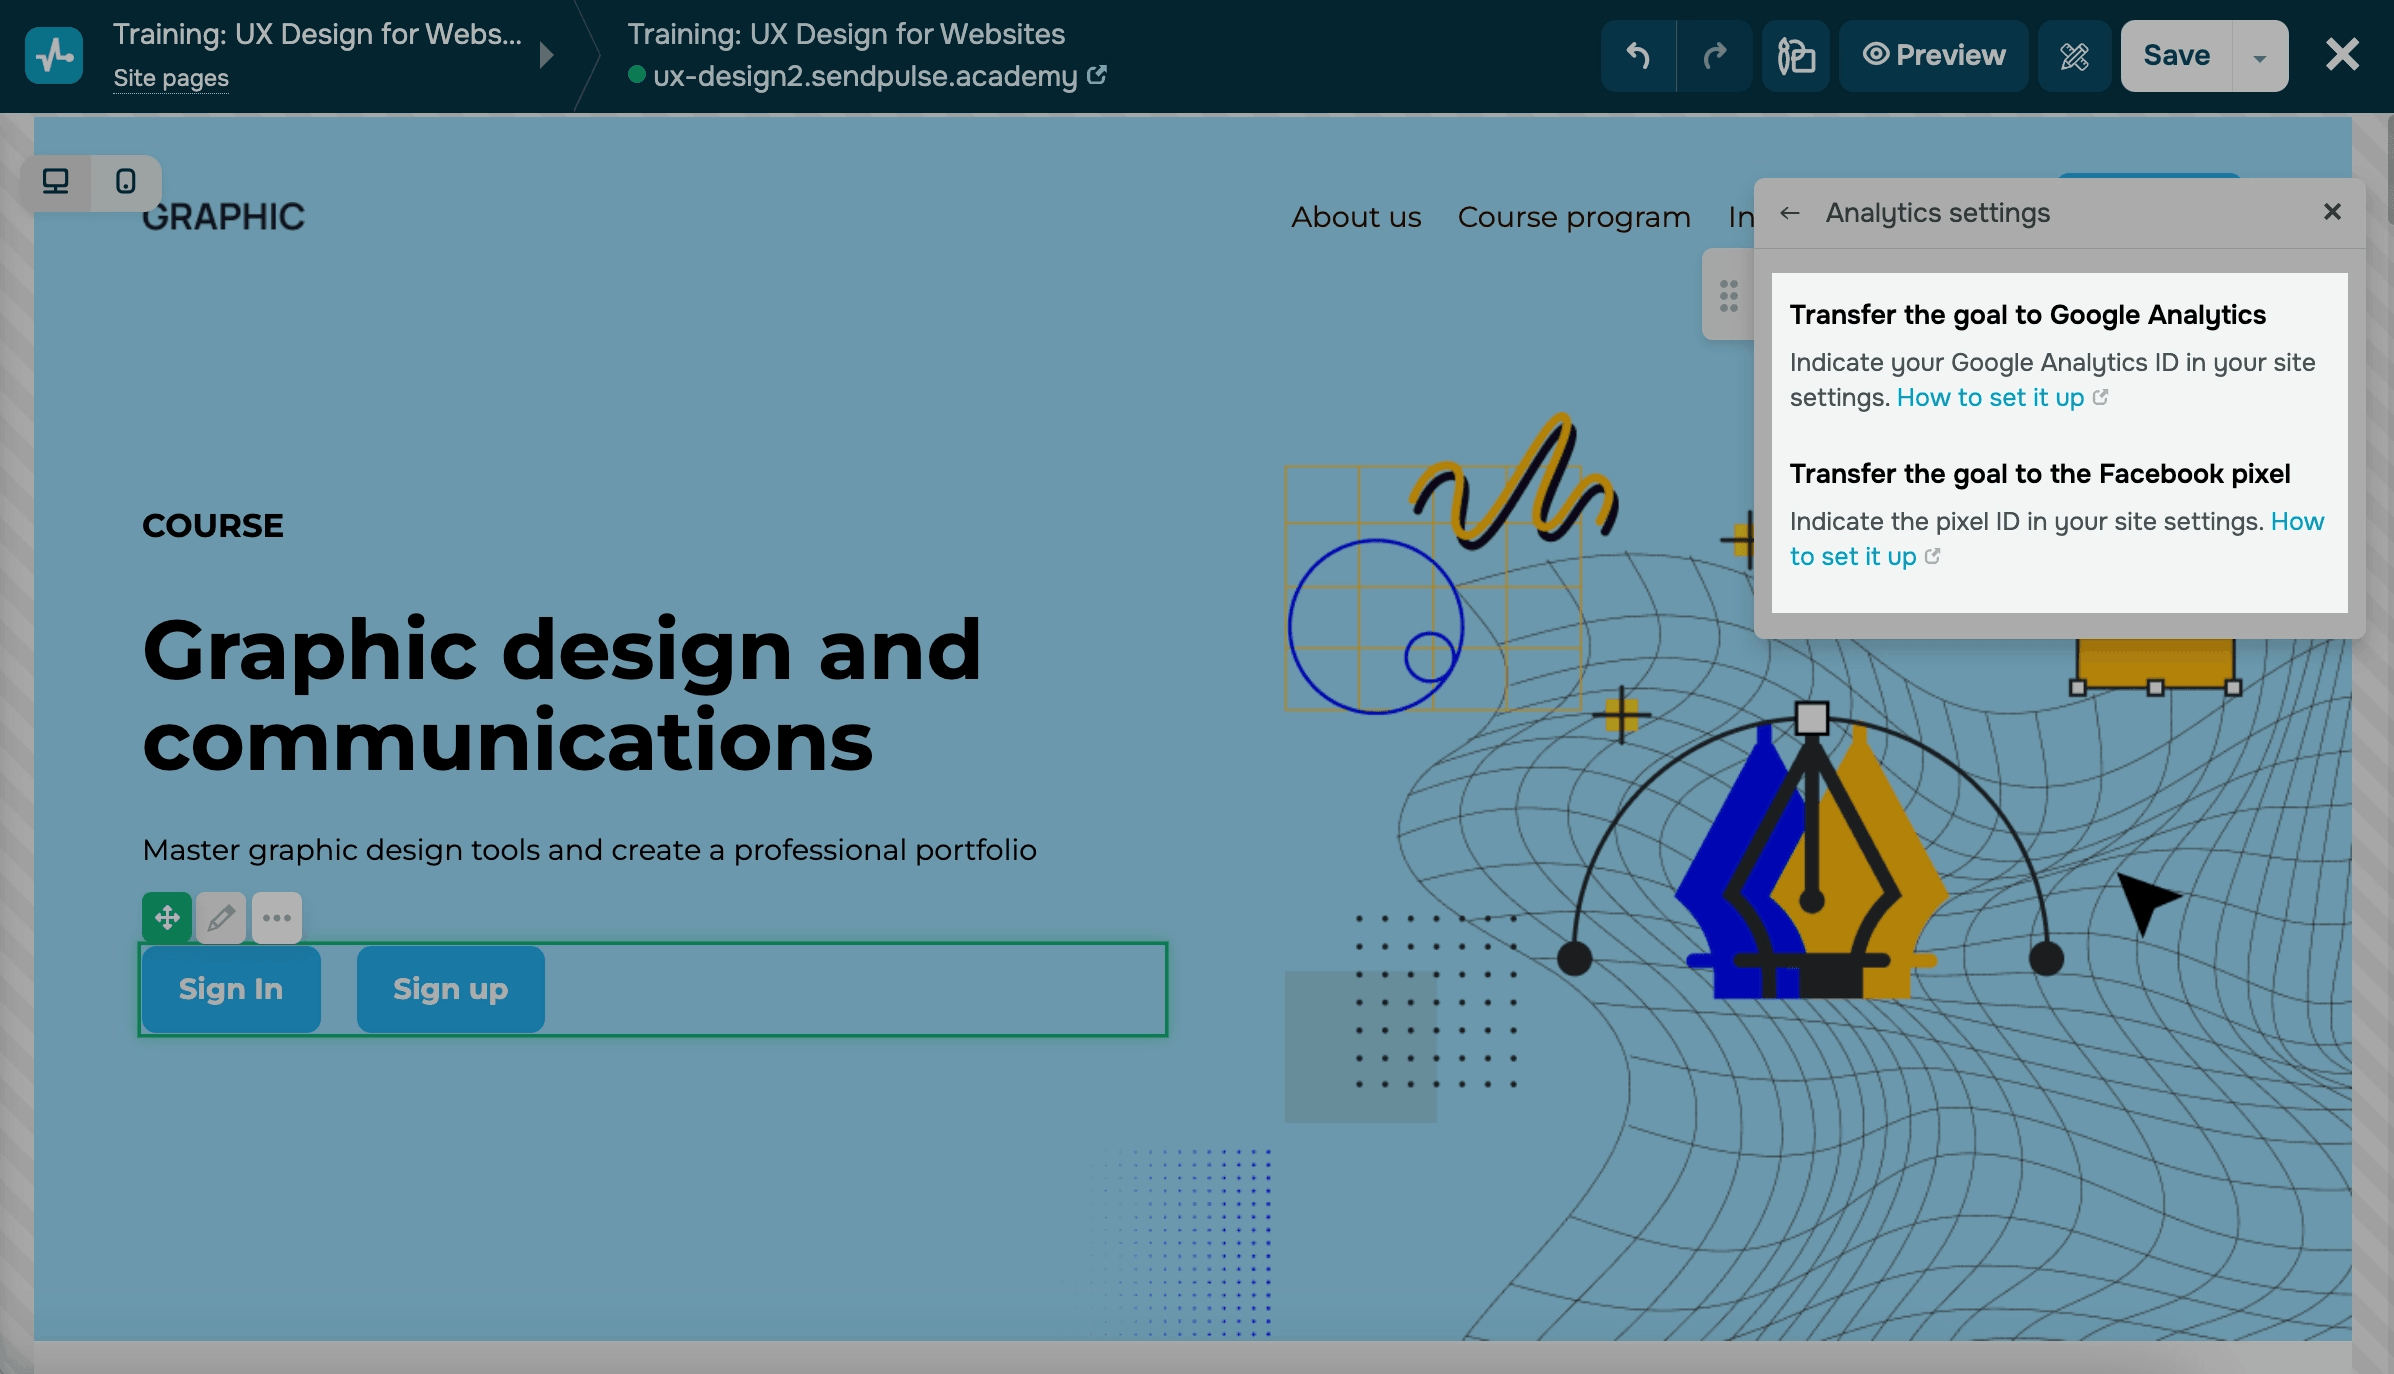
If your analytics are already activated, two toggles appear. Turn on the Transfer the goal to Google Analytics or Transfer the goal to the Facebook pixel toggle.
If you turn on the Transfer the goal to Google Analytics toggle, enter your data in the Category, Action, and Label fields. These parameters are transferred to Google Analytics in the Events section.
If you turn on the Transfer the goal to the Facebook pixel toggle, the Complete Registration event is generated automatically. You can see it in Events Manager in your Facebook Business account.
Save your settings, and then publish the site.
Last Updated: 05.02.2025
or