Create a WhatsApp ad via Facebook to start a chatbot conversation
You can set up targeted Facebook ads to promote your products and services using WhatsApp and start chatbot conversations with users who interacted with your ads. You can leverage ads to strengthen your brand image, attract new customers, and keep in touch with them.
In this article, we will talk about how to create an ad campaign, define your audience, add the copy itself, and choose a message template users will see when starting a conversation with you on WhatsApp.
Before creating your WhatsApp chatbot ad, you need to create and verify your Facebook business account, create a WhatsApp chatbot, and connect your number to the WhatsApp Business API.
Connect your Facebook Page to WhatsApp
Before you get started, make sure the phone number you use in the WhatsApp Business API is connected to your Facebook Page.
Go to your Page settings, and select the WhatsApp section.
In your Facebook account, go to Settings & privacy and select the Linked WhatsApp tab.
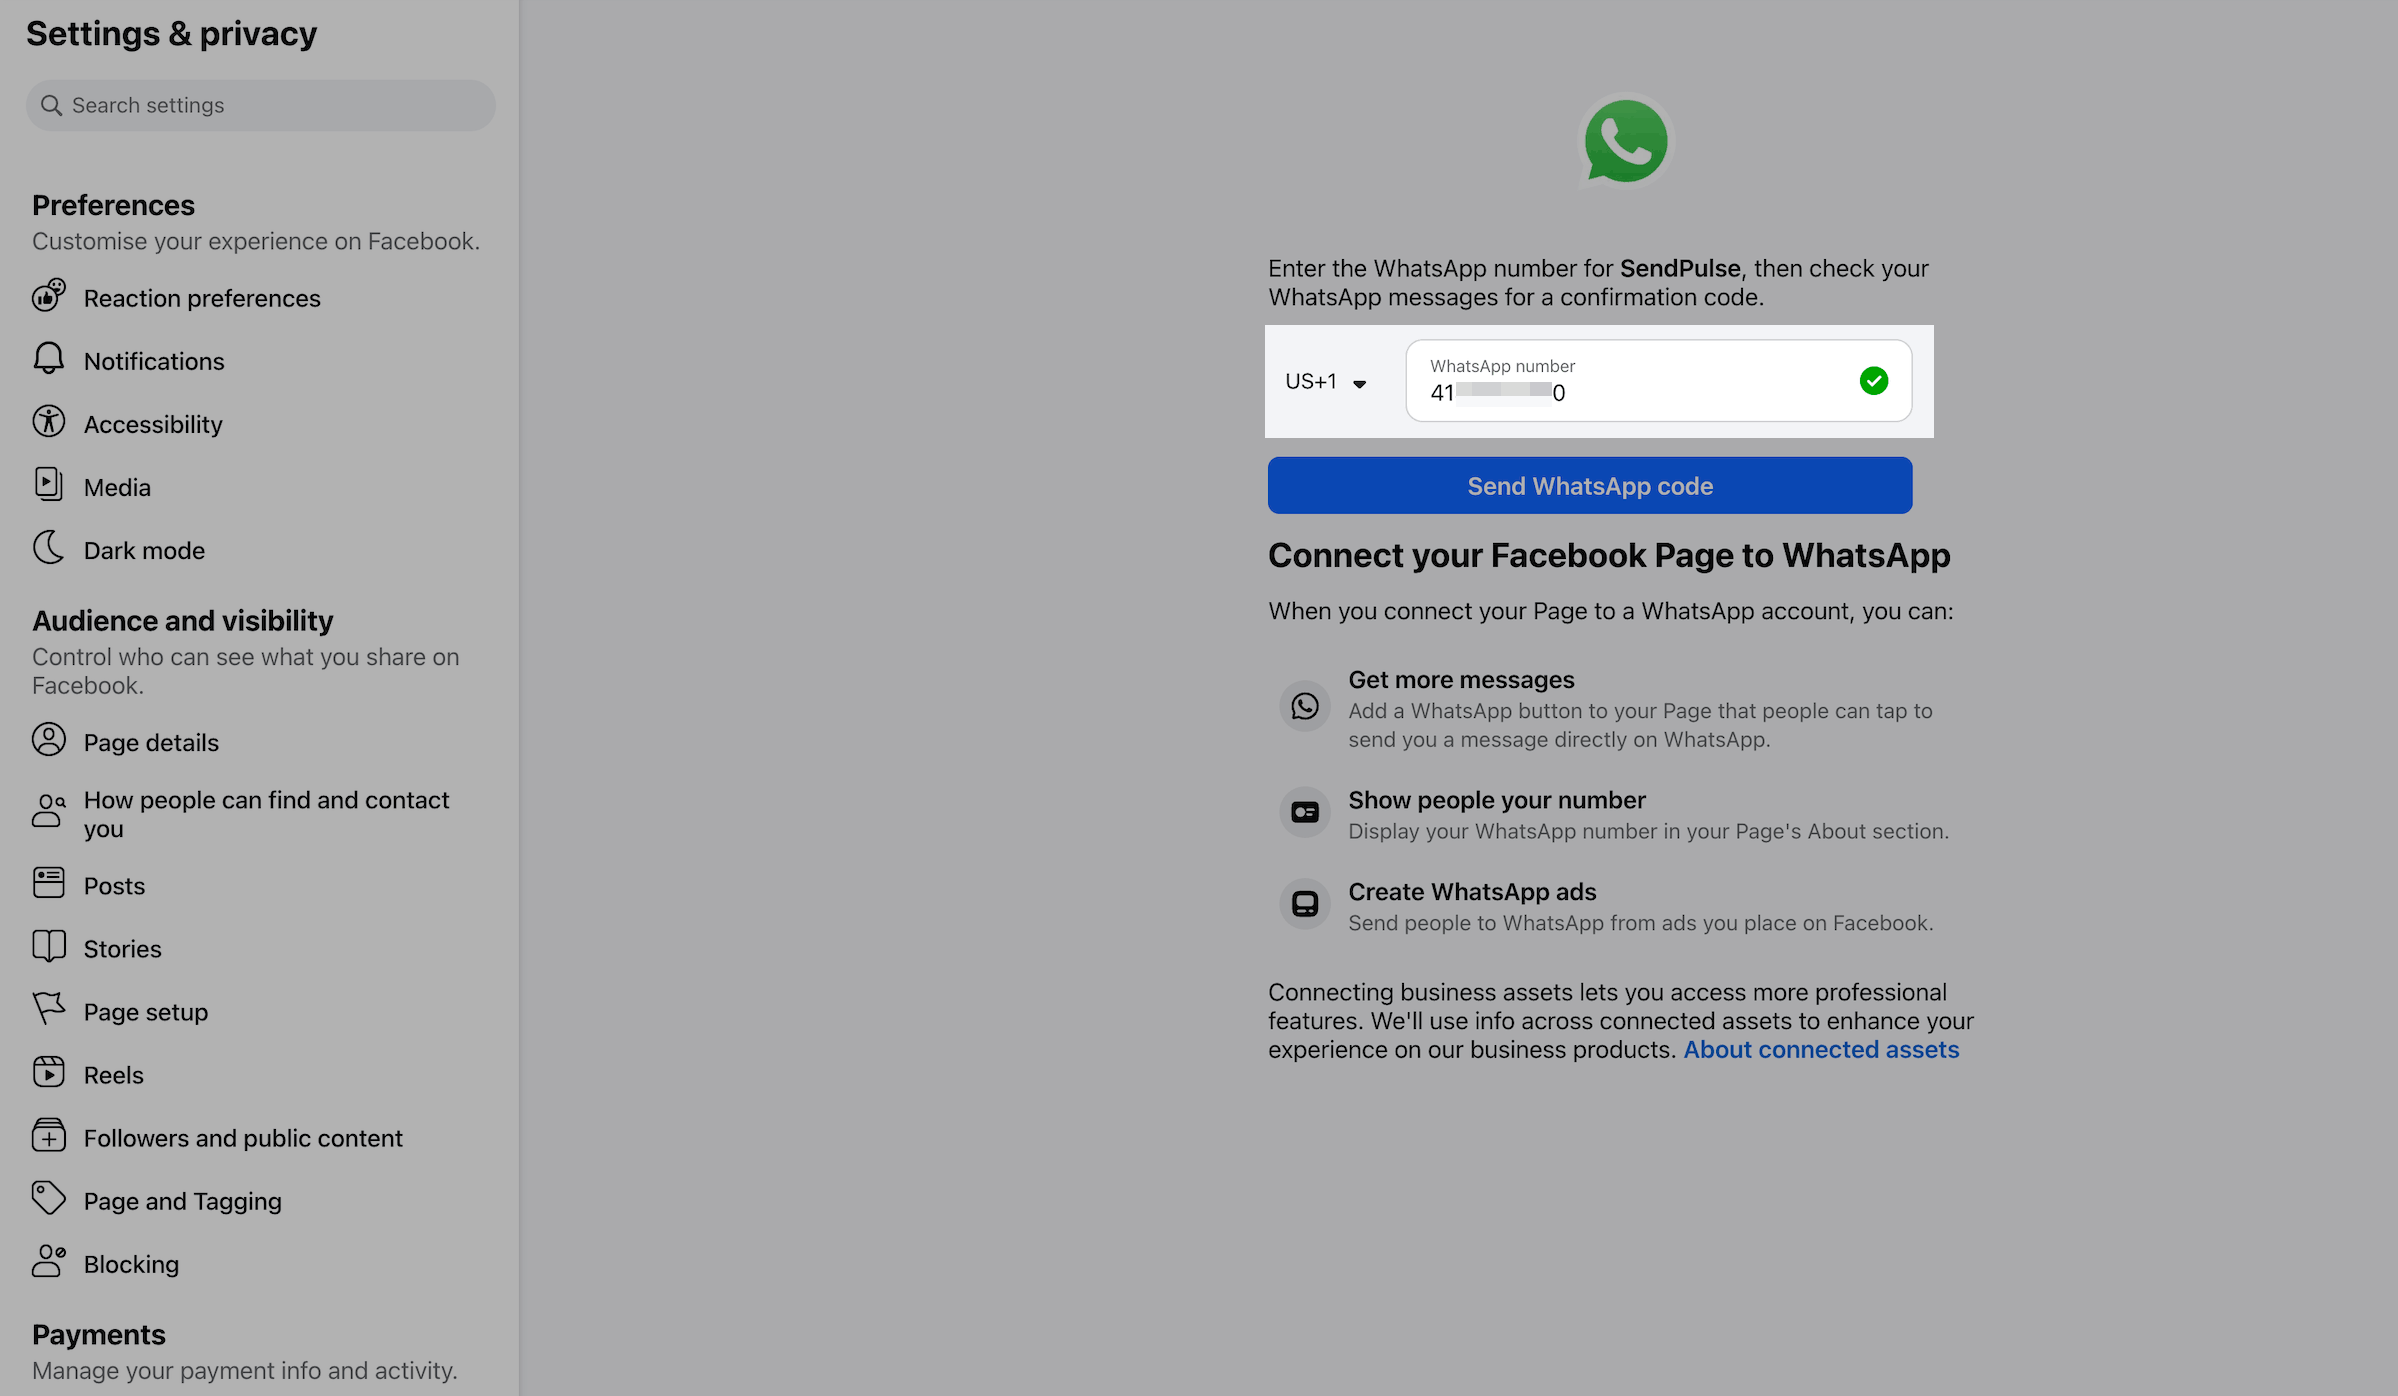
If the phone number is incorrect, click it and enter a number connected to the WhatsApp Business API.
Once you connect your WhatsApp number to your Facebook Page, you can run ads to get new subscribers and promote products and services using automated communication. You will not be charged for incoming messages from users who followed your ad link.
User-initiated conversations started by clicking on your ad button will be free, even if you reached the 1,000 free messages limit. Each ad click activates a 72-hour free messaging window.
Read more about WhatsApp’s pricing policy: WhatsApp Pricing Policy Changes.
Create a new ad campaign
Choose a campaign objective
Log in to your Ads Manager, click Create, and select the Leads objective.
WhatsApp ads support four campaign objectives. Each objective has its own setup and optimization strategy.
| Traffic | Optimizes for clicks and shows your ad to users most likely to tap Send Message. A simpler, legacy option. |
| Engagement | Optimizes for conversations started in messaging apps. A simpler, legacy option. |
| Leads (recommended) | Optimizes for the maximum number of conversations today. Meta is gradually introducing the Maximize number of leads through messaging performance goal. If you do not see this option, it is not available for your account yet. |
| Sales | Optimizes for actual conversions you track through the Conversions API. Supported only when multiple conversion locations are selected, such as WhatsApp and Messenger. Not supported for WhatsApp-only ads. |
Read more: Choose the right objective.

Name your campaign
Click your campaign’s tab. In the Campaign name section, enter the name of your advertising campaign so that you can find it quickly.
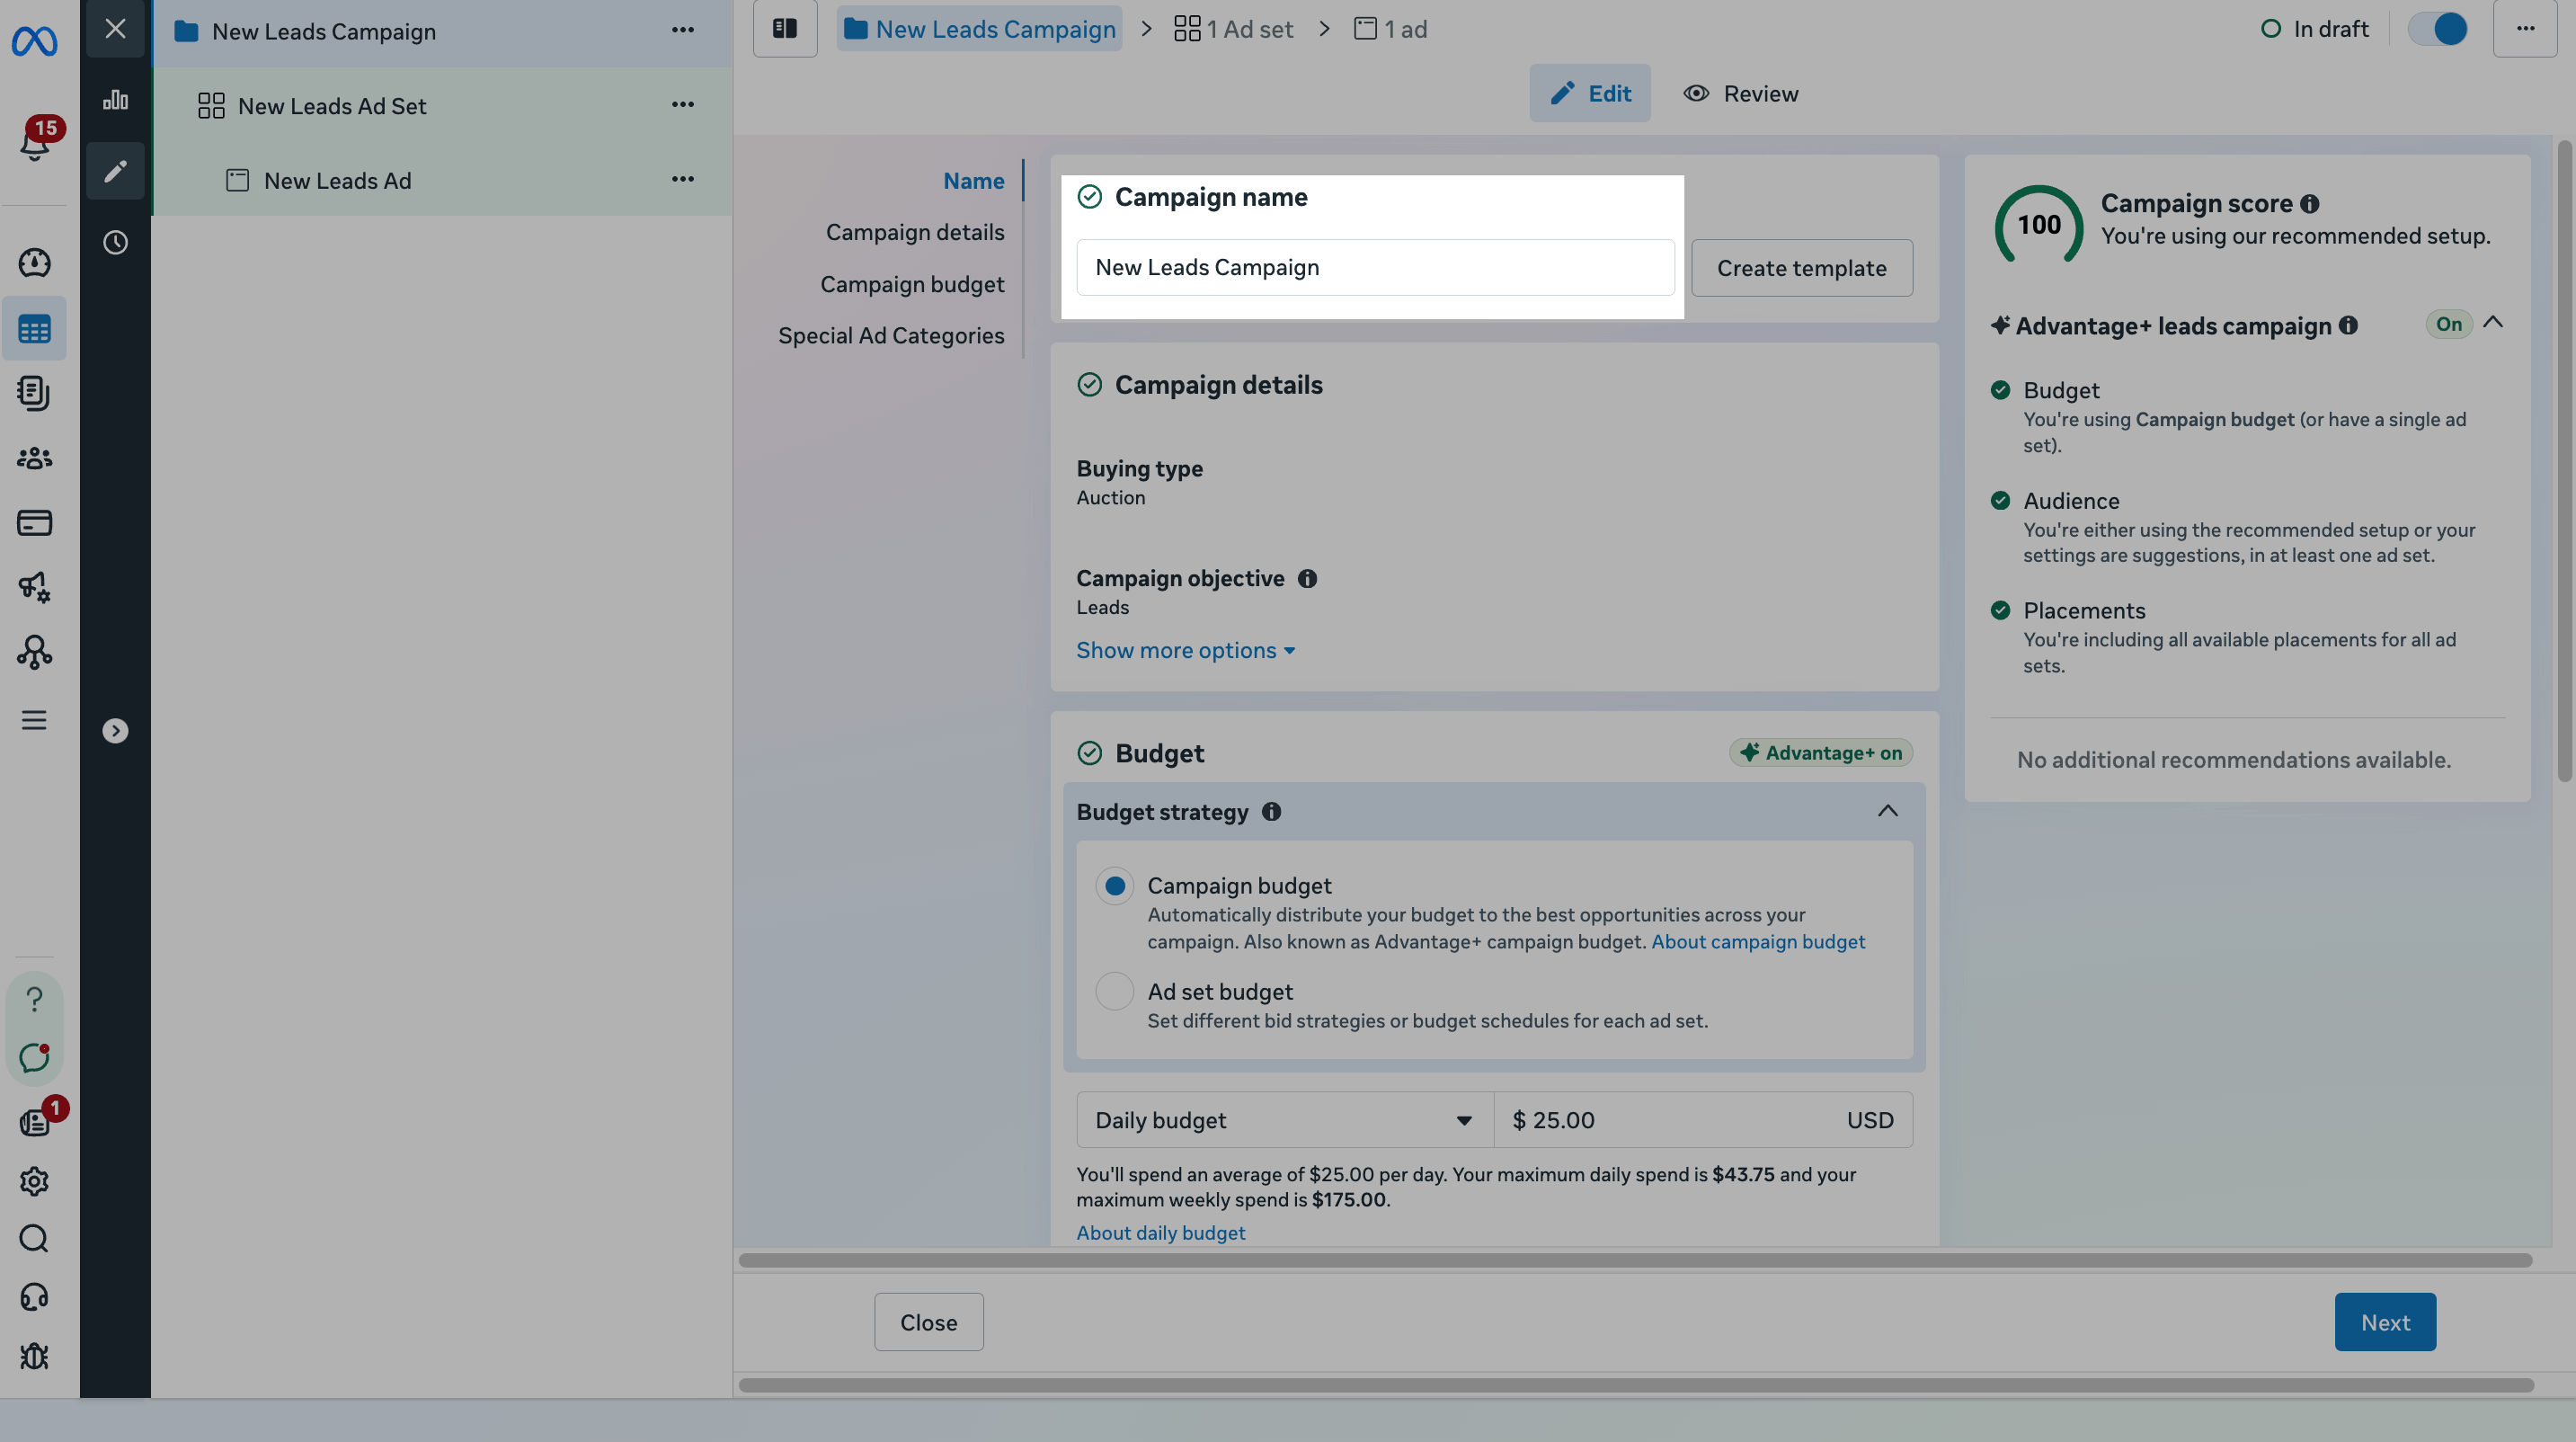
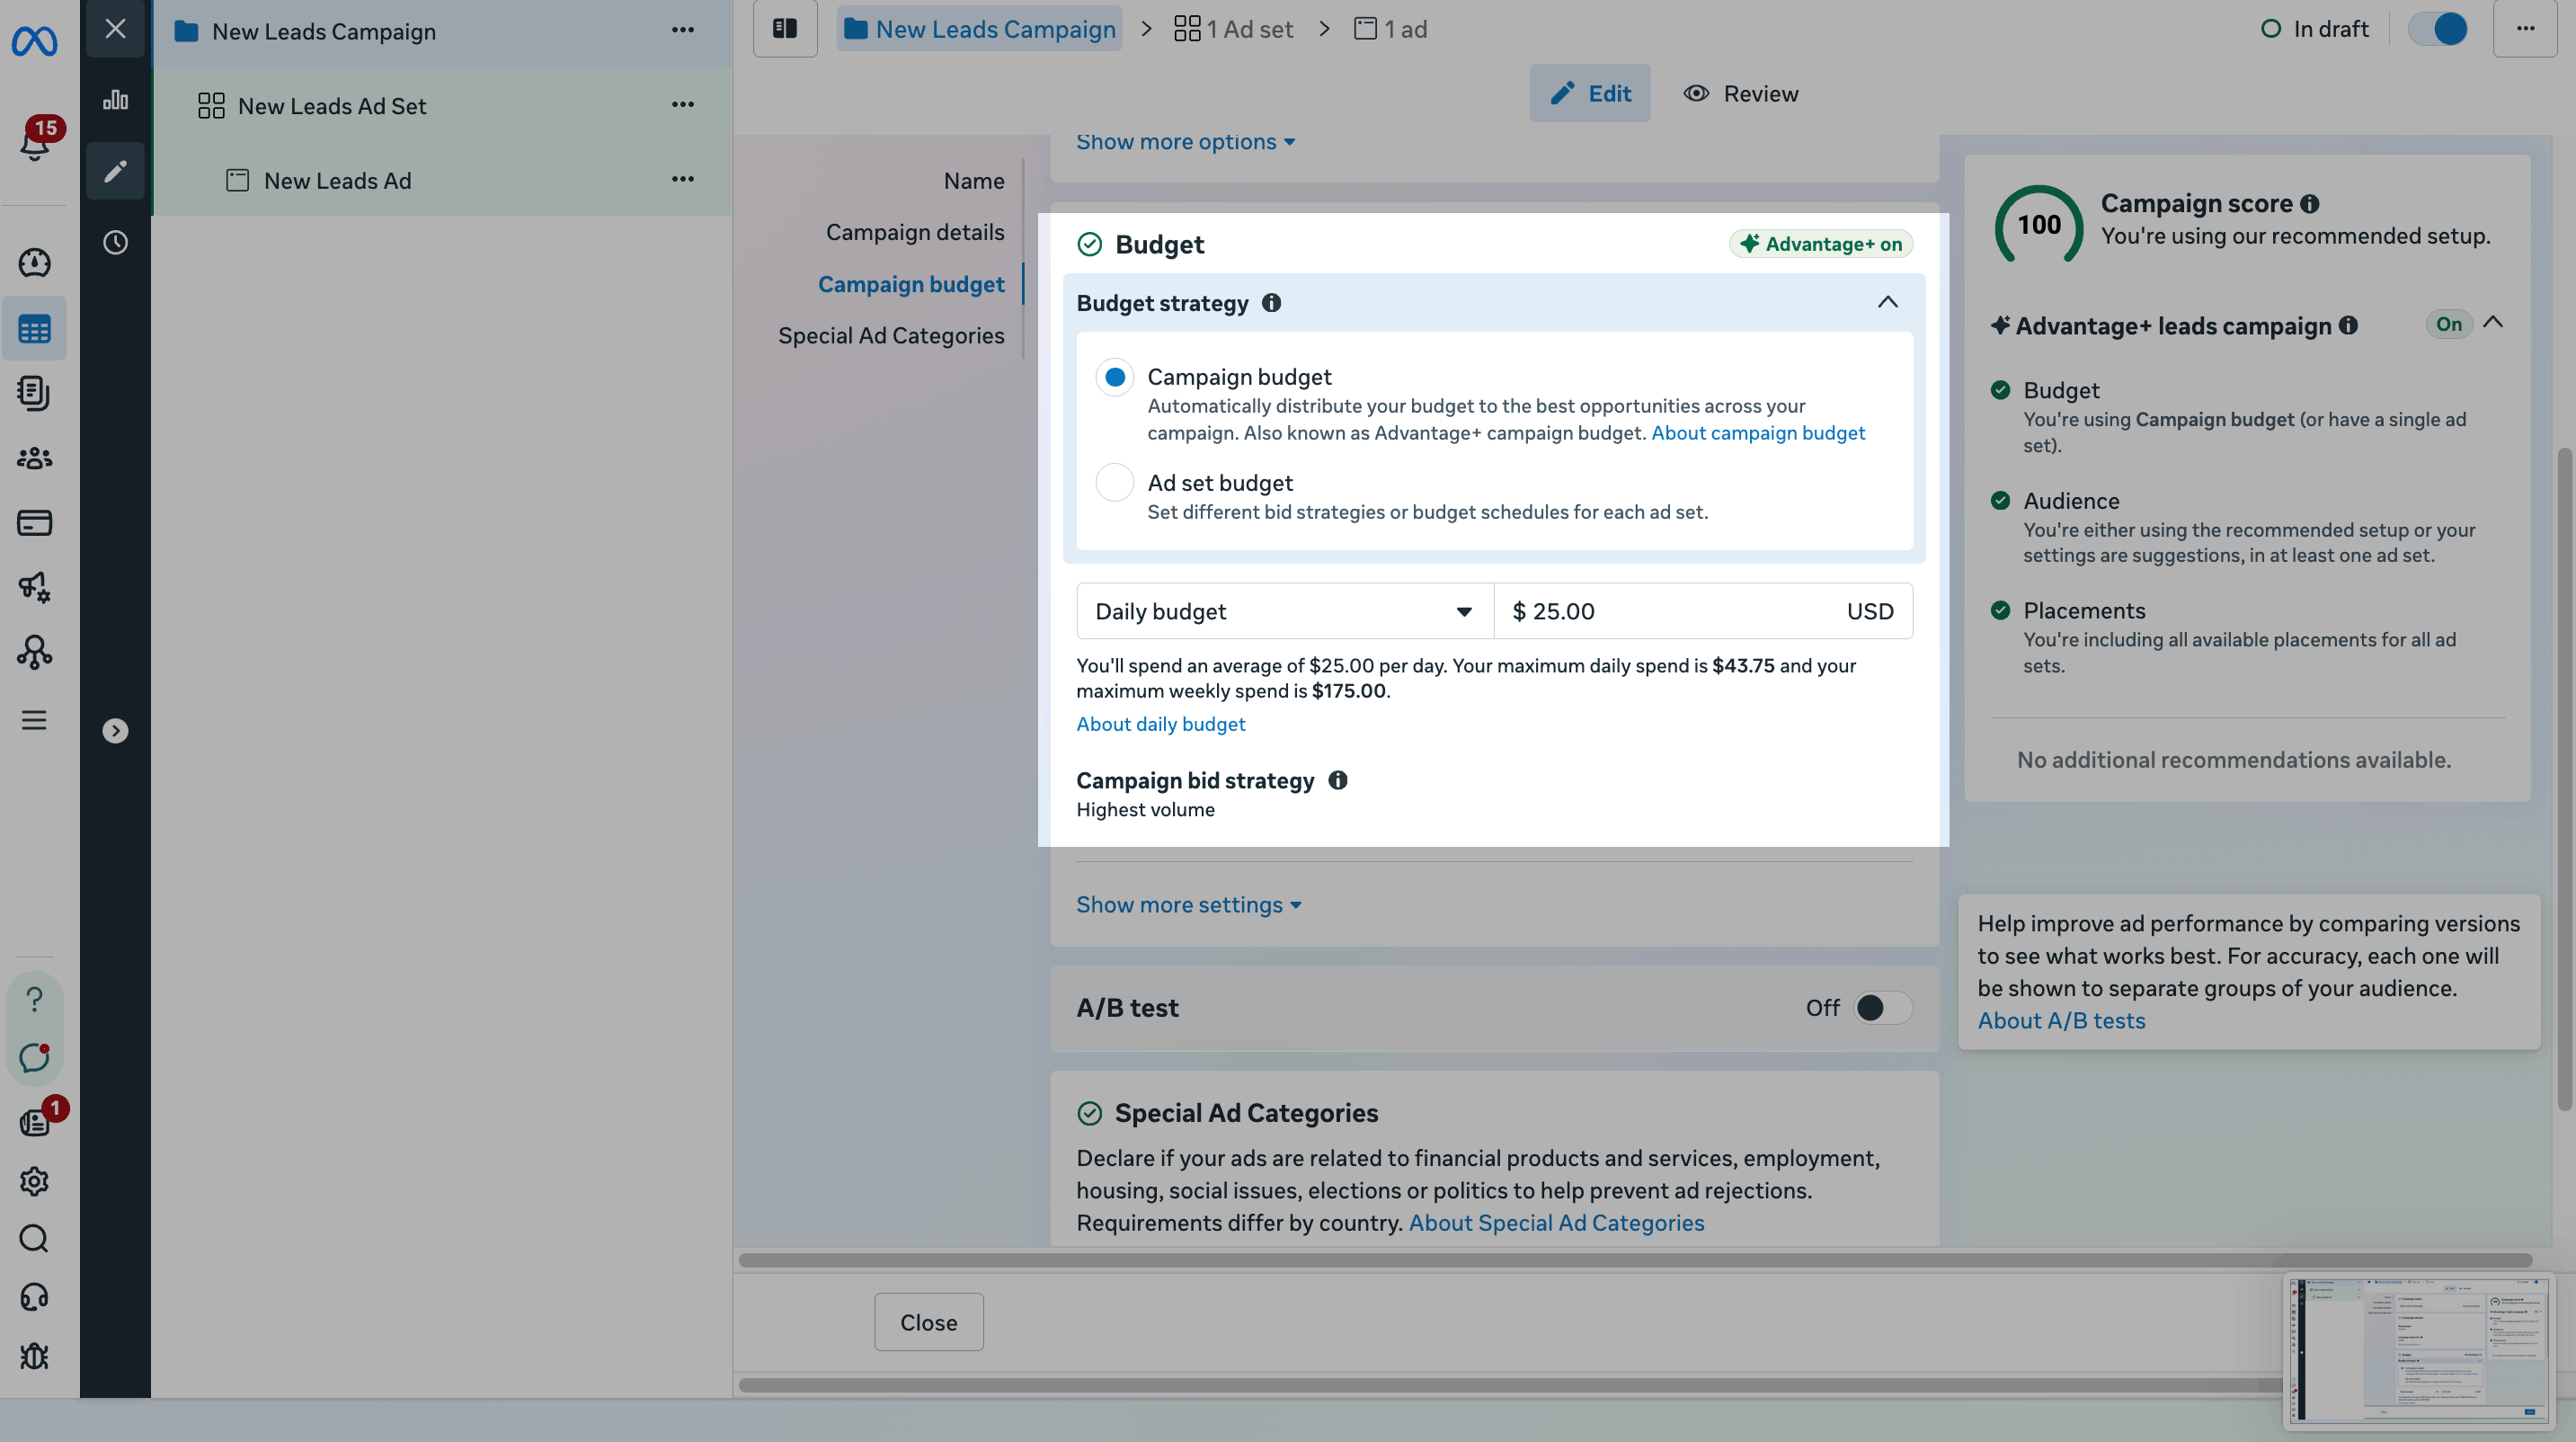
Define your ad budget
In the Budget section, choose where to apply your budget. Use a Campaign budget to let Meta automatically distribute spending across ad sets. Use an Ad set budget to manage spending for each ad set manually. Then, enter a budget amount and select a daily or lifetime budget.
Daily budget is how much you want to spend on a specific campaign per day.
Lifetime Budget is how much you want to spend over the entire run-time of your campaign.
Read more: About Advantage+ campaign budget and About daily budgets.
Choose how to show your ad
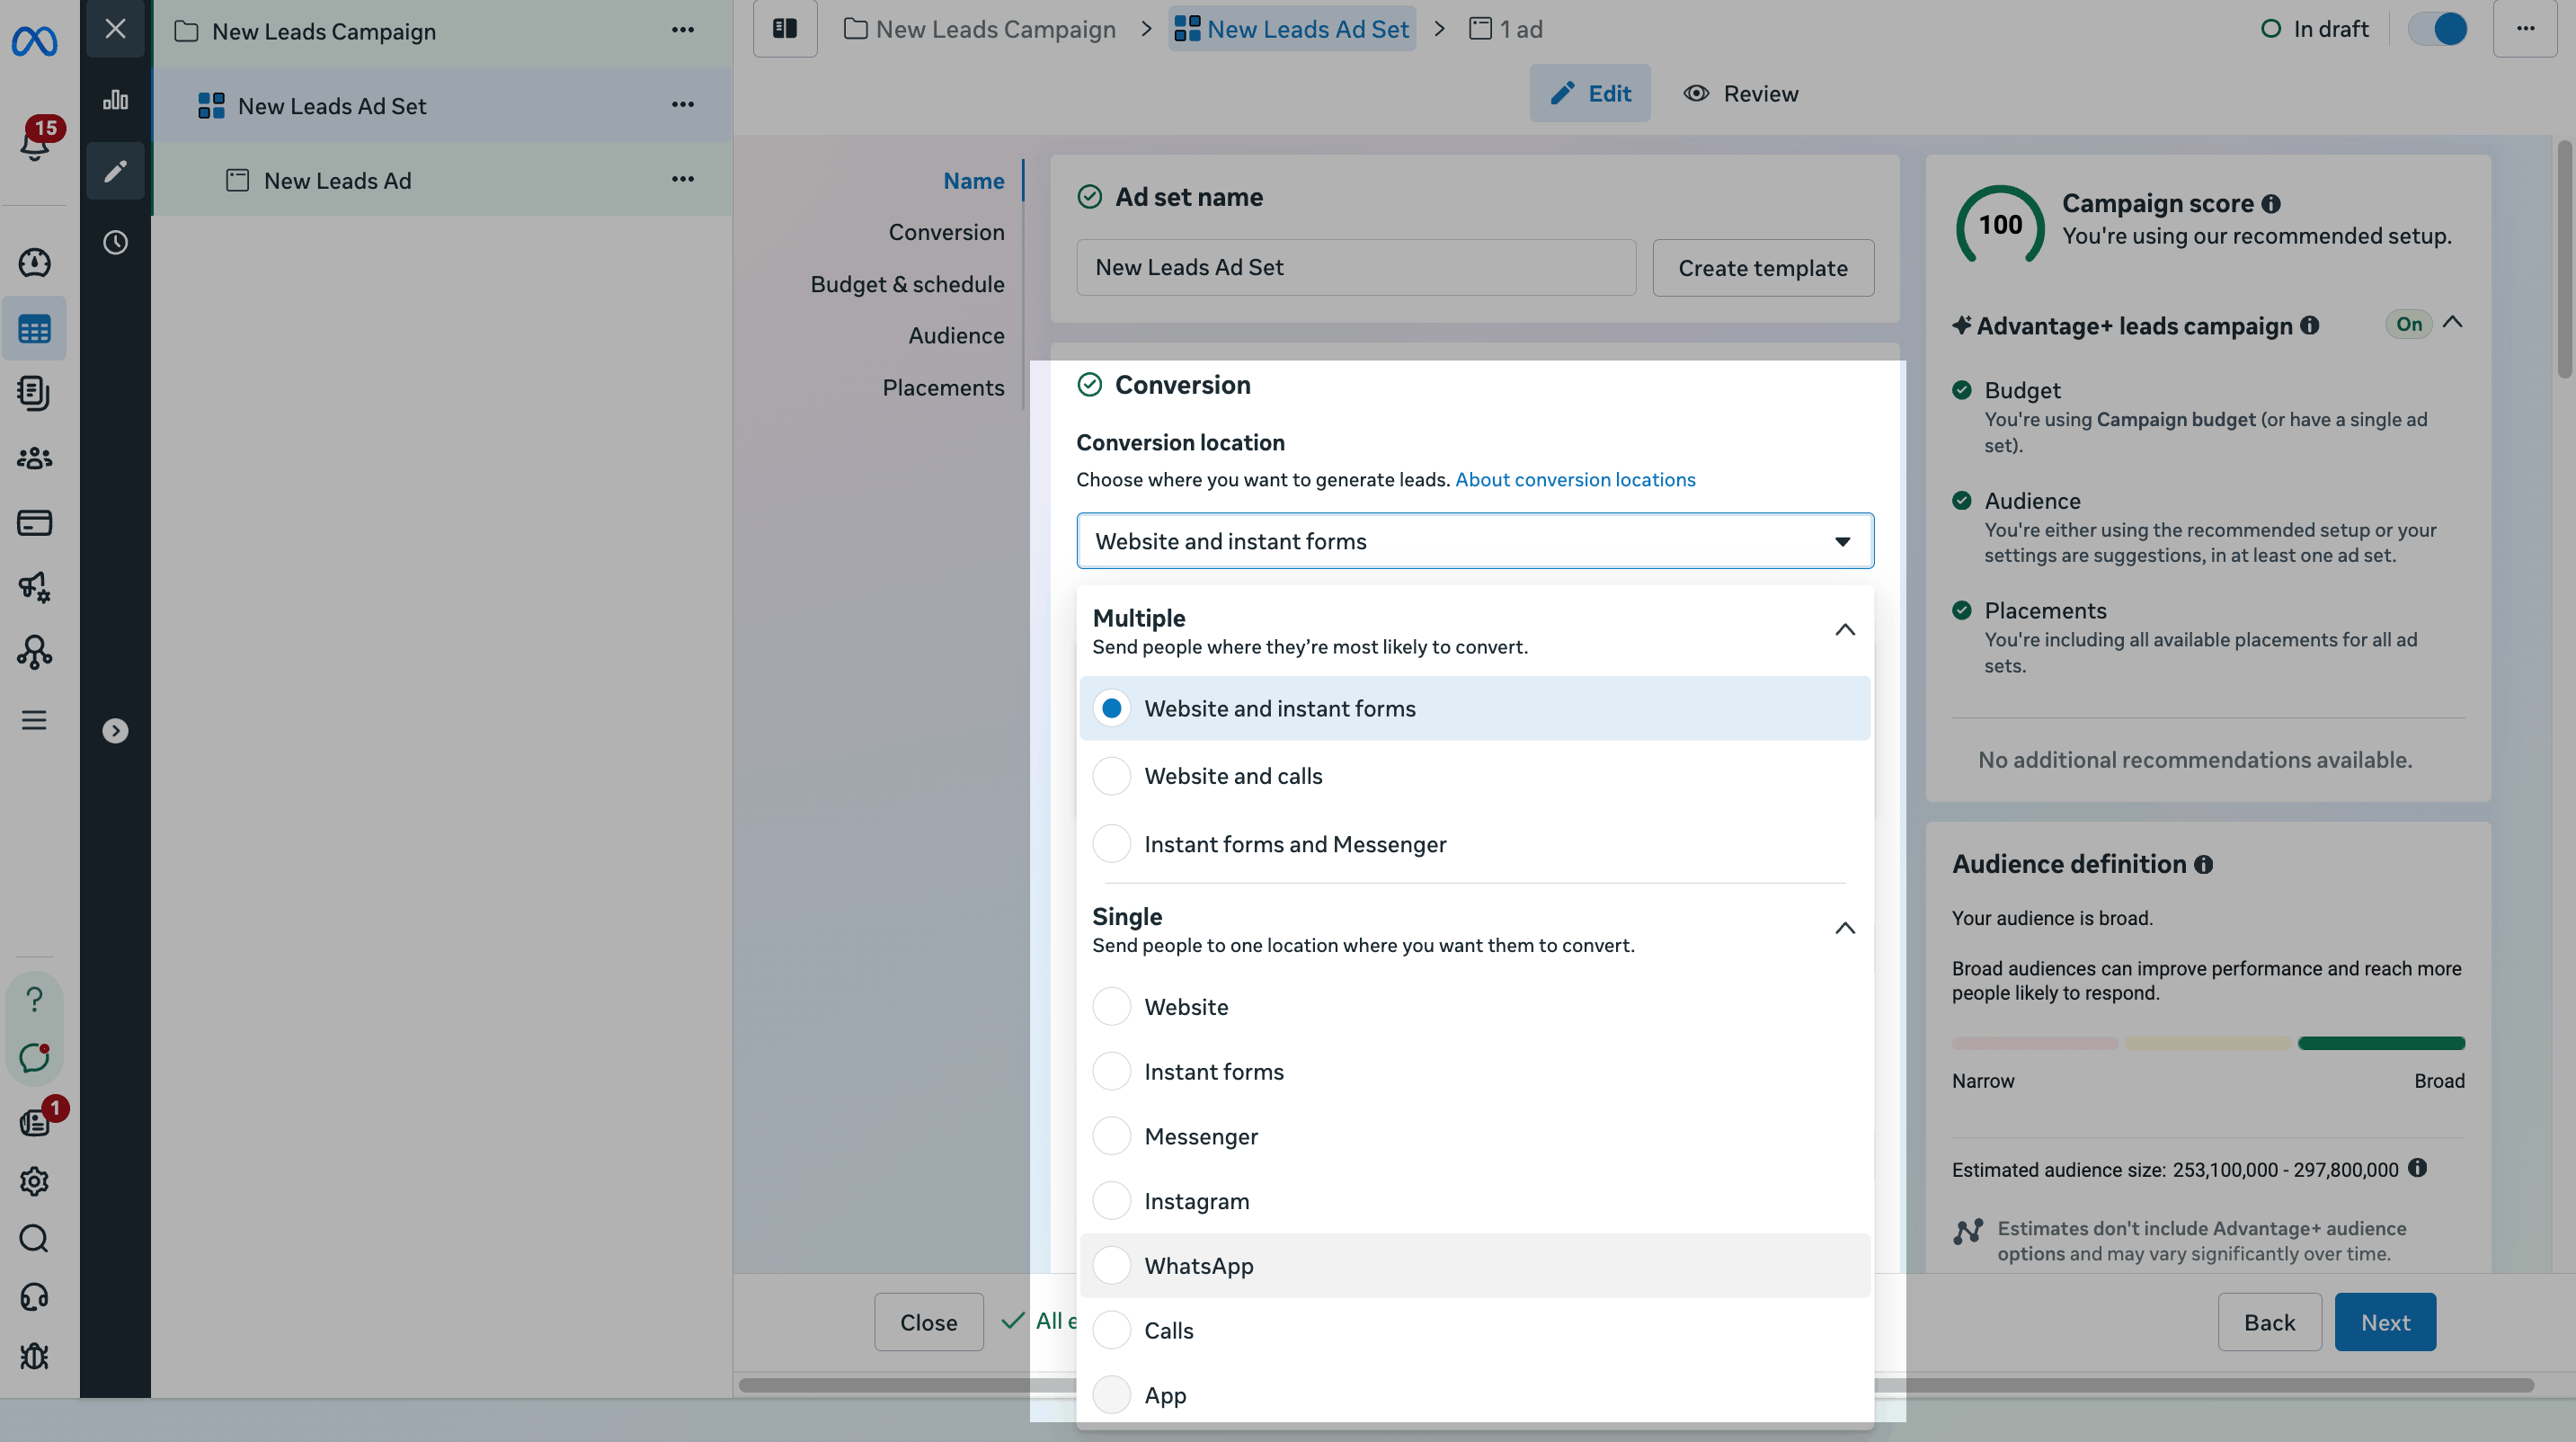
Set an ad destination
Your ad destination determines where you want users to message you after they click on the ad button.
In the Conversion section, expand Single and select WhatsApp.
Read also: How to create a Facebook Messenger Ad and launch the chatbot it links to and How to create an Instagram ad via Facebook to run a chatbot.
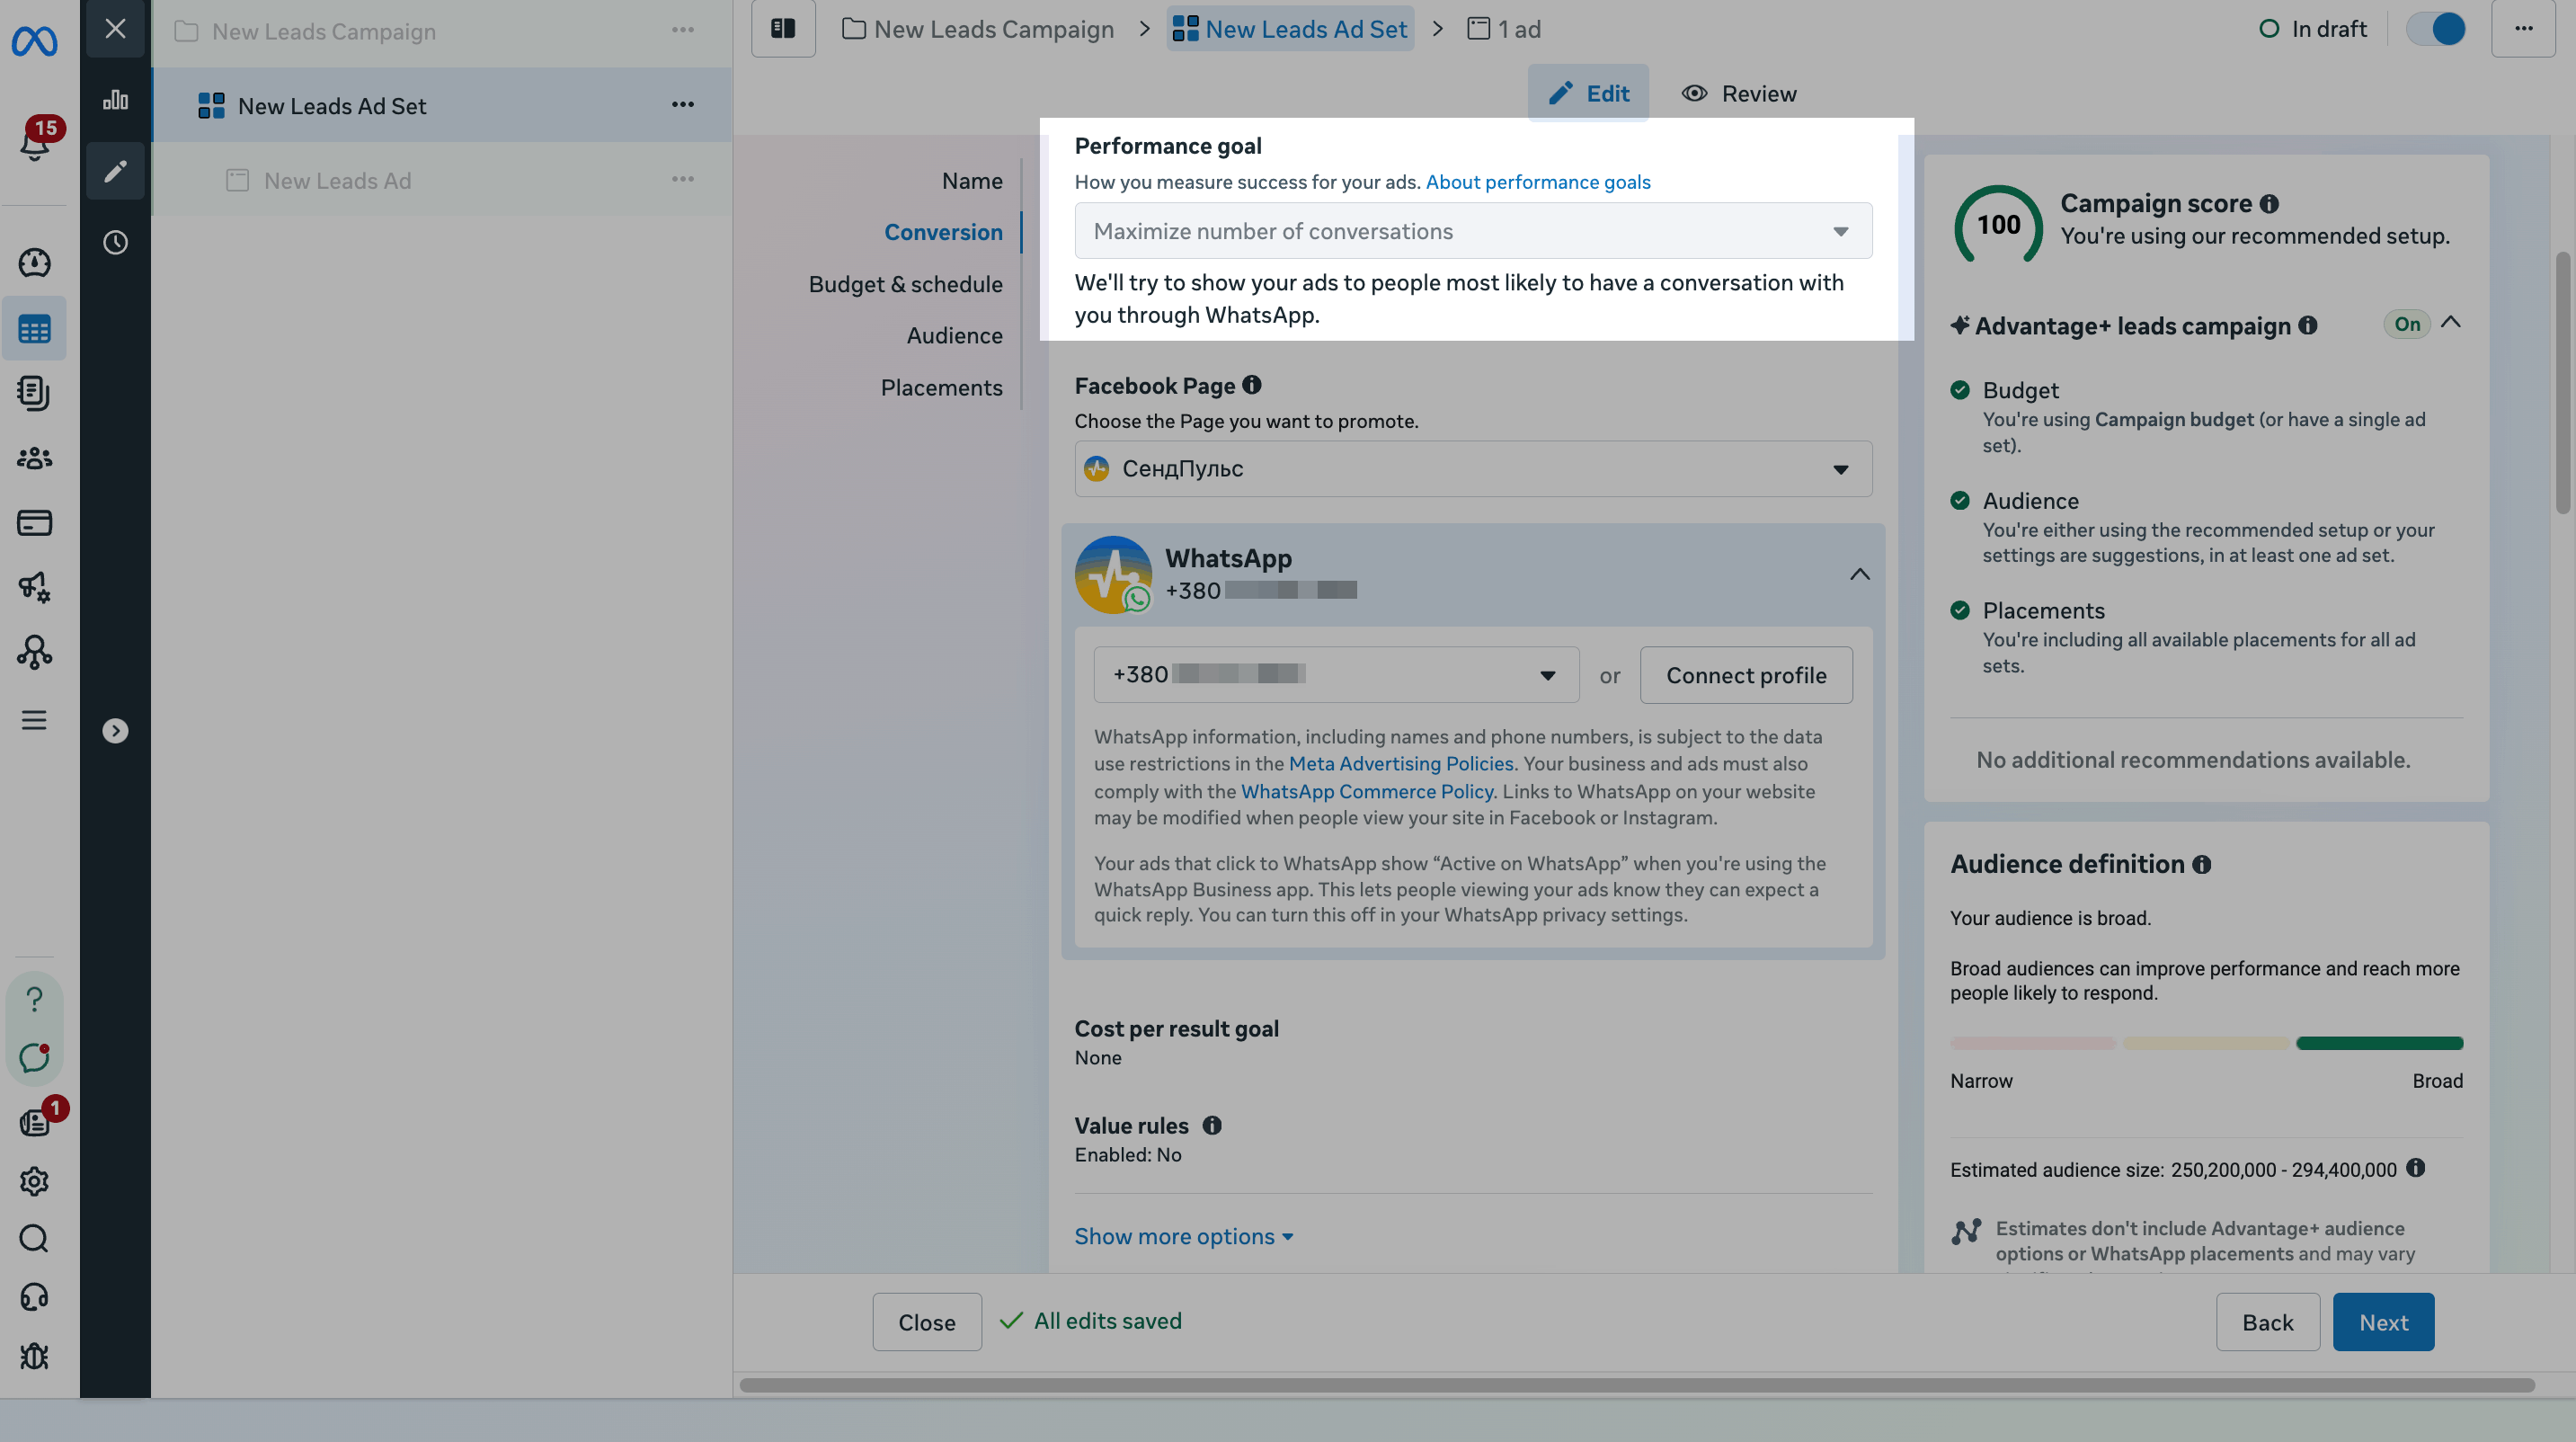
Set a performance goal
Click your ad set's tab. In the Performance goal section, choose how Meta should optimize your ads.
The default option is Maximize number of conversations. Meta will show your ads to people most likely to start a conversation with you through WhatsApp.
Some accounts can have the Maximize number of leads through messaging performance goal. If it's not visible, it may not be available for your account yet. This option will also be unavailable if you have not set up the Conversions API and started sharing lead events.
To use Maximize number of leads through messaging as a performance goal for click-to-WhatsApp ads, you must share at least 10 lead events or purchase events with Meta within 30 days. You can do this through the WhatsApp Business app or through the Conversions API. To learn how to share events, see the Conversions API.
Choose your accounts
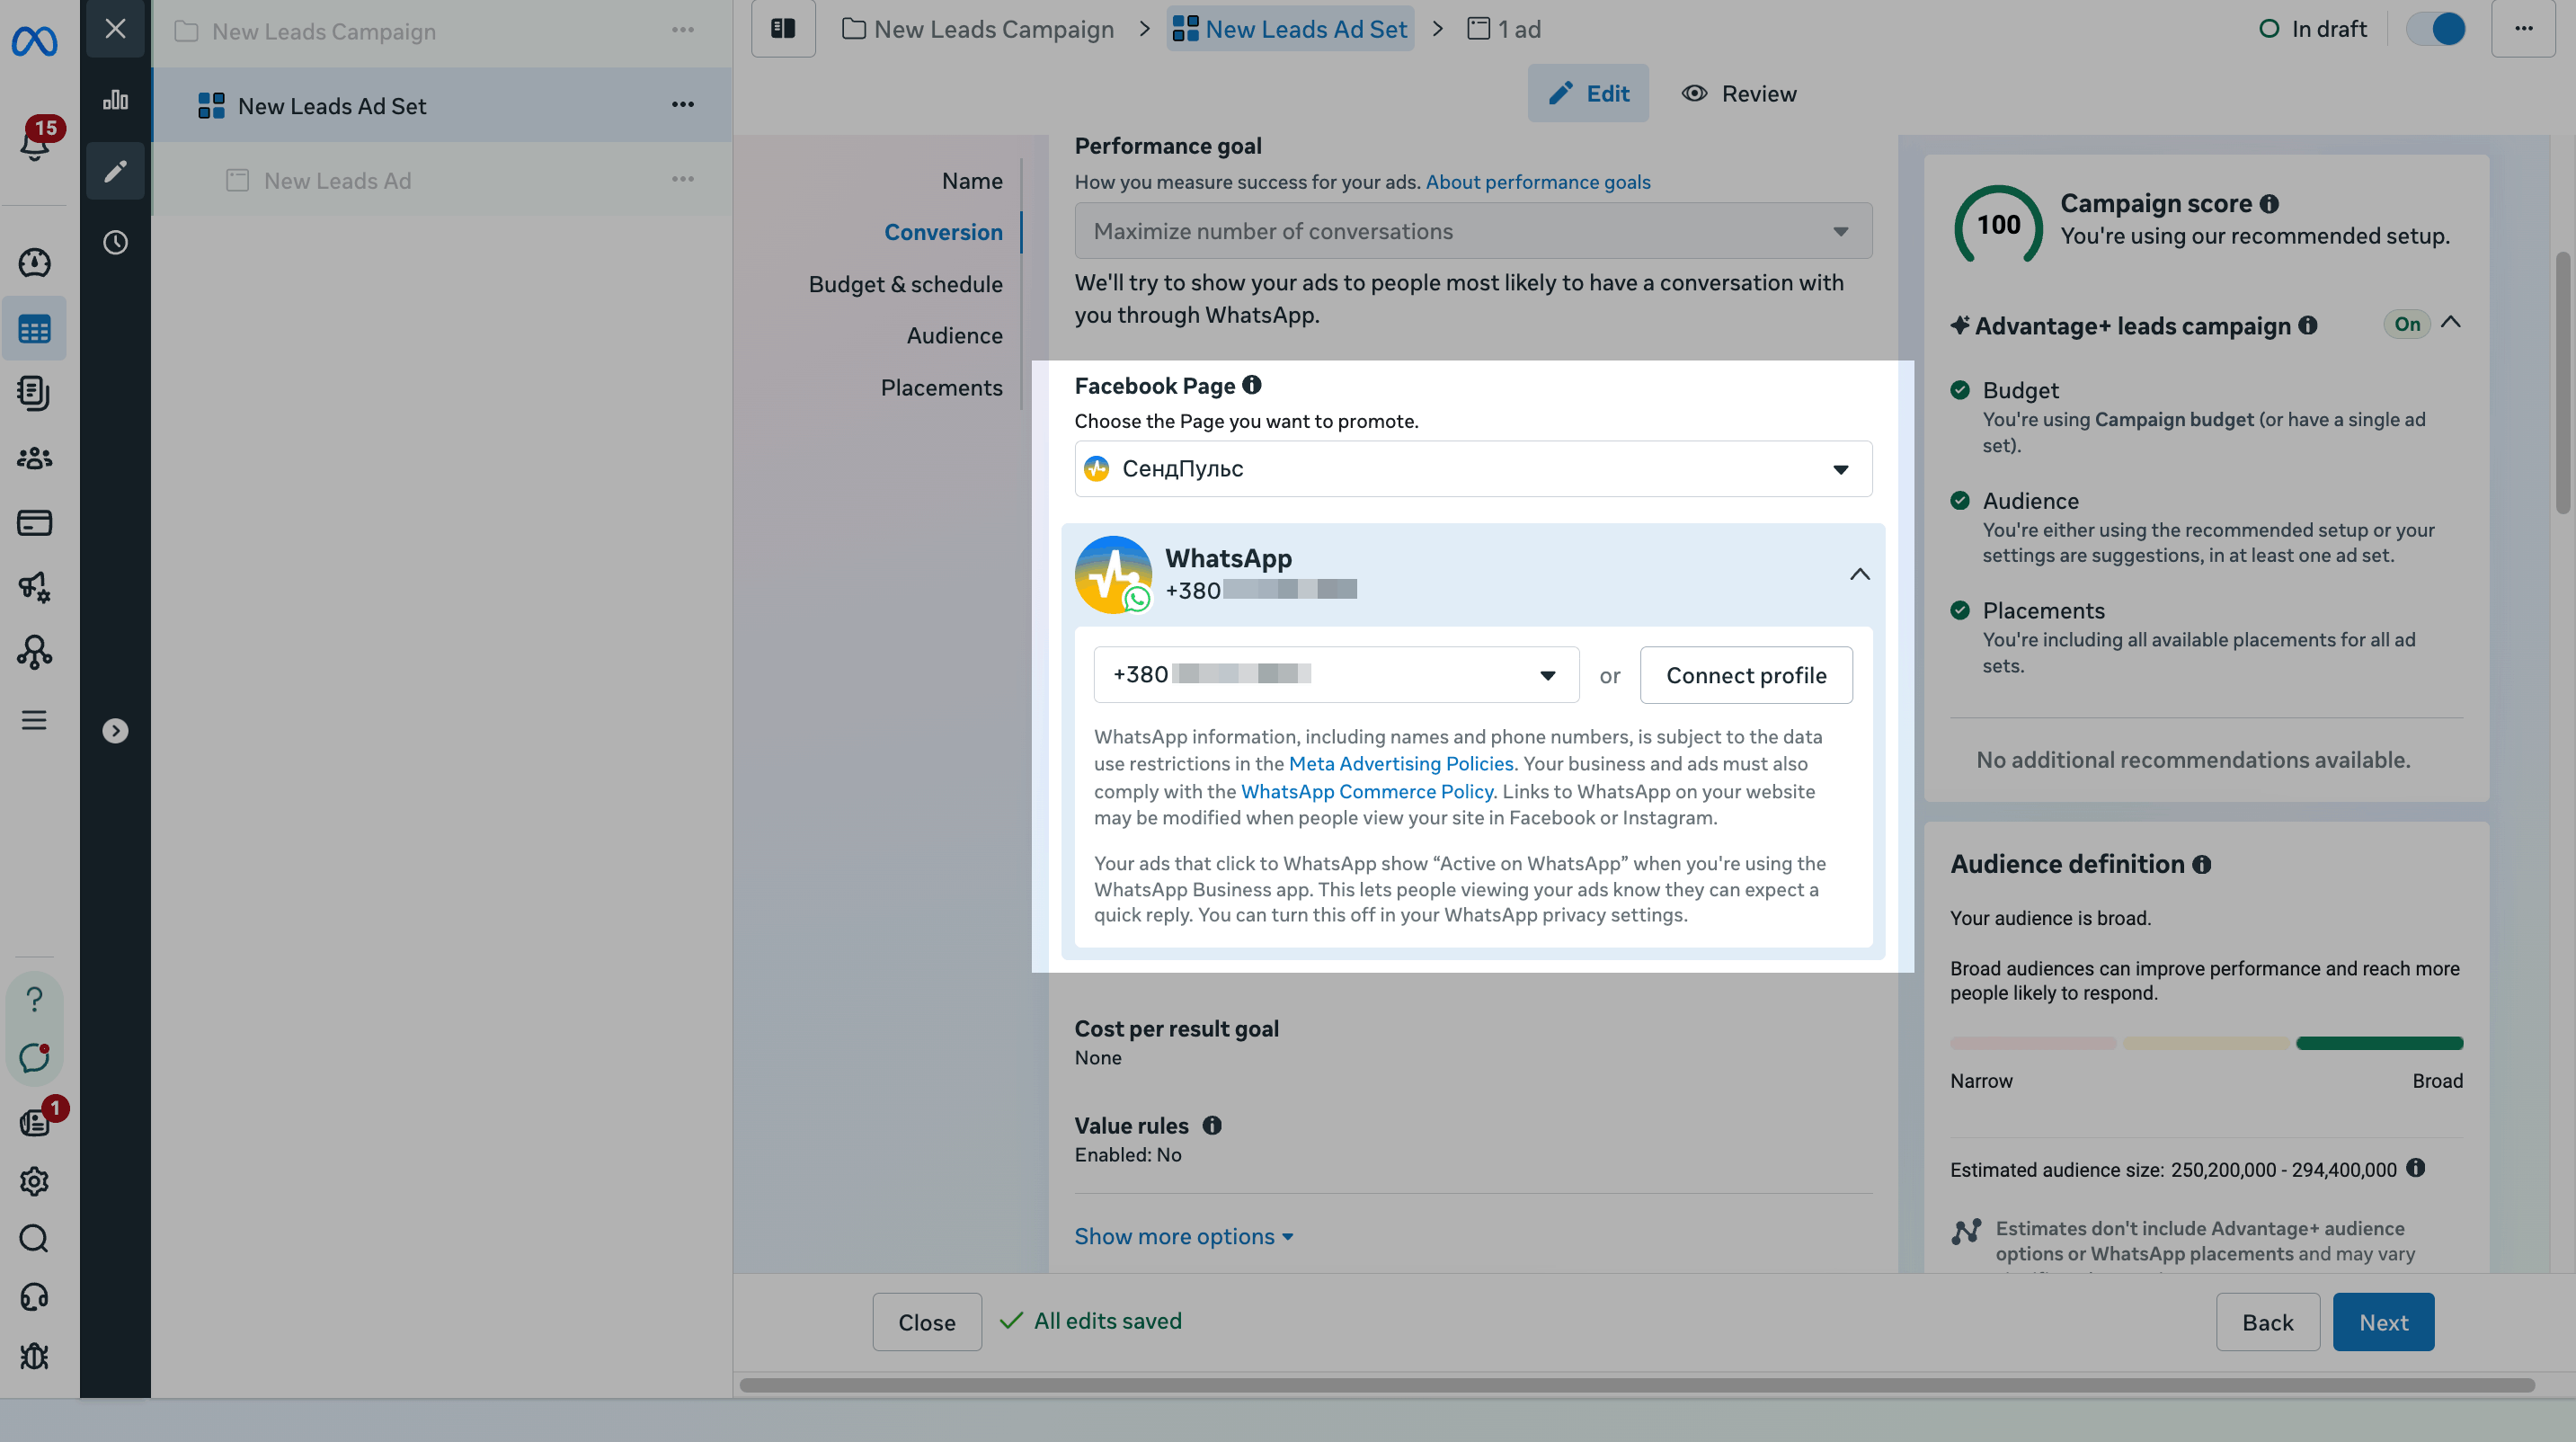
In the Facebook page section, select the Facebook Page on behalf of which you want to run your ads.
Select WhatsApp and your connected phone number.
Your Page must have a phone number associated with the WhatsApp Business API. To change your phone number, click on the Page settings link under the menu.
Read more: Connect your Facebook Page to WhatsApp.
Set a campaign schedule
In the Schedule section, set a start and end date for your advertising campaign.
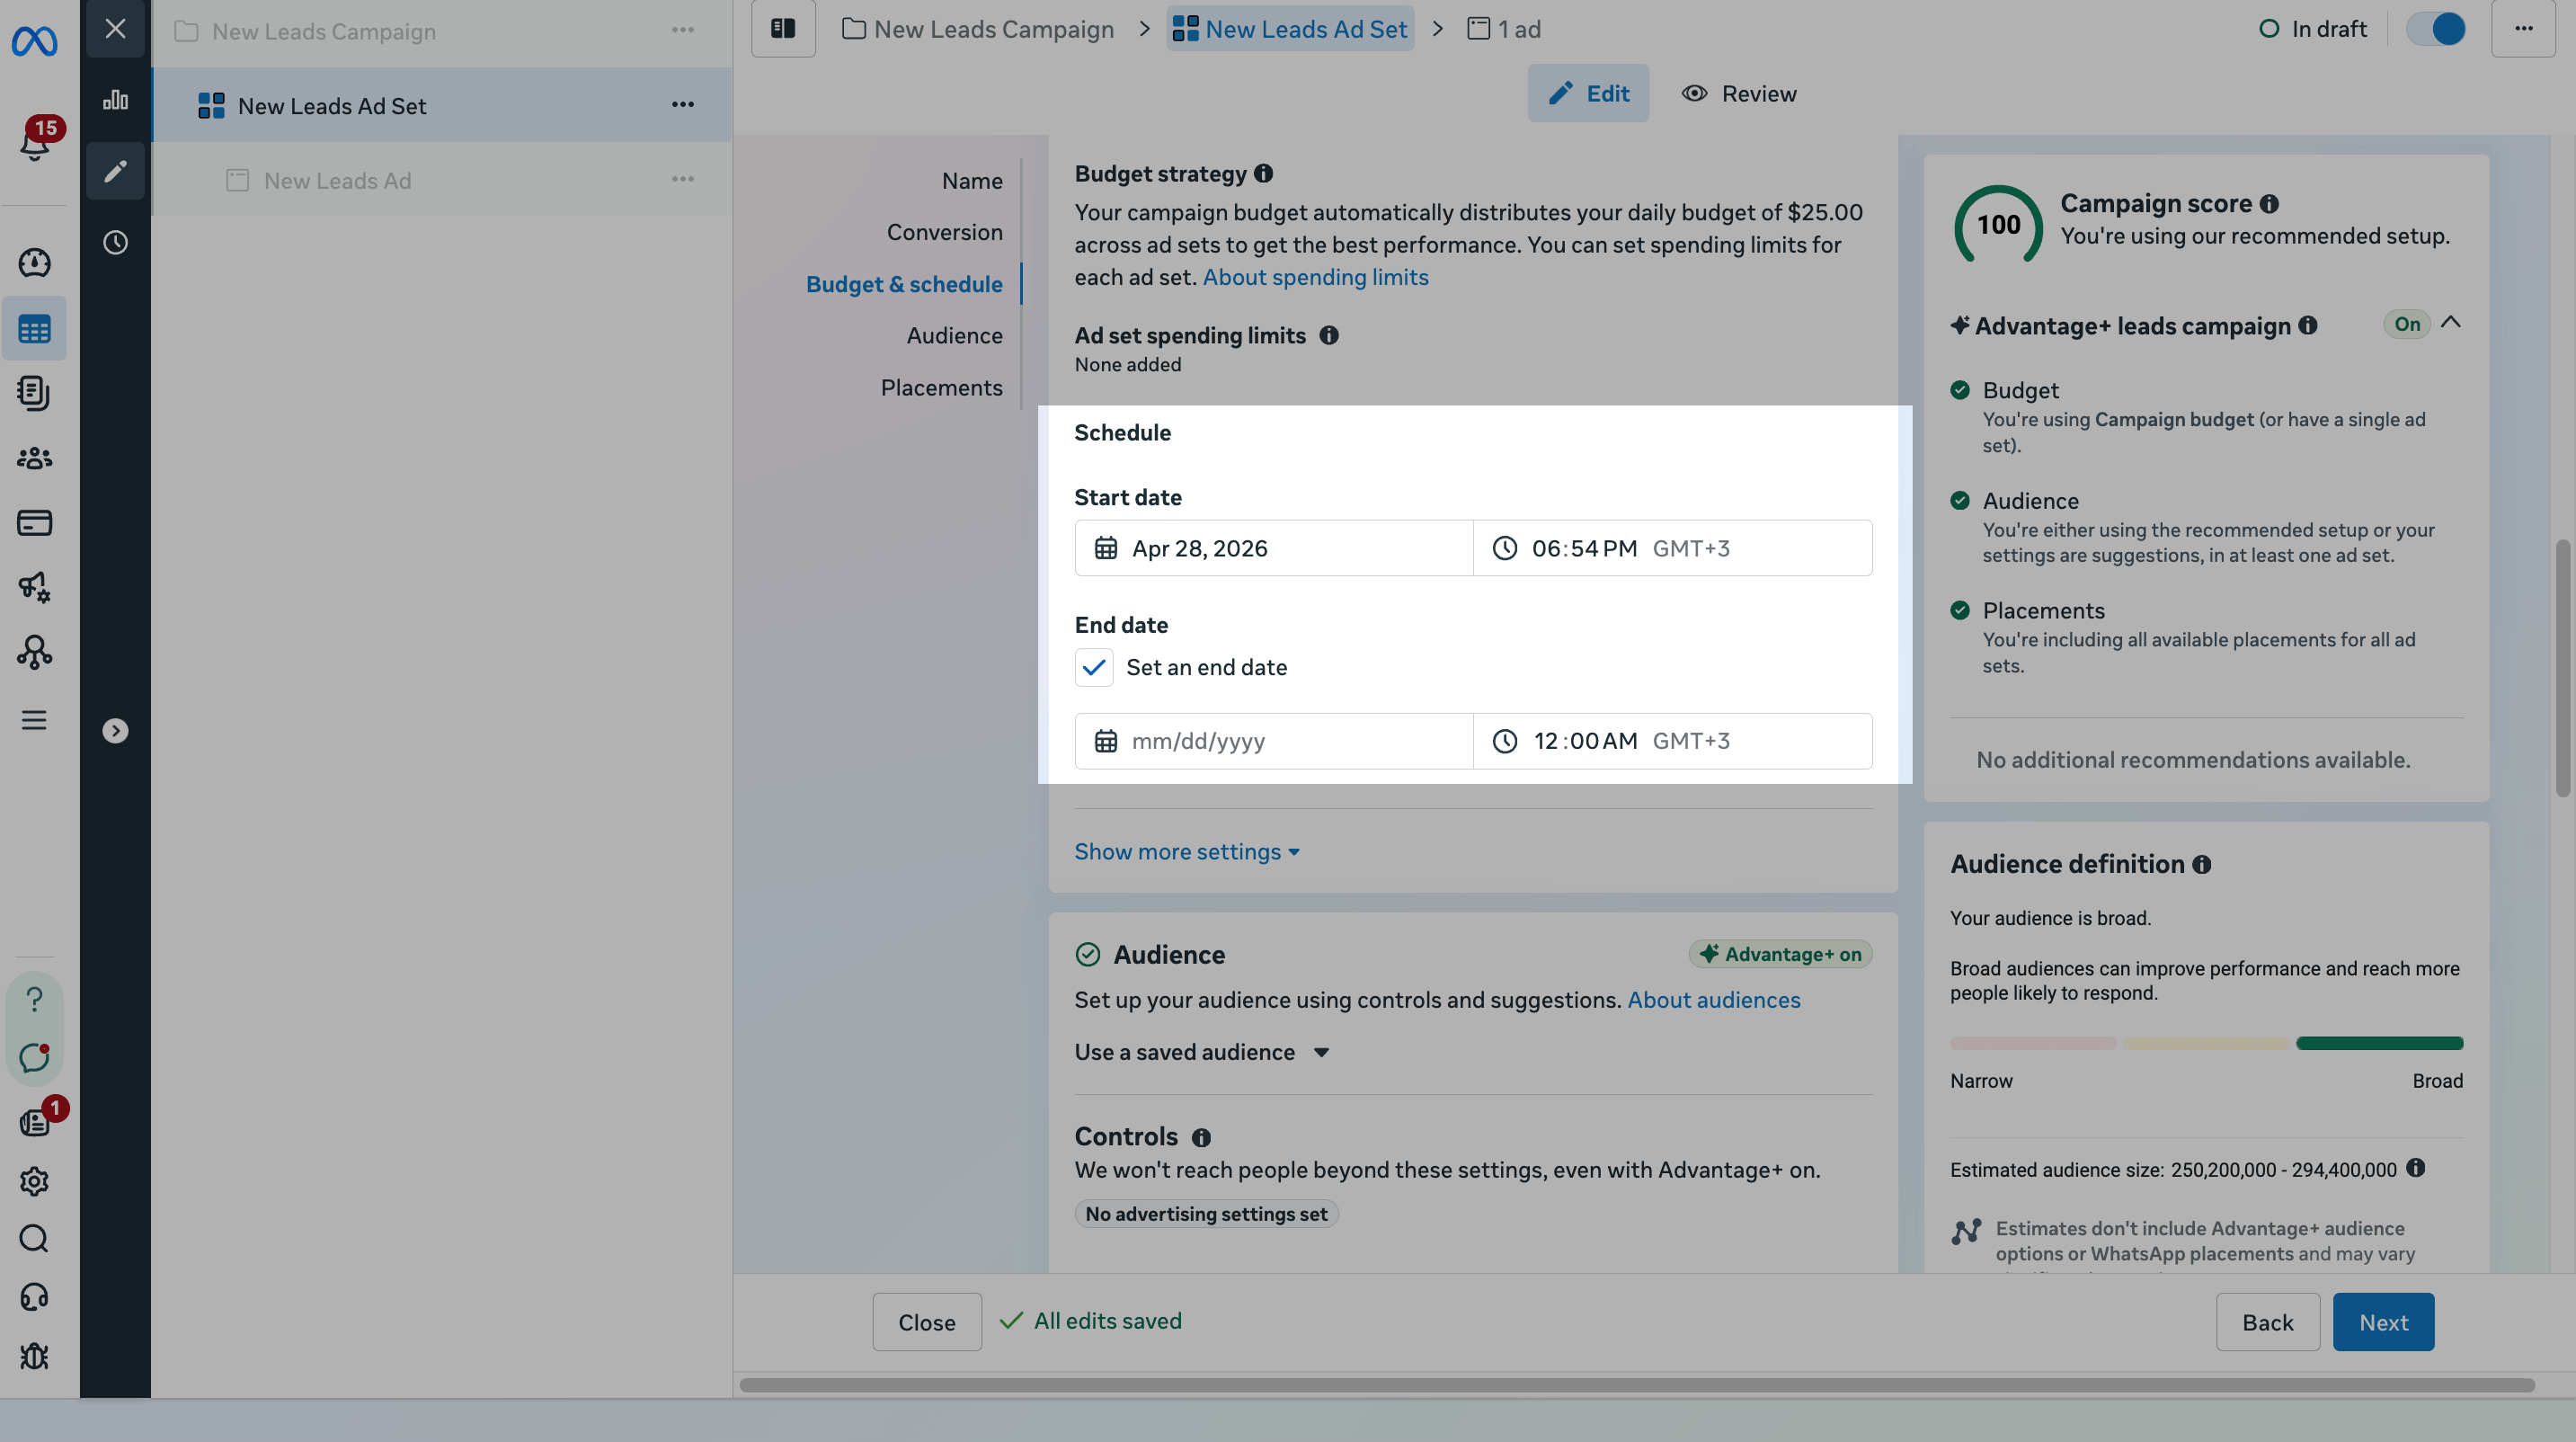
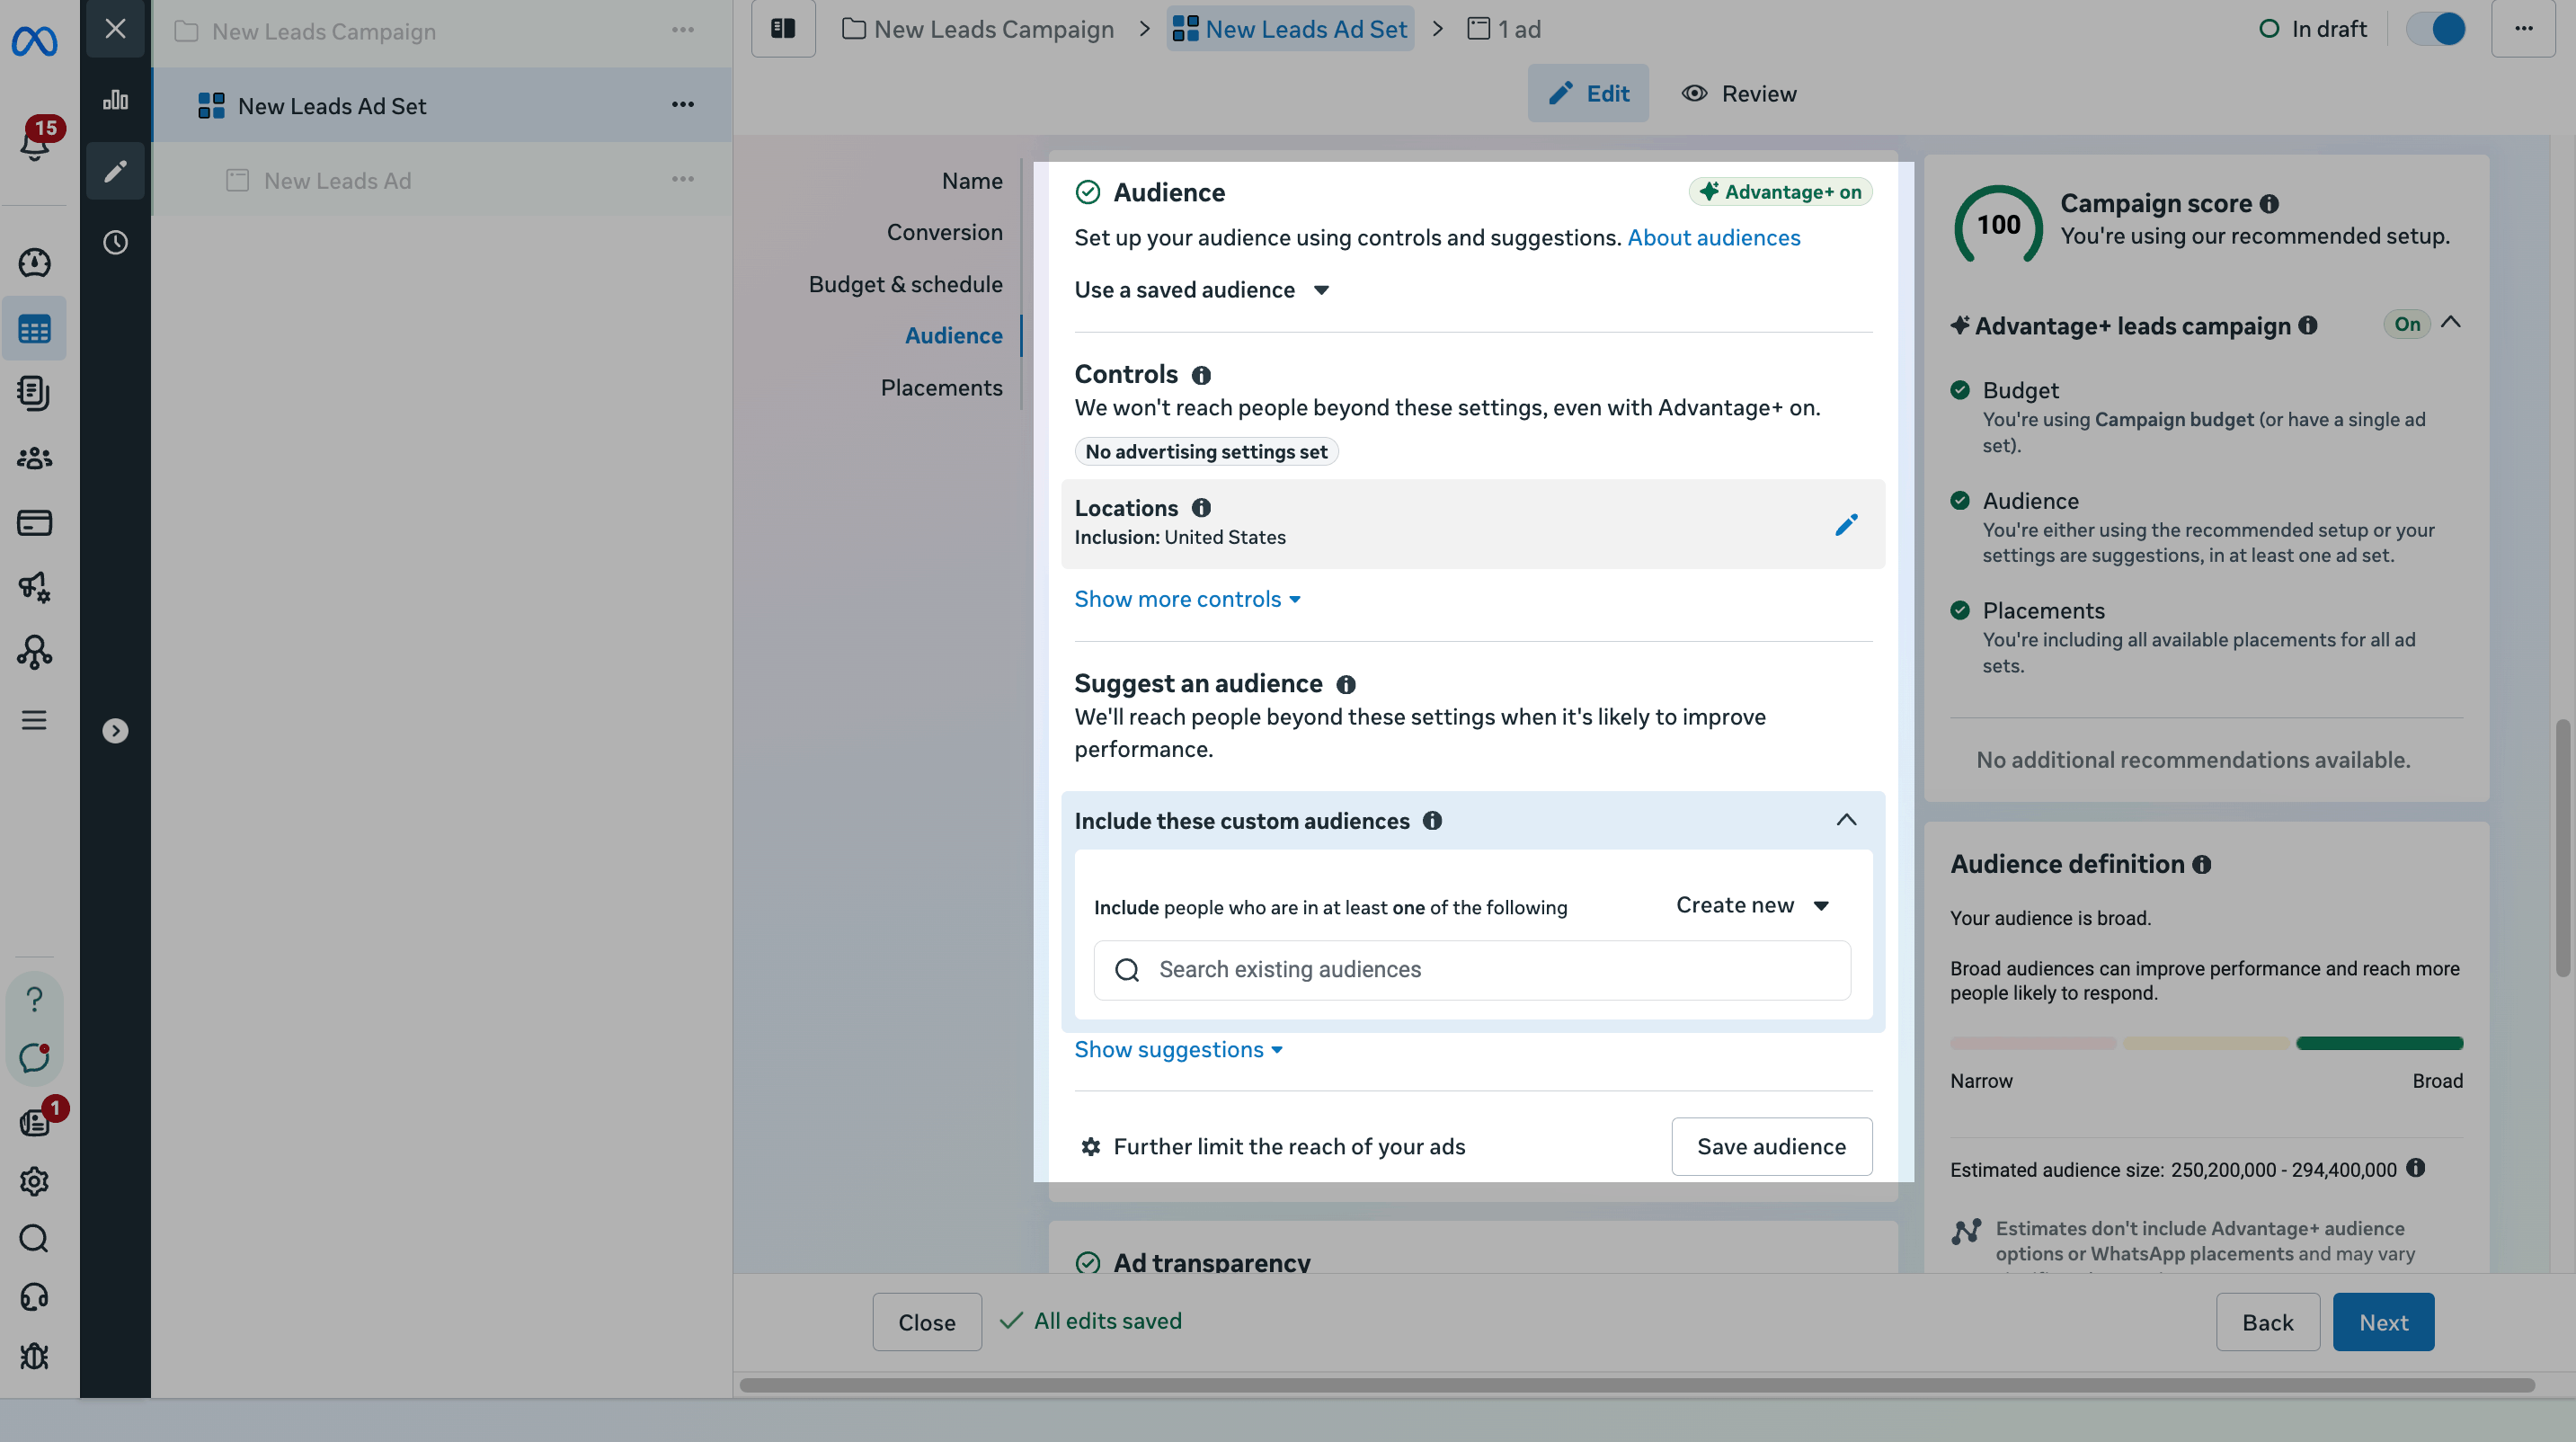
Set a target audience
In the Audience section, define your target audience. Set your audience’s location, age, and language in the Controls section. Set the gender, interests, and demographics in the Suggest an audience section, or select pre-built audiences.
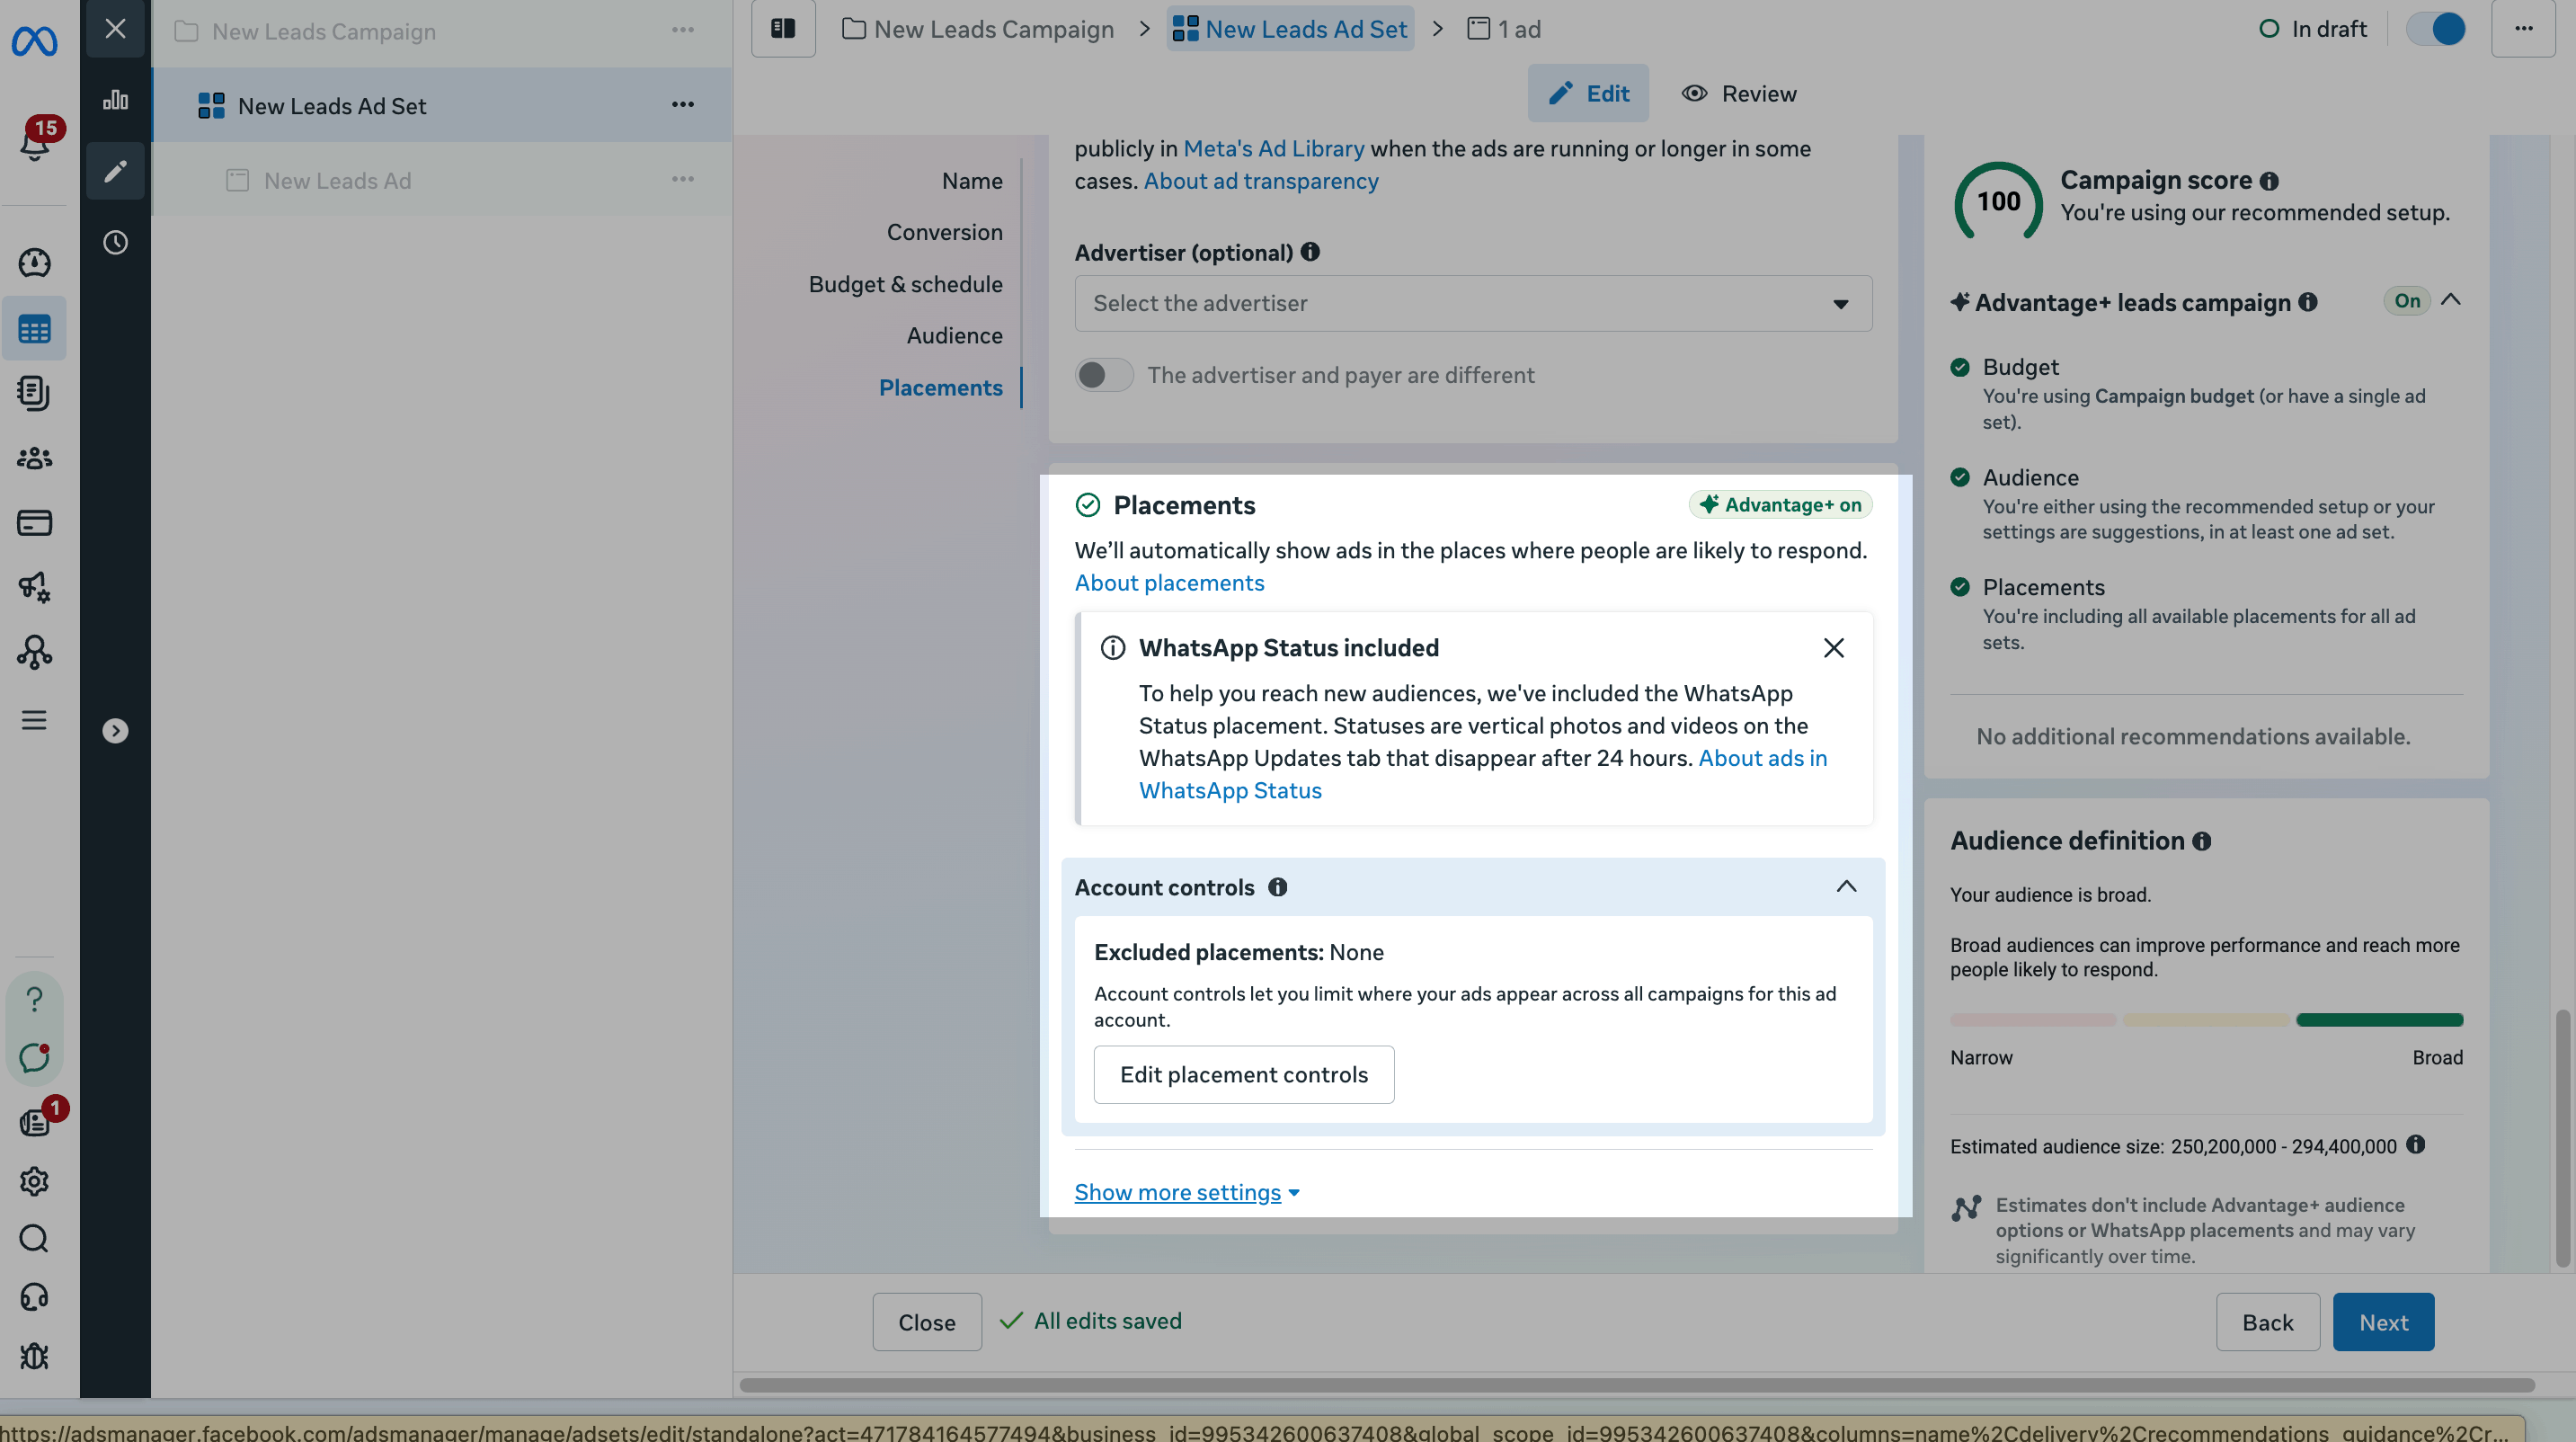
Select ad placements
To show ads on WhatsApp, in the Placements section, you can choose automated placement.
To set placements manually, click Show more settings and filter placements by device, operating system, or platform.
Add your ad content
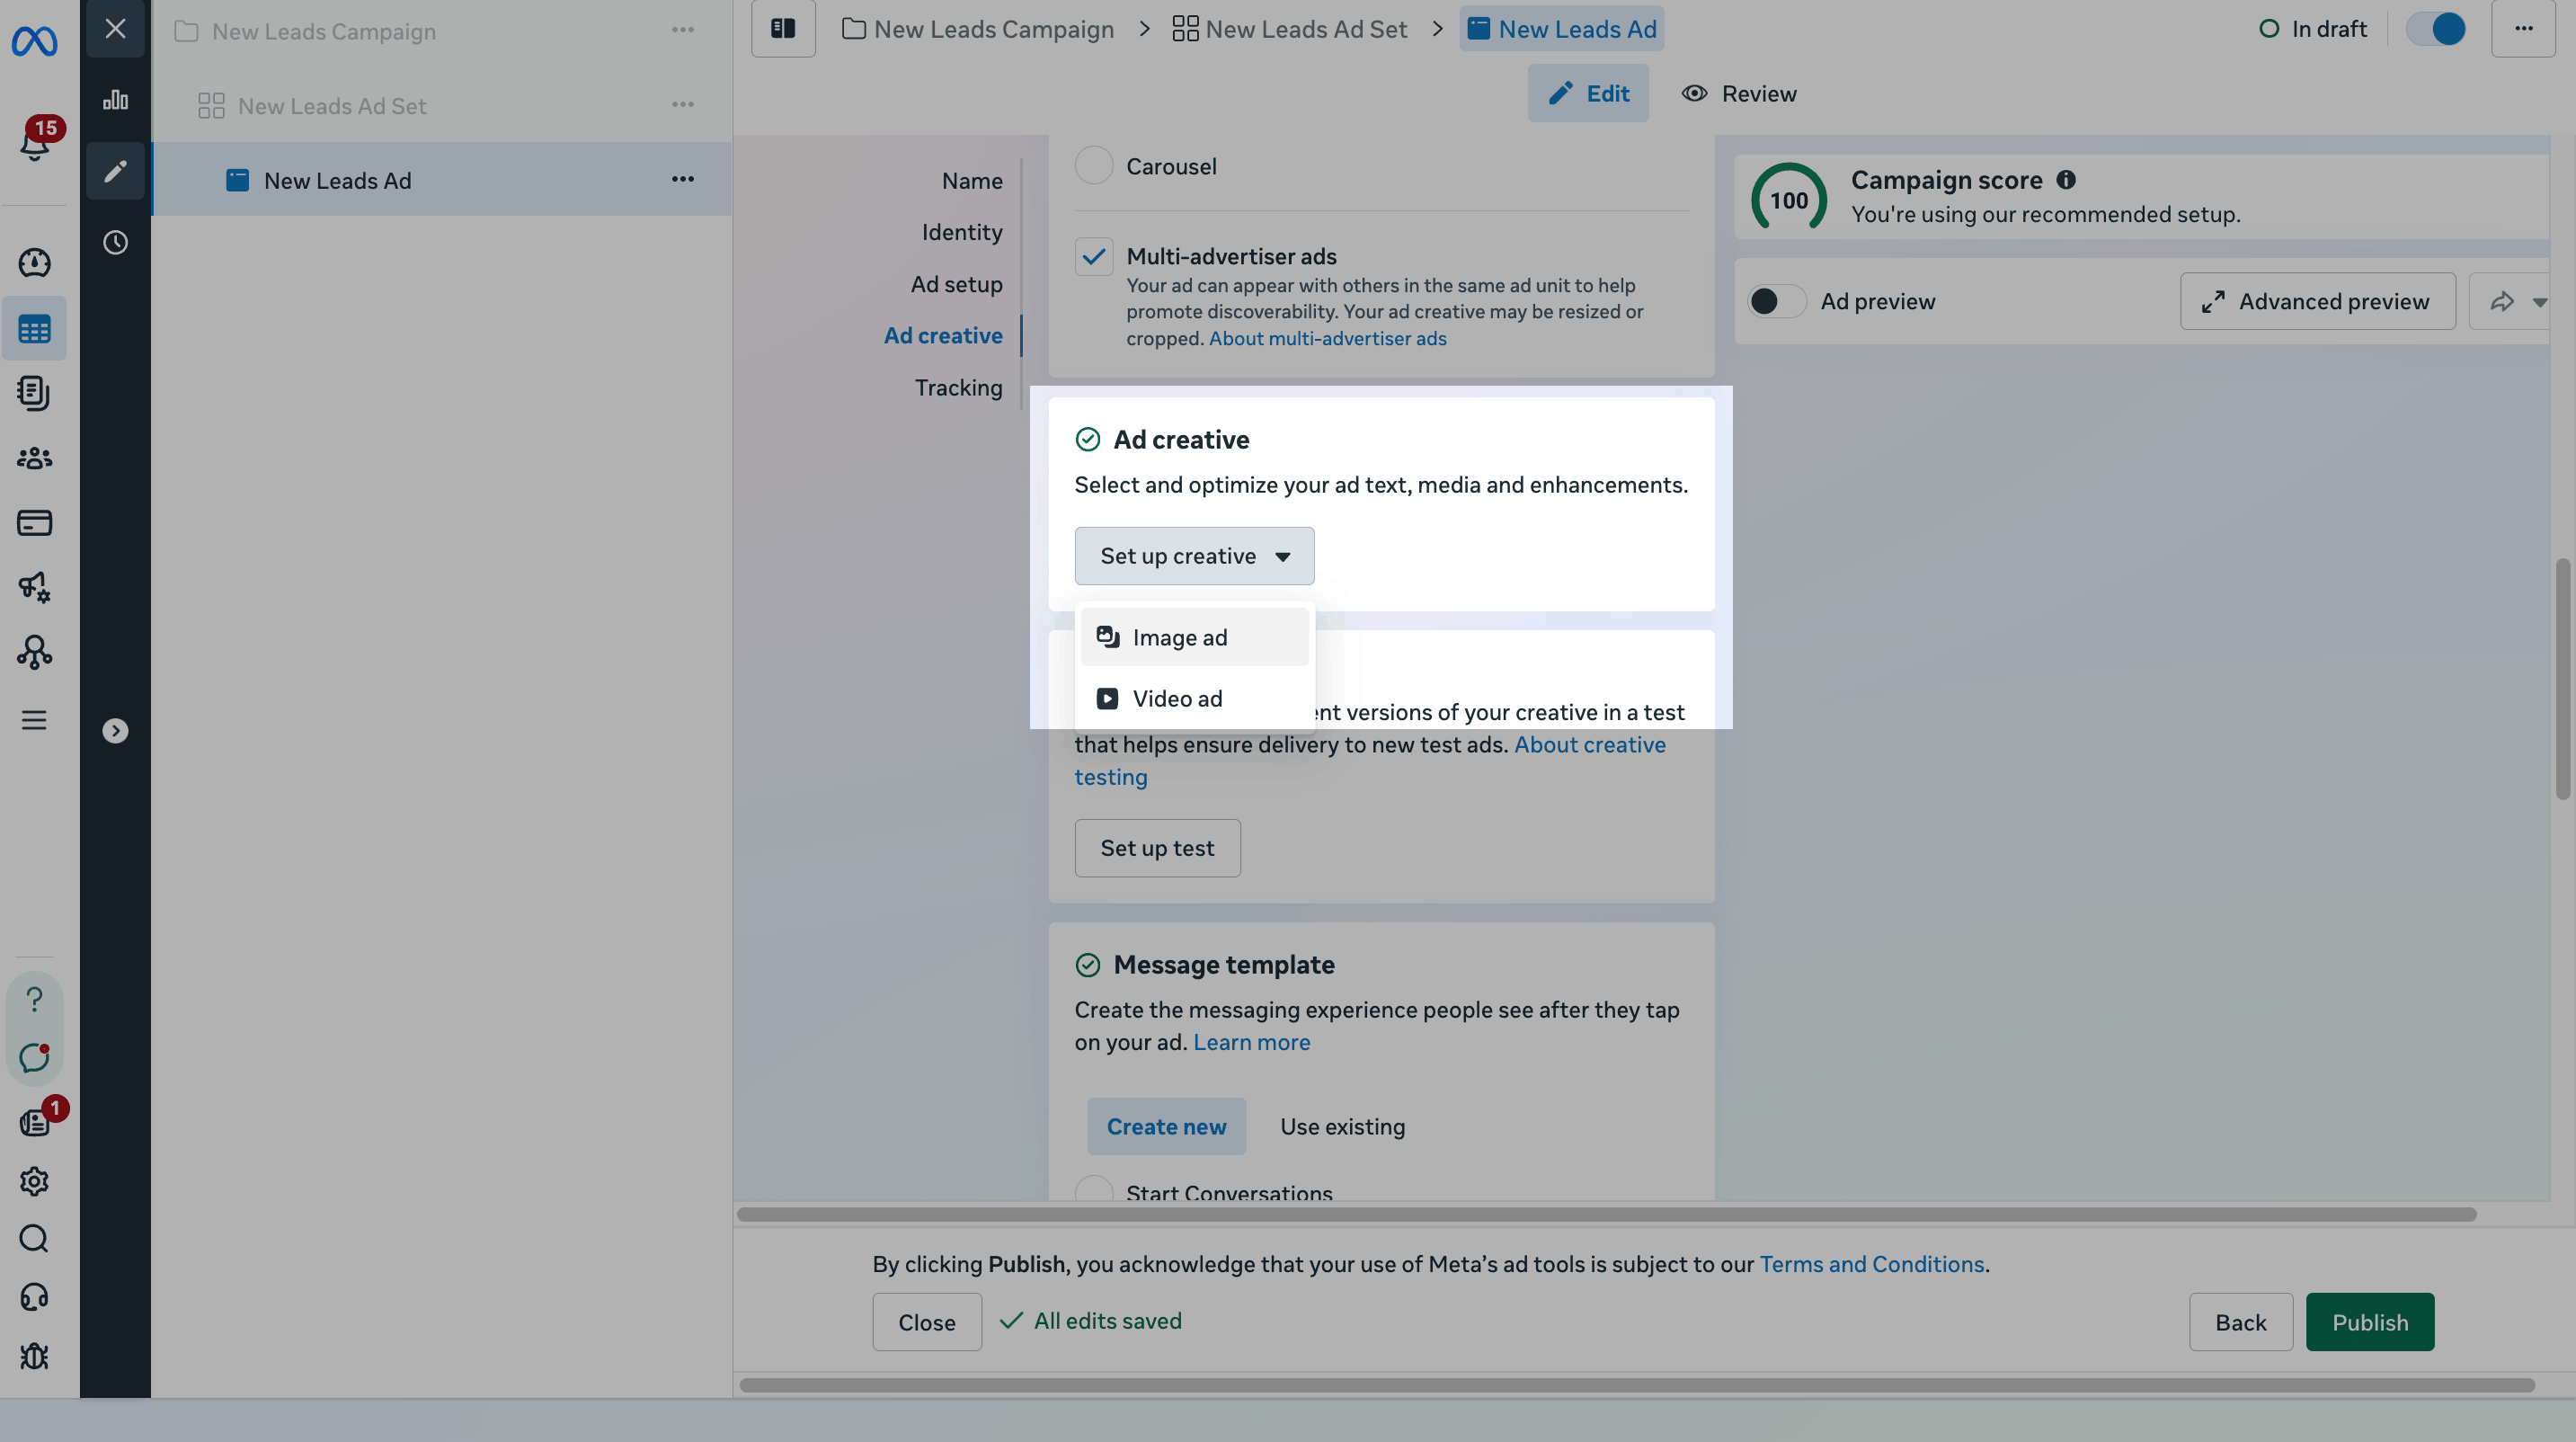
Choose a format
Click your ad tab. In the Ad setup section, choose a Format layout: Single image or video or Carousel. Optionally, enable Multi-advertiser ads to show your ad alongside other businesses in the same ad unit.
Meta is introducing Format display options in Ad creative to unify layout selection. Once this change reaches your account, the Format selector in Ad setup may move into Ad creative.
Then, in the Ad creative section, click Set up creative and select Image ad or Video ad.
Read more about ad formats: About image ads, About video ads, About carousel ads, and About Multi-advertiser ads.
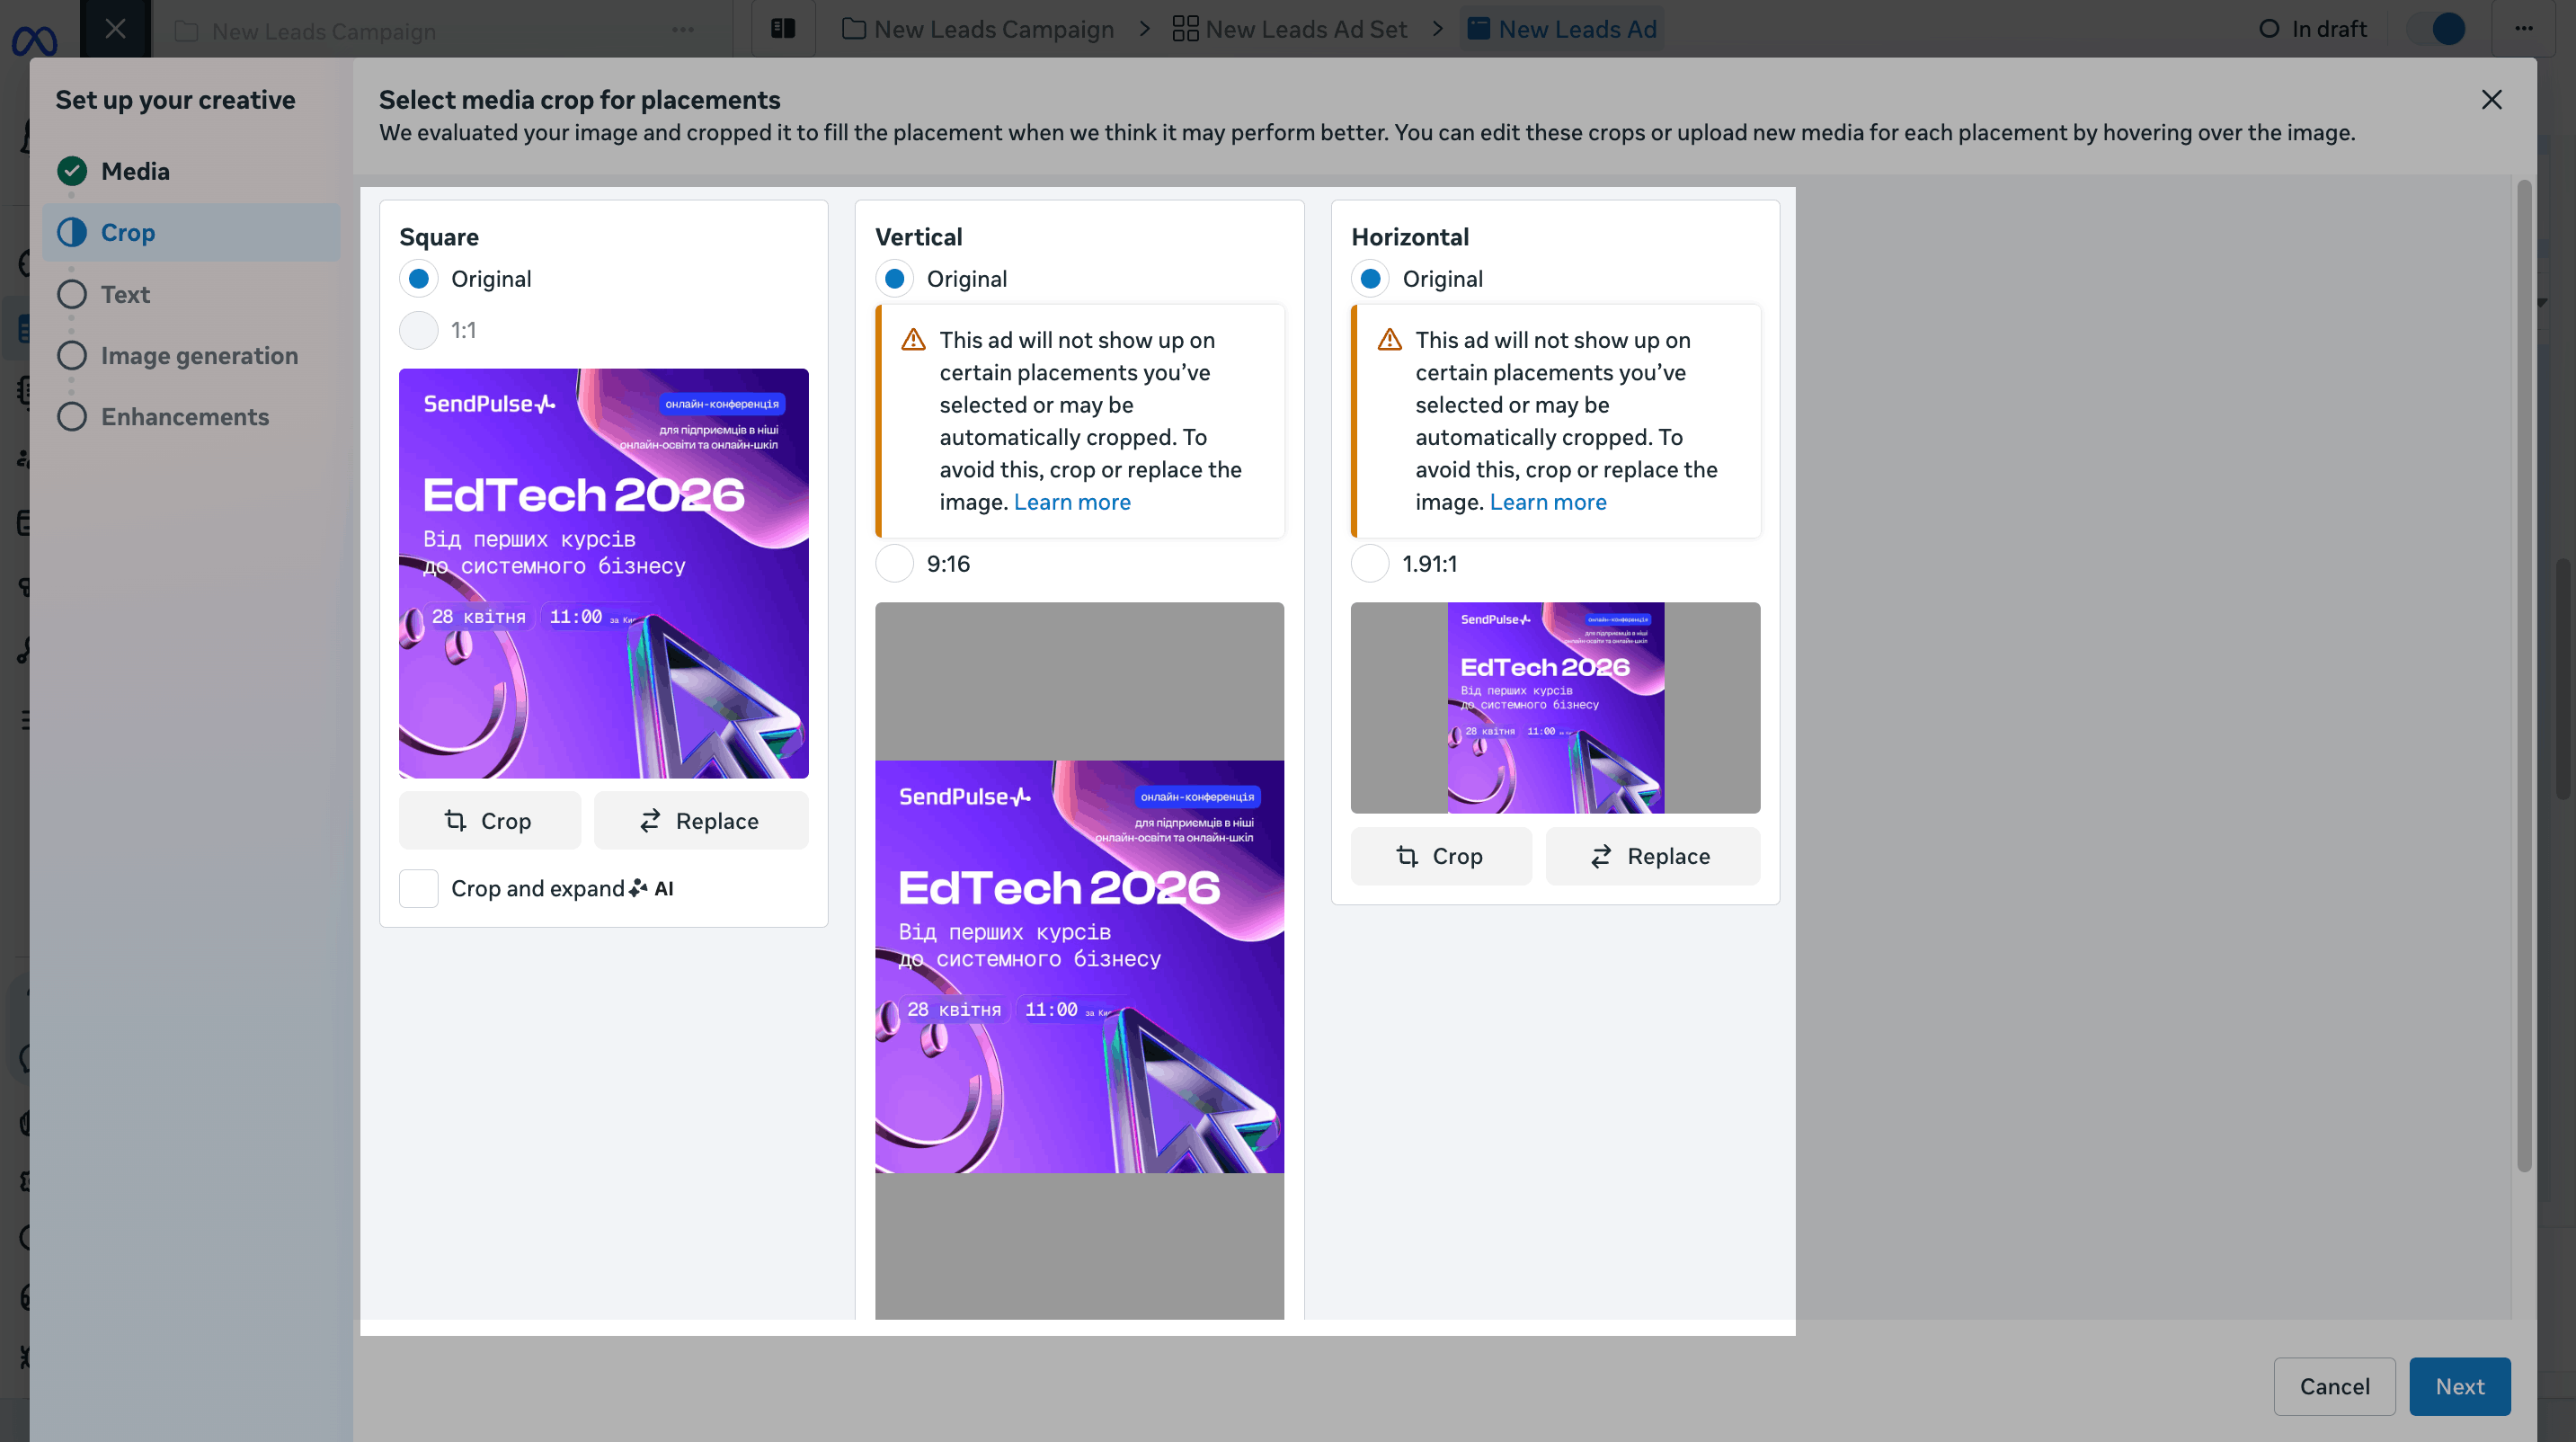
Add media
In the Set up your creative window, configure the following settings:
| Media | Upload an image or video, or select one from your account, Business Manager, Instagram account, or Page library. |
| Crop | View and adjust placement-specific crops. Options include: Square (1:1), Vertical (9:16), and Horizontal (1.91:1). Use Crop or Replace on a card to fix flagged placements. |
| Text | Add the Primary text, Headline, and optional Description. Choose a Call to action, such as Send WhatsApp message for WhatsApp ads. |
| Image generation (optional) | Enable Meta Advantage+ AI to generate image options for your ad. |
| Enhancements (optional) | Review AI-powered enhancements, such as Enhance media text, Translate text, Add overlays, and Visual touch-ups. Enable or disable them for each campaign as needed. |
Keep in mind that Stories and Reels require a Vertical crop (9:16). If you don't select it, Meta may automatically crop or hide your ad in these placements.
Read also: On customizing creatives for different placements and Call to action buttons available for different purposes.
Create a message template
To create a message template for users who click your ad, in the Message template section, choose how subscribers reach your chatbot, then click Create.
You can choose from the following message template options:
| Start Conversations (recommended for chatbot flows) | Redirects users to a WhatsApp conversation with your business. Users see a welcome message and a pre-filled message they can tap to send. |
| Collect info with a form in WhatsApp | Asks users to fill out a short sign-up form before the conversation starts. Once they submit it, they are redirected to WhatsApp. |
| Partner app | Uses an existing flow from your SendPulse-powered chatbot. |
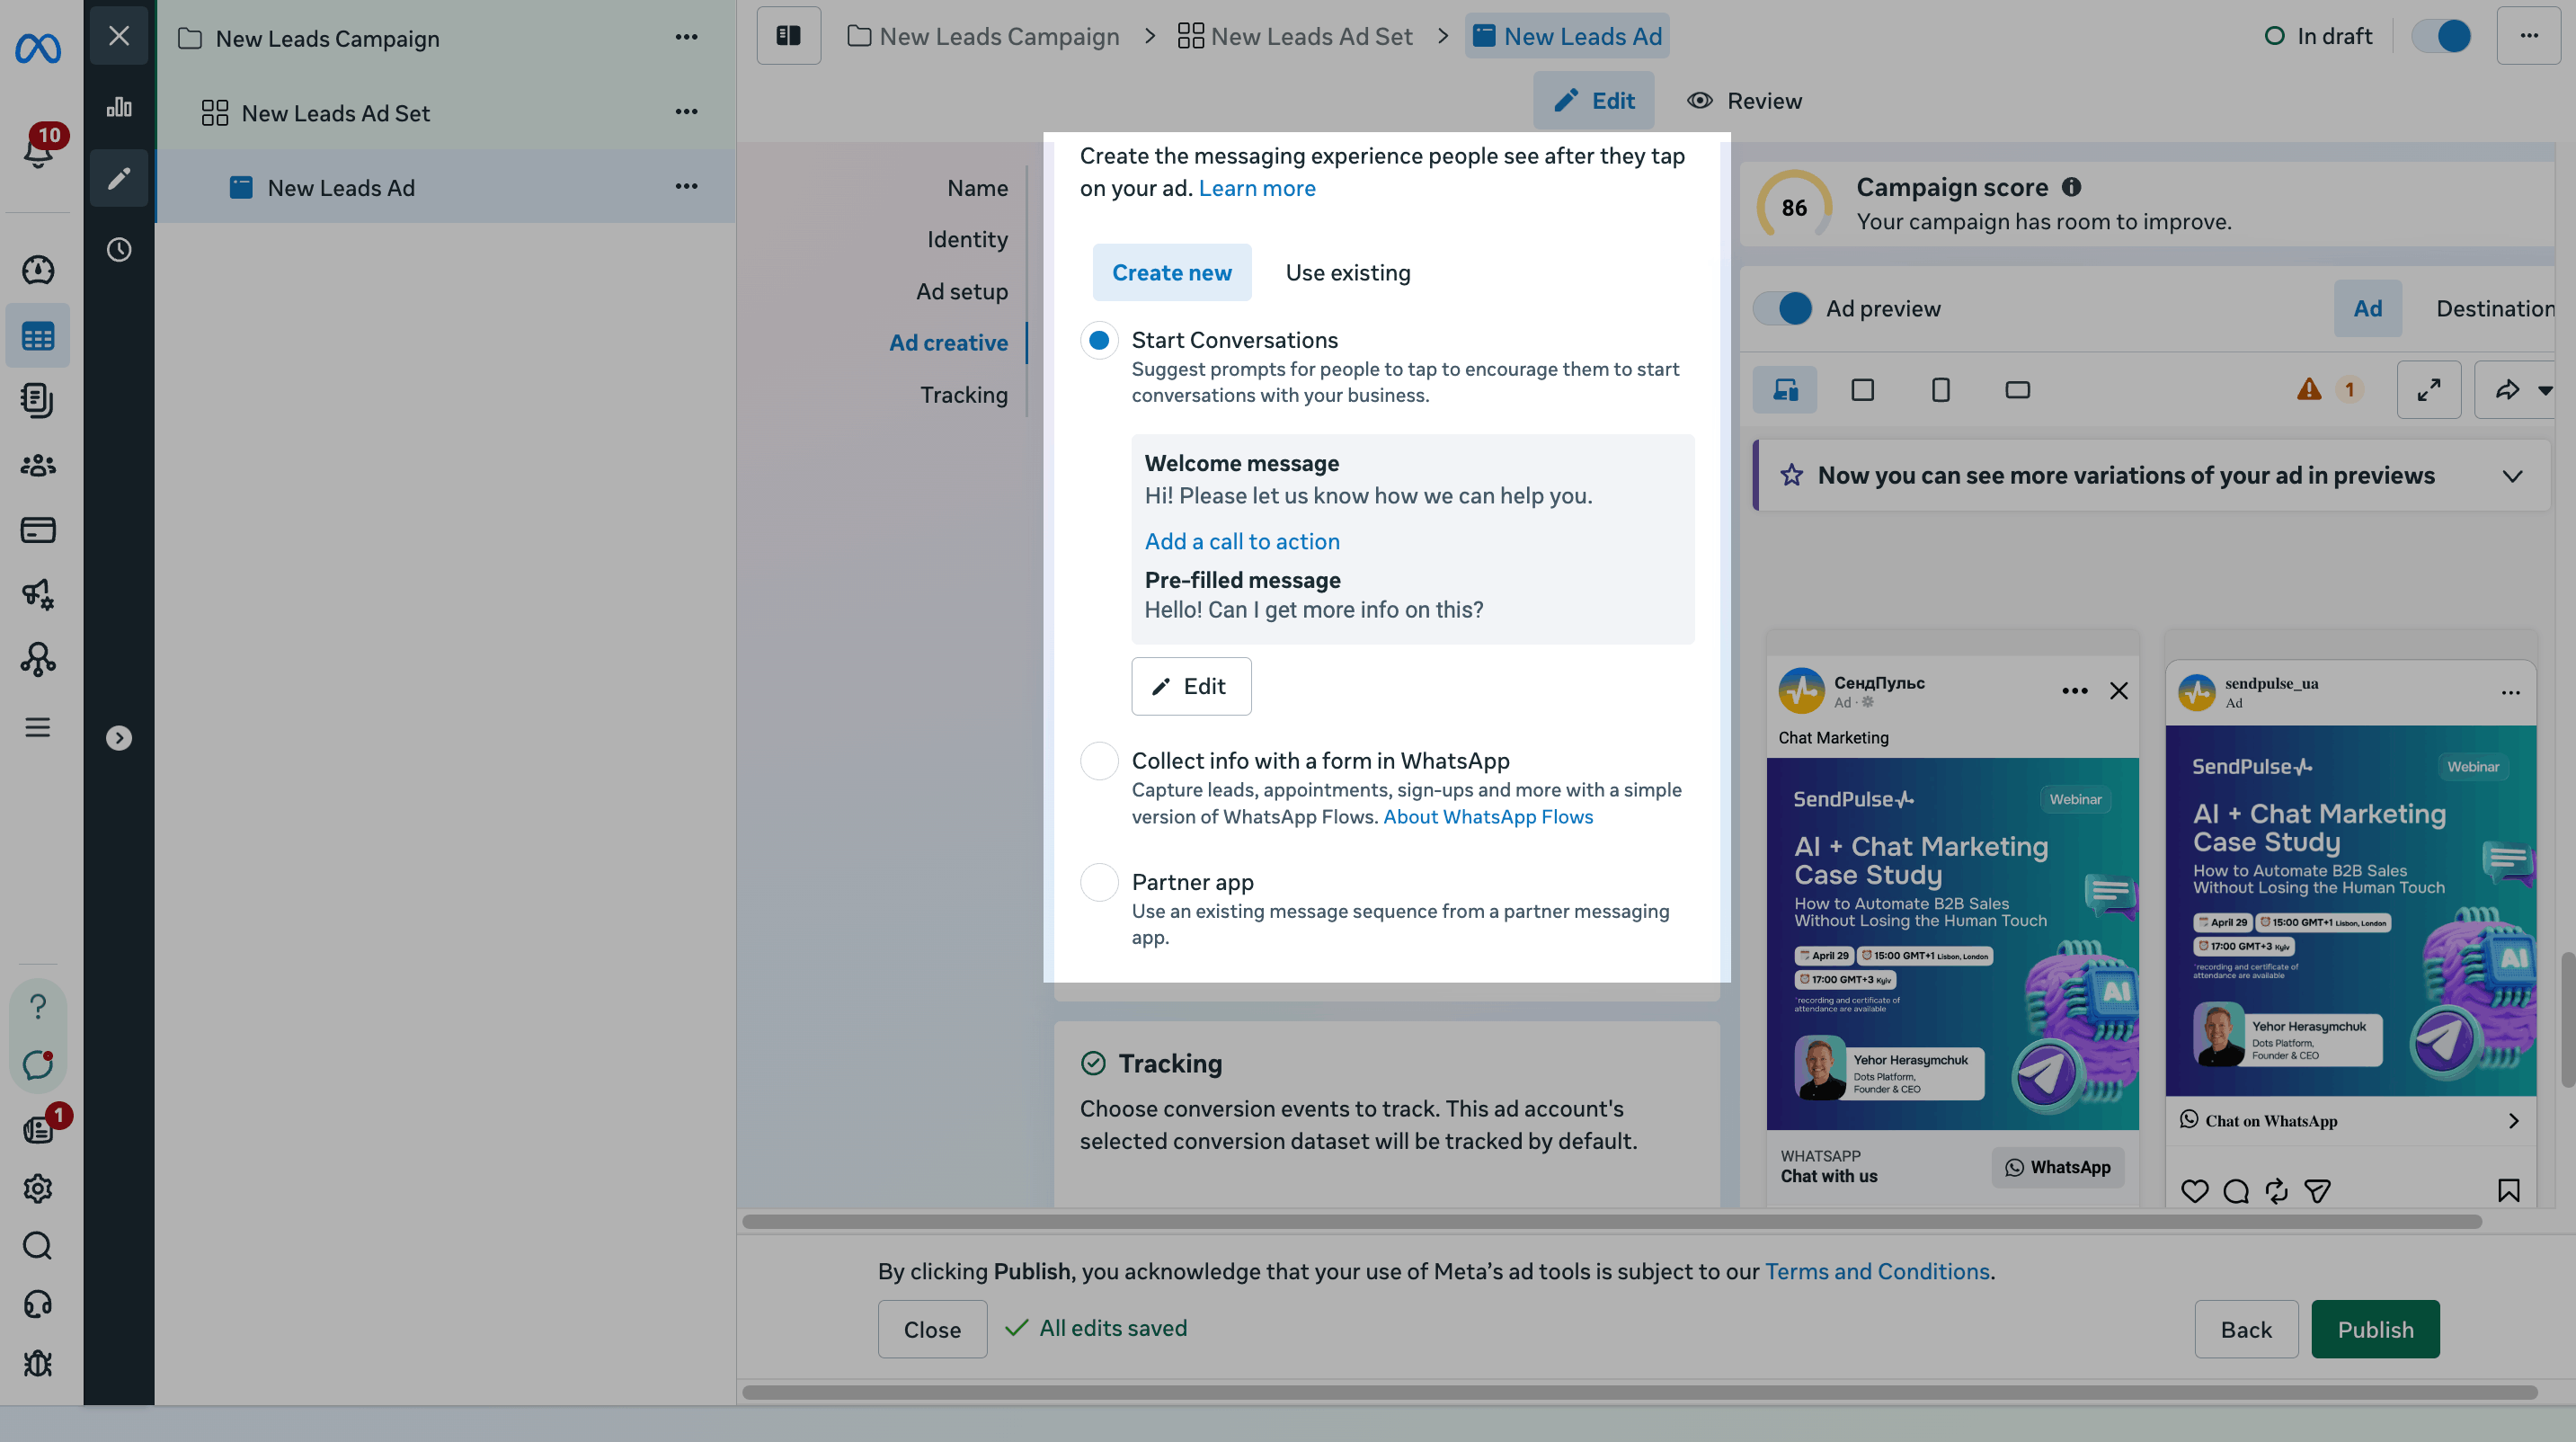
If you use a chatbot flow, keep Start Conversations selected and click Edit to customize the template.
In the Edit template dialog, fill in:
| Set up your welcome message | Add an automated message that users see after tapping your ad. Options include: Text — an automated greeting. Call to action — a button that encourages users to complete an action, such as purchasing, opening a link, or subscribing. |
| Suggest messages or questions people can send | Suggest relevant messages. Options include: Pre-filled message (recommended for chatbot flows) — a customizable first message users send with one tap. The message text is sent exactly as written, helping chatbot triggers work reliably. Frequently asked questions — a list of tappable suggestions, up to 80 characters each. |
| Template name | Set an internal name to find and reuse the template later. |
To run a chatbot flow, make sure your FAQs include the keywords set as triggers that start the matching flow in your chatbot.
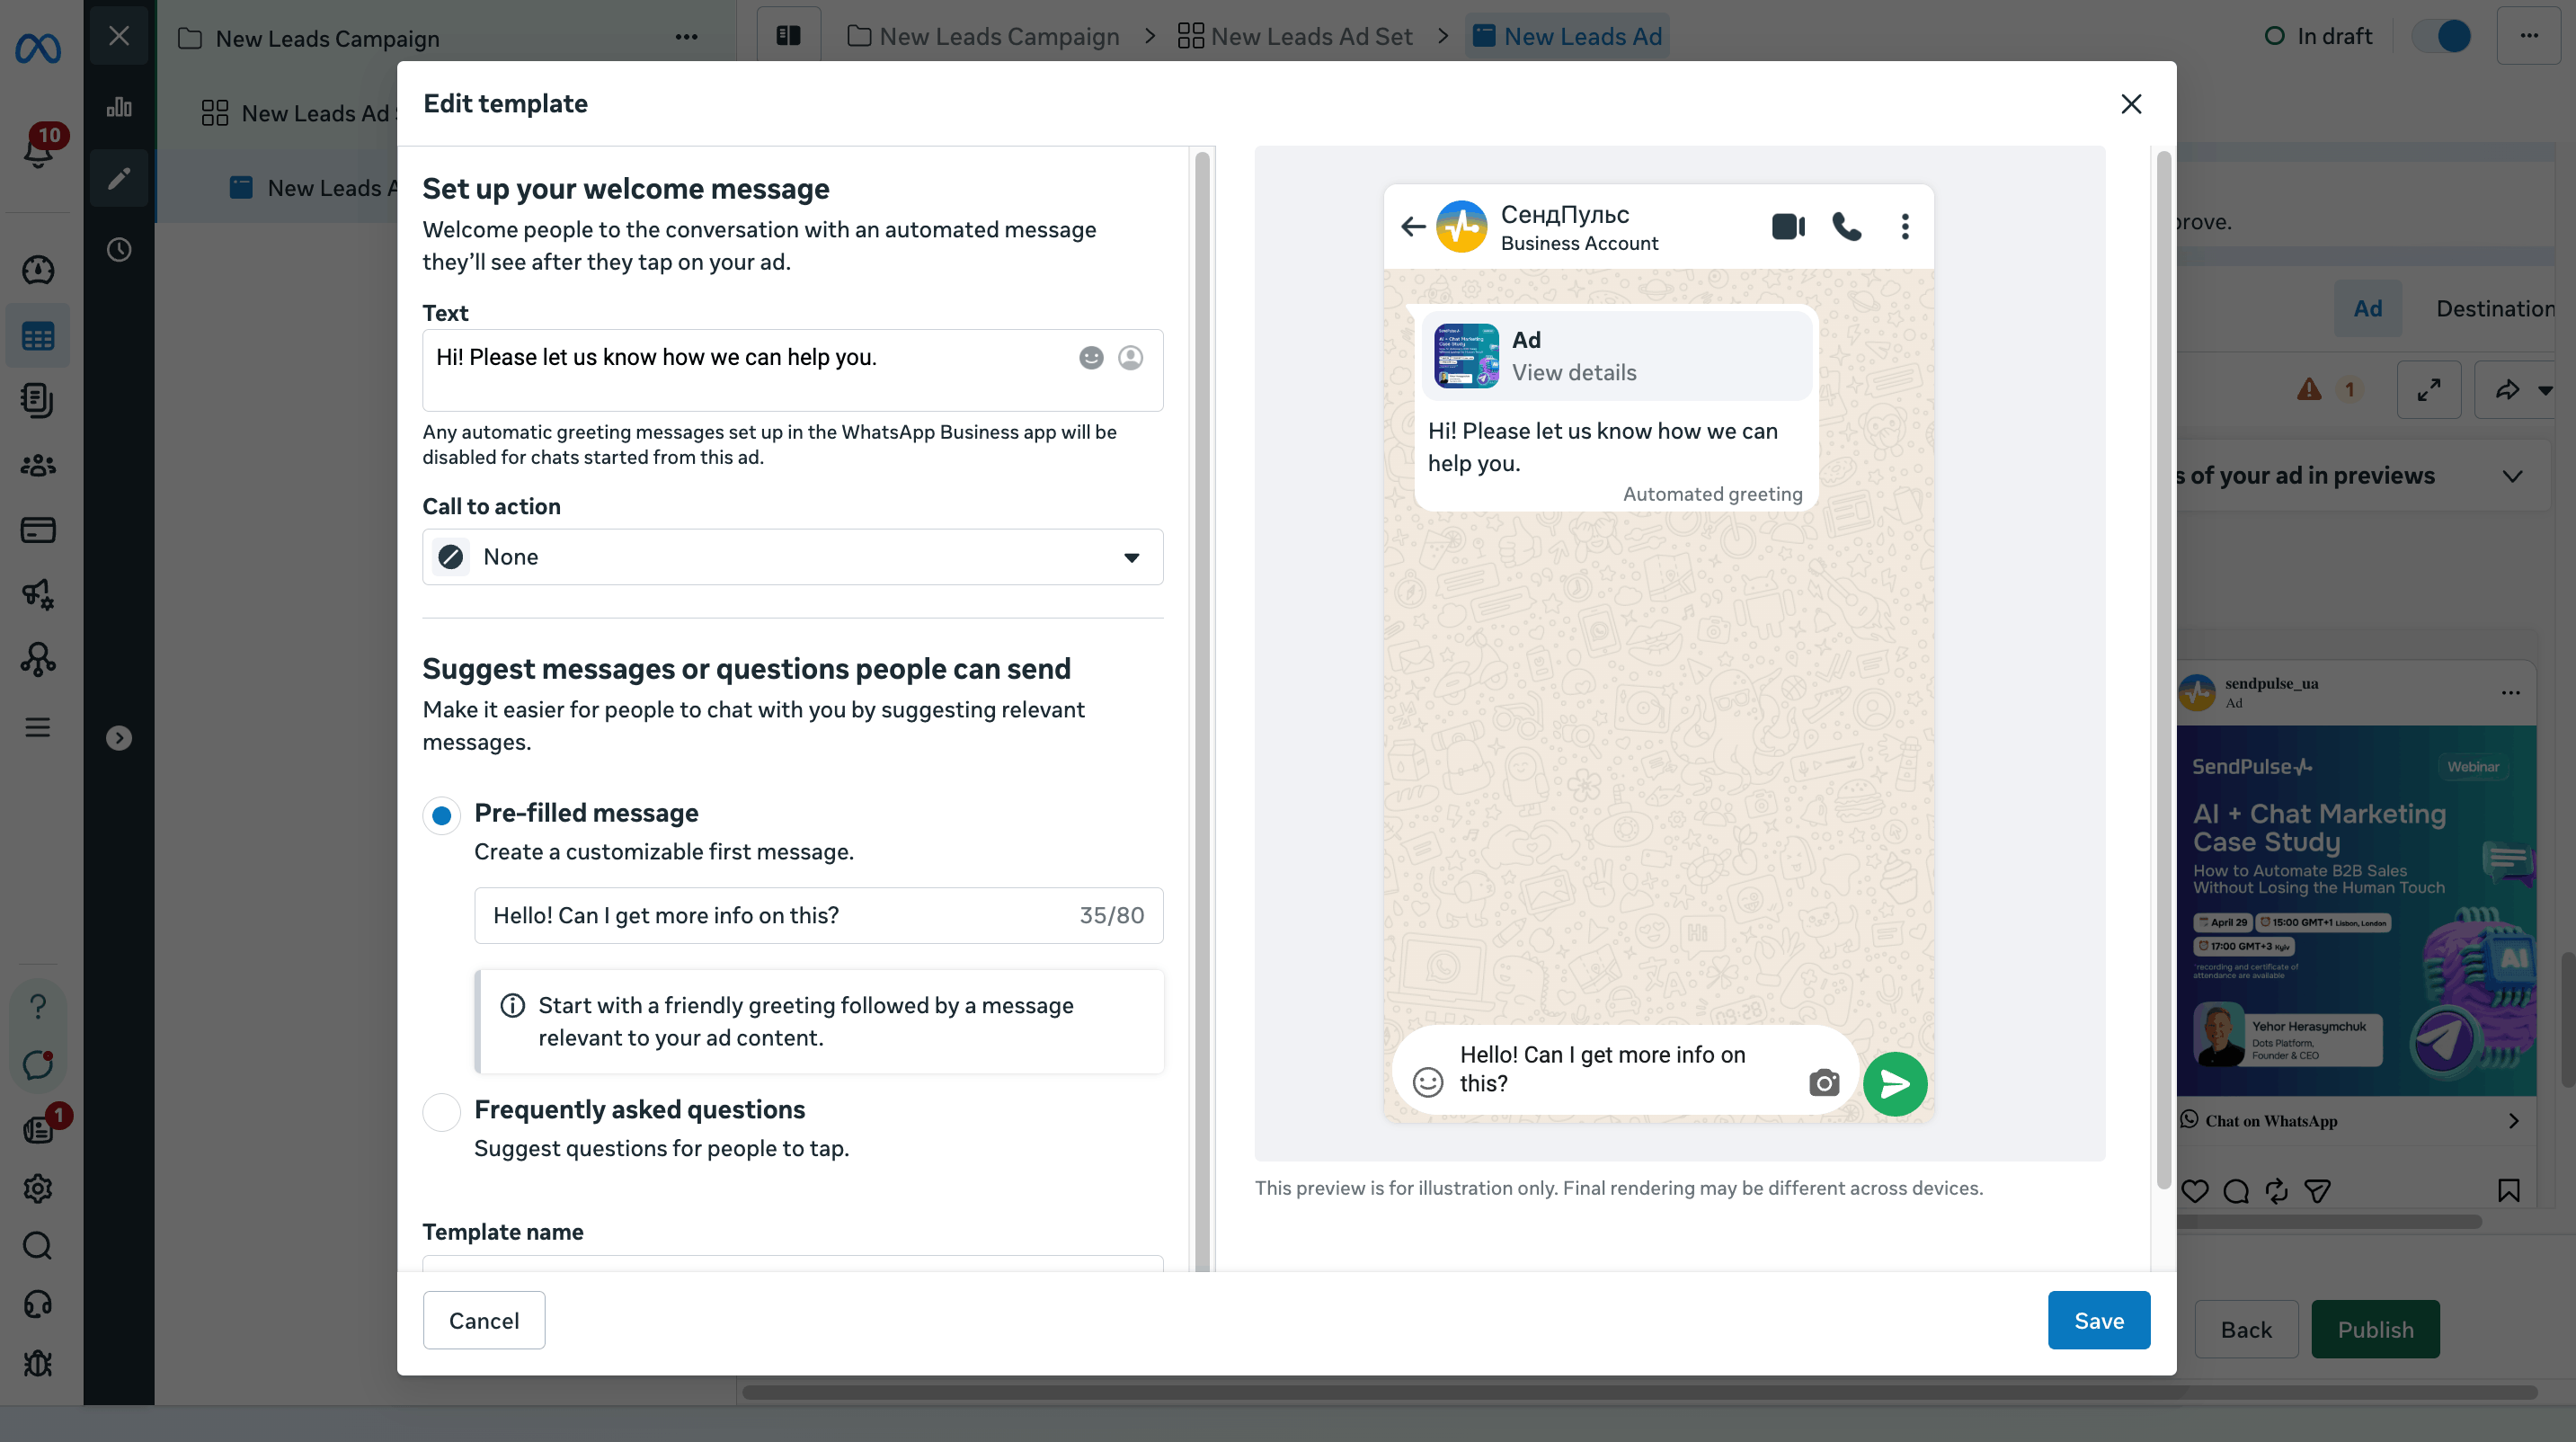
Click Save. Then, click Publish to submit the ad campaign for review.
Once published, your ad is marked as Pending review while Meta reviews it against its advertising policies. This review typically takes a few hours, but delays of up to 24 hours are possible during peak load times.
Your ad starts running automatically once it's approved.
Start a chatbot conversation via your ad
When users see your ad based on the chosen placement and click on it, they will see the list of FAQs you set up. Then, users will select the question they want to ask and send it to WhatsApp, which will trigger a specific chatbot flow.
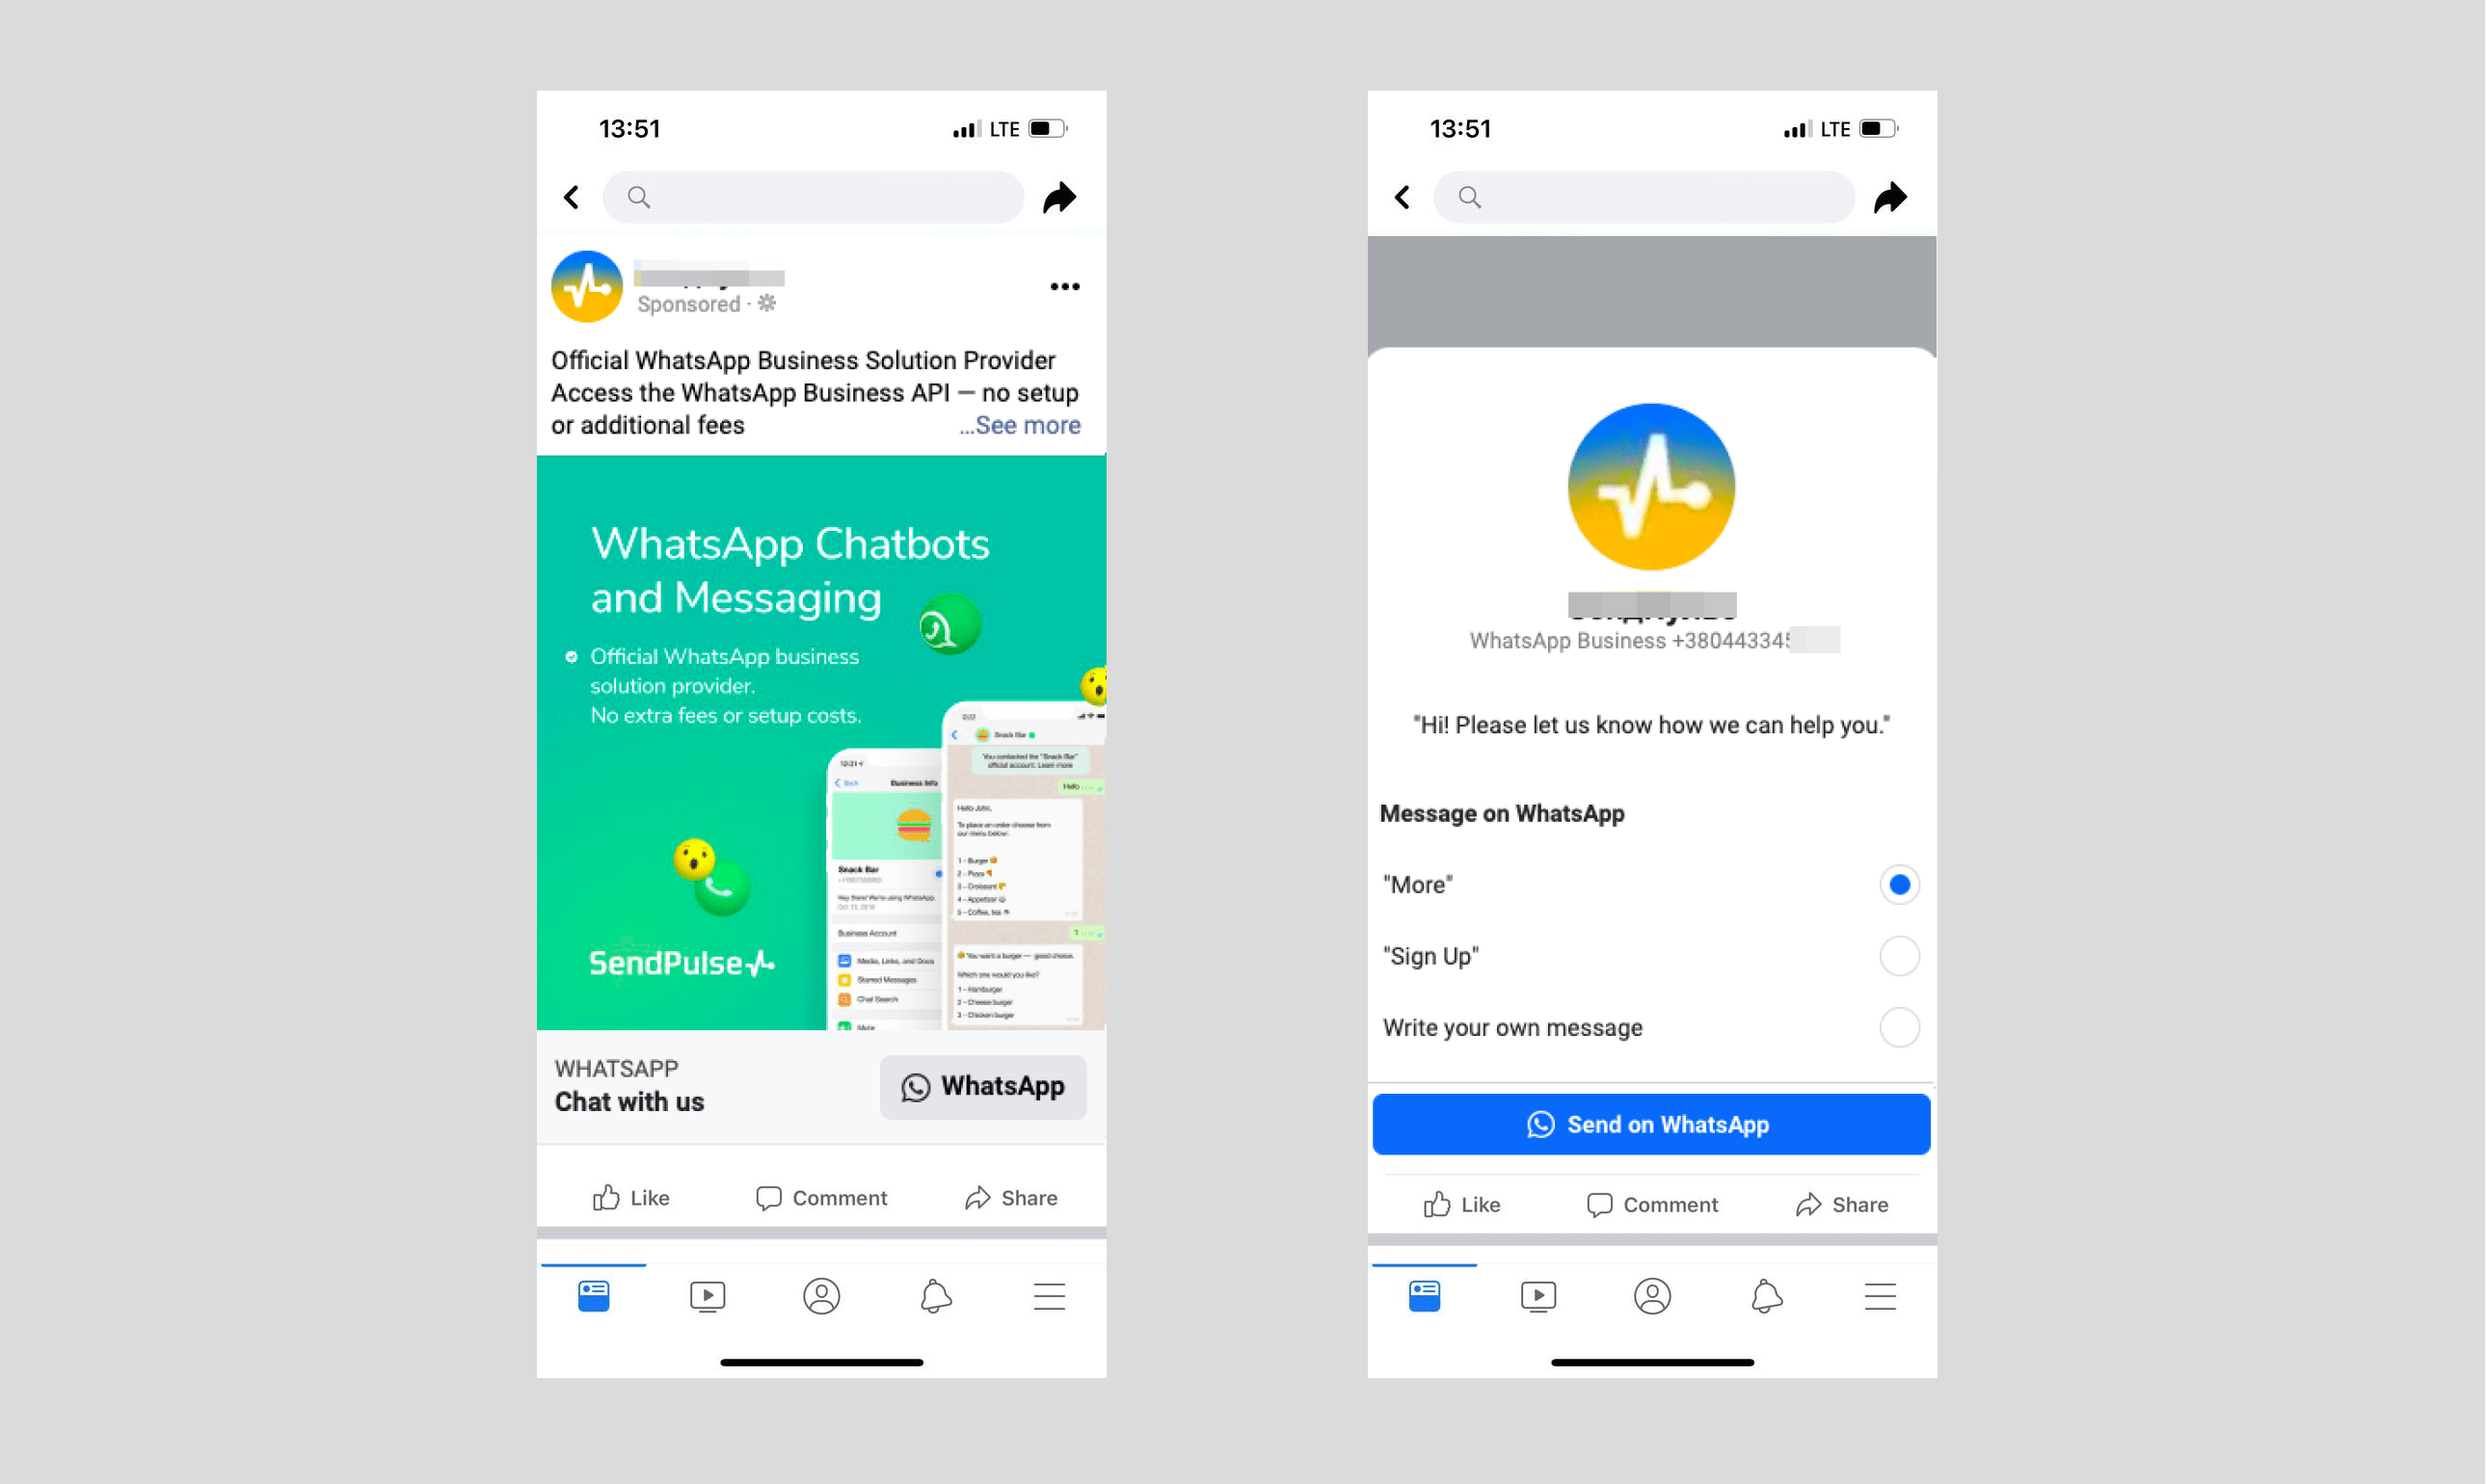
In chats, you will see the name of the last ad to which your subscriber replied. The message will contain a link to this ad.
Optimize your campaigns with the Conversions API
To improve Meta ad optimization, enable Conversions API on the Integrations tab of your WhatsApp chatbot. SendPulse will send conversion events, such as subscriptions, form submissions, and purchases, to Meta. This helps Meta optimize ad delivery, reach users more likely to convert, and improve cost-per-result reporting accuracy.
The Conversions API is essential if you choose the Sales campaign objective with multiple conversion locations, such as WhatsApp and Messenger. Without conversion events flowing back to Meta, Sales optimization can't work properly.
For the Leads objective, the Conversions API is required if you want to optimize for the Maximize number of leads through messaging performance goal.
For other objectives, such as Engagement and Traffic, the Conversions API is recommended but optional.
Track ad performance
Track in Meta Ads Manager
Go to Campaigns, and select a campaign from the list.
You will be able to view your campaign results, estimated audience size, the number of impressions, the cost per result, and the amount of money spent.
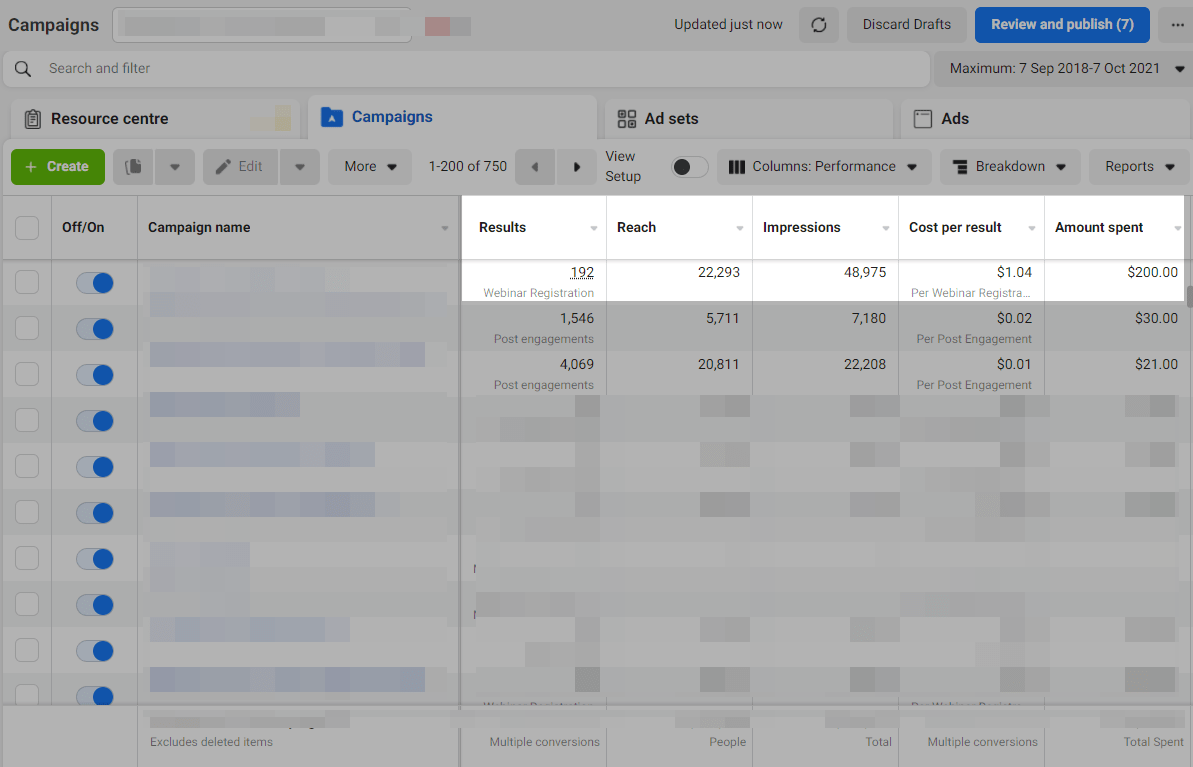
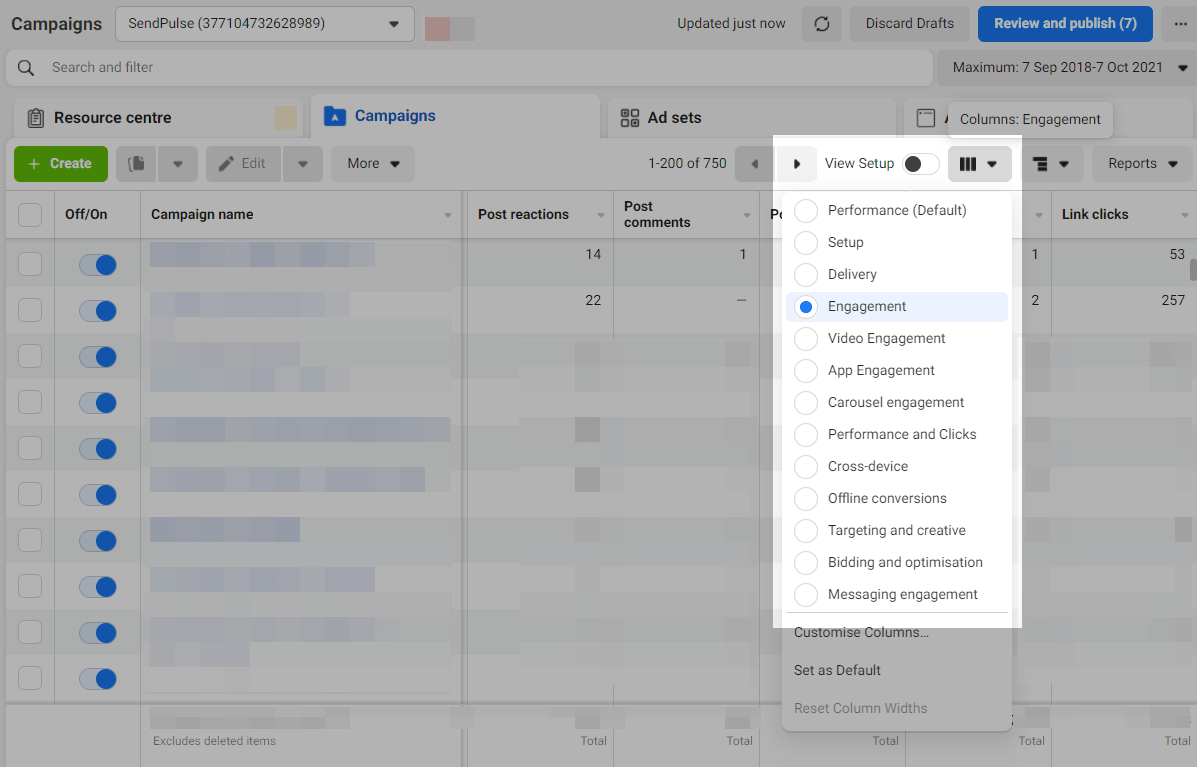
You can also view more statistics, for example, statistics on user engagement and reactions. Click Columns: Performance, and select a metric.
Read also: How to use ad relevance diagnostics.
You can also use filters to segment data in reports and define target audiences more effectively. You can segment your audience by age and analyze your ad performance by location.
Track in SendPulse
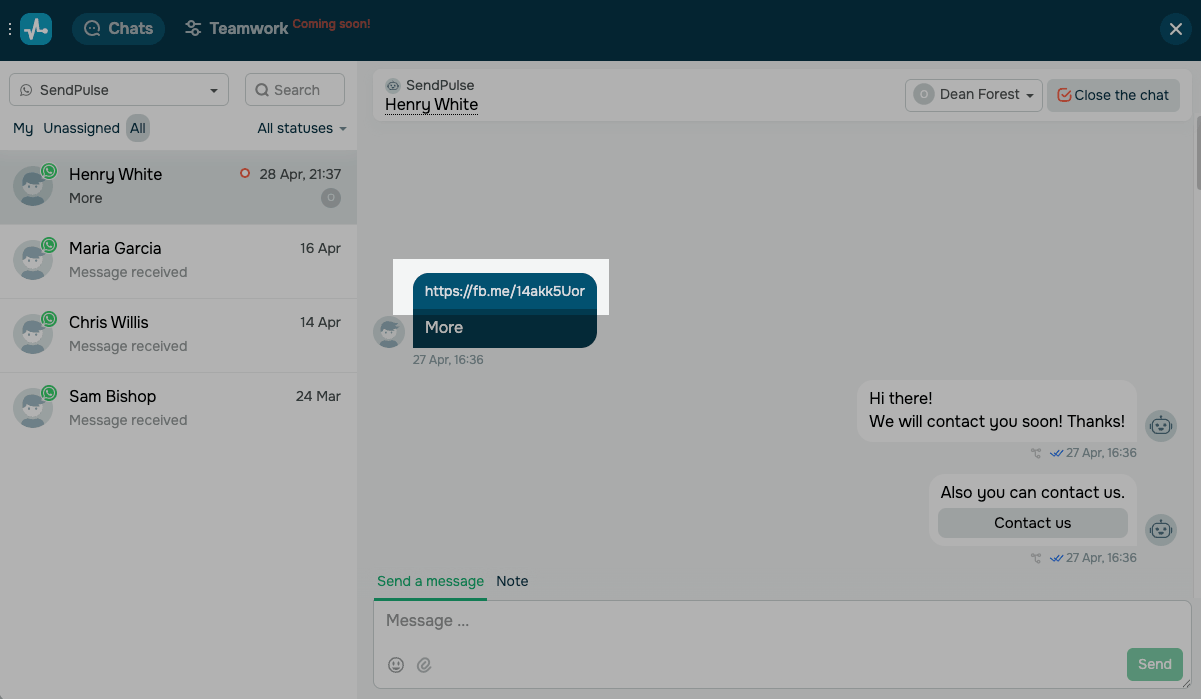
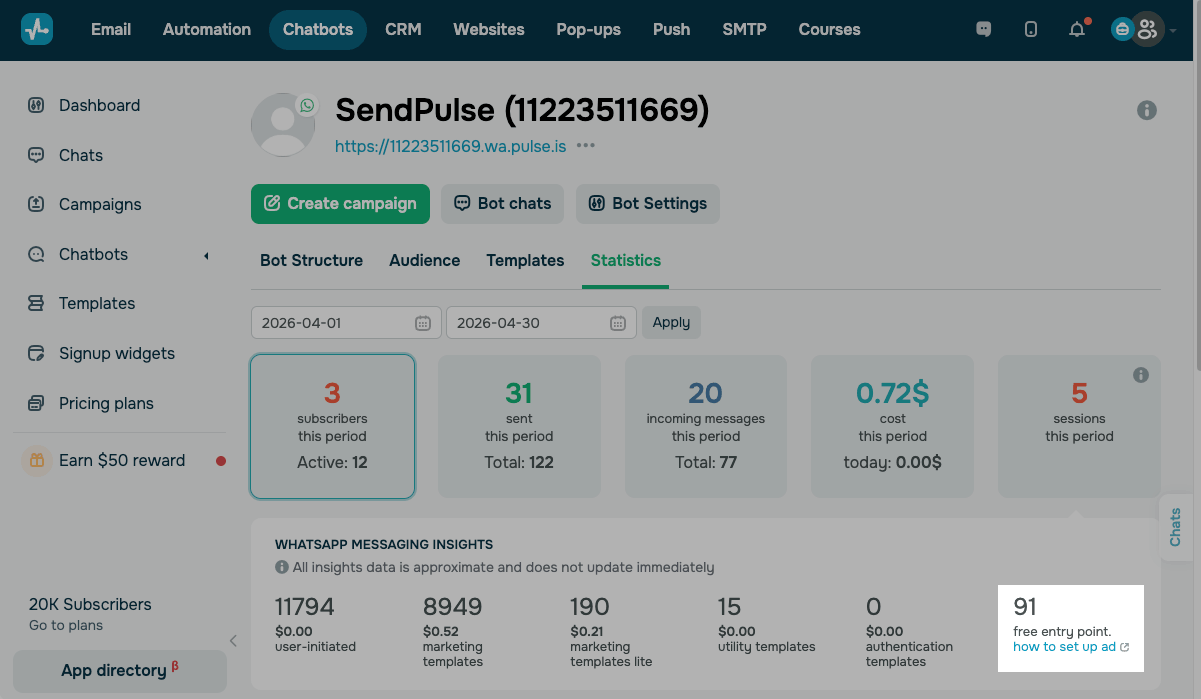
Statistics on chatbot conversations started after users clicked your ad link are available in your SendPulse account on the chatbot statistics page.
Resolve the “Conversation option is unavailable” error
Select the Traffic objective when creating your ad.
If you see the Conversation option is unavailable error in Meta Ads Manager, make sure your phone number in the WhatsApp Business API is connected to your Facebook Page. Then, check if your ad account has geographic or policy restrictions for Click-to-WhatsApp ads.
If reconnecting the phone number doesn't resolve the issue, as a workaround, select the Traffic objective and choose WhatsApp as the conversion location. Then, customize your ads.
Last Updated: 29.01.2025
or