Create an Automation that starts on a special date
With SendPulse, you can send automated messages to subscribers on special dates specified in your mailing list. Send automations on your subscribers' birthdays, webinar dates, customer registration anniversaries, or first order dates.
Create a variable
First, make sure that you have created a variable using the Date type in your mailing list.
If there is no such variable, create it. To do this, go to the Mailing Lists section, and click Create variable.
Enter your variable name, and select the Date type.
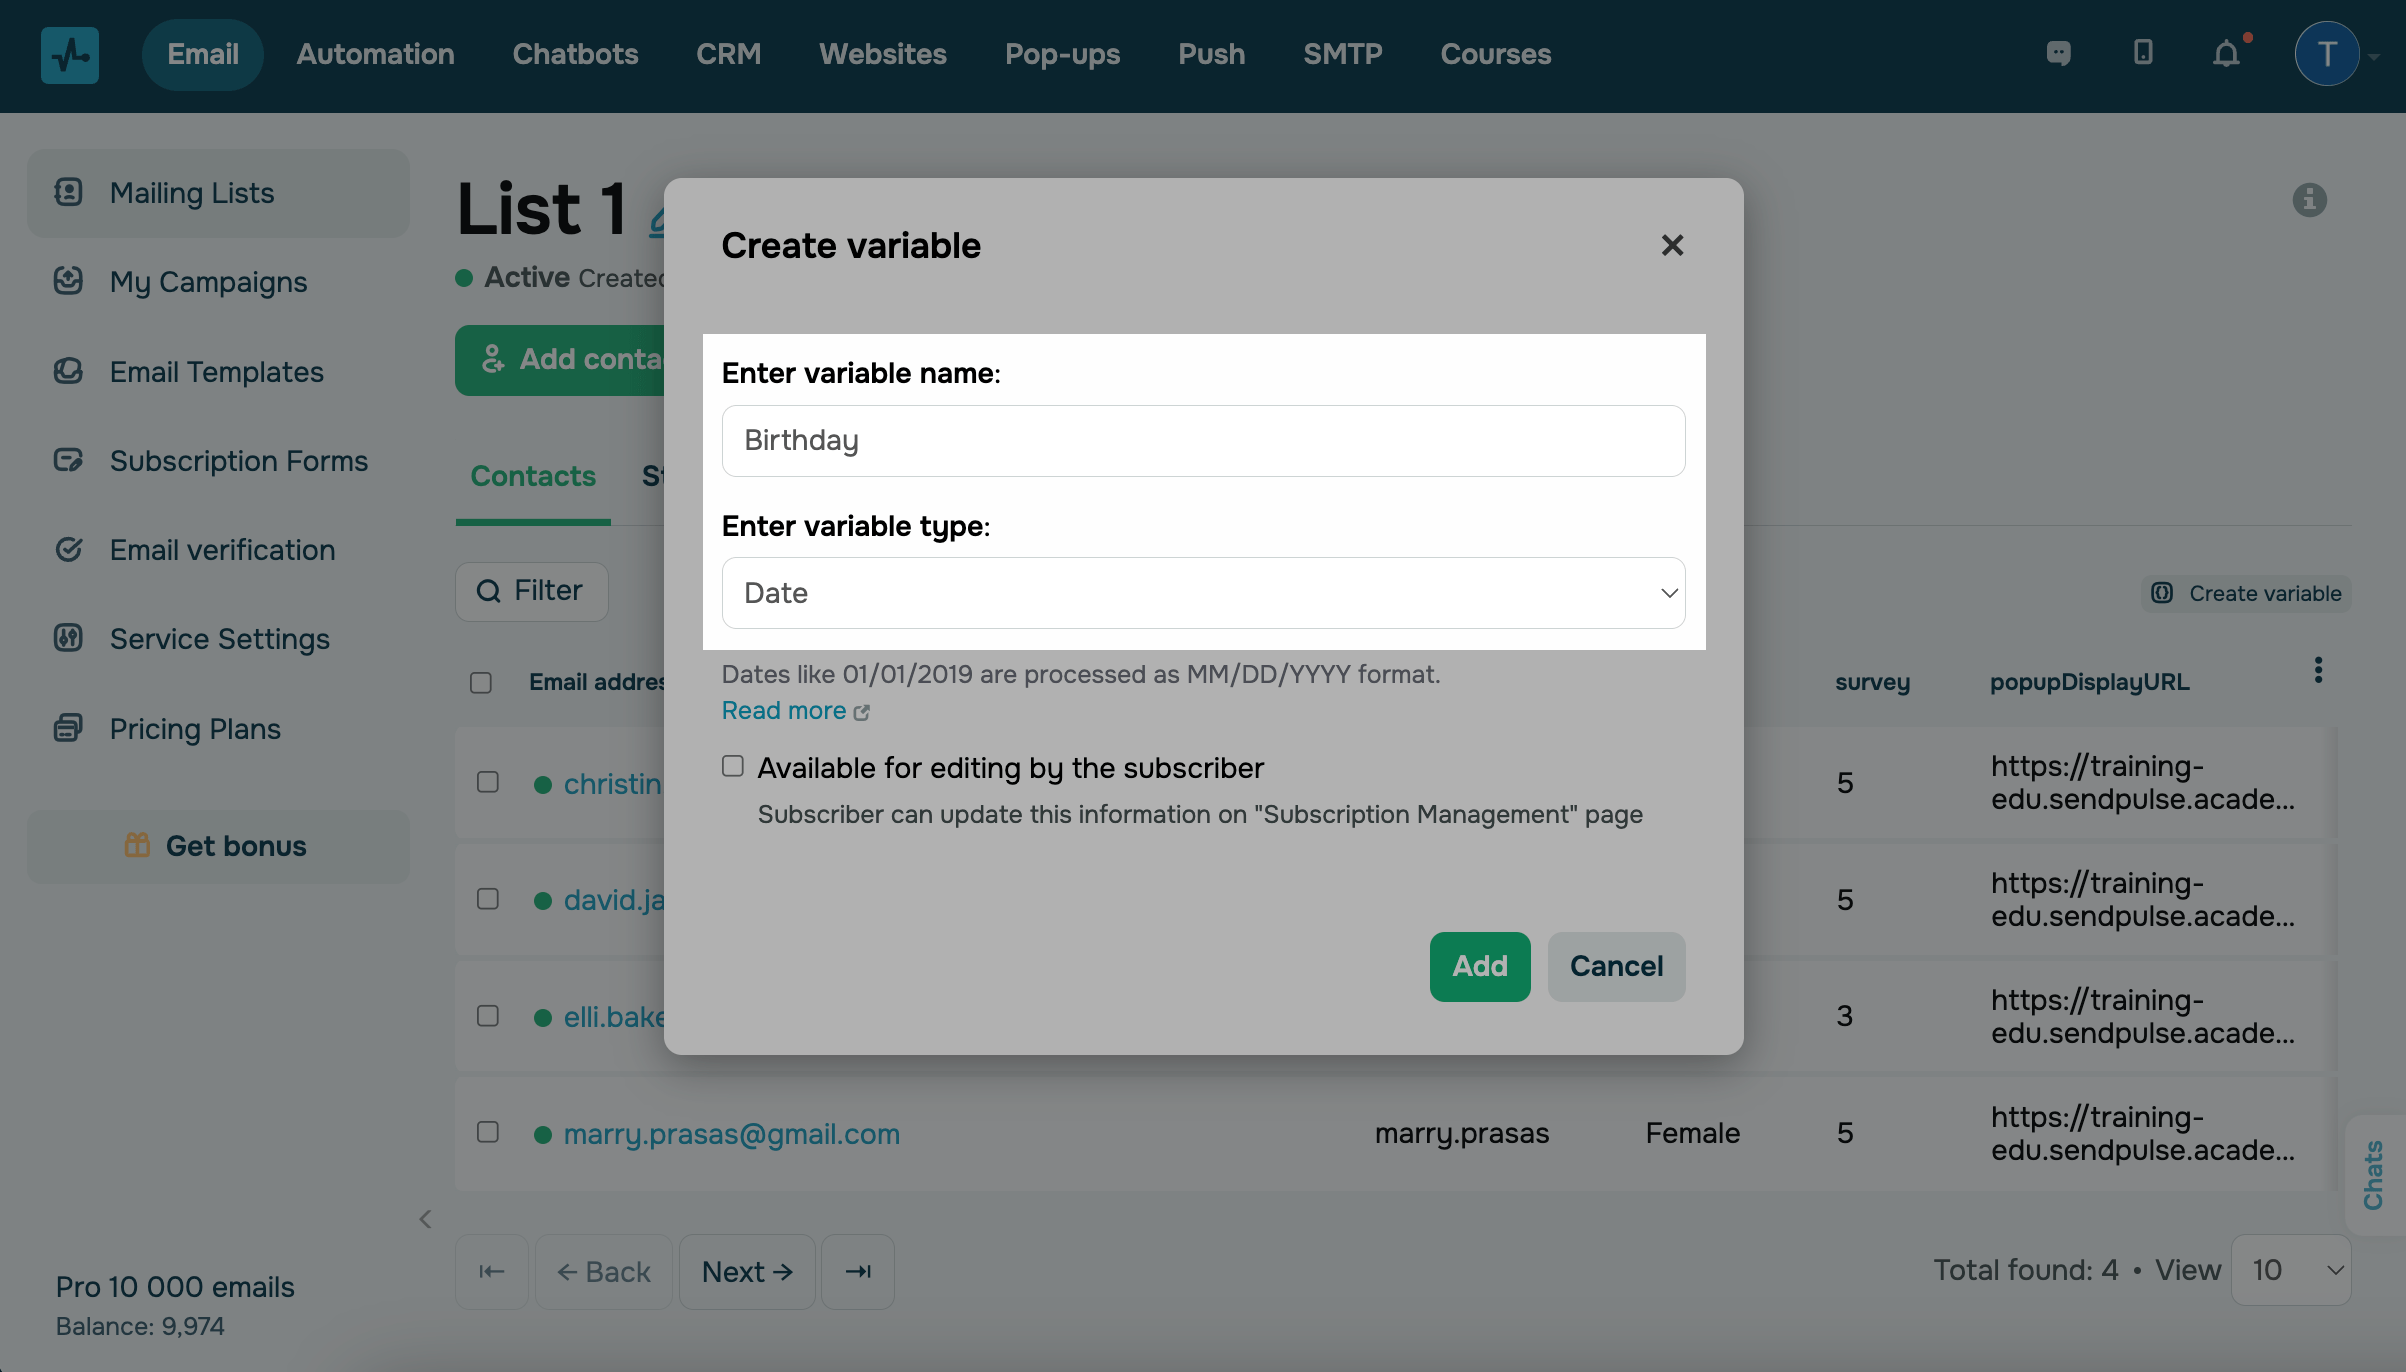
Click Add.
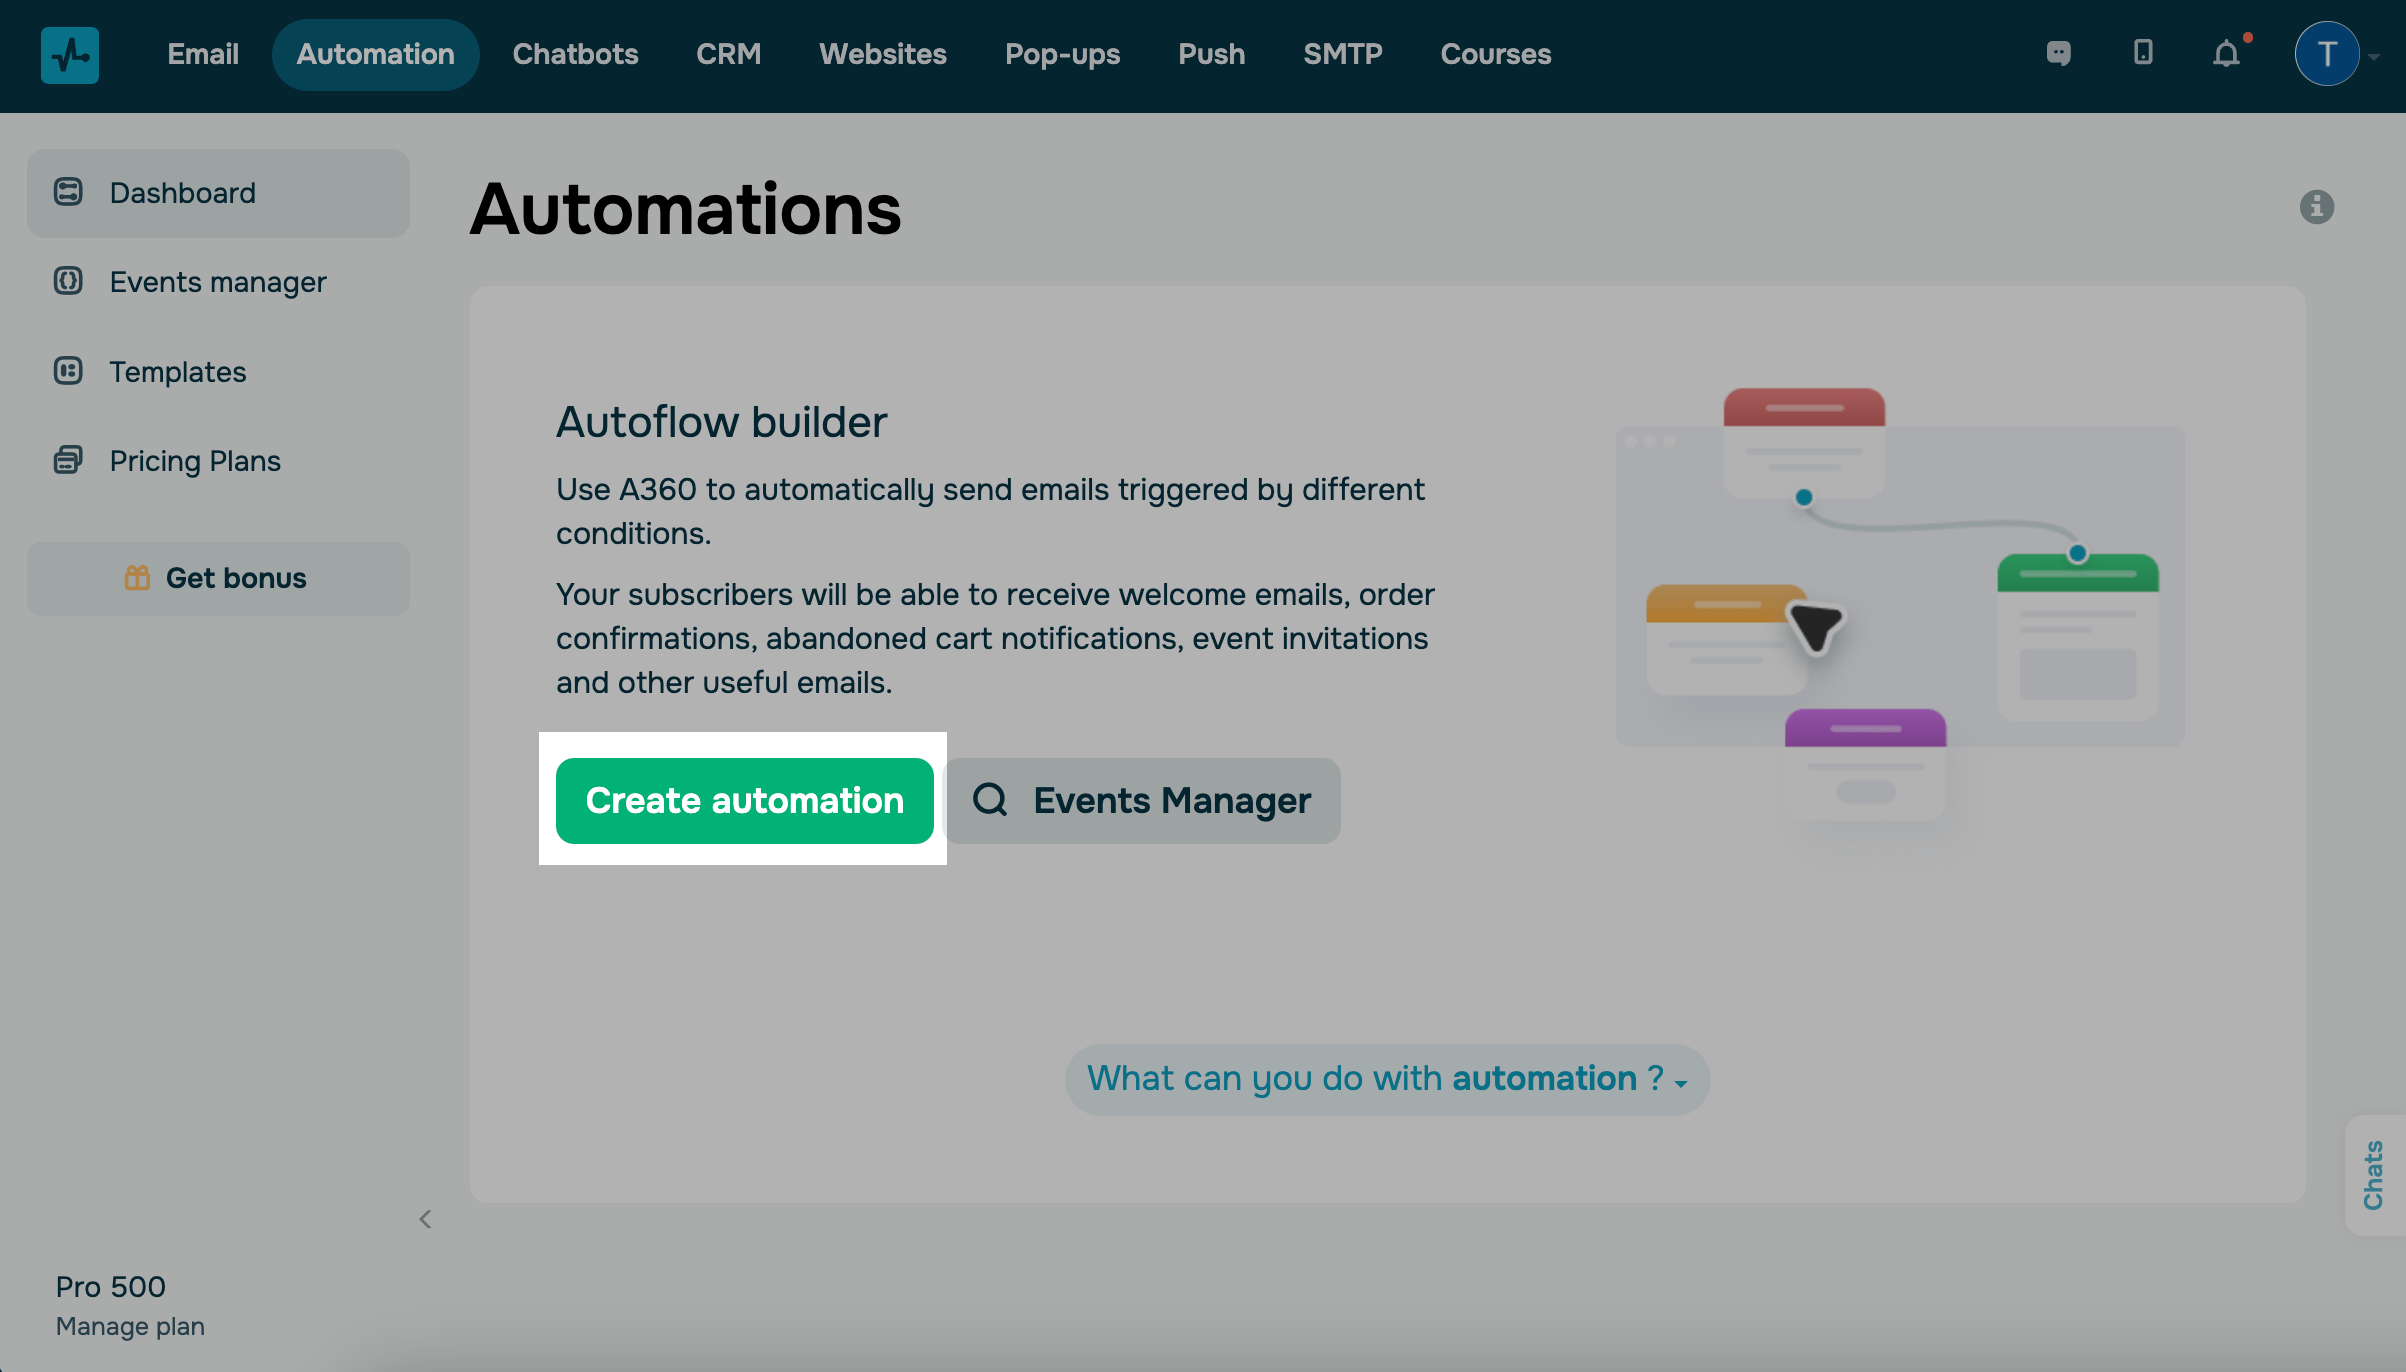
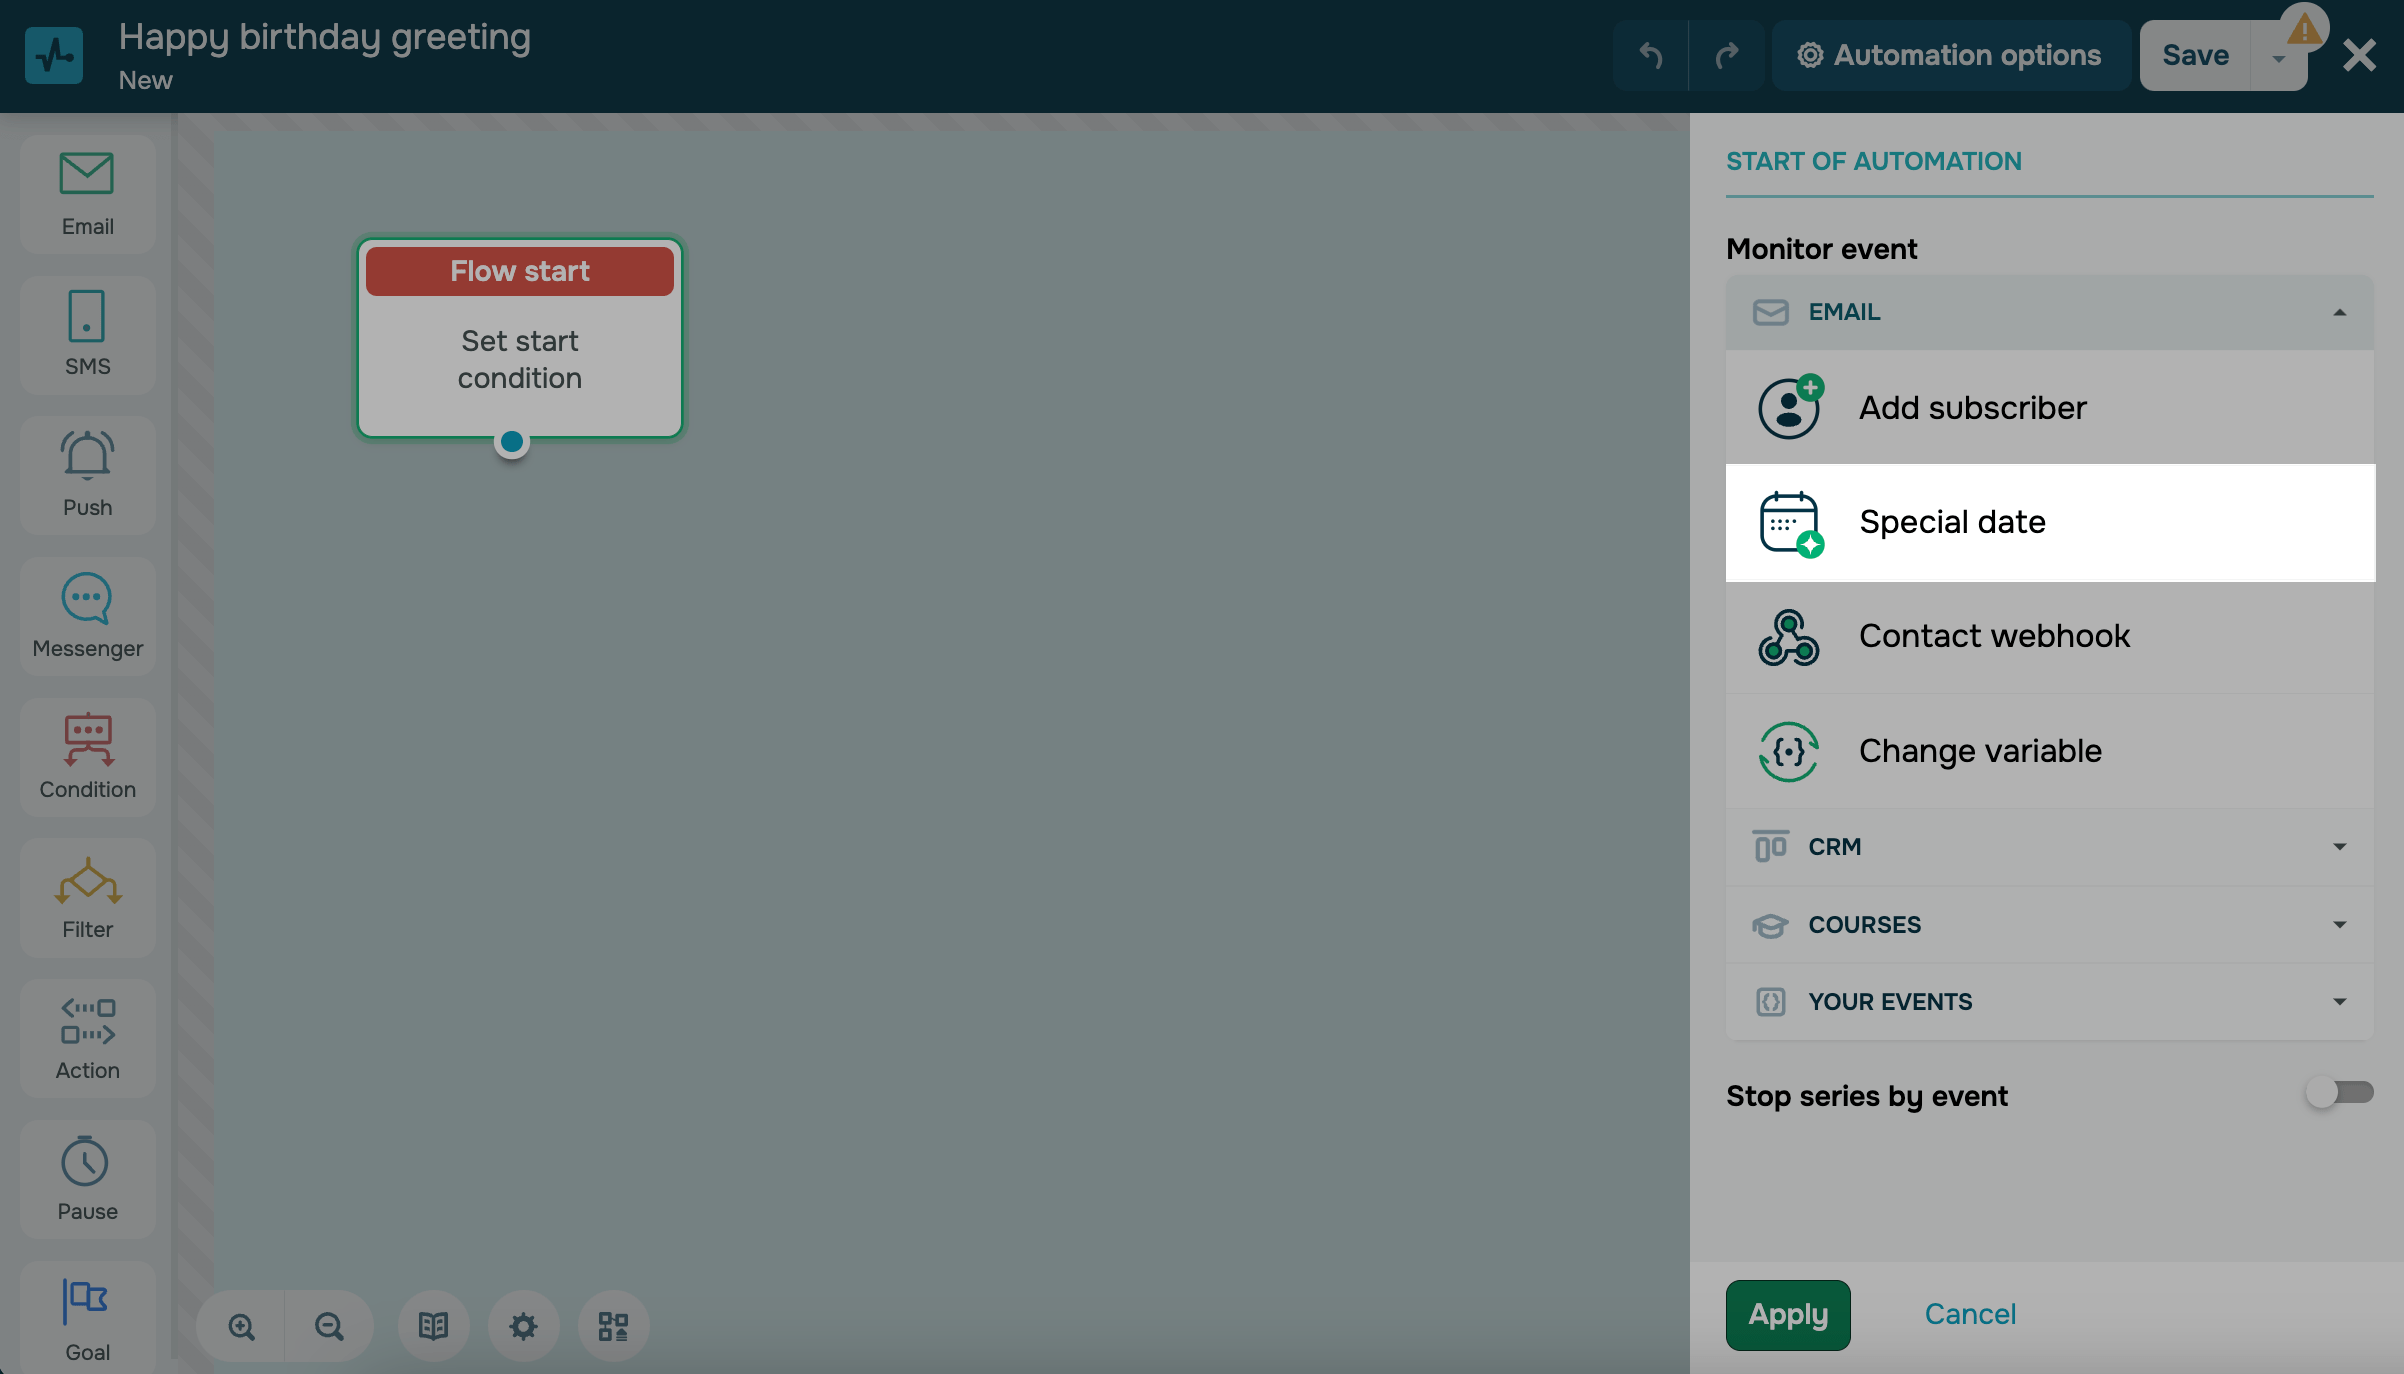
Create an automation
Go to Automations360 section and click Create automation.
Special date flows start at 9:00 a.m. according to your account's configured time zone. Contacts can enter such a flow only if their variables contain your specified date prior to the start time.
To view or change your time zone settings, go to Settings > the General tab > the Time zone field.
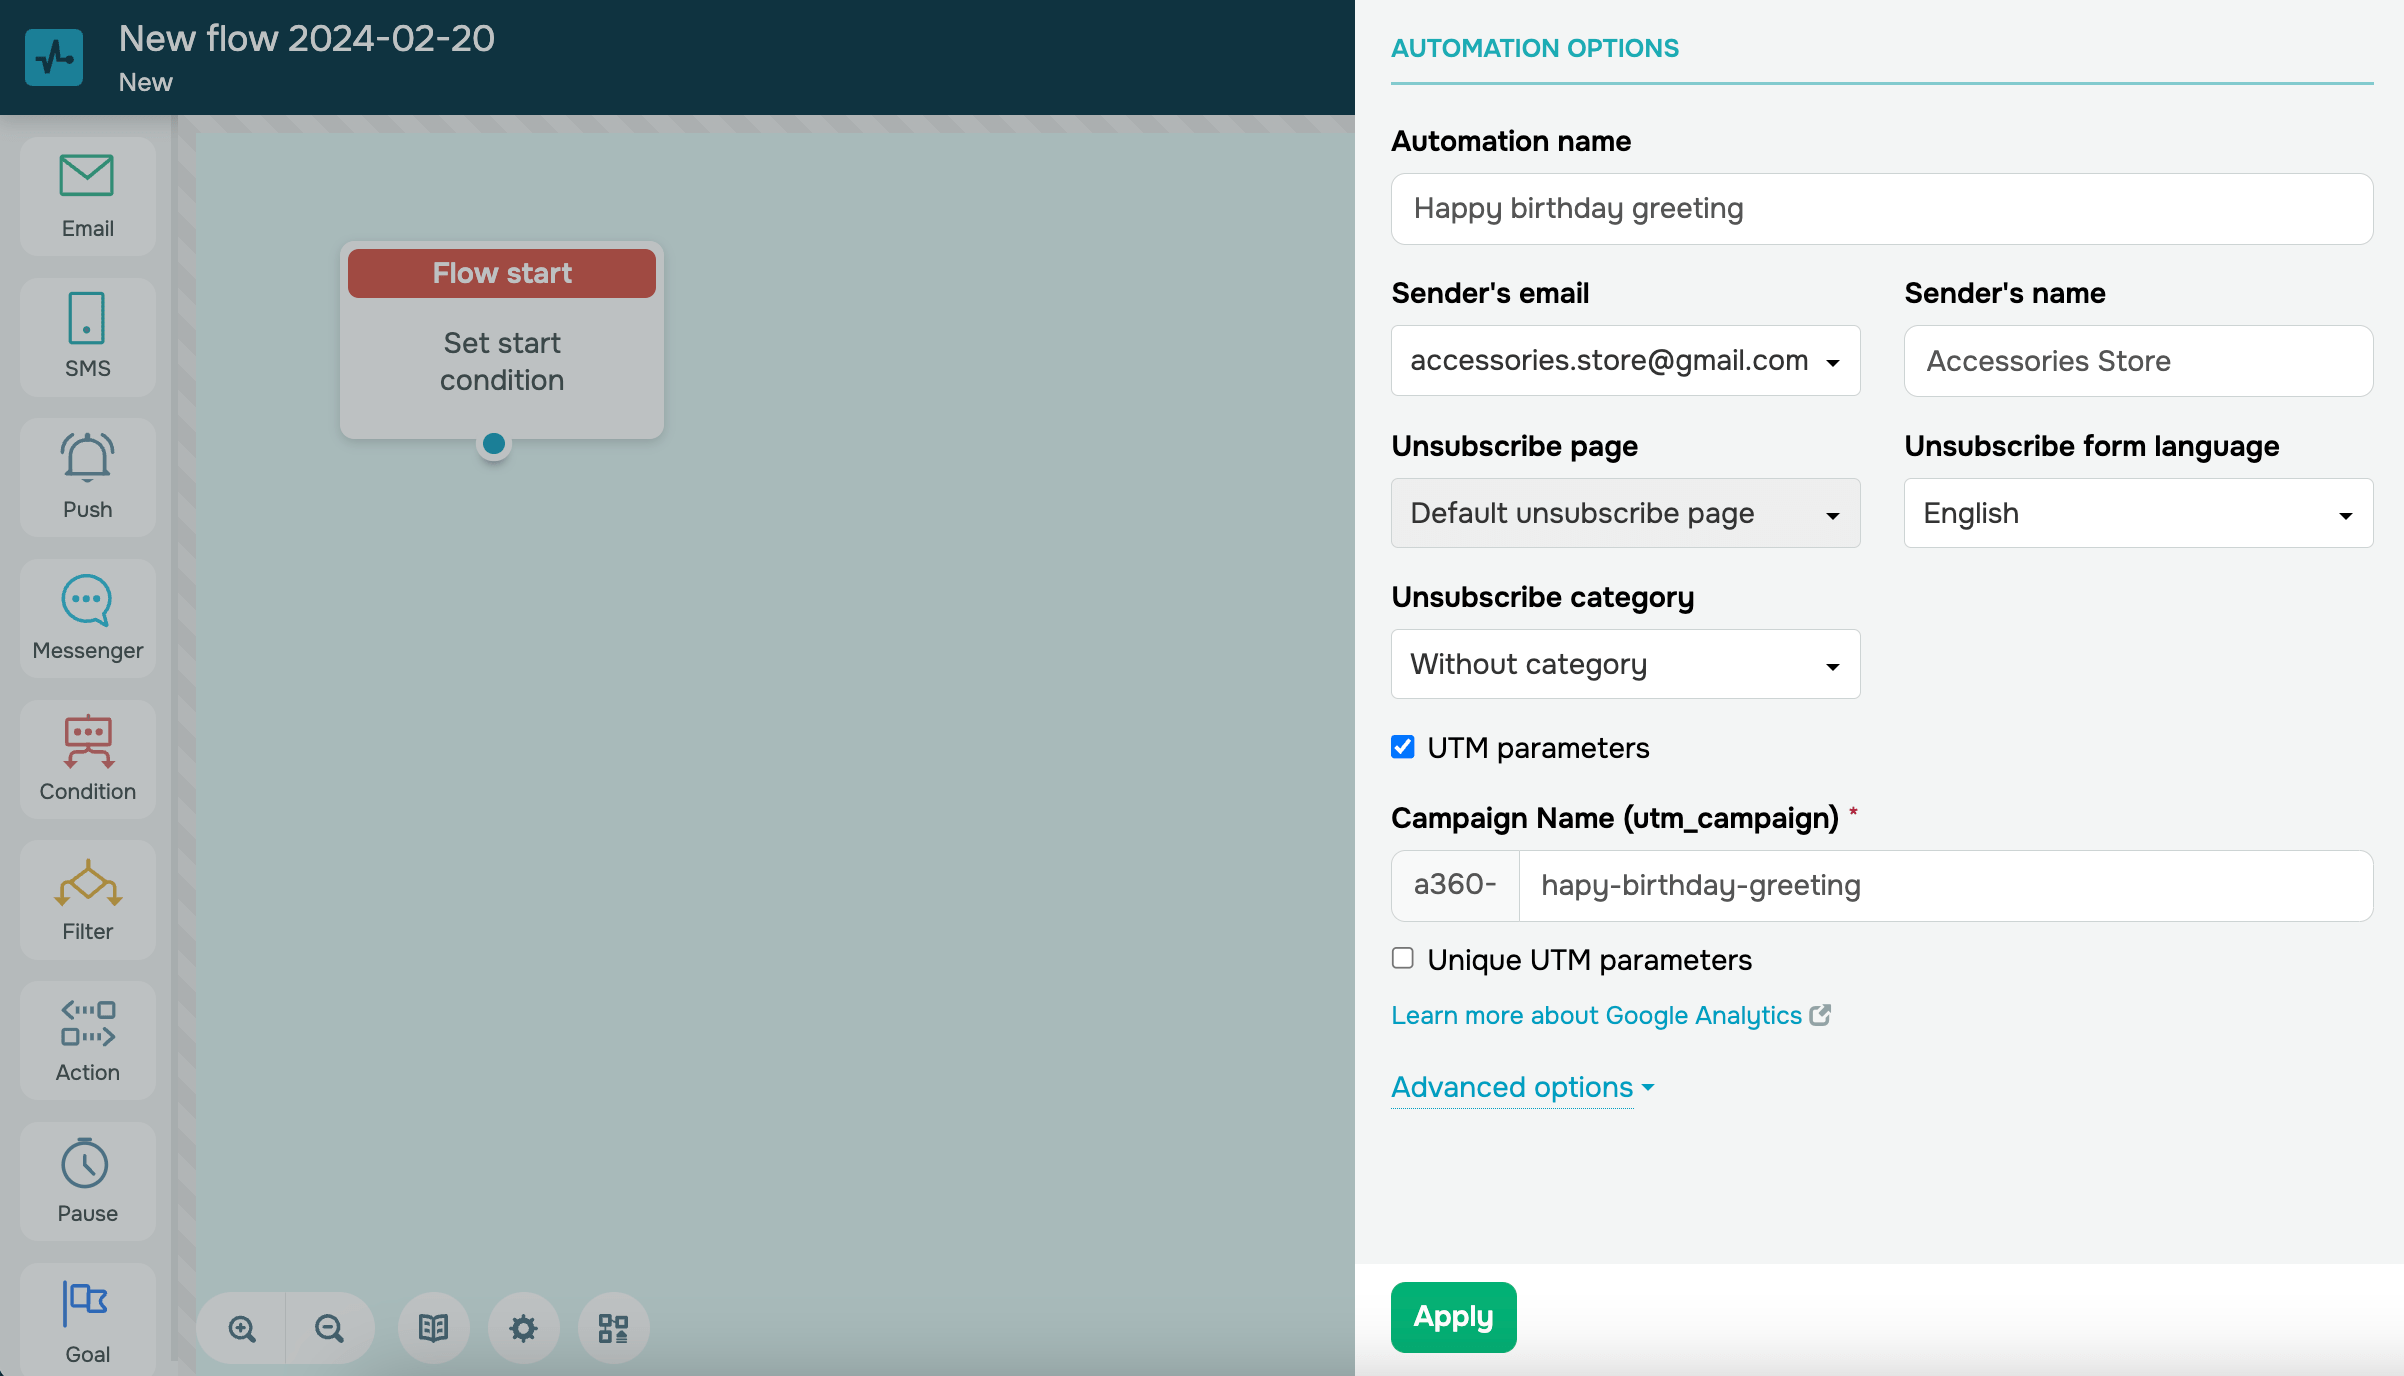
Configure automation settings
Enter your automation name, specify the sender, connect Google analytics, and select the unsubscribe page and unsubscribe form's language.
Set your series start
With the start of the series on a special date, the automation flow will start when the date specified in the contact variable comes.
Specify a contact source
Select a mailing list and a date variable.
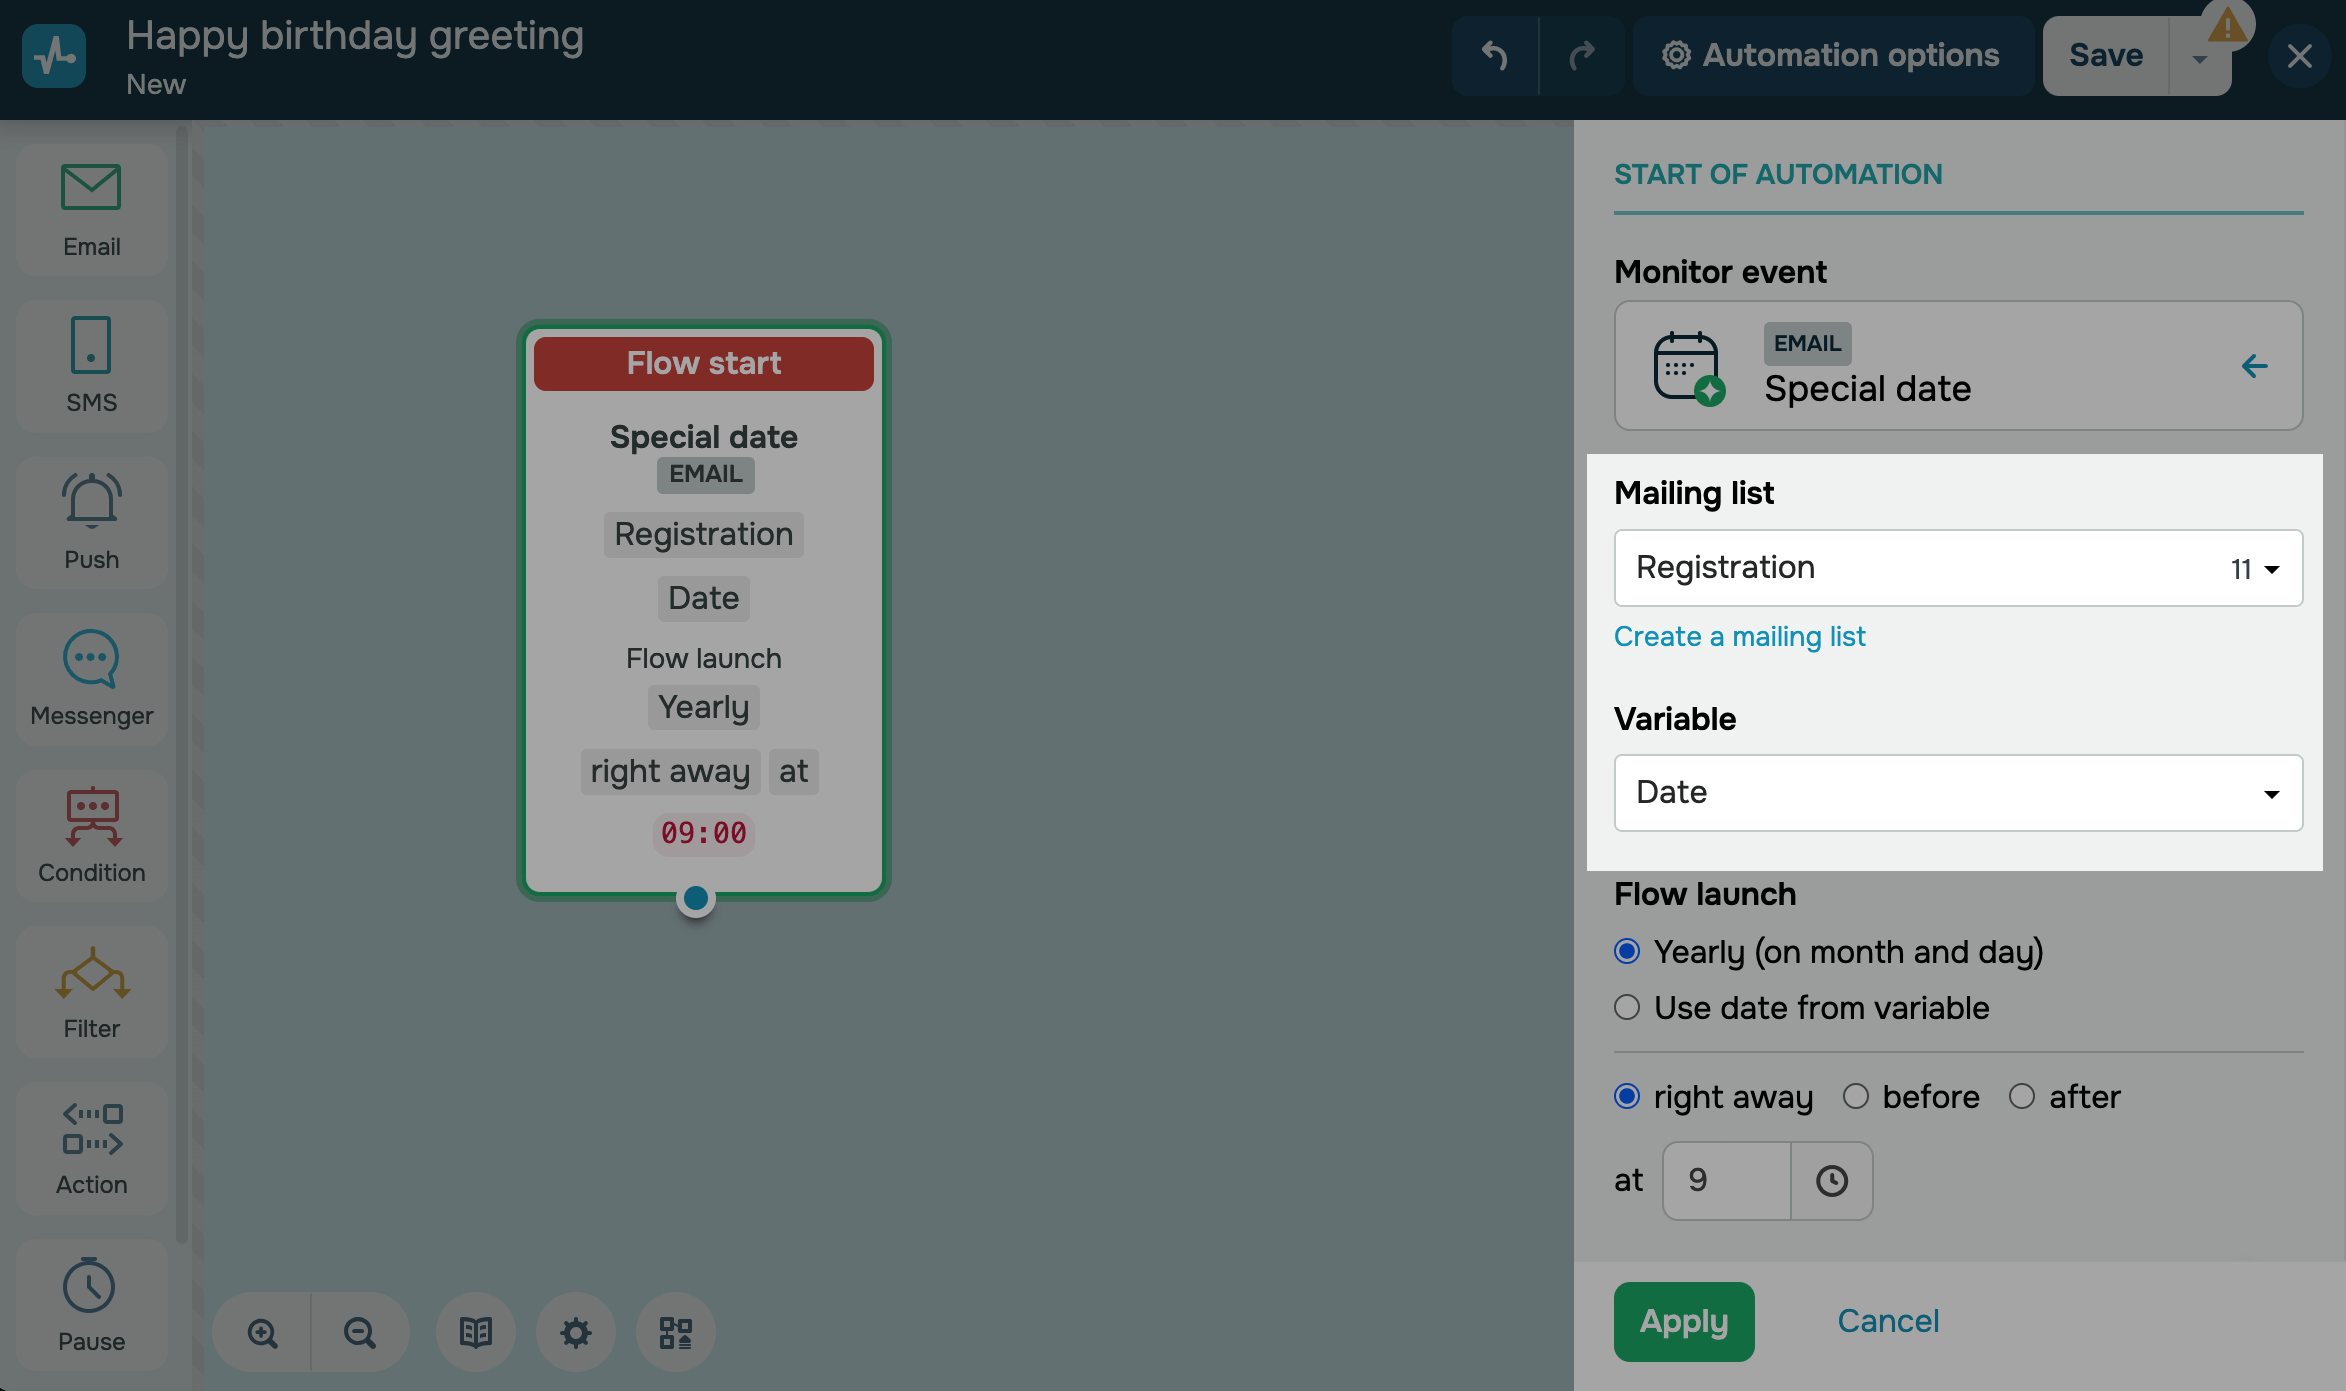
Set up a flow launch time
In the Flow launch section select a launch frequency:
| Yearly (on month and day) | The flow will be launched for your selected mailing list contacts every year on the date specified in the variable. |
| Use date from variable | The flow will be launched once on the date specified in the variable. |
Below select a launch time:
On the specified variable date, contacts enter your flow for data processing and remain in the queue. Afterward, the system checks the automated campaign settings, frequency, and time to let the contact go further down your flow at the set time.
When you select your flow start time and add a contact to your mailing list, take the time when they enter your flow into account. If this contact enters your flow with the required variable date after your flow start time, they will not progress down your flow.
| Right away | The flow will launch right away during the selected date and time. In the field below, select a start time from 0 to 23. |
| Before | The flow will launch before the variable date at the selected time. In the field below, select a number of days and a launch time. |
| After | The flow will launch after the variable date at the selected time. In the field below, select a number of days and a launch time. |
Select the checkbox if you want the series stop to be triggered by an event, and select this event. You can also count the series stop as a conversion.
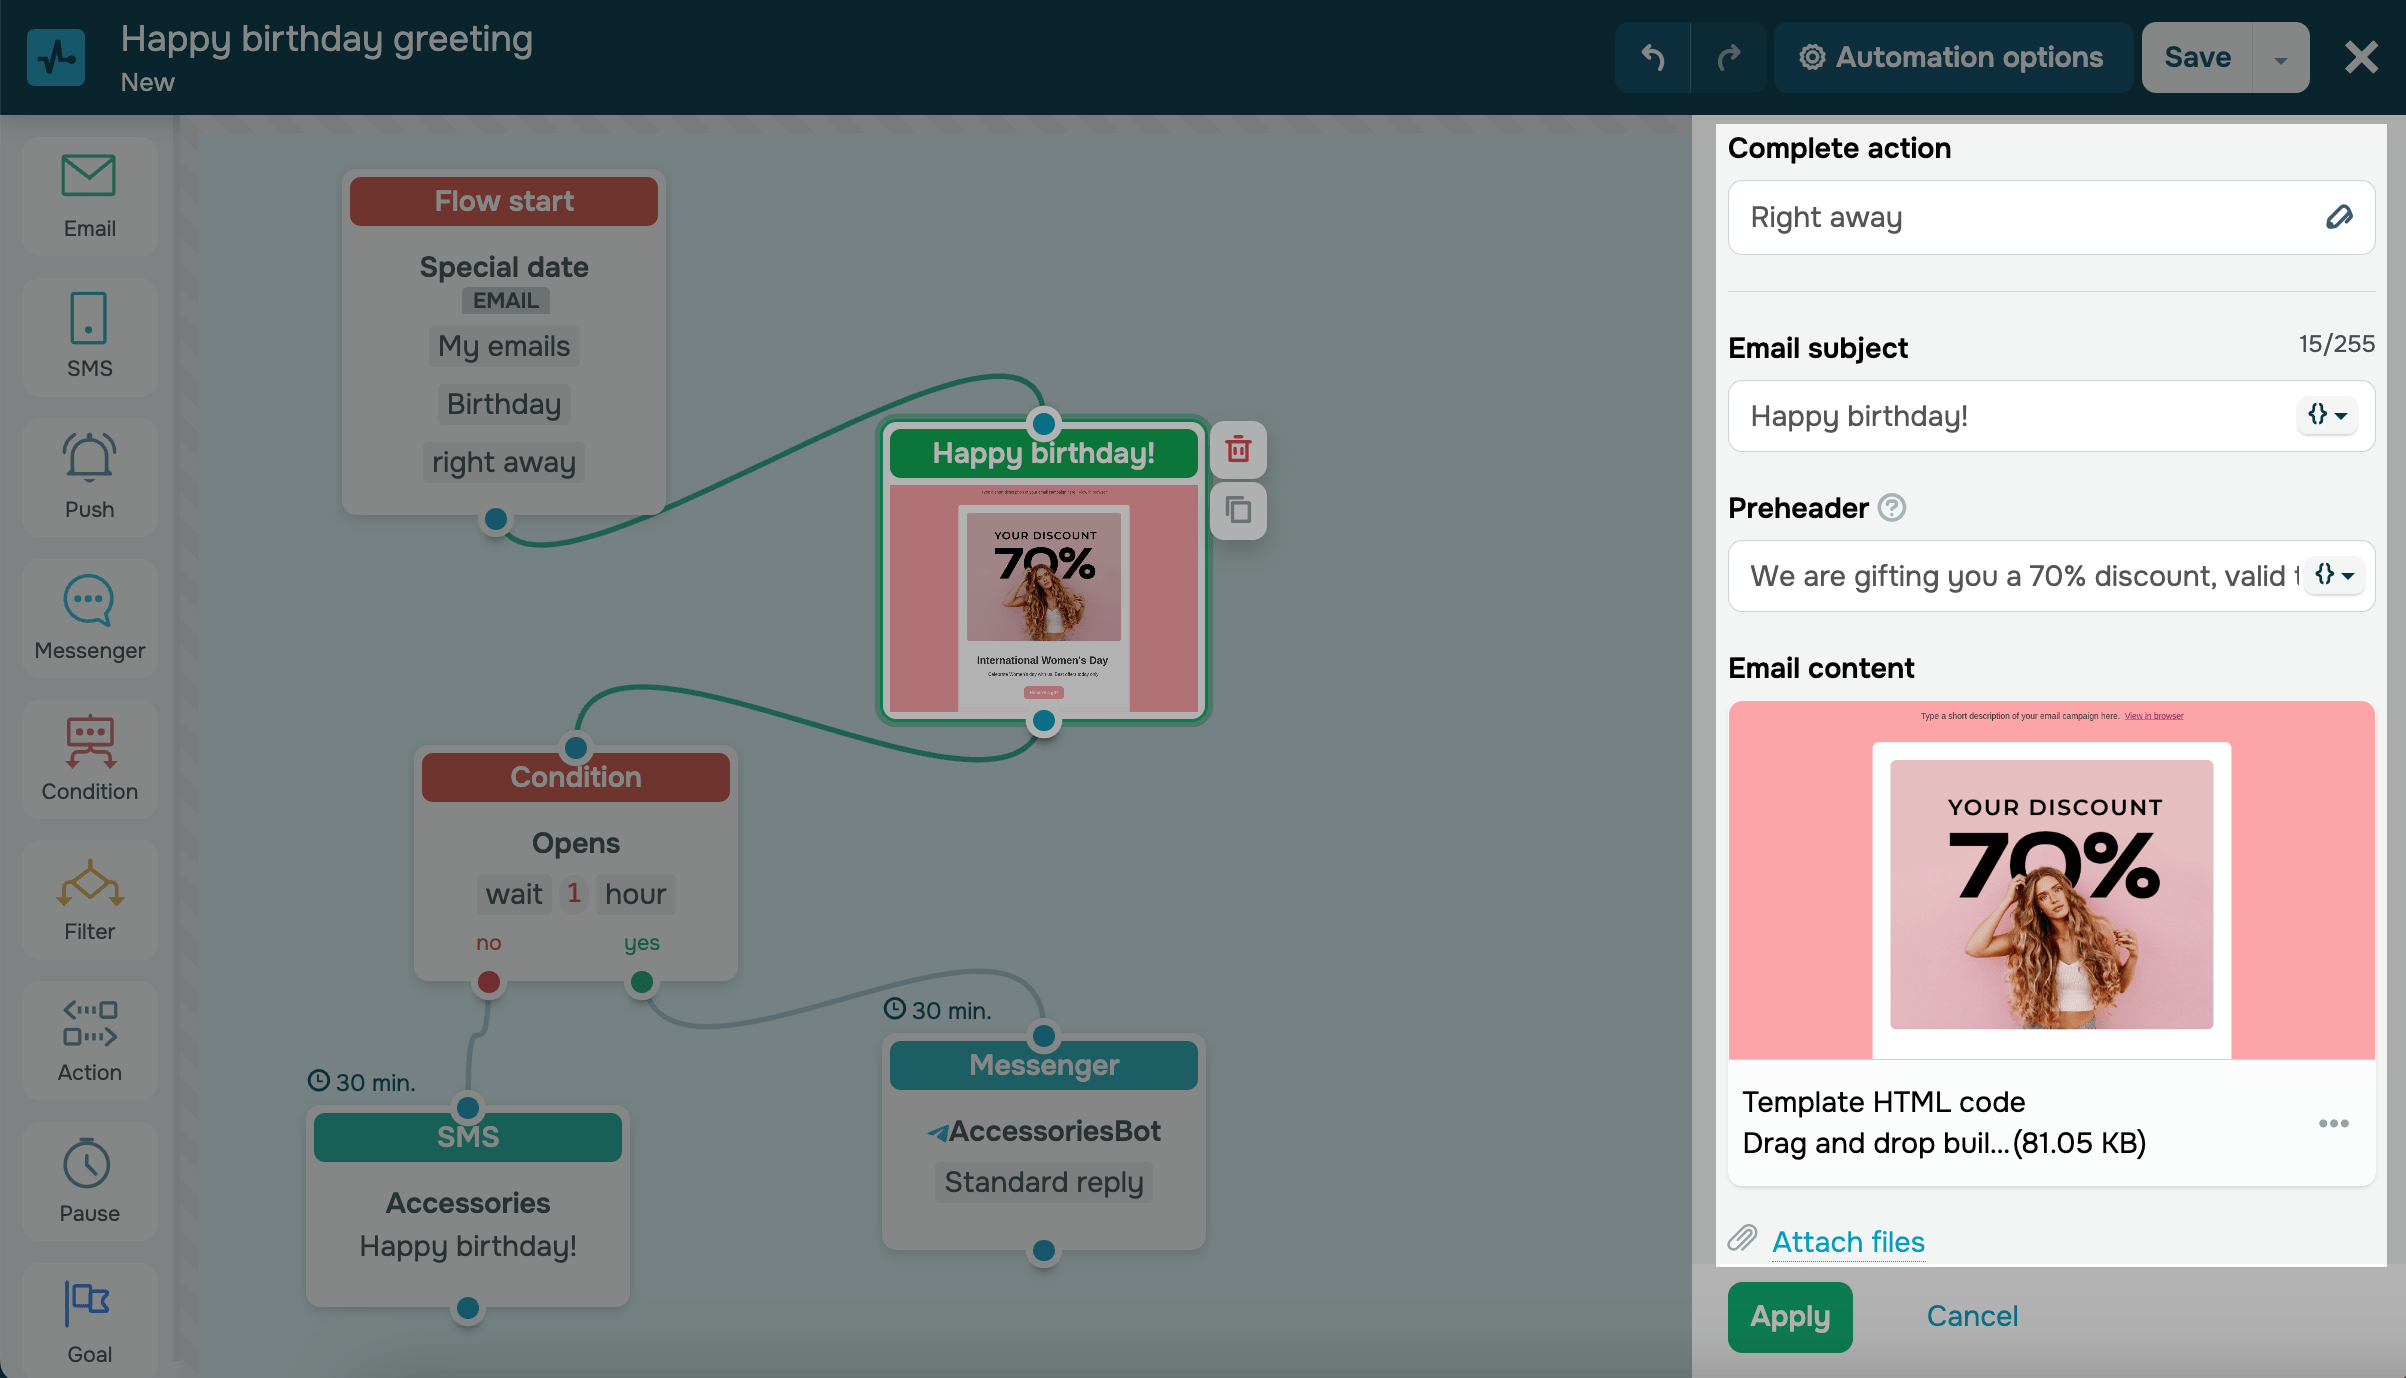
Add an element to send a message
In Automation 360, you can send a message to the user via Email, SMS, Push, and Messenger elements.
Drag the Email element into the editor field, and specify the start message’s sending time. Enter your email subject and preheader, and add your variables from the mailing list. Select a template. Additionally, you can attach files to your email.
Read more about block execution conditions in the article: Element execution time.
SMS
Drag the SMS element into the editor field, and specify the start message’s sending time. Enter the SMS sender's name and SMS text. You can personalize the message text and insert more variables.
You can enter up to 11 Latin characters in combination with numbers as your SMS sender name, including spaces. Entering numbers without letters is not allowed.
Additionally, you can add the unsubscribe link, which will add from 23 to 25 characters to the overall length of your message text.

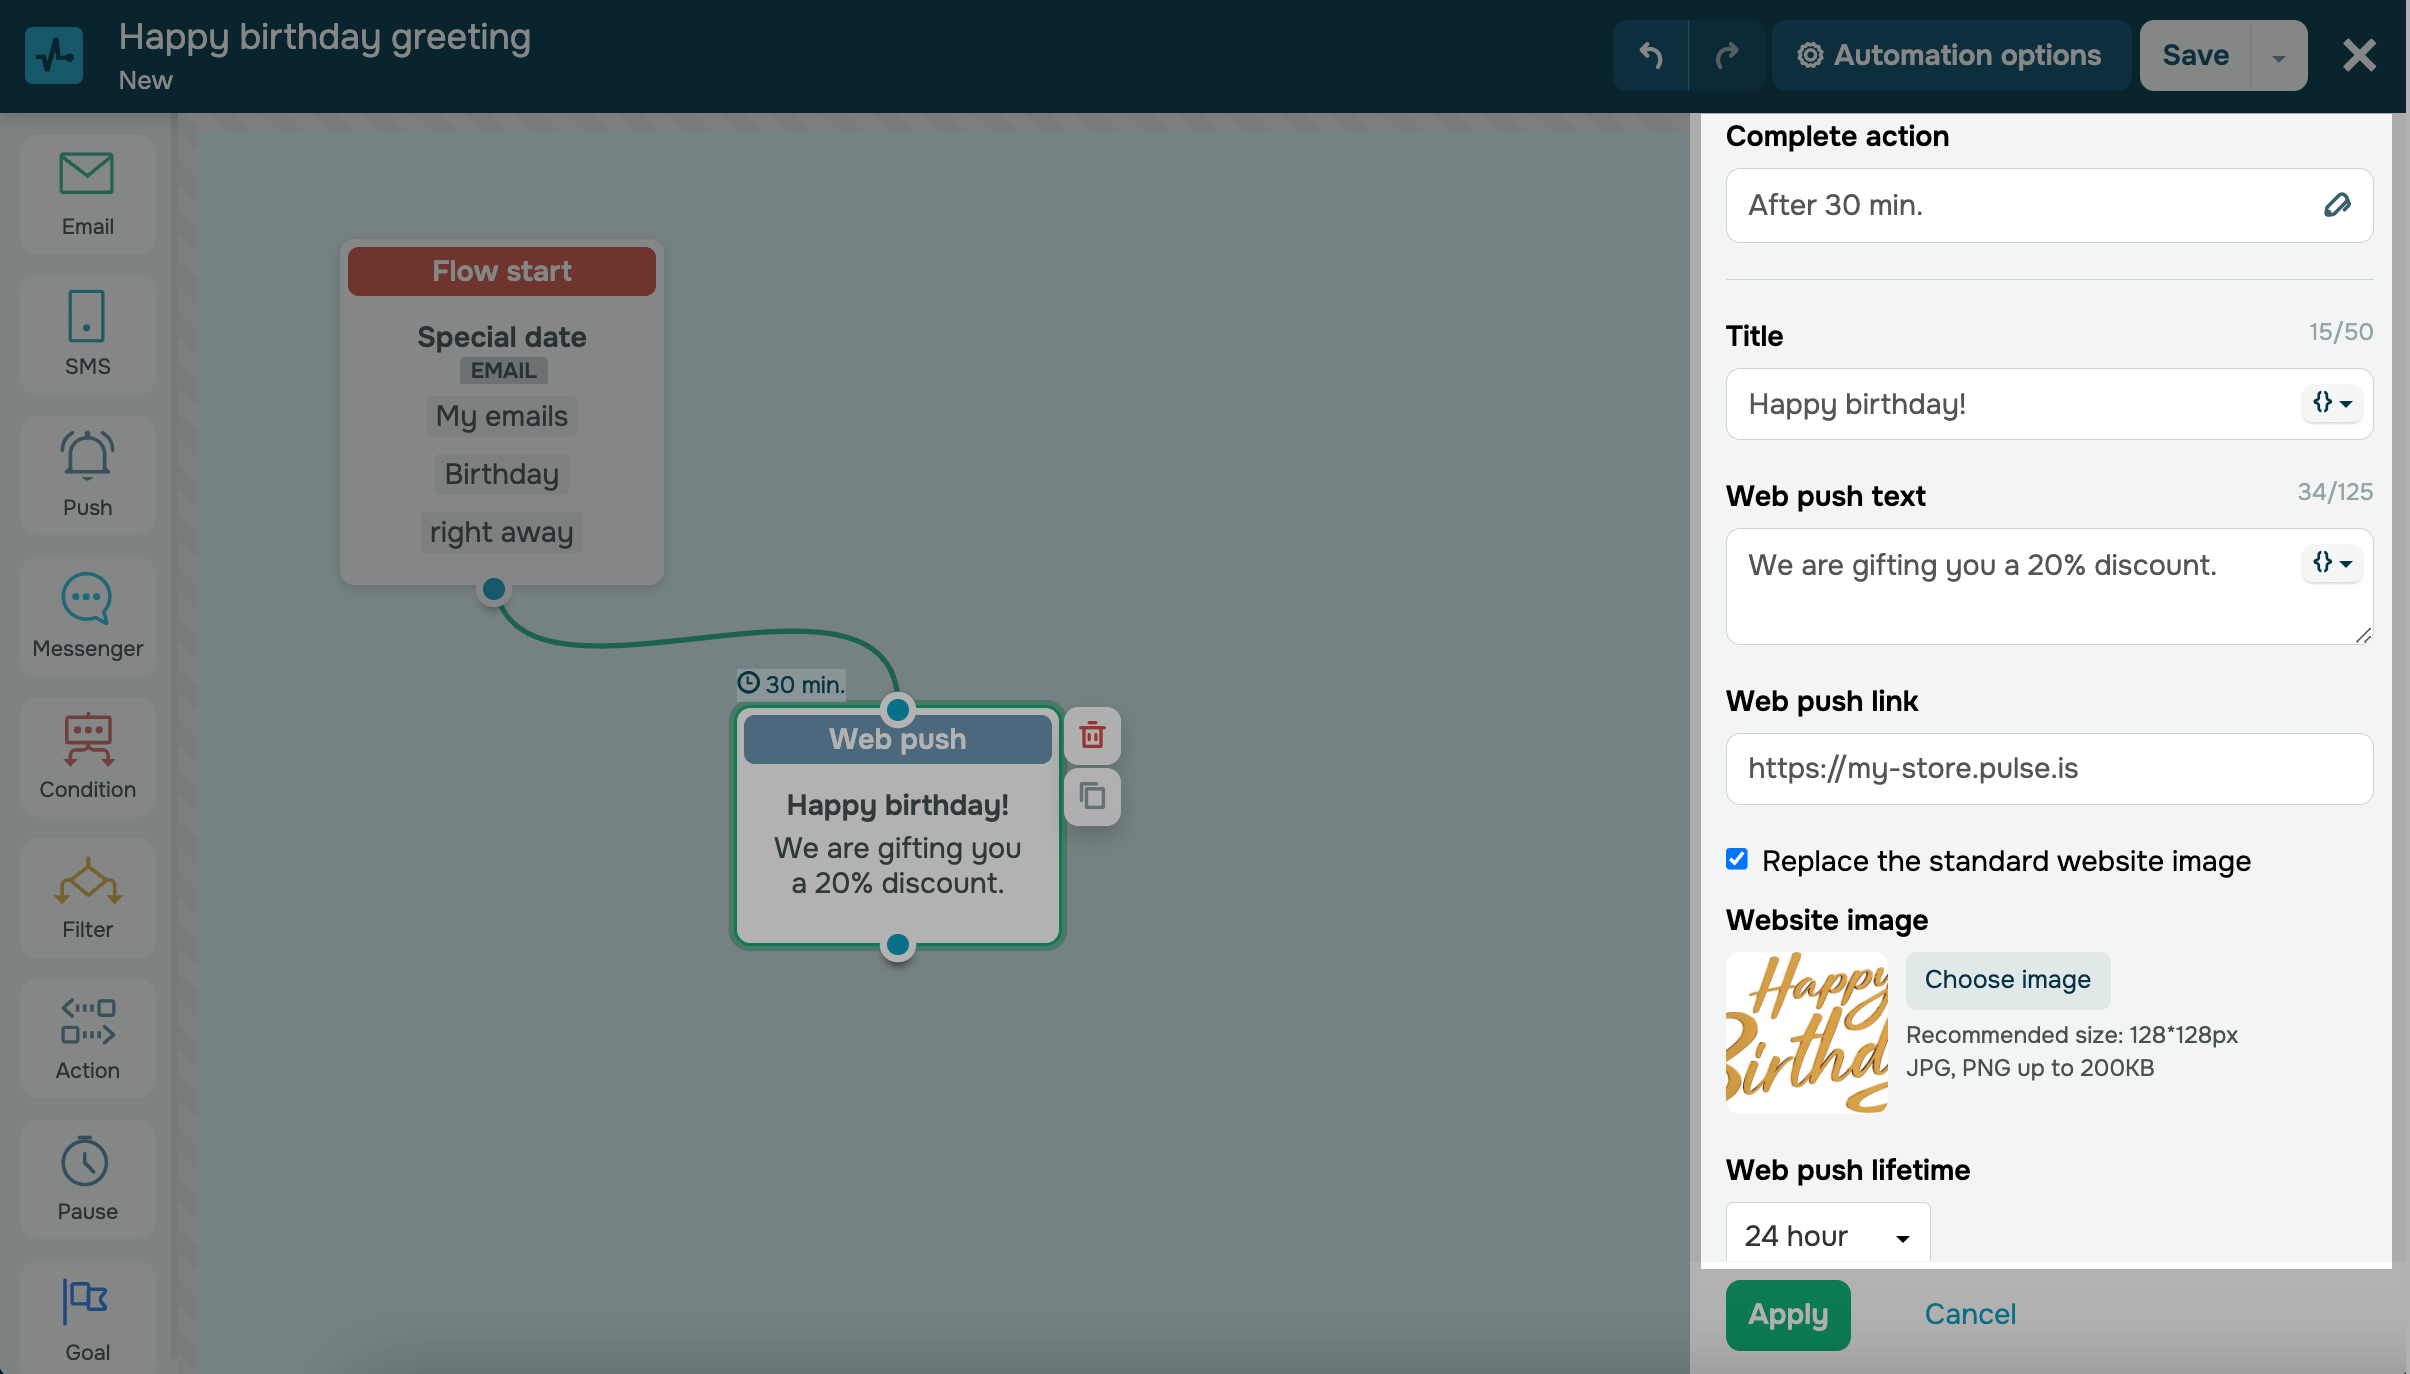
Push
Drag the Push element to the editor, and select the recipients of your push message. Enter the start notification’s sending time, title, text, and a web push link. Specify the web push lifetime.
Additionally, you can replace the standard push notification image.
To send push notifications, the subscriber of the selected site must have the same email address as your contact in the mailing list going through the flow.
Read more: How to send web push notifications in automations.
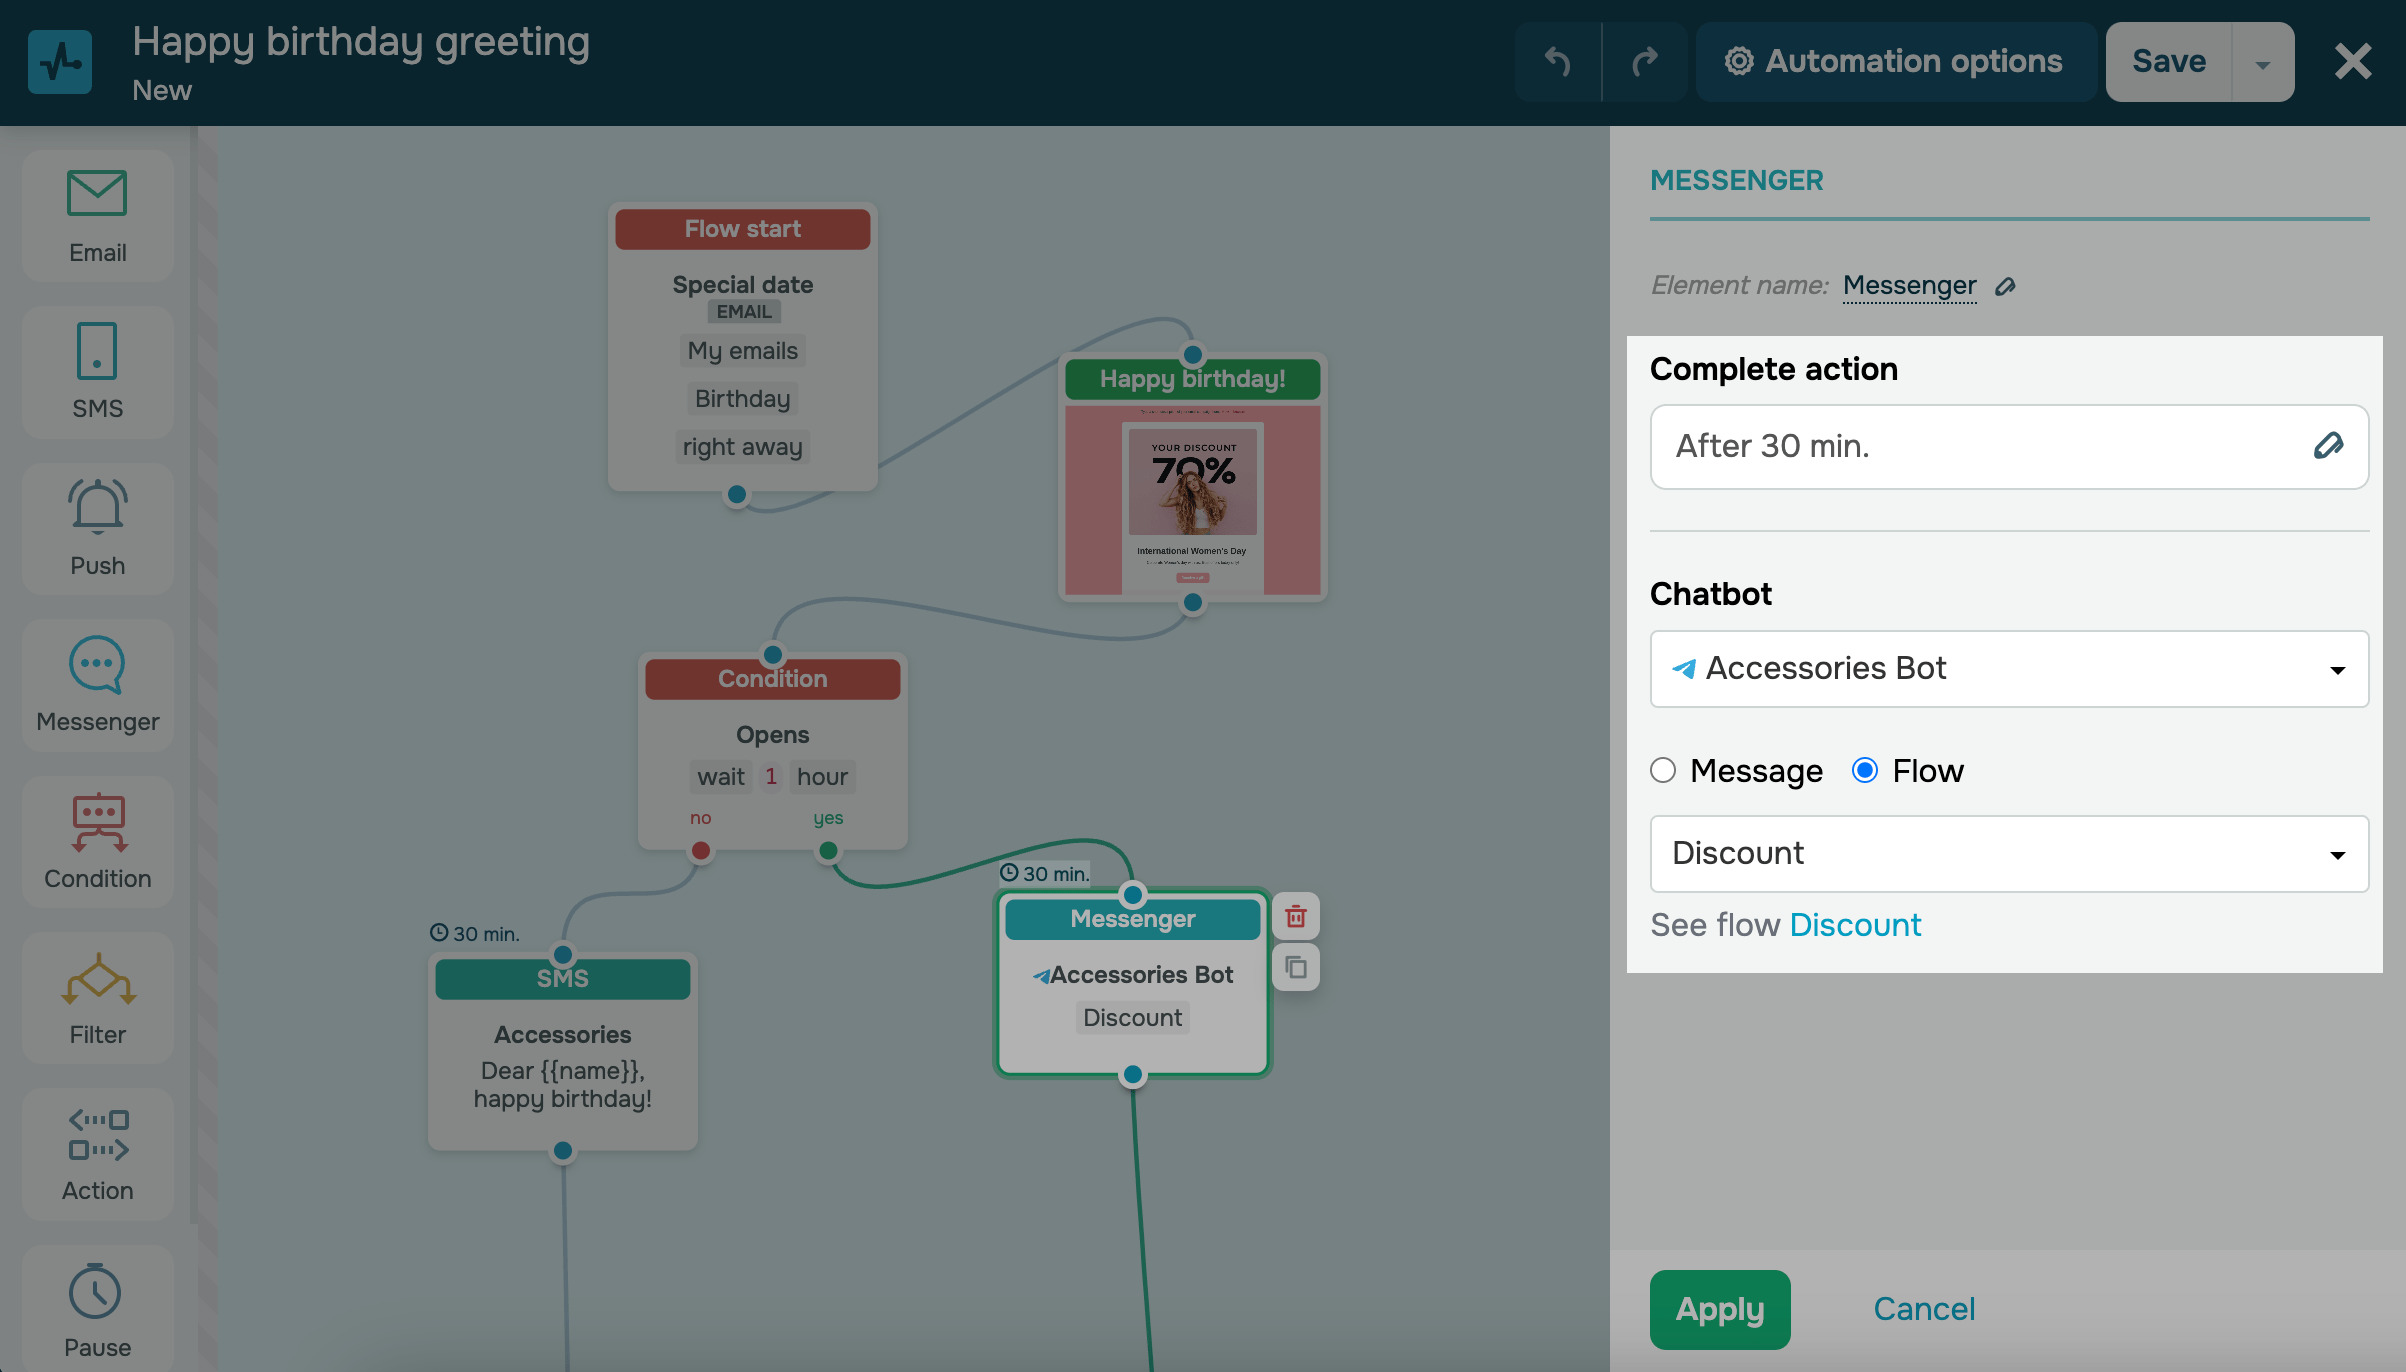
Messenger
Drag the Messenger element into the editor field, and specify the start message’s sending time. Select the chatbot with the help of which you want to send a message to subscribers.
Note: the recipient must be subscribed to the chatbot using which you will send the message and have an email or phone number included in your chatbot's Audience. Read more about how to get additional variables: Messenger in Automation 360 and How to manage subscribers and their data in your chatbot audience.
Choose an action: send a message or start a flow.
In the Message section, enter your message text. You can also add variables and emoji to the text.
In the Flow section, select a flow.
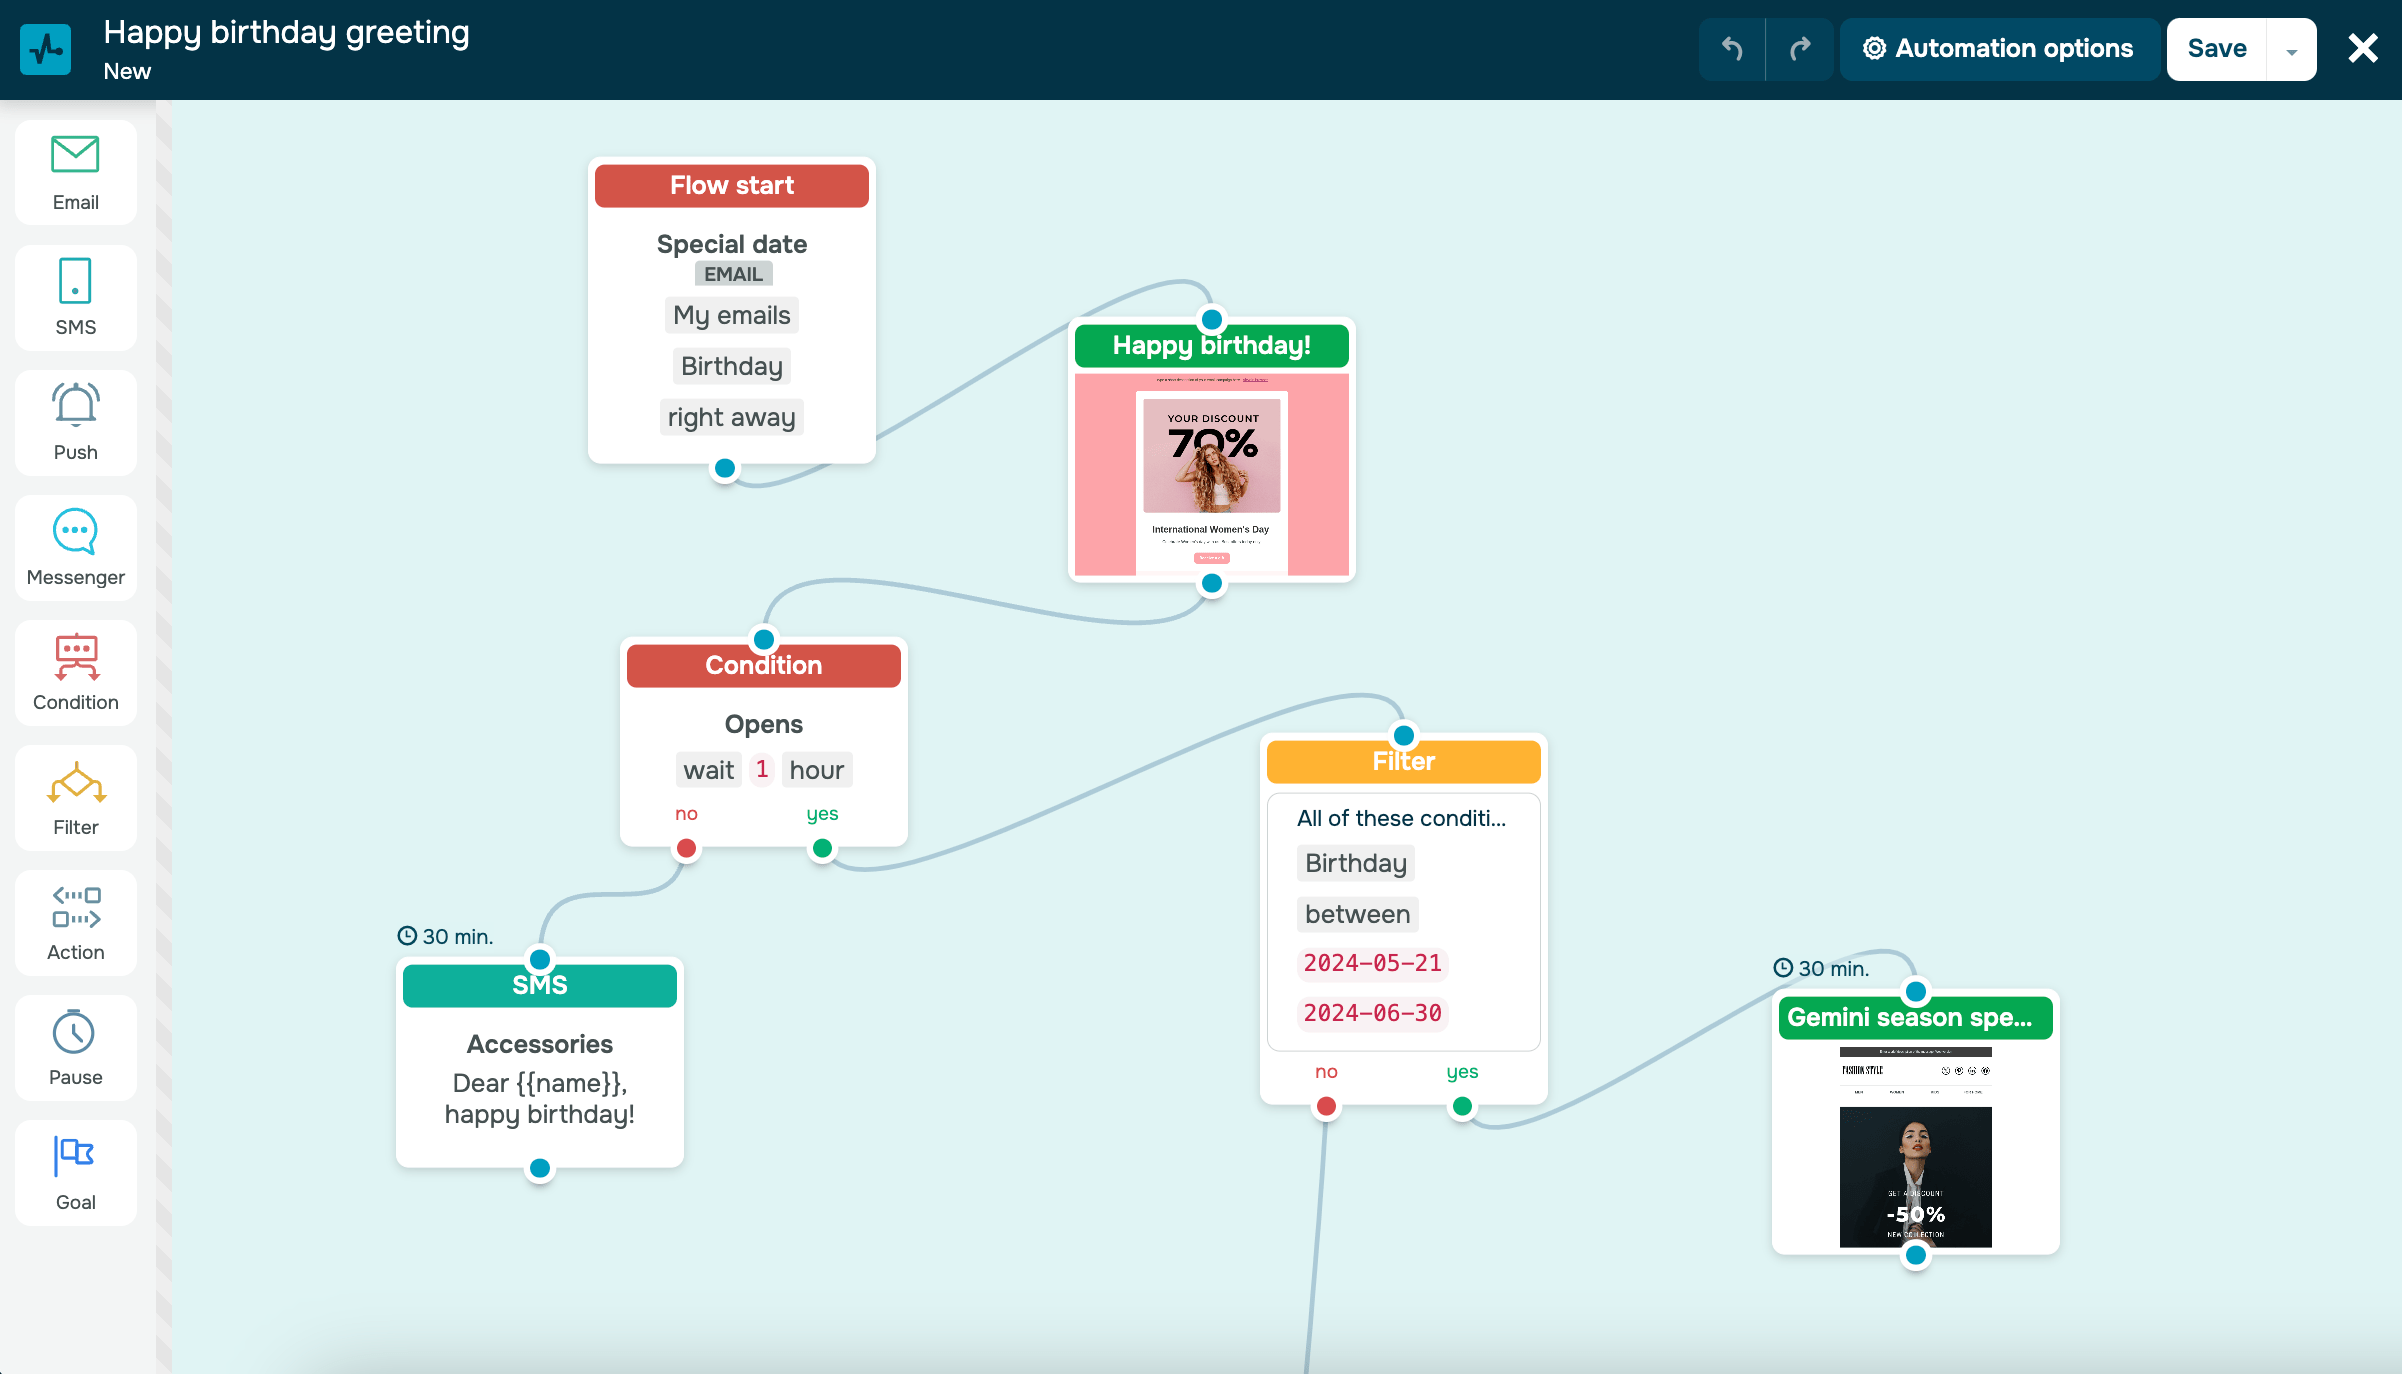
Add additional elements
Additionally, you can add other elements to diversify the functionality of the flow. For example, you can add the Condition element to track your email opens and deliverability or the Filter element to branch the flow based on the variable value.
Save and launch
Once you've finished setting up your flow, save and launch it.

As soon as the date from the variable in your contact's mailing list comes, they will receive your message.
Last Updated: 18.04.2024
or