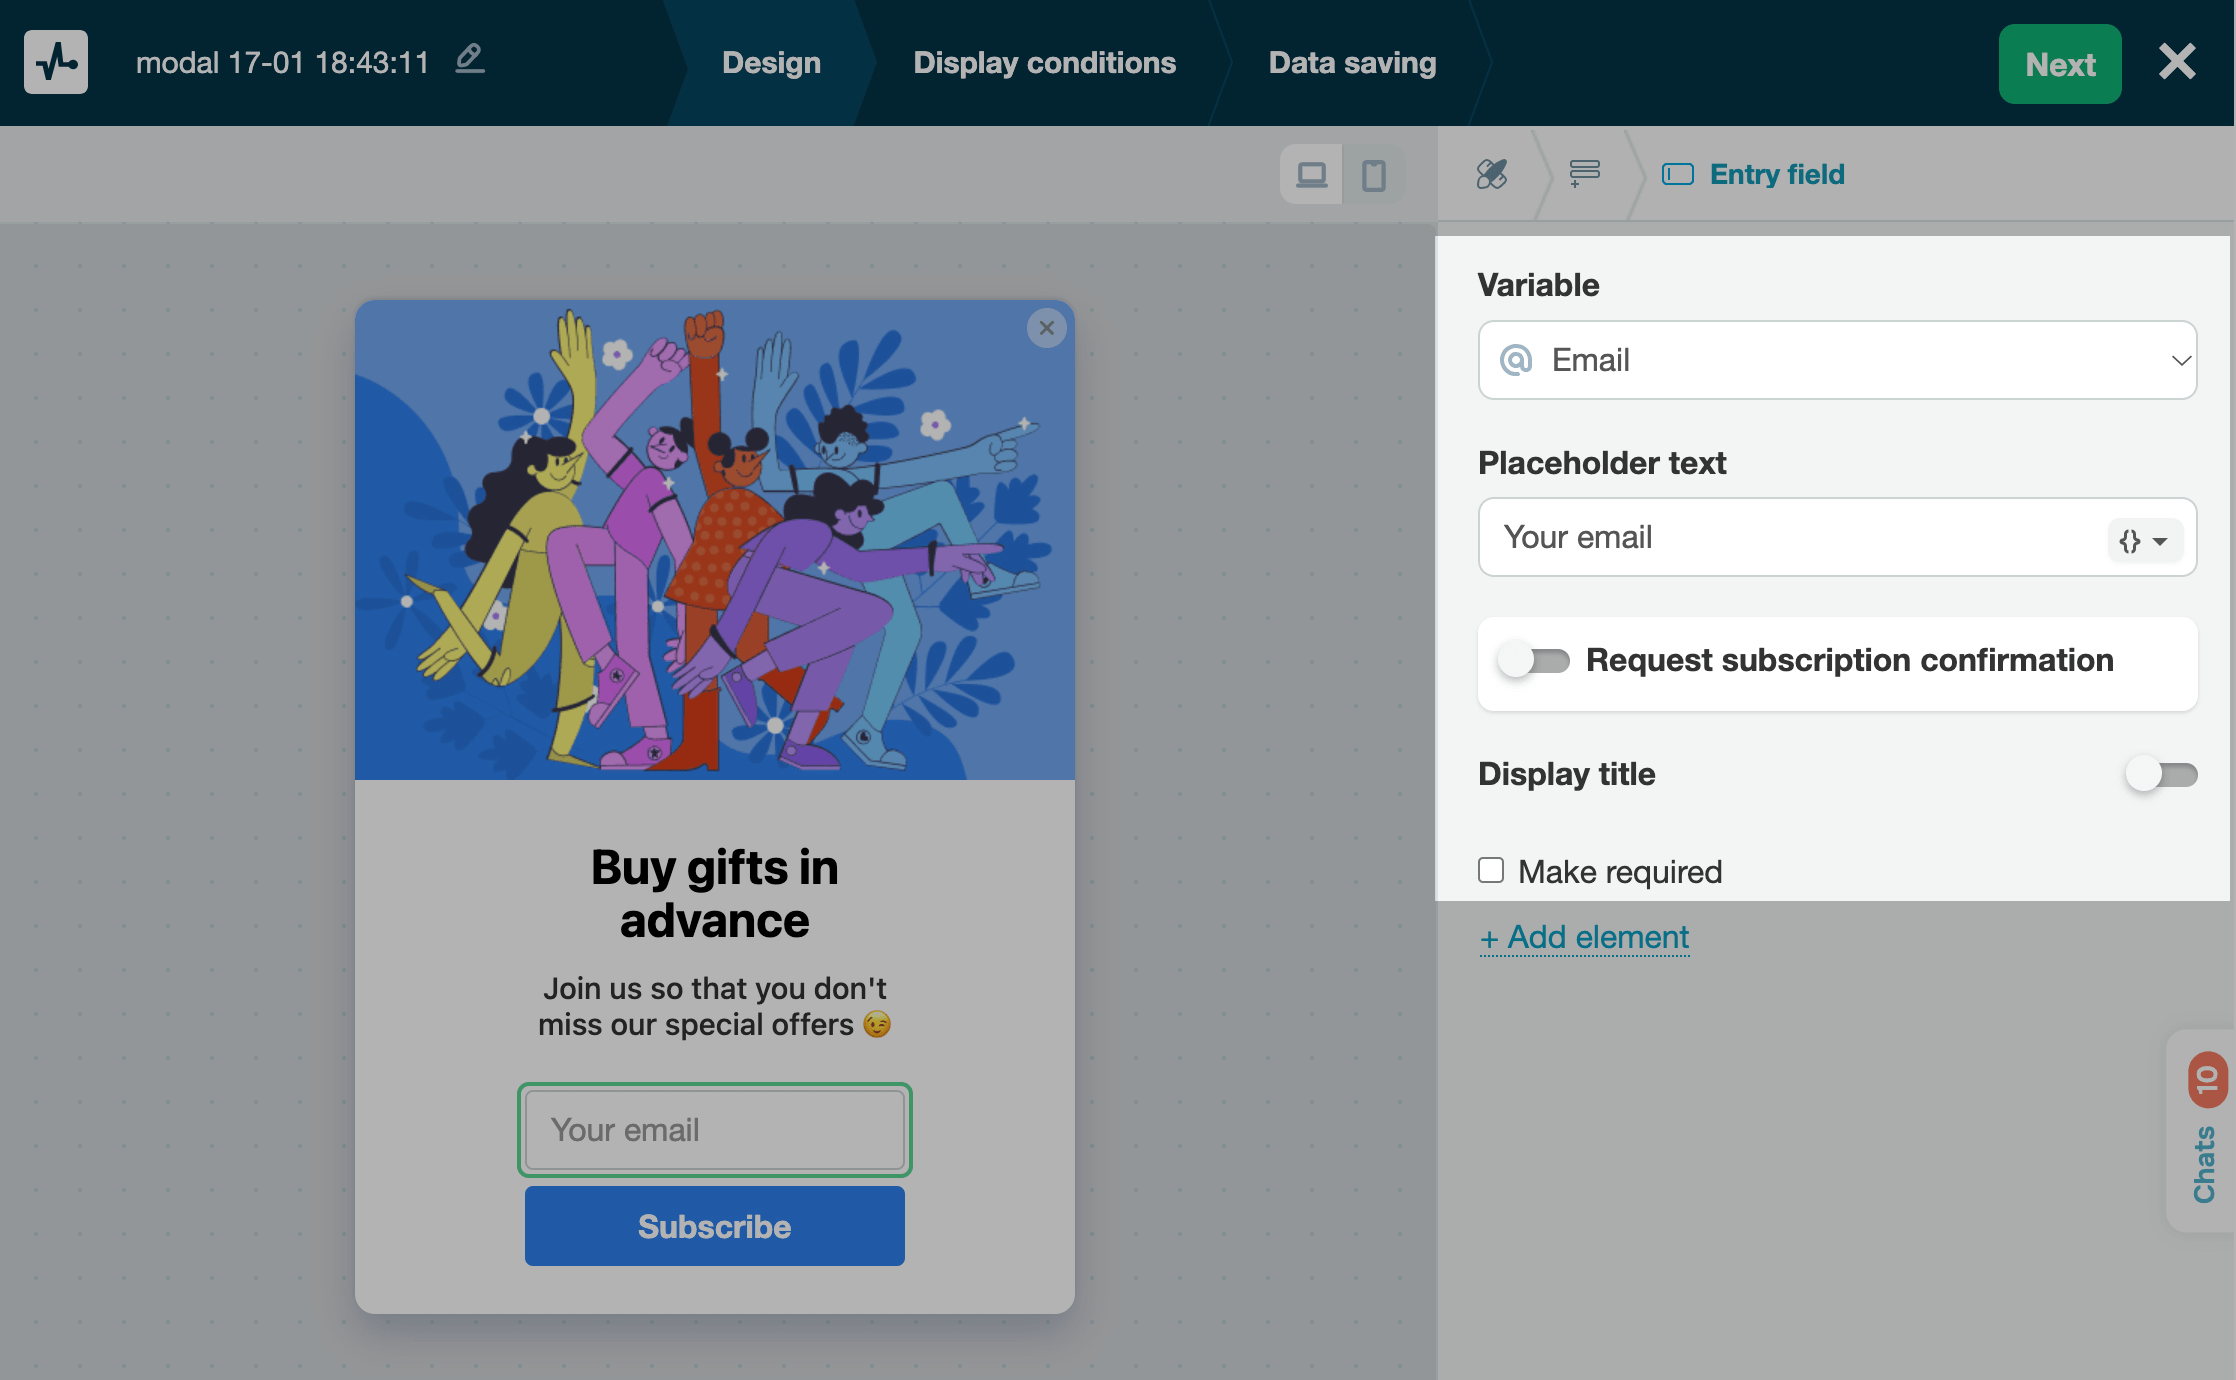
The Entry field pop-up element
An entry field is a form element where users can type in their name, email address, phone number, or other information. It appears as a text box with a prompt that explains what information to provide.
Use this element to collect user data and personalize future communication. The submitted data is saved to a variable, and a contact is created or updated.
In the pop-up builder, select the Entry field element and go to its settings.
Choose where to store the data
In the Variable field, select or create the variable where you want to store the value.
You can store values with the following data types: String, Number, Date, and Link.
Add variables to your pop-up to collect users’ contact details, such as email or phone number, so you can reach out to them later.
In the variable list, default system variables appear above the divider, and custom variables you've created in the Pop-ups or CRM sections appear below it.
Set your field name
To help users understand what information they need to enter, add explanatory text.
| Placeholder text | Add placeholder text to your pop-up. For example, outline the expected input.
You can also select a variable to autofill the field. |
| Display title | Enable and add a field label that will appear above the field. |
You can also select Make required if users should submit your pop-up form only after they fill in the field.
Learn more: How to set up a custom pop-up form.
Set up a confirmation email
You can also turn on the Request subscription confirmation toggle to send a confirmation email to the email addresses users submit through your pop-up form.
In the Confirmation template field, select an email from the list of templates available in your subscription tool settings.
You can also customize the message that appears once a user submits your pop-up form. To do this, click Set up notification, then enter and format your message.
Last Updated: 13.06.2025
or